BlackVue DR770X Series - Changing Settings Using Smart Phone
DR770X Series - Changing Settings Using Smart Phone
Table of Contents
1. SETTINGS
- Open the BlackVue app.
- Select Camera in the navigation bar.
- Select the 3 dots next your dashcam model and tap settings to access firmware settings menu.
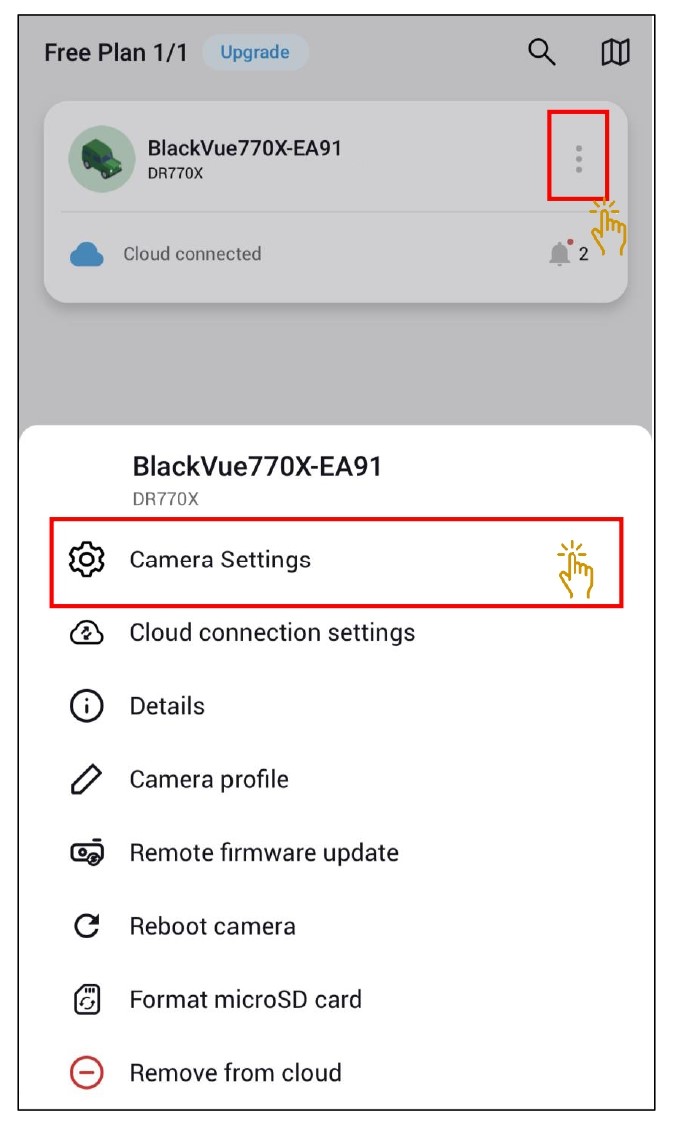
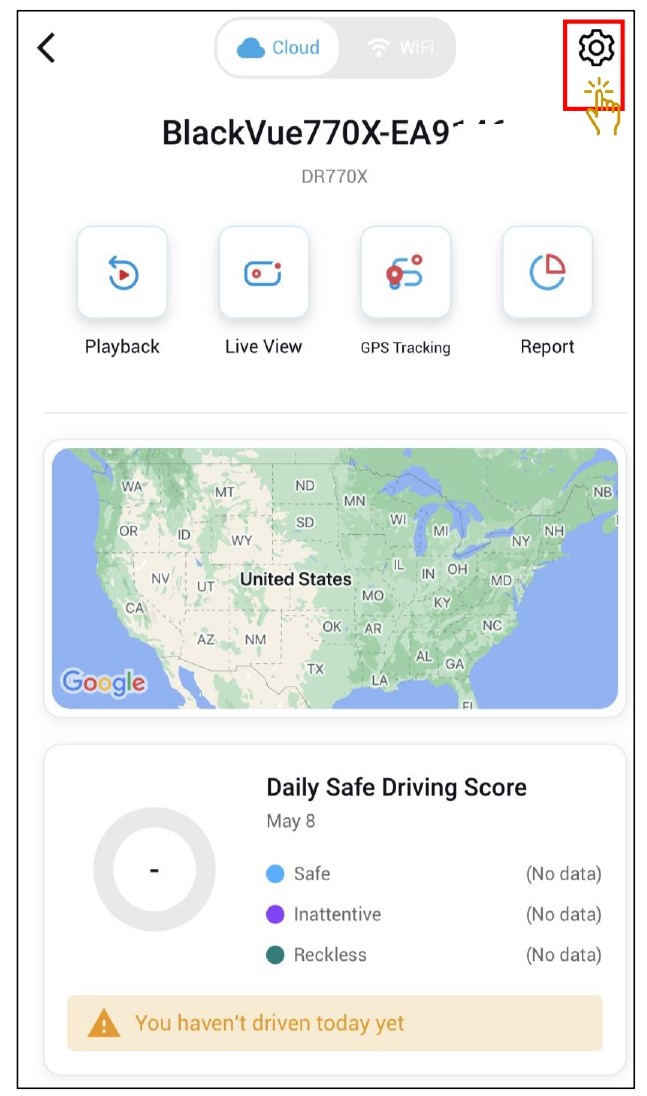
- Alternatively, select your dashcam and and press "Setting Button".
- Once in the Setting page, the following settings as shown below.
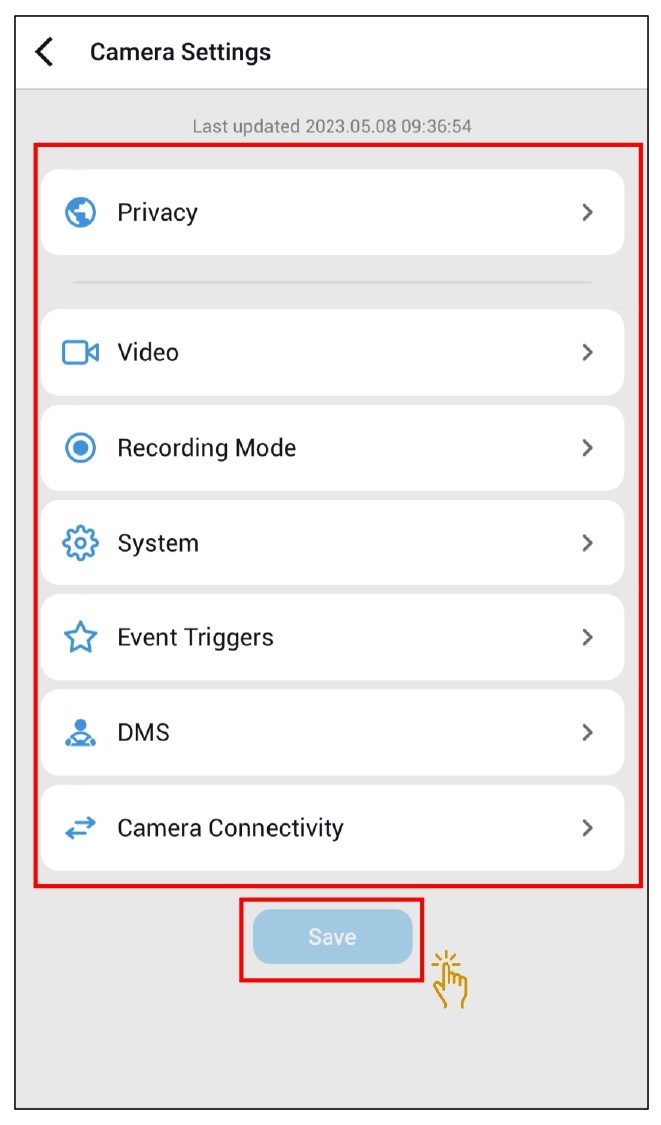
- After making any changes, go back to the Firmware settings menu, tap " < " and tap " Save".
Please backup necessary recordings before changing time or image quality settings.
If any of the aforementioned settings are changed and saved, the dashcam will format the microSD card and delete all recordings stored on the card including locked event files in order to ensure optimal performance.
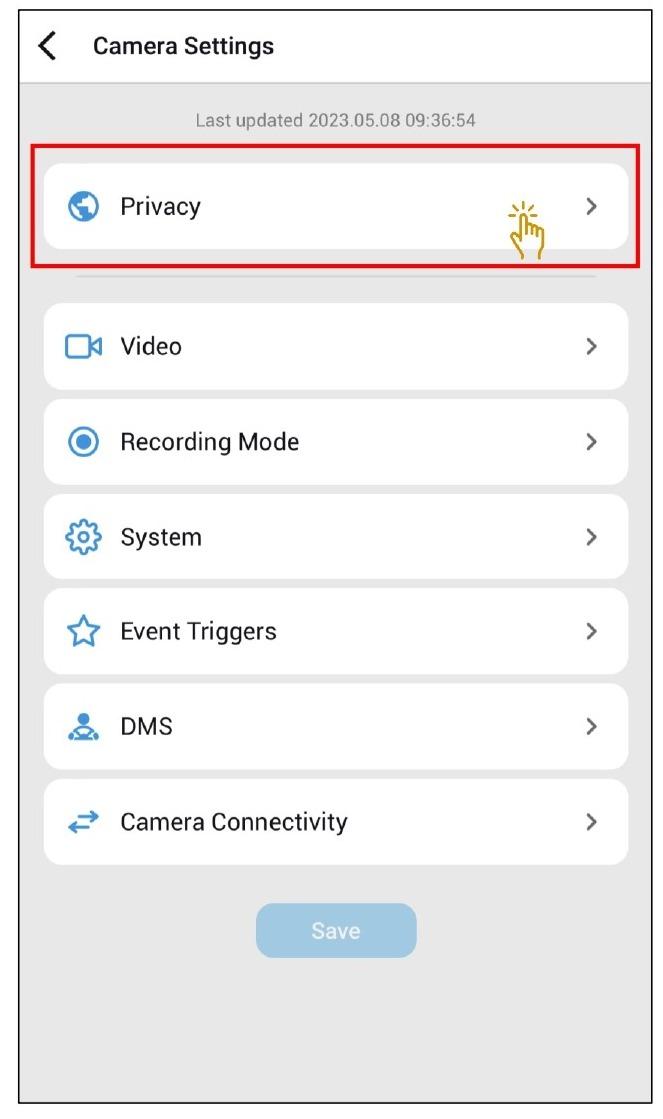
1.1 Privacy Settings
Camera Settings > Privacy
- This setting is only applicable when "Cloud" is connected.
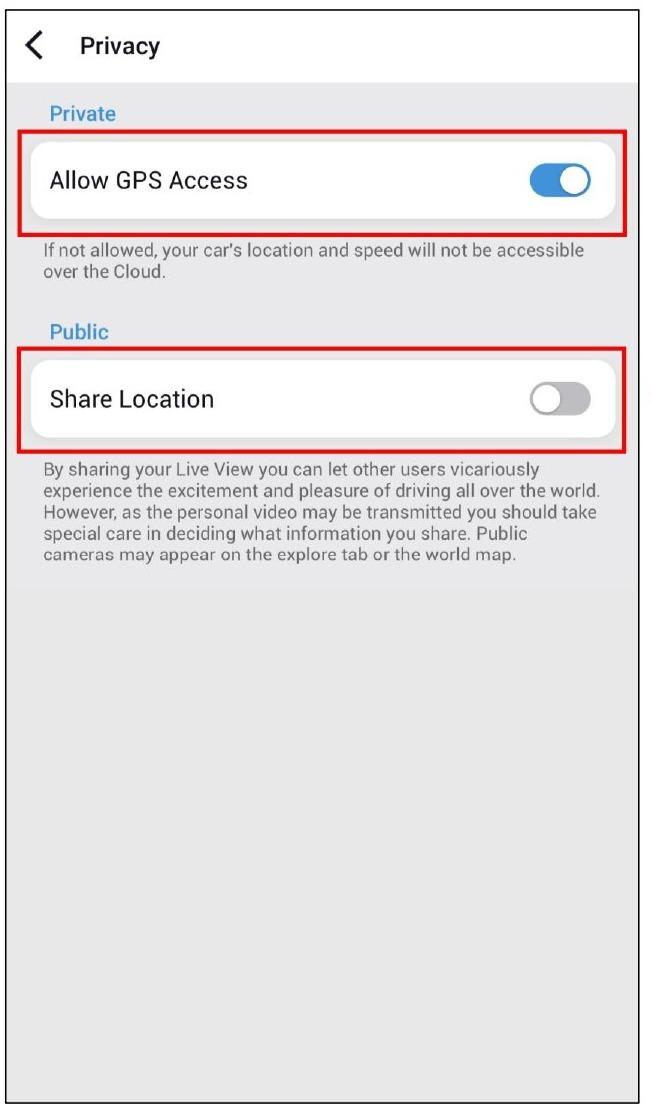
- If "Allow GPS Access" is turn on, car's location and speed will be accessible over the Cloud.
- If "Share Location" is turn on, it allows other users vicariously to view user's location and videos sharing.
Default setting "Share Location" is turn off.
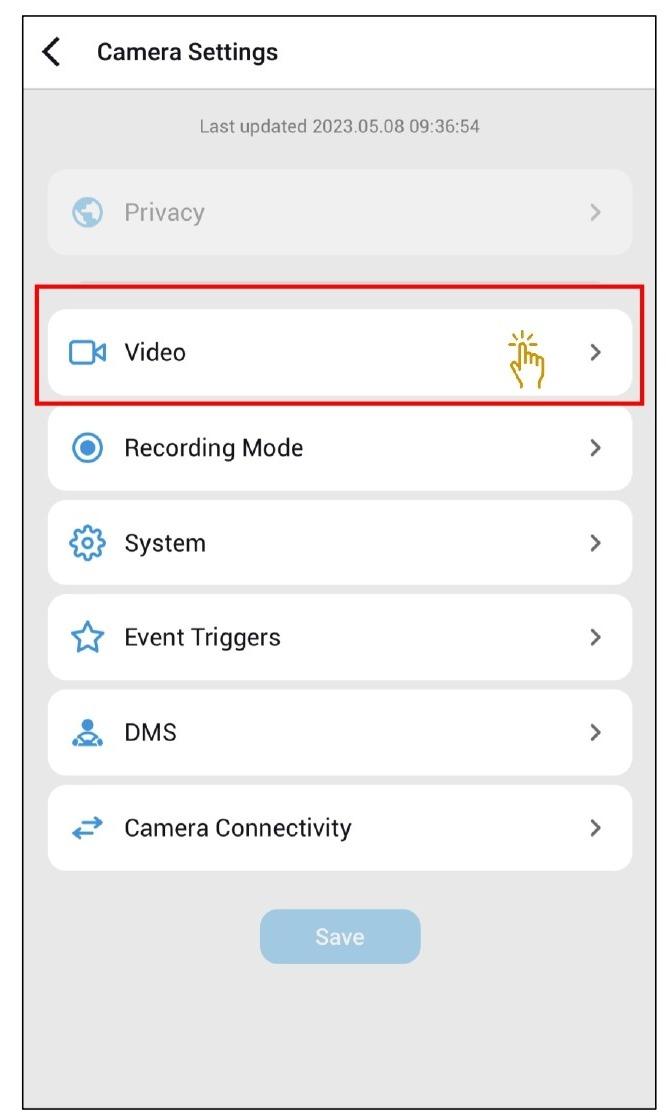
1.2 Video Settings
Camera Settings > Video
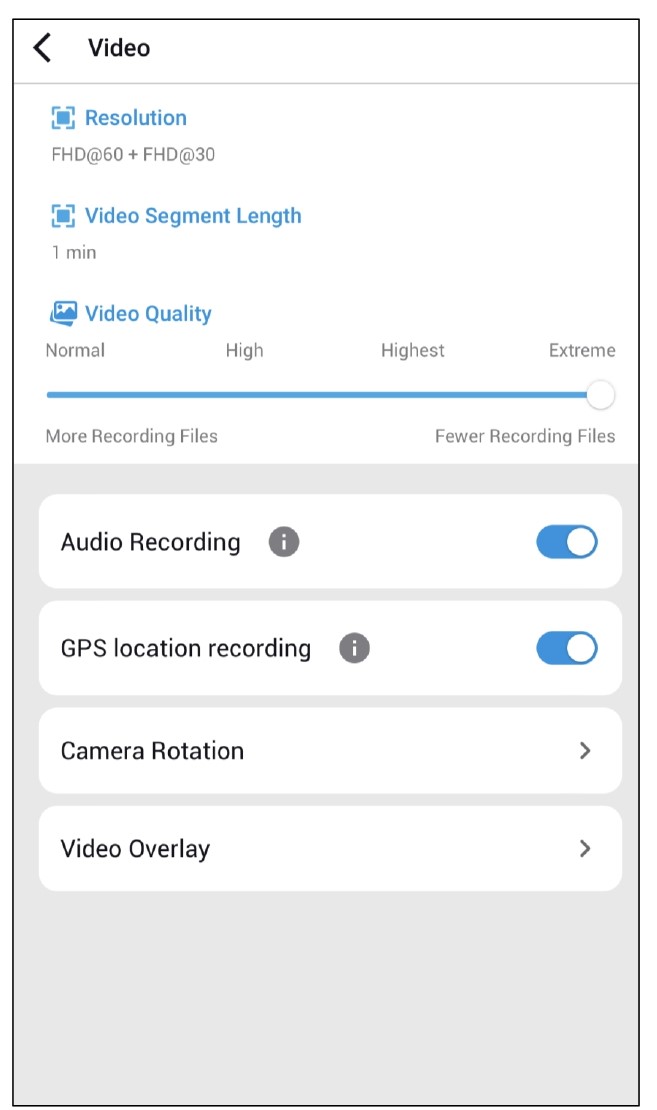
1.2.1 Resolution
Camera Settings > Video > Resolution
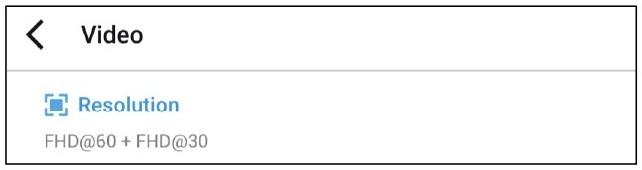
- Resolution and frame rate is fixed at “FHD@60 + FHD@30”. This means the front camera records Full HD video at 60 frames per second, and the rear camera records Full HD video at 30 frames per second.
• The playback of 60 fps videos depends on your device’s hardware and software. Older devices may not support 60 fps video playback. If you encounter issues please check your device’s video playback capabilities.
• Frame rate may vary during Wi-Fi streaming.
1.2.2 Video Segment Length
Camera Settings > Video > Video Segment Length

- Video segment length is fixed at 1 minute.
1.2.3 Video Quality
Camera Settings > Video > Video Quality
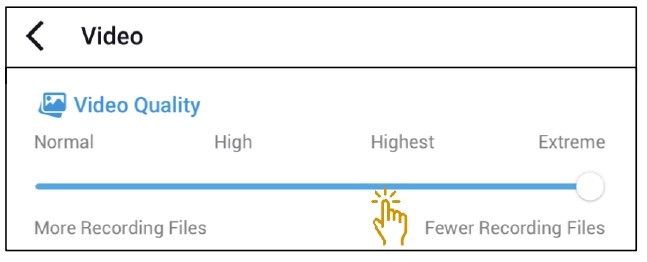
You can adjust the recording image quality (bit rate) settings.
Choose between:
• Highest (Extreme) (Front: 25 Mbit/s, Rear: 10 Mbit/s)
• Highest (12 Mbit/s) (Front: 12 Mbit/s, Rear: 10 Mbit/s)
• High (10 Mbit/s) (Front: 10 Mbit/s, Rear: 8 Mbit/s)
• Normal (8 Mbit/s) (Front: 8 Mbit/s, Rear: 6 Mbit/s)
Increasing the image quality will increase the size of the video files. Loading and copying time will increase accordingly. If your phone does not support video streaming at the ‘Highest (Extreme)’ image quality setting, please copy the recording to your phone and play from internal memory. Alternatively, you can choose “Quick playback” option
1.2.4 Audio Recording
Camera Settings > Video > Audio Recording
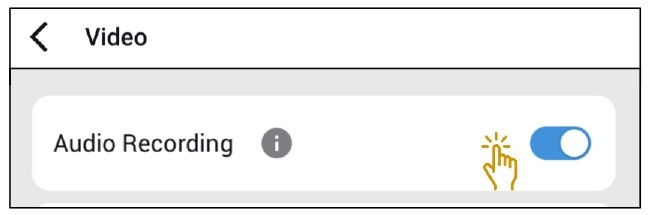
You can choose to turn on or turn off the dashcam on audio recording.
1.2.5 GPS Location Recording
Camera Settings > Video > GPS Location Recording
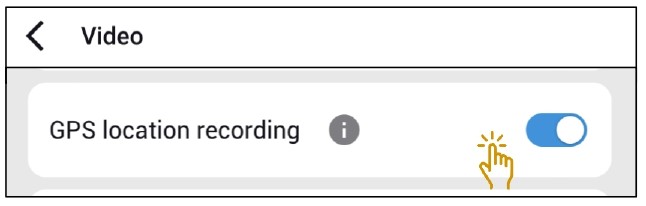
GPS location recording is able to protect your privacy. GPS location recording is on by default. When it is off, the GPS location is not recorded or sent to the cloud server. Therefore, your privacy will be protected. Turning it off will not disable some convenient features such as time correction, speed display, and other speed-related events. Find the features that will be affected by turning it off.
– Live view: Under the live view, you will see a message letting you know GPS location recording is off over the map. (GPS location recording off)
– Camera list (Map view): The vehicle’s location will not show on the map.
– Video playback: Under the live view, you will see a message letting you know GPS location recording is off over the map.
– GPS Tracking: The server will not save tracking data.
– Geo-Fencing: No alerts will occur, hence a live event upload file will not be created.
– Drive report: Location-related information will not be shown.
– Live even upload: Under the video player, you will see a message letting you know GPS location recording is off over the map. (GPS location recording off)
– GPS time correction: It is not affected by either turning it on or off.
– Speed-related events (acceleration, harsh braking, overspeed, and sharp turn) and speed: It is not affected by either turning it on or off.
1.2.6 Camera Rotation
Camera Settings > Video > Camera Rotation
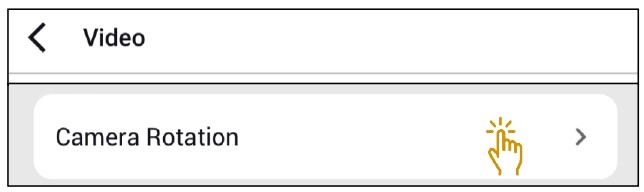
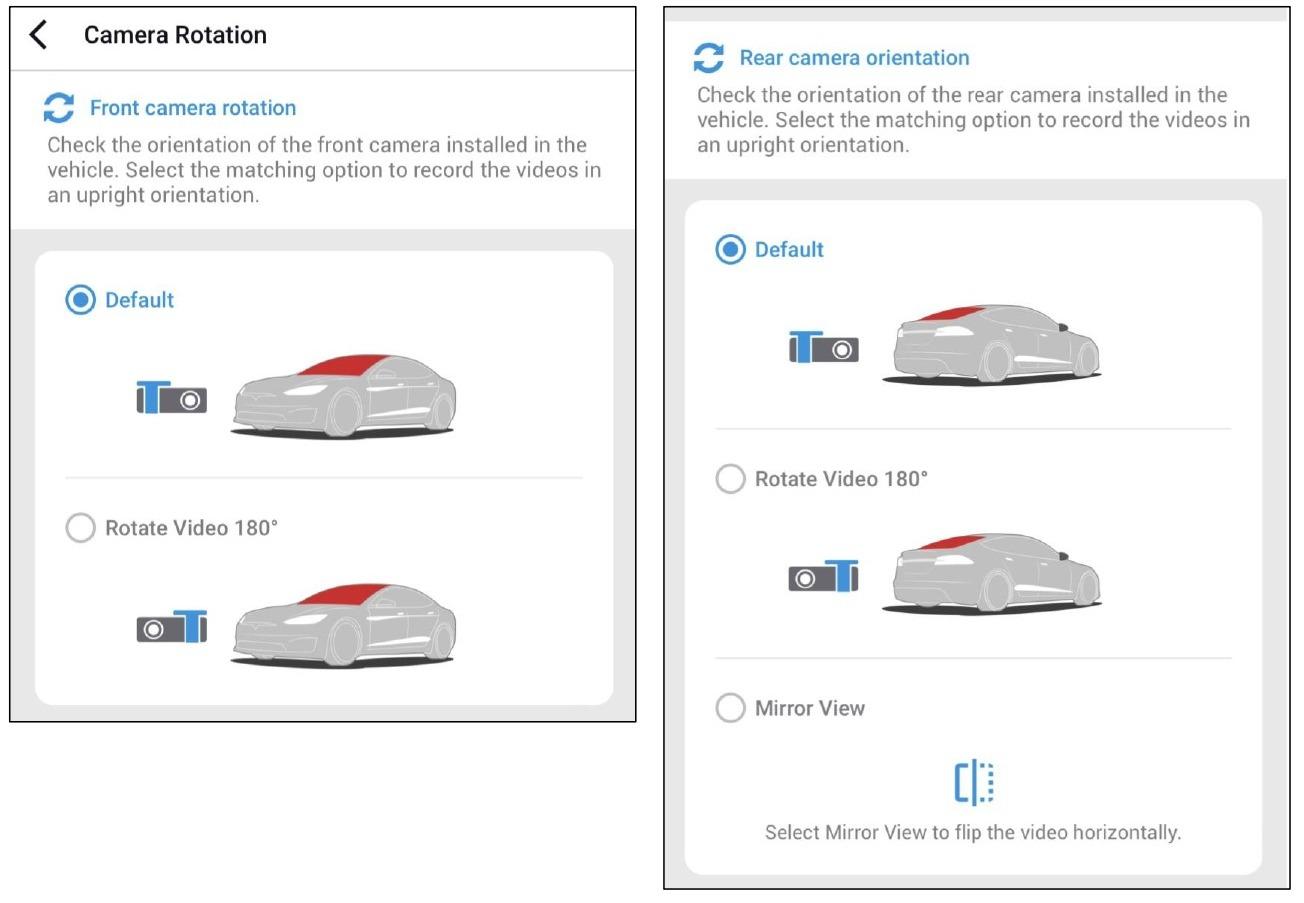
Front camera rotation
If you installed the front camera in a flipped position, use this setting to rotate the front camera image 180°.
Rear camera orientation
Use this setting to rotate the rear camera image 180° or mirror the video.
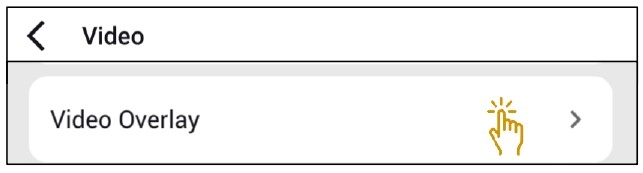
1.2.7 Video Overlay
Camera Settings > Video > Video Overlay
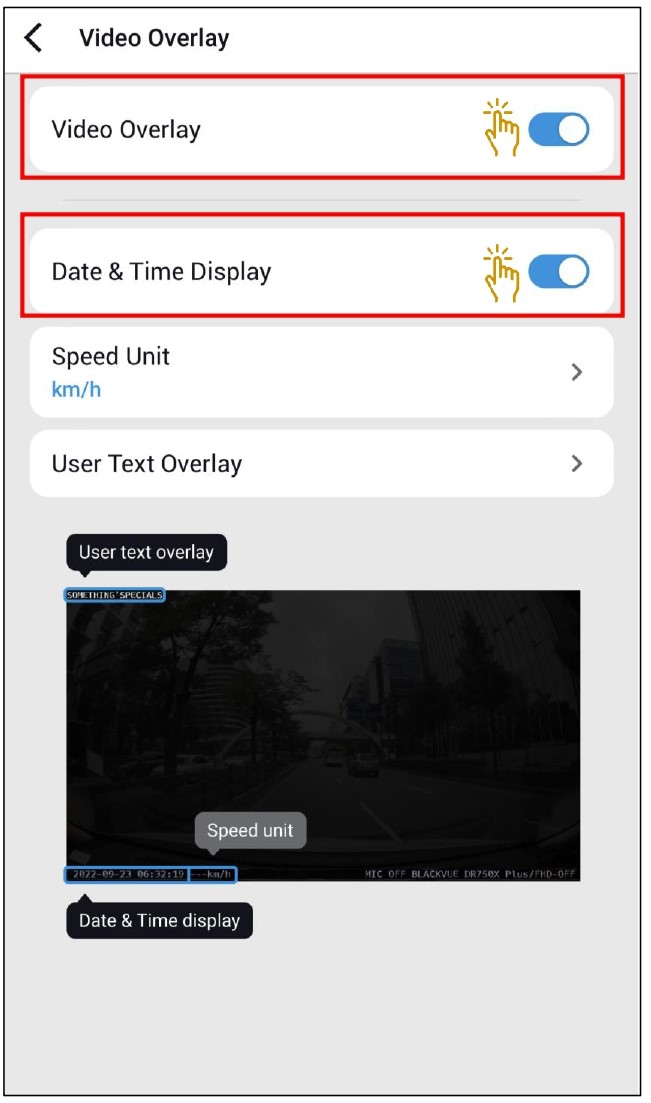
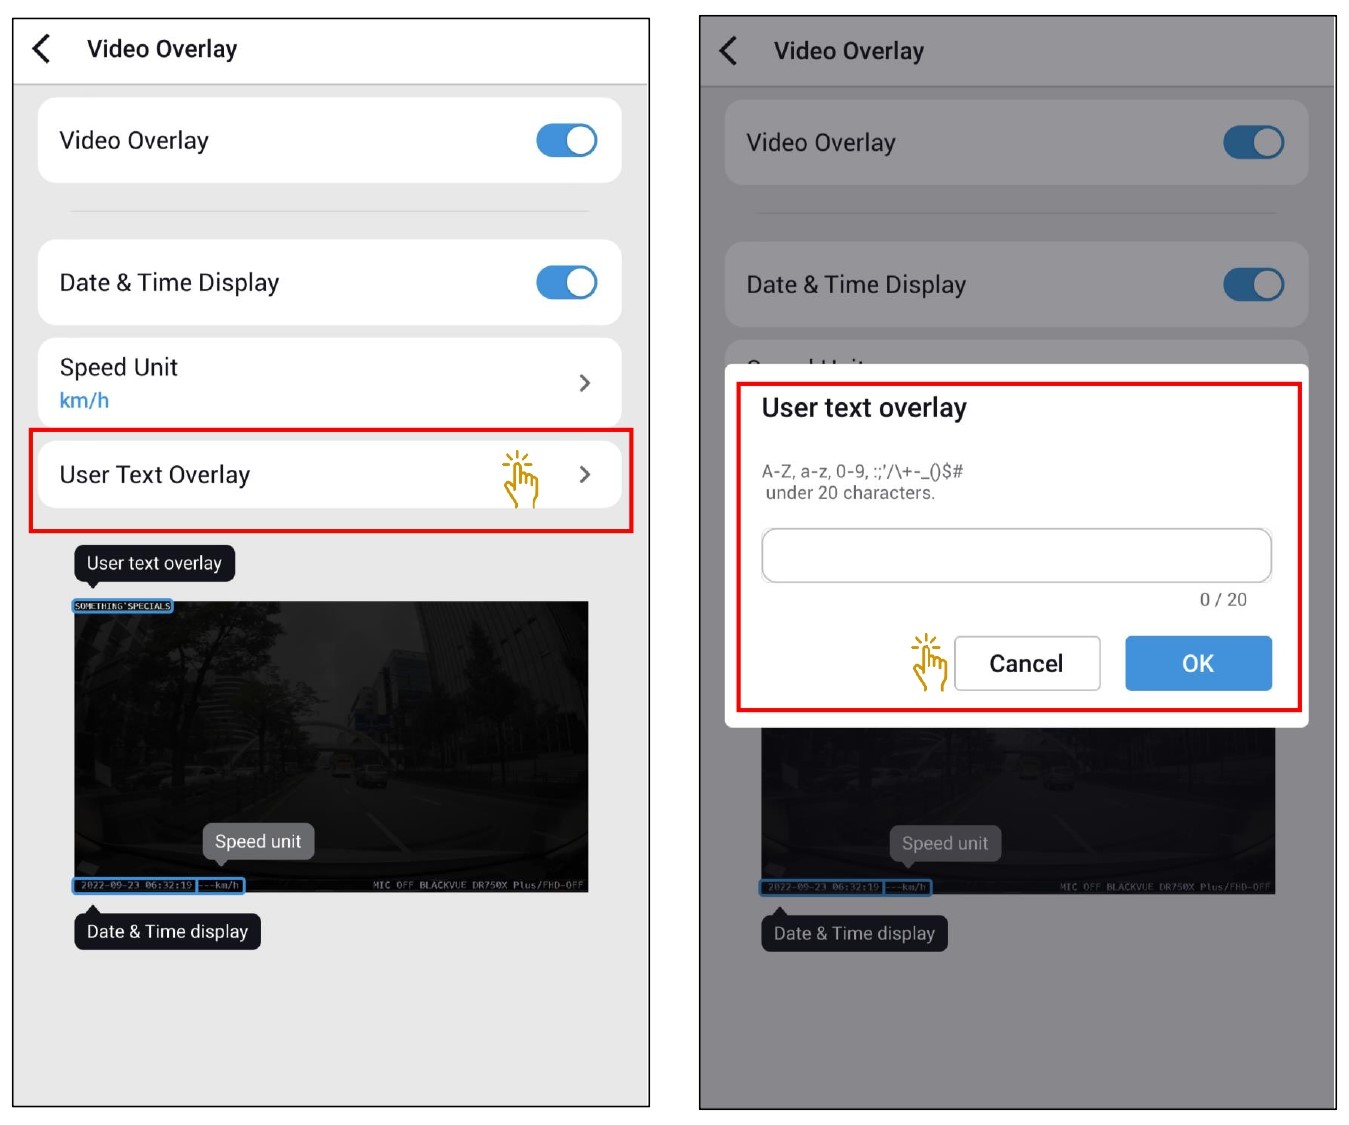
Video overlay
If disabled, date & time, speed unit, and user text overlay will not be overlaid on recorded videos.
Date & time display
Turn on/off the date and time display on videos.
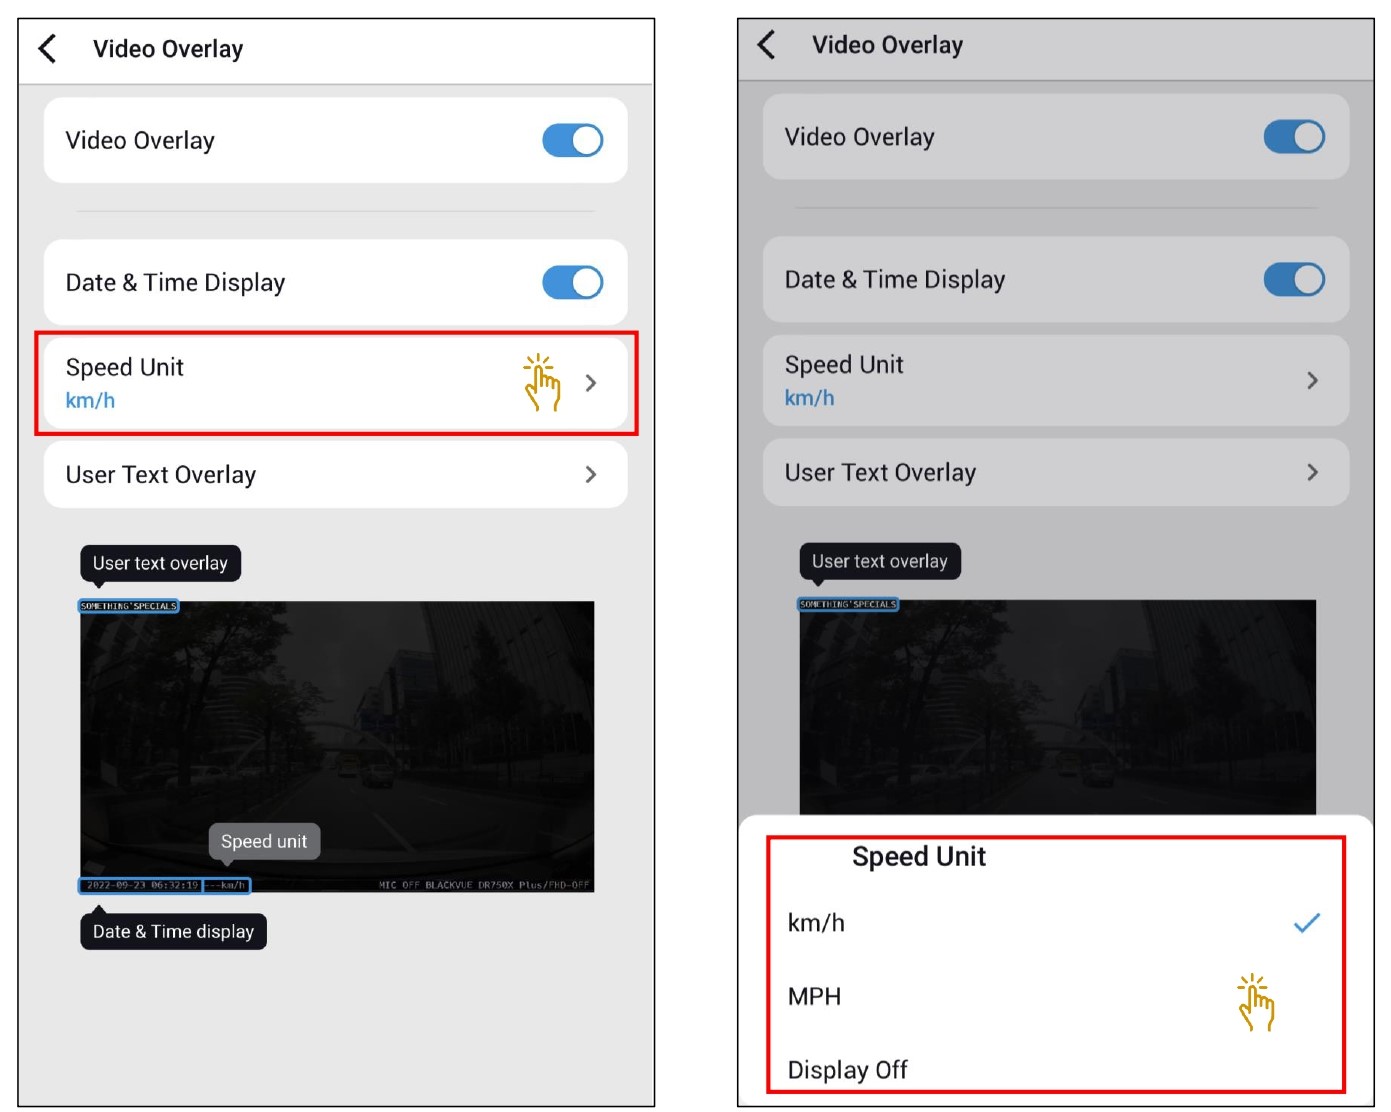
Speed unit
Select km/h, MPH, or turn off.
User text overlay
You can create a user text overlay of up to 20 characters using a combination of English letters (A – Z, a – z), numbers (0 – 9), and symbols (:;‘/+-_()$#). The text is overlaid in the top-left corner of the recorded videos.
1.3 Recording Mode
Camera Settings > Recording Mode
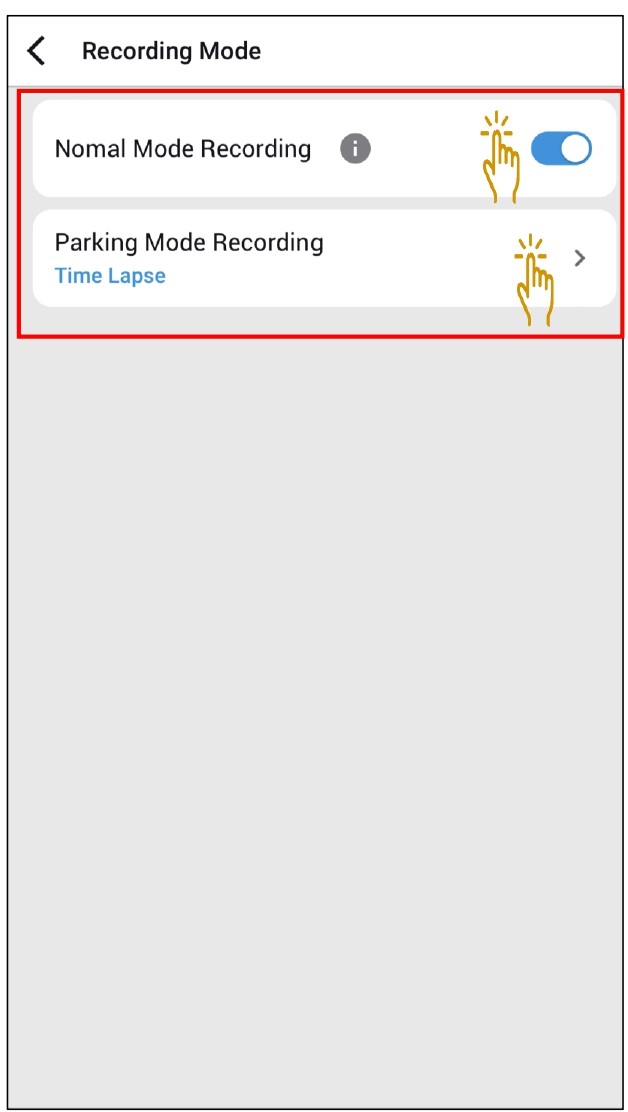
1.3.1 Normal Mode Recording
When turned on, the camera records continuously in a loop and records event files in normal mode.
When turned off, the camera only records event videos in normal mode.
1.3.2 Parking Mode Recording
Camera Settings > Recording Mode > Parking Mode Recording
If enabled, the dashcam switches from normal mode to parking mode when the vehicle is turned off (ACC+) or stationary for 5 minutes (G-Sensor).
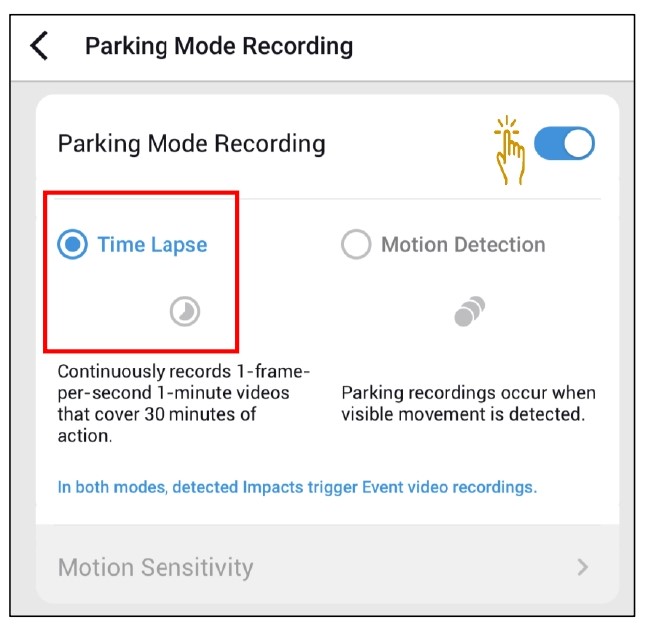
There are two parking mode options.
Choose “Motion & Impact detection” to save a parking recording when motion is detected in the dashcam’s field of view. If the G-sensor detects an impact/bump the dashcam saves a separate event recording file.
Alternatively, if you choose “Time lapse” the camera continuously records 1 frame per second and saves recordings that playback at 30 times normal speed. If the G-sensor detects an impact/bump the camera saves a separate event recording file at normal speed.
1.3.2.1 Motion Sensitivity
Camera Settings > Recording Mode > Parking Mode Recording > Motion Sensitivity
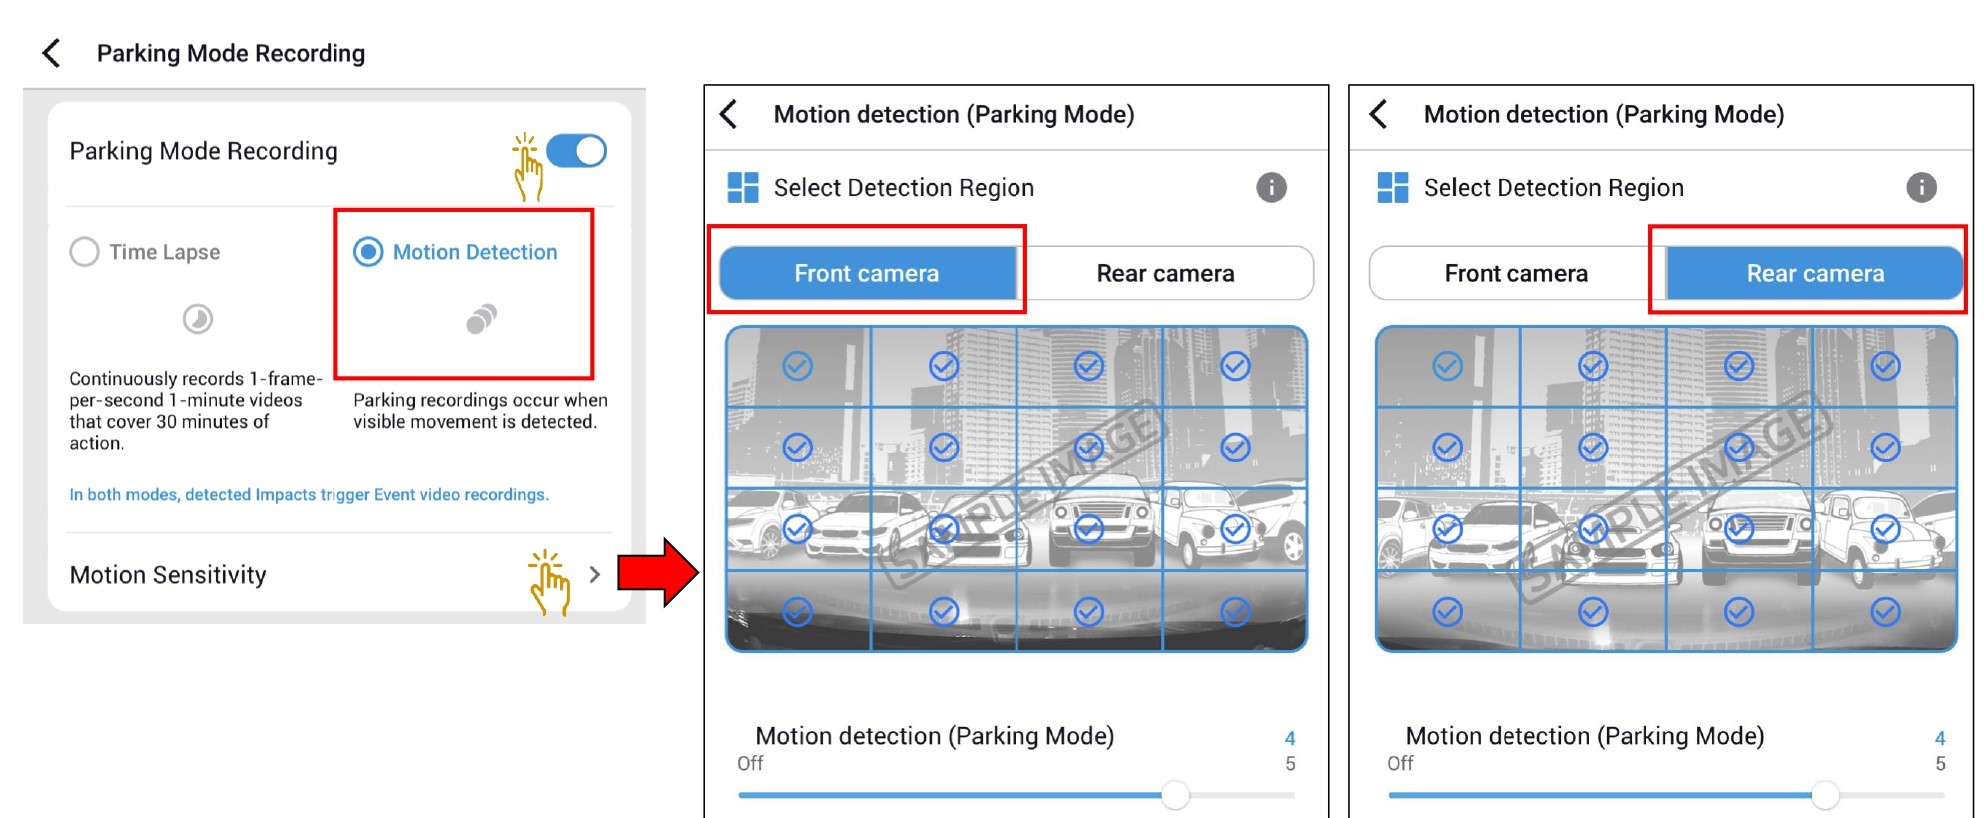
In Motion Detection Parking Mode the dashcam continuously buffers video and saves a parking recording when motion is detected in the dashcam’s field of view.
You can adjust the sensitivity of the motion detection so minor motion caused by wind or rain doesn’t trigger a recording.
Please take into account your vehicle’s surroundings when adjusting the sensitivity.
You can also choose the detection regions to reduce the risk of triggering unwanted motion recordings due to trees swaying in the wind, far-away moving objects, etc. By default, all the regions are selected. If you want to ignore motion detection in particular region(s), unselect them.
1.3.3 Rear Camera Recording
Camera Settings > Recording Mode > Rear Camera Recording
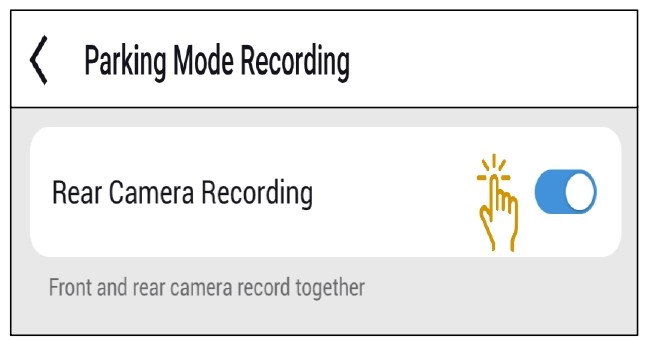
When turned on, the front and rear camera record together.
When turned off, the rear camera stops recording 5 minutes after entering parking mode. Rear camera recording restarts when entering normal mode.
1.3.4 Battery Protection(Hardwiring Power Cable Installation Only)
Camera Settings > Recording Mode > Battery Protection
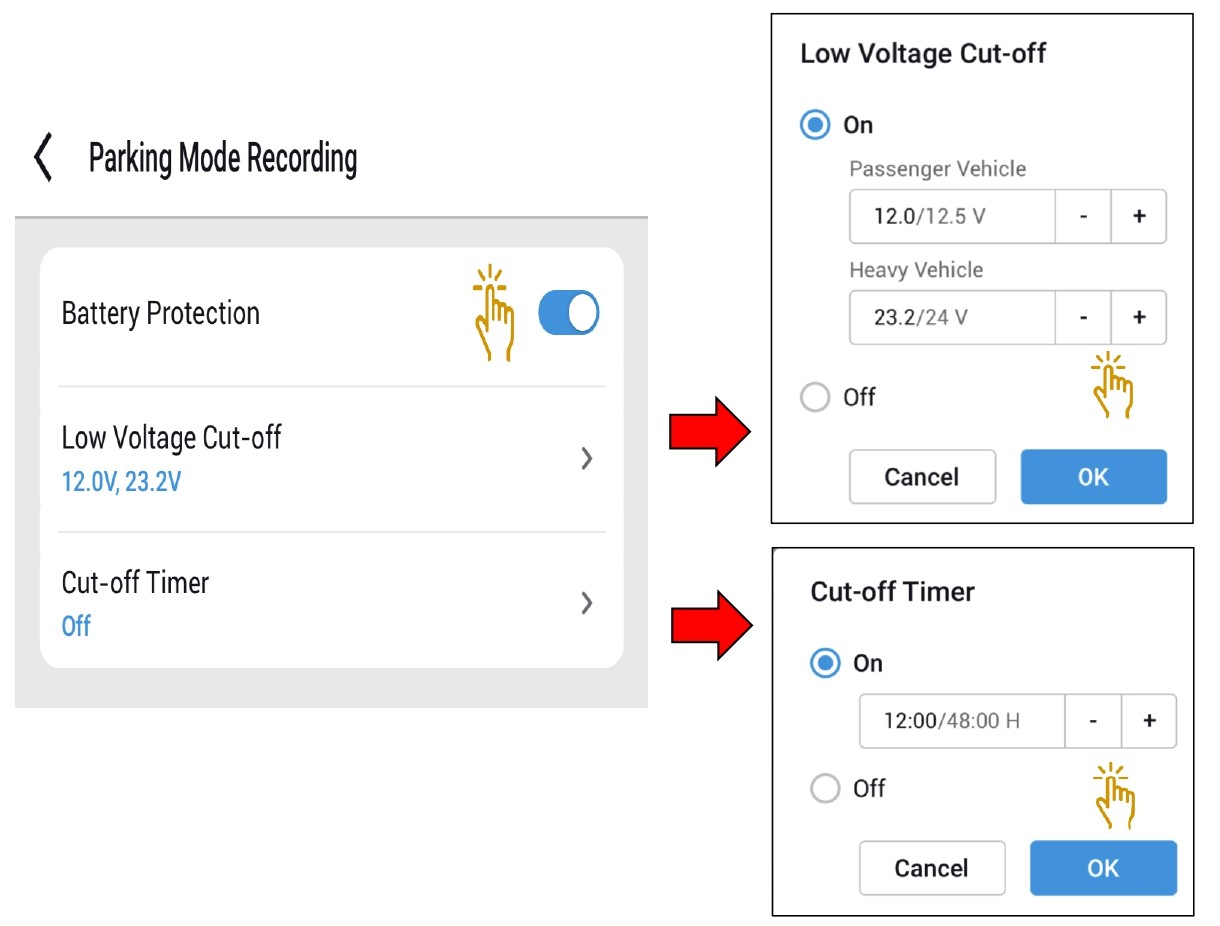
When the battery protection is on, power is supplied to your BlackVue while the vehicle is off (ACC+ off) and also prevents the vehicle from battery discharge while it is parked.
When enabled, BlackVue will automatically power down according to the set cut-off timer and voltage.
Recommended settings for low voltage cut-off is 12V or higher during winter.
If battery protection is off, BlackVue will not operate when the vehicle is turned off (ACC+ off).
1.3.4.1 Enabling Parking Mode Using Cellink Battery
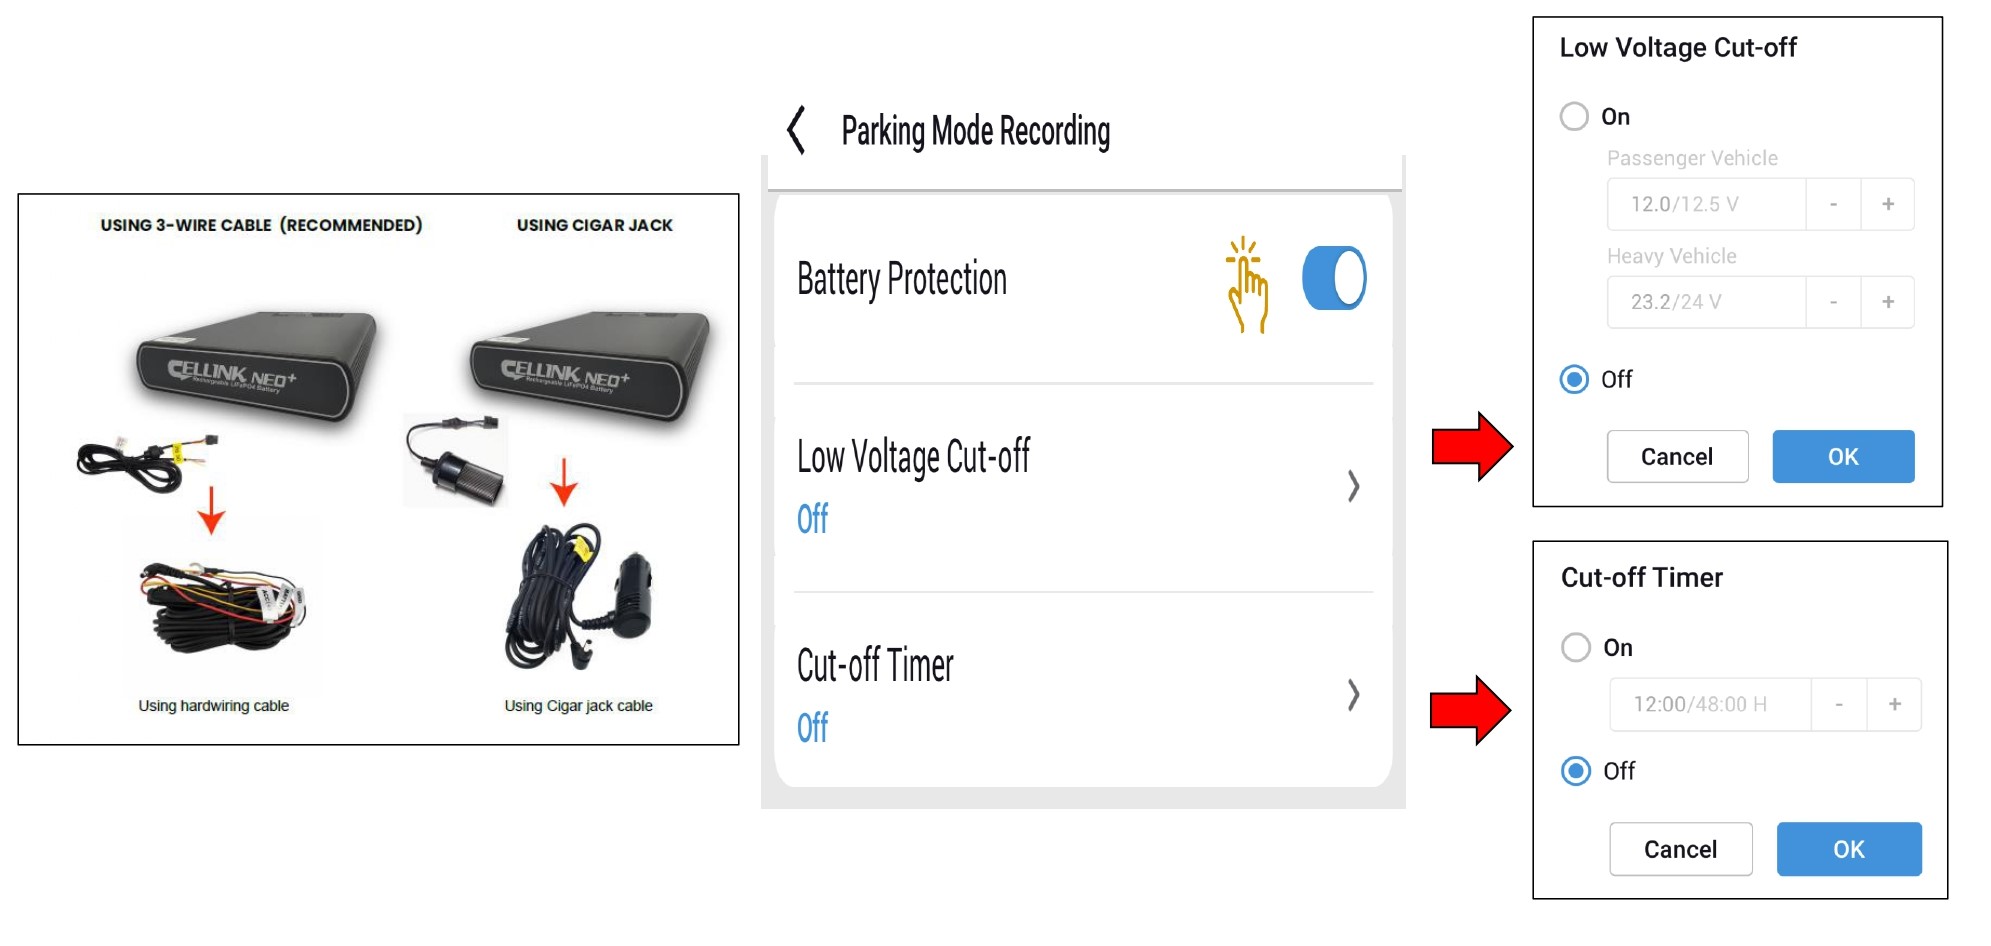
If using external Cellink Battery to power the dashcam during parking mode,
| Settings | Status |
| Battery Protection | ON |
| Low Voltage Cut Off | OFF |
| Cut-Off Timer | OFF |
1.4 System
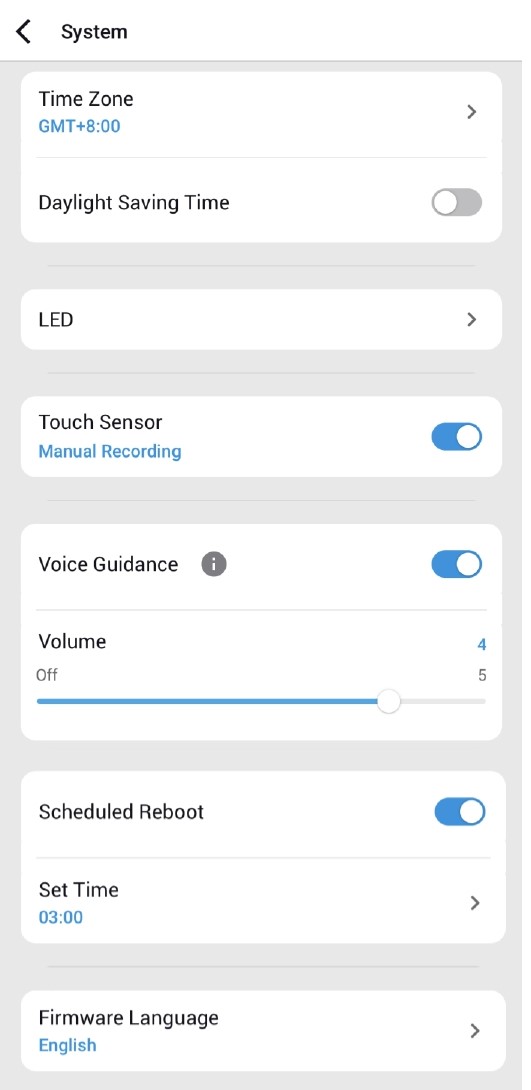
1.4.1 Time Zone
Camera Settings > System > Time Zone
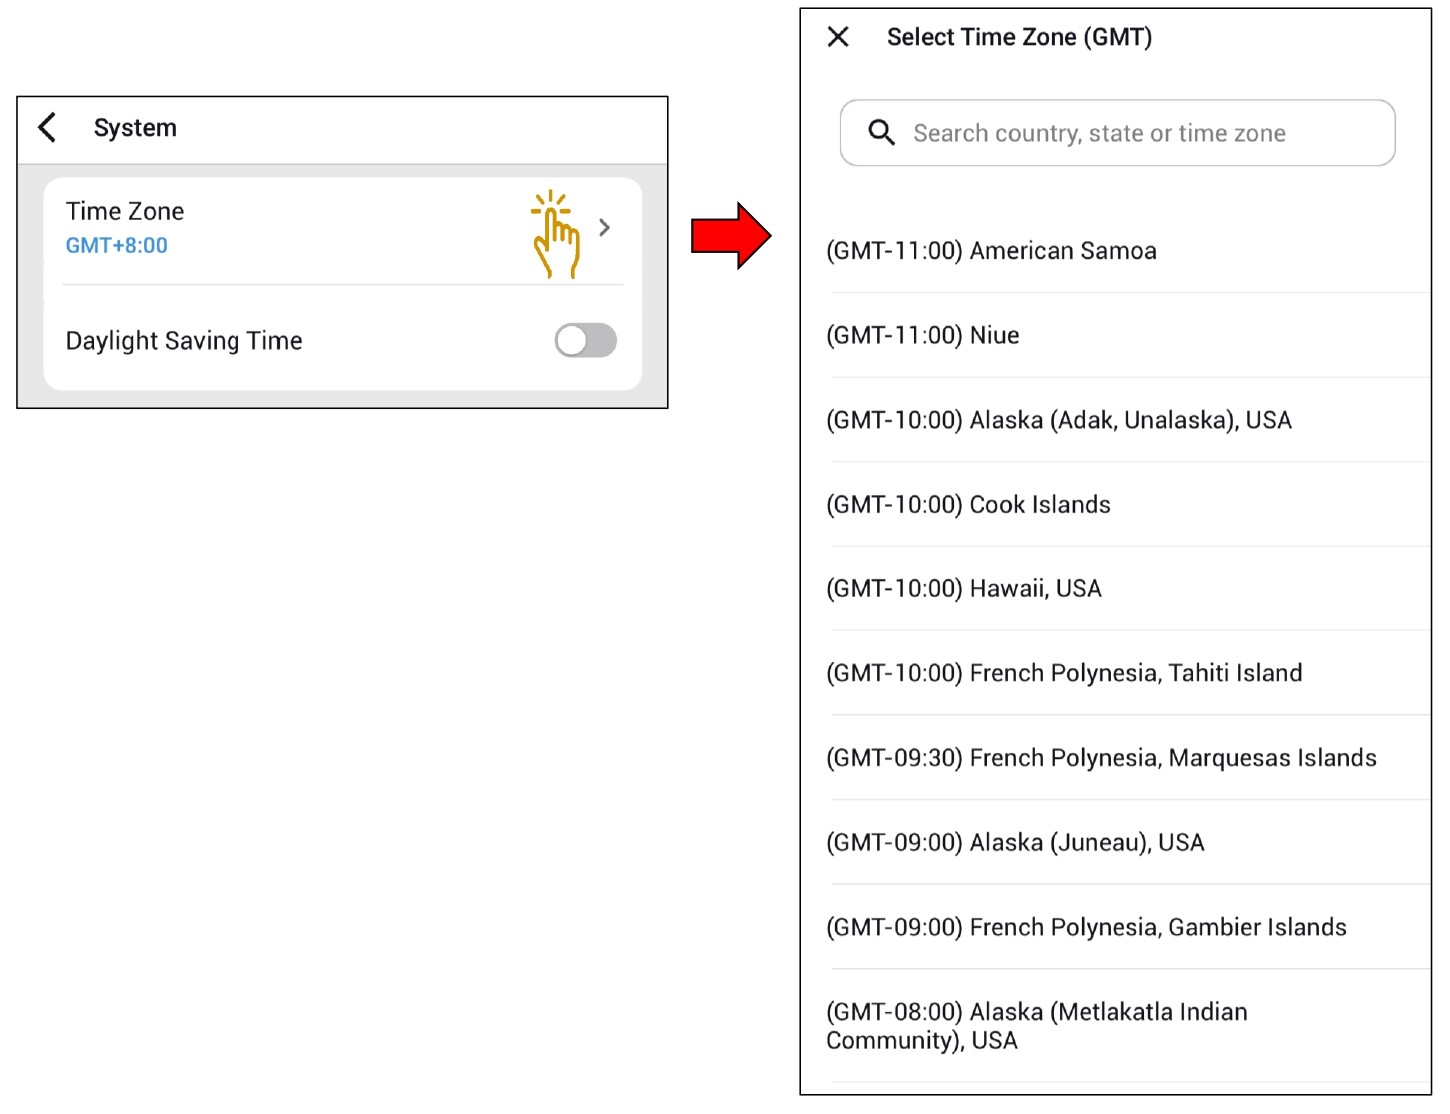
Time zone
Select your time zone to auto-sync with GPS time.
Note
• The factory setting is GMT -11.
Some examples of GMT time offsets are:
– GMT-7: Los Angeles
– GMT-4: New York
– GMT+0: London
– GMT+1: Paris
– GMT+3: Moscow
– GMT+8: Singapore
– GMT+9: Seoul
– GMT+10: Sydney
If you are unsure of your GMT offset please look up your city on https://greenwichmeantime.com/
*Selecting Daylight saving time will advance the clock by one hour
• When setting the time manually, please set to the expected time you will use the BlackVue (not the present time).
1.4.2 LED
Camera Settings > System > LED
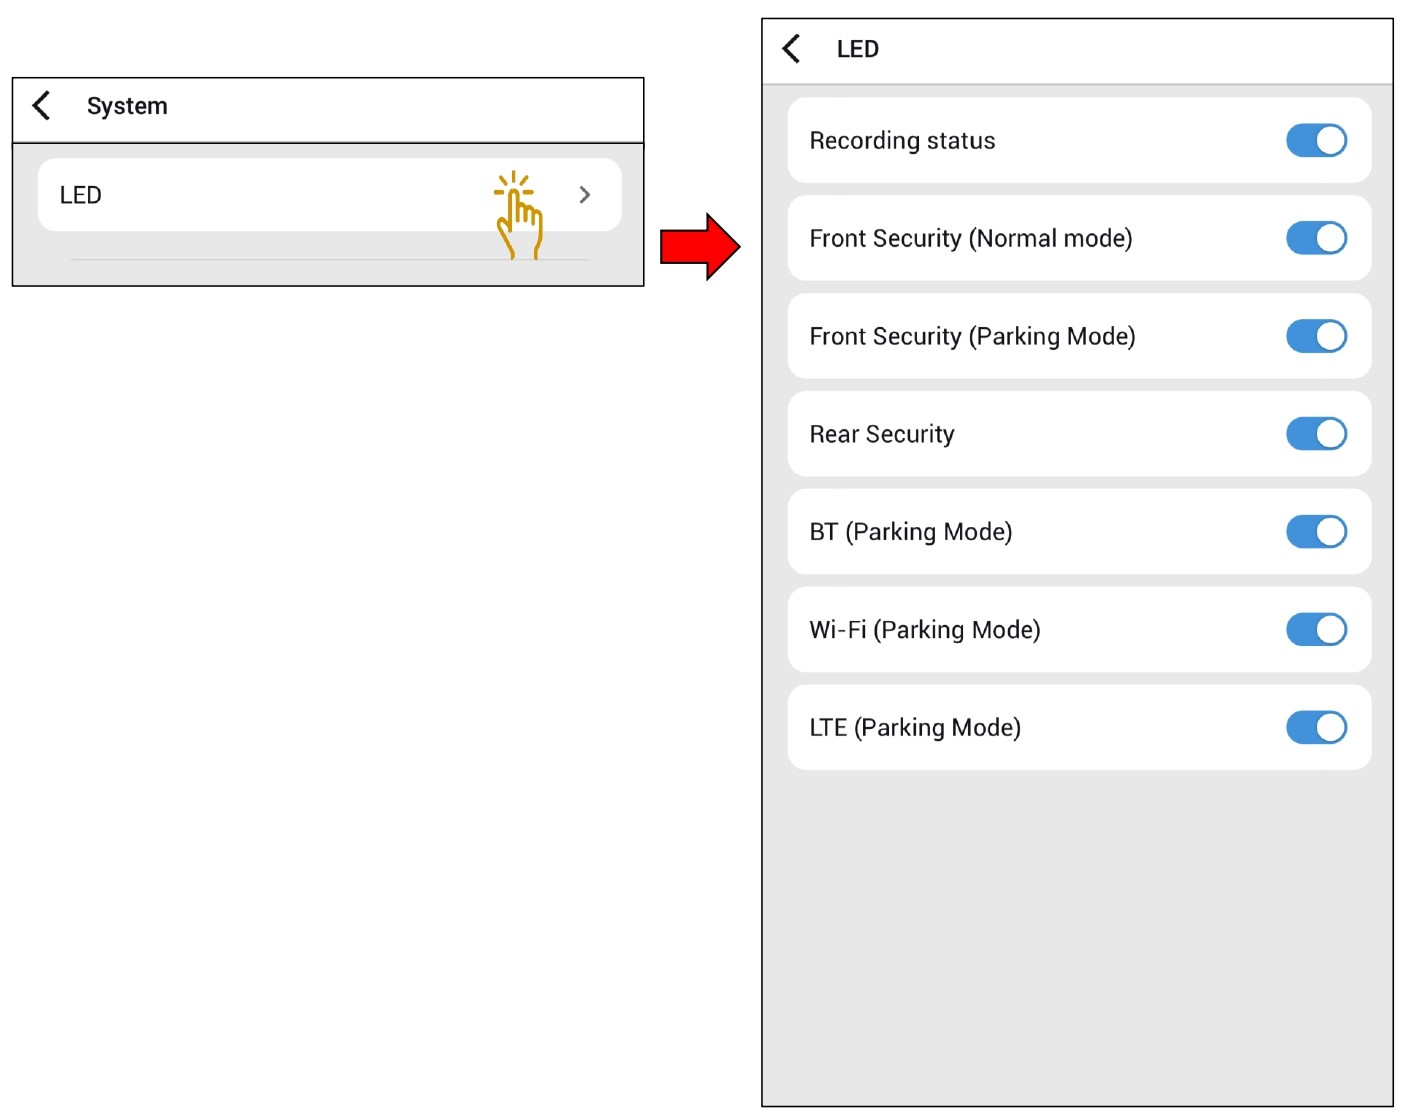
Recording status
You can turn the recording status LED on/off.
Front security (Normal mode)
You can turn the security LED on/off for normal mode.
Front security (Parking mode)
You can turn the security LED on/off for parking mode.
Rear security
You can turn the security LED on/off.
BT (Parking mode)
You can turn the bluetooth LED on/off for parking mode.
Wi-Fi (Parking mode)
You can turn the LTE LED on/off for parking mode.
LTE (Parking mode)
You can turn the Wi-Fi LED on/off for parking mode.
1.4.3 Touch Sensor
Camera Settings > System > Touch Sensor
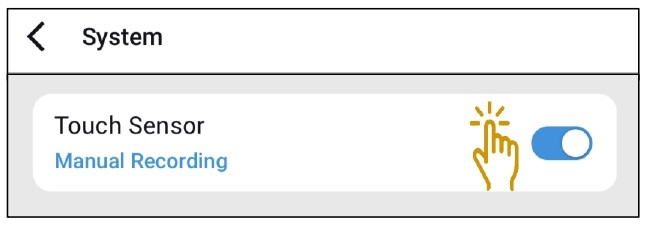
Touch Sensor
You can turn on/off the touch sensor.
*Pressing the touch sensor triggers manual recording.
1.4.4 Voice Guidance And Volume
Camera Settings > System > Voice Guidance and Volume

Voice guidance
You can turn on/off the voice guidance (announcements).
Volume
You can adjust the volume of the voice guidance (announcements).
1.4.5 Scheduled Reboot
Camera Settings > System > Scheduled Reboot
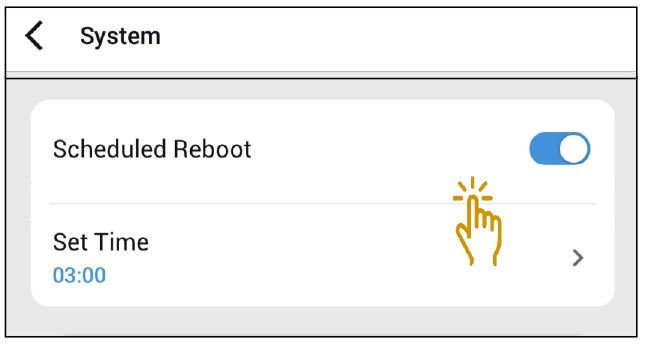
Scheduled Reboot
The dashcam reboots automatically once-a-day if in parking mode at the set time for improved stability. If the dashcam is recording at the set time, the scheduled reboot is skipped.
You can enable/disable and change the time for scheduled rebooting. Default time is 03:00 am.
1.4.6 Firmware Language
Camera Settings > System > Firmware Language
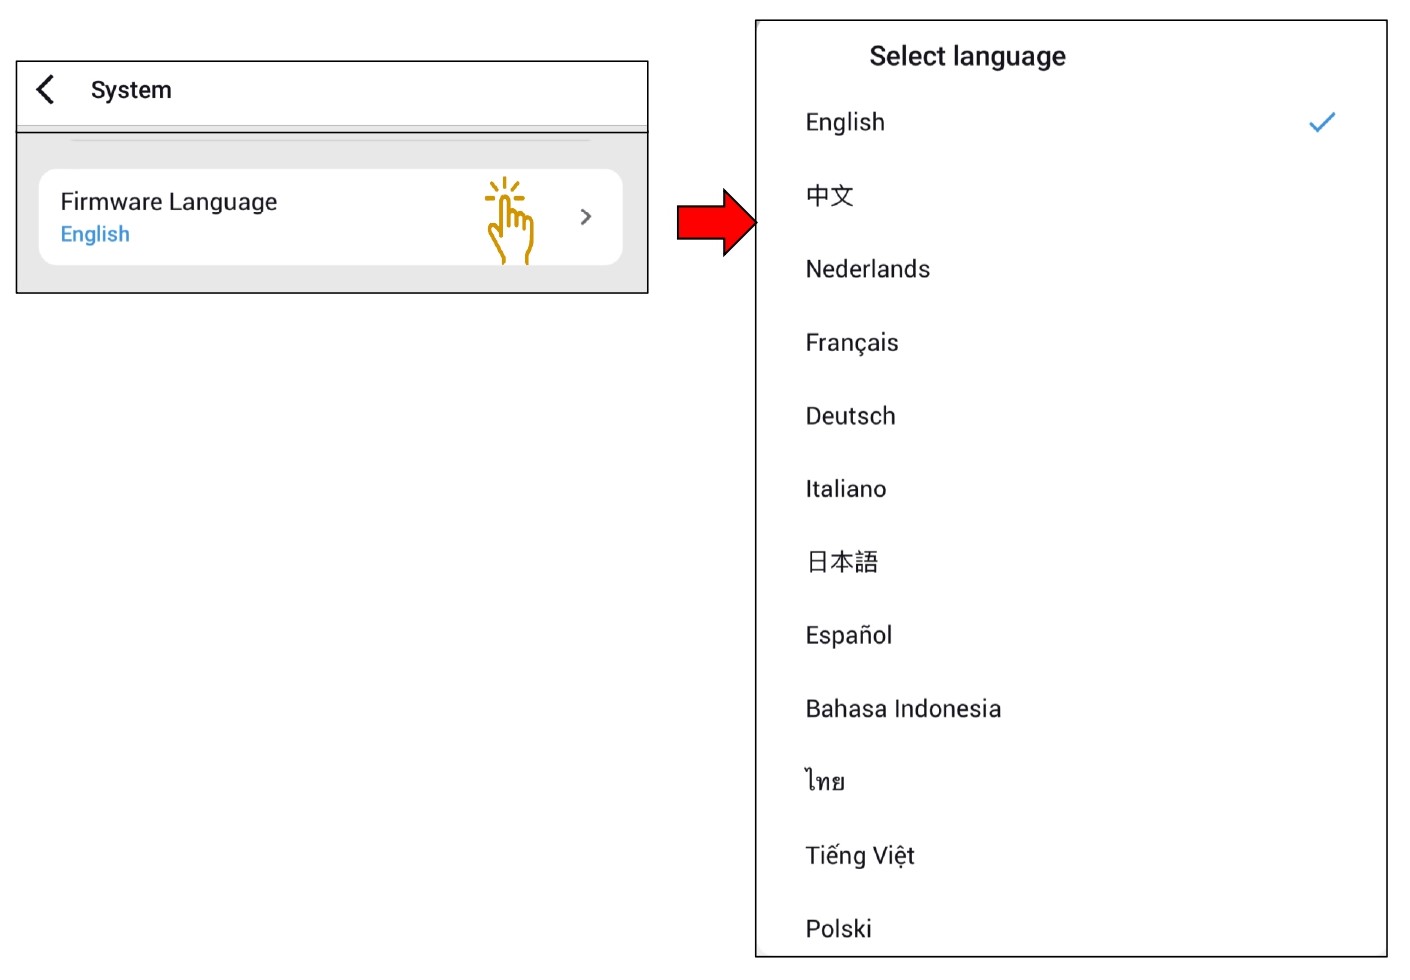
FW language
You can change the Firmware language of your dashcam.
1.5 Event Triggers
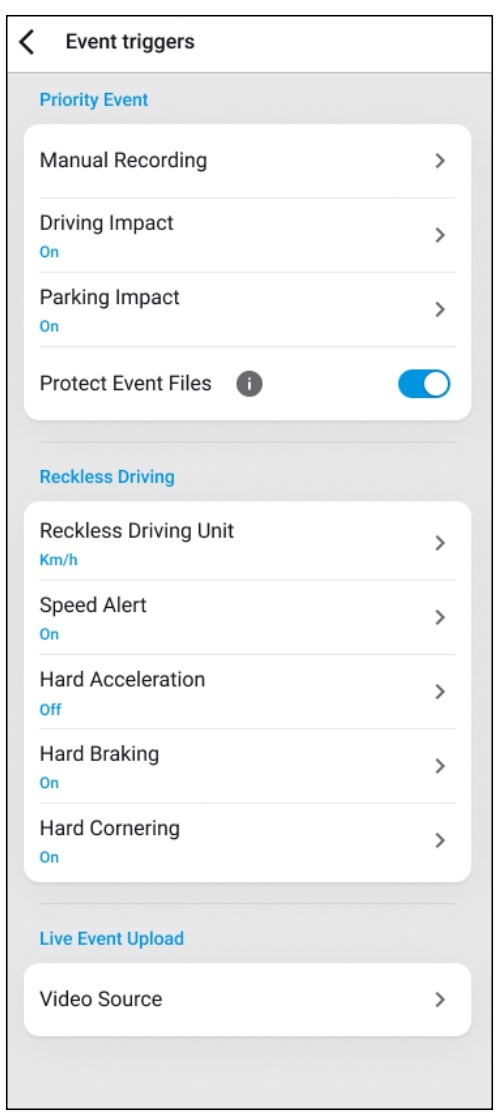
1.5.1 Priority Event
1.5.1.1 Manual Recording
Camera Settings > Event Triggers > Priority Event > Manual Recording
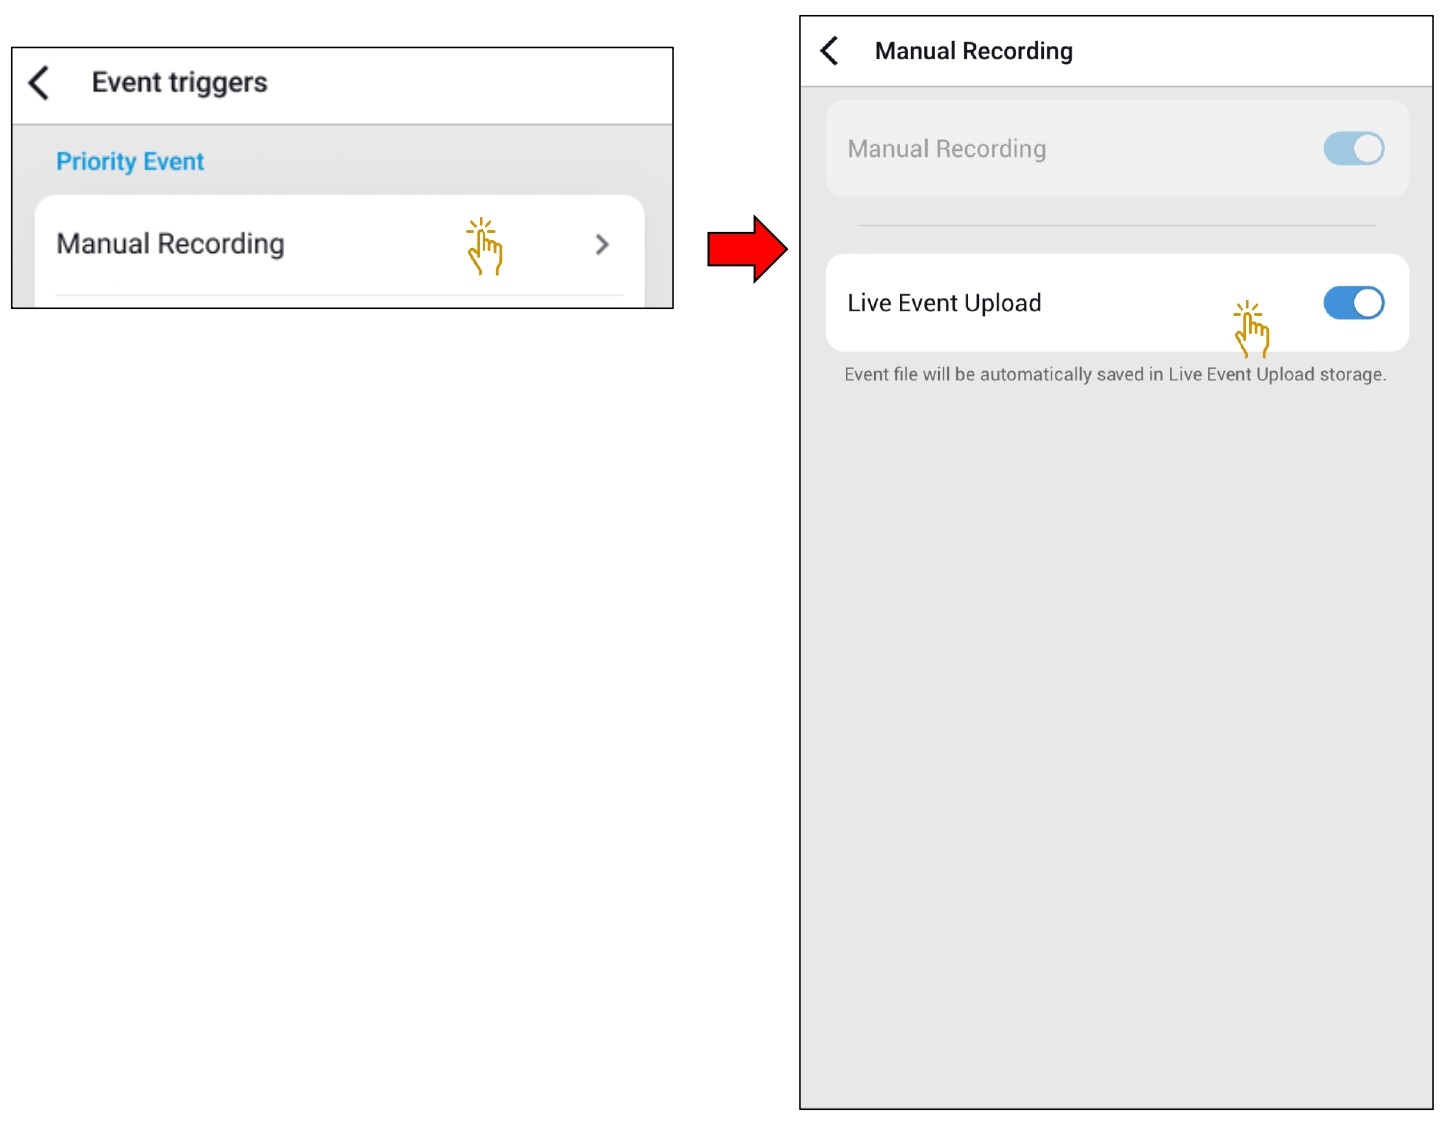
Manual recording
By default the Manual recording feature is turned on.
Live event upload
Enabling Live event upload automatically uploads event files to live event upload storages.
1.5.1.2 Driving Impact
Camera Settings > Event Triggers > Priority Event > Driving Impact

Driving impact
When the G-sensor detects significant or sudden movement (such as an impact or collision) it will trigger an event recording. The G-sensor measures the movement of your vehicle through 3 axes – up and down, side to side, and front and back. You can adjust the sensitivity so minor incidents and bumps don’t trigger an event recording. To turn off event recordings by impact detection during normal mode disable Driving impact.
Live event upload
Enabling Live event upload automatically uploads event files to live event upload storages.
Beep alert
Enable Beep alert to hear beep alert when driving impact has occurred.
1.5.1.3 Parking Impact
Camera Settings > Event Triggers > Priority Event > Parking Impact

Parking impact
When the G-sensor detects significant or sudden movement (such as an impact or collision) it will trigger an event recording. The G-sensor measures the movement of your vehicle through 3 axes – up and down, side to side, and front and back. You can adjust the sensitivity so minor incidents and bumps don’t trigger an event recording. To turn off event recordings by impact detection during parking mode disable Parking impact.
Live event upload
Enabling Live event upload automatically uploads event files to live event upload storages.
Parking impact history alert
Parking impact history alert voice alert notifies when exiting parking mode if an impact had been detected during parking mode, however, it ignores any impact detected within three minutes before exiting parking mode.
1.5.1.4 Protect Event Files
Camera Settings > Event Triggers > Priority Event > Protect Event Files

Protect event files
Turning on this option will protect the following recording types and stop them from being overwritten by newer recordings:
– Impact event recordings during normal mode (E) and parking mode (I); and
– Manual recordings (M).
A maximum of 50 files can be locked.
Once 50 Events are recorded, new Events will overwrite the oldest ones.
1.5.2 Reckless Driving
1.5.2.1 Reckless Driving Unit
Camera Settings > Event Triggers > Reckless Driving > Reckless Driving Unit

Reckless driving unit
Select km/h or MPH unit to use for Speed alert, Hard acceleration, Hard braking, and Hard cornering.
1.5.2.2 Speed Alert
Camera Settings > Event Triggers > Reckless Driving > Speed Alert
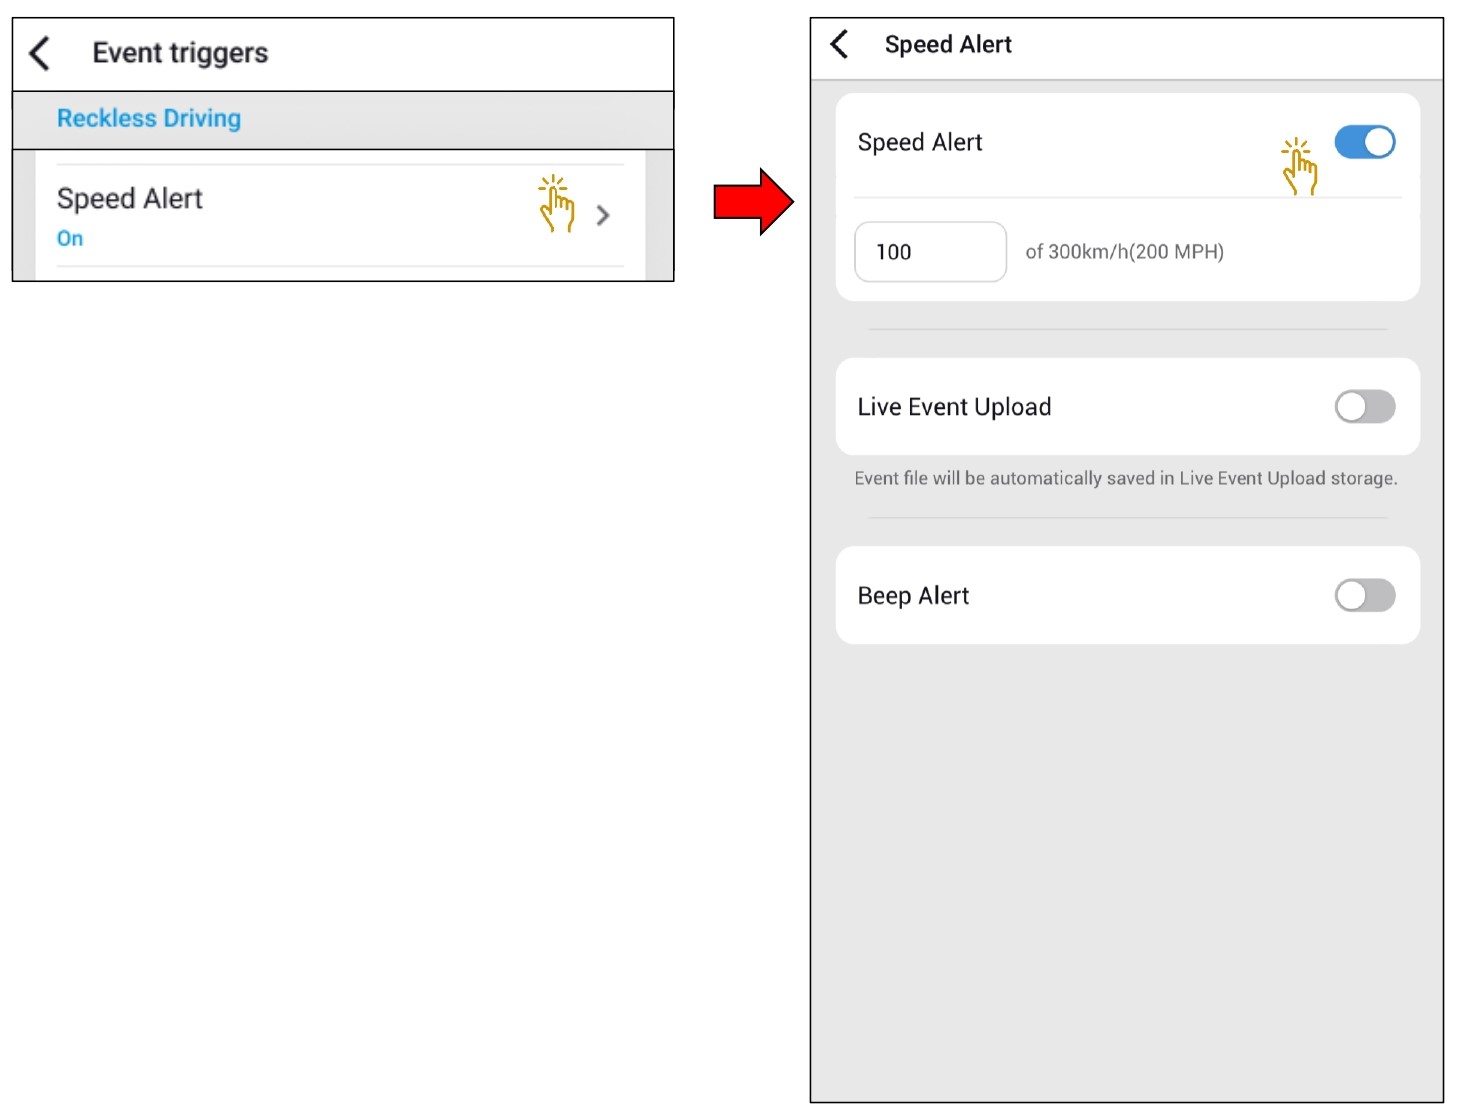
Speed alert
When enabled, an event file is recorded when the car exceeds the set speed limit
Live event upload
Enabling Live event upload automatically uploads event files to live event upload storages.
Beep alert
Enable Beep alert to hear beep alert when speed alert has occurred.
1.5.2.3 Hard Acceleration
Camera Settings > Event Triggers > Reckless Driving > Hard Acceleration
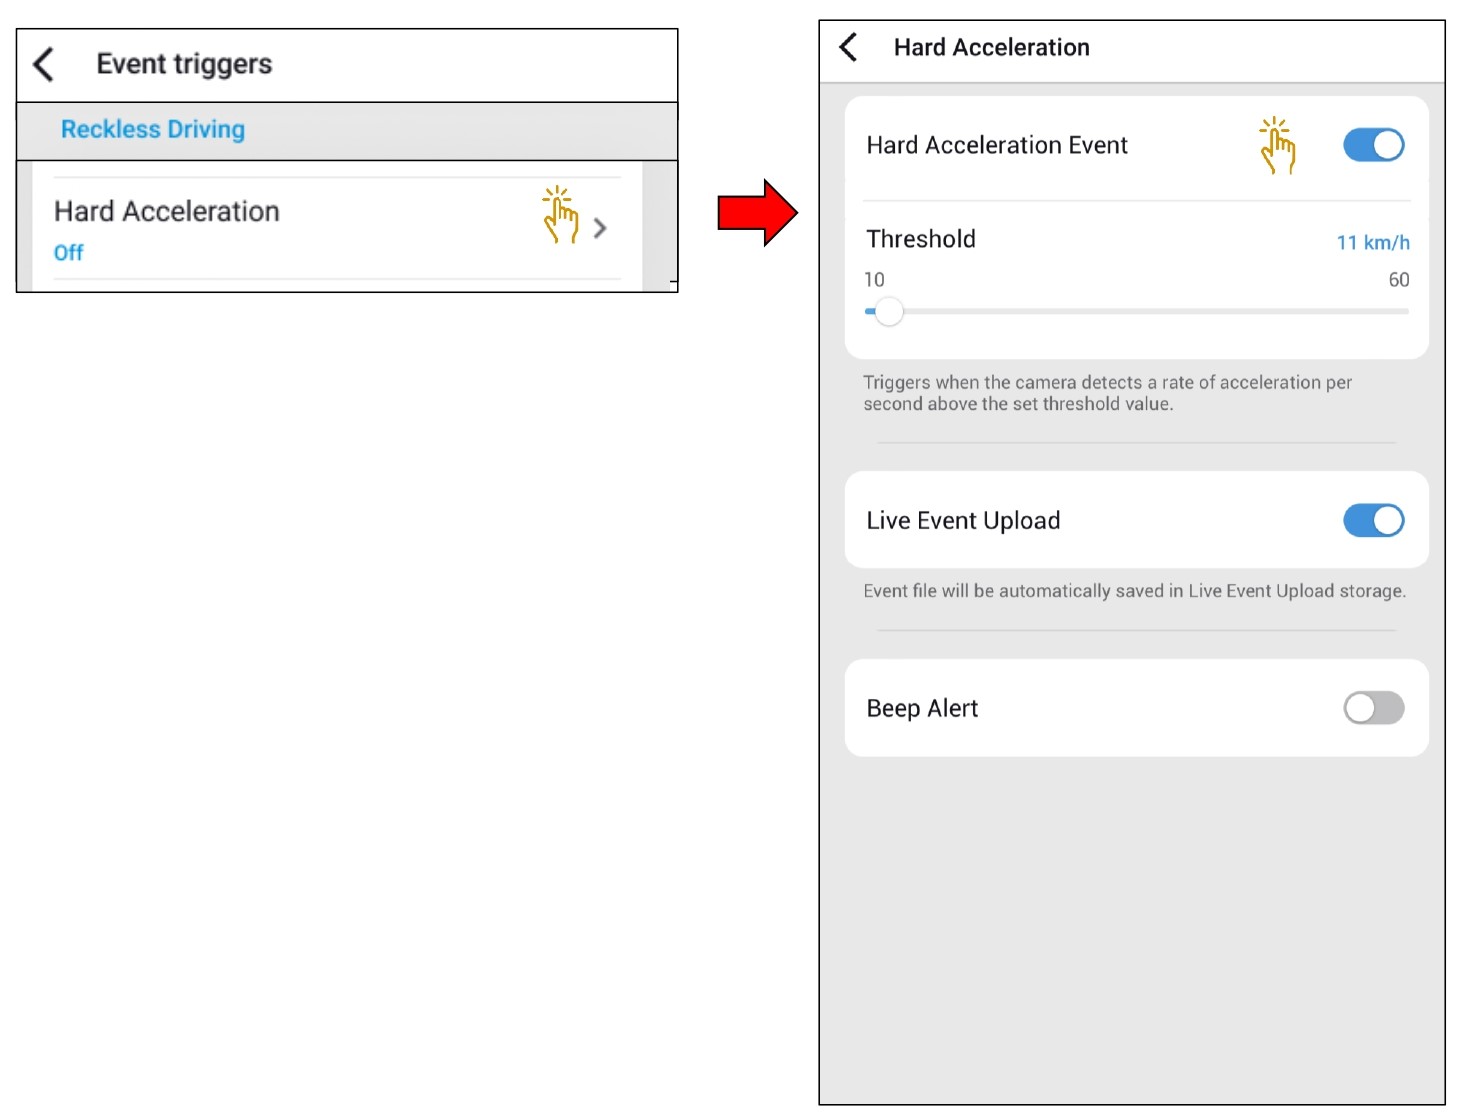
Hard acceleration event
When enabled, an event file is recorded when the camera detects a rate of acceleration per second above the set threshold value.
Live event upload
Enabling Live event upload automatically uploads event files to live event upload storages.
Beep alert
Enable Beep alert to hear beep alert when Hard acceleration event has occurred.
1.5.2.4 Hard Braking
Camera Settings > Event Triggers > Reckless Driving > Hard Braking
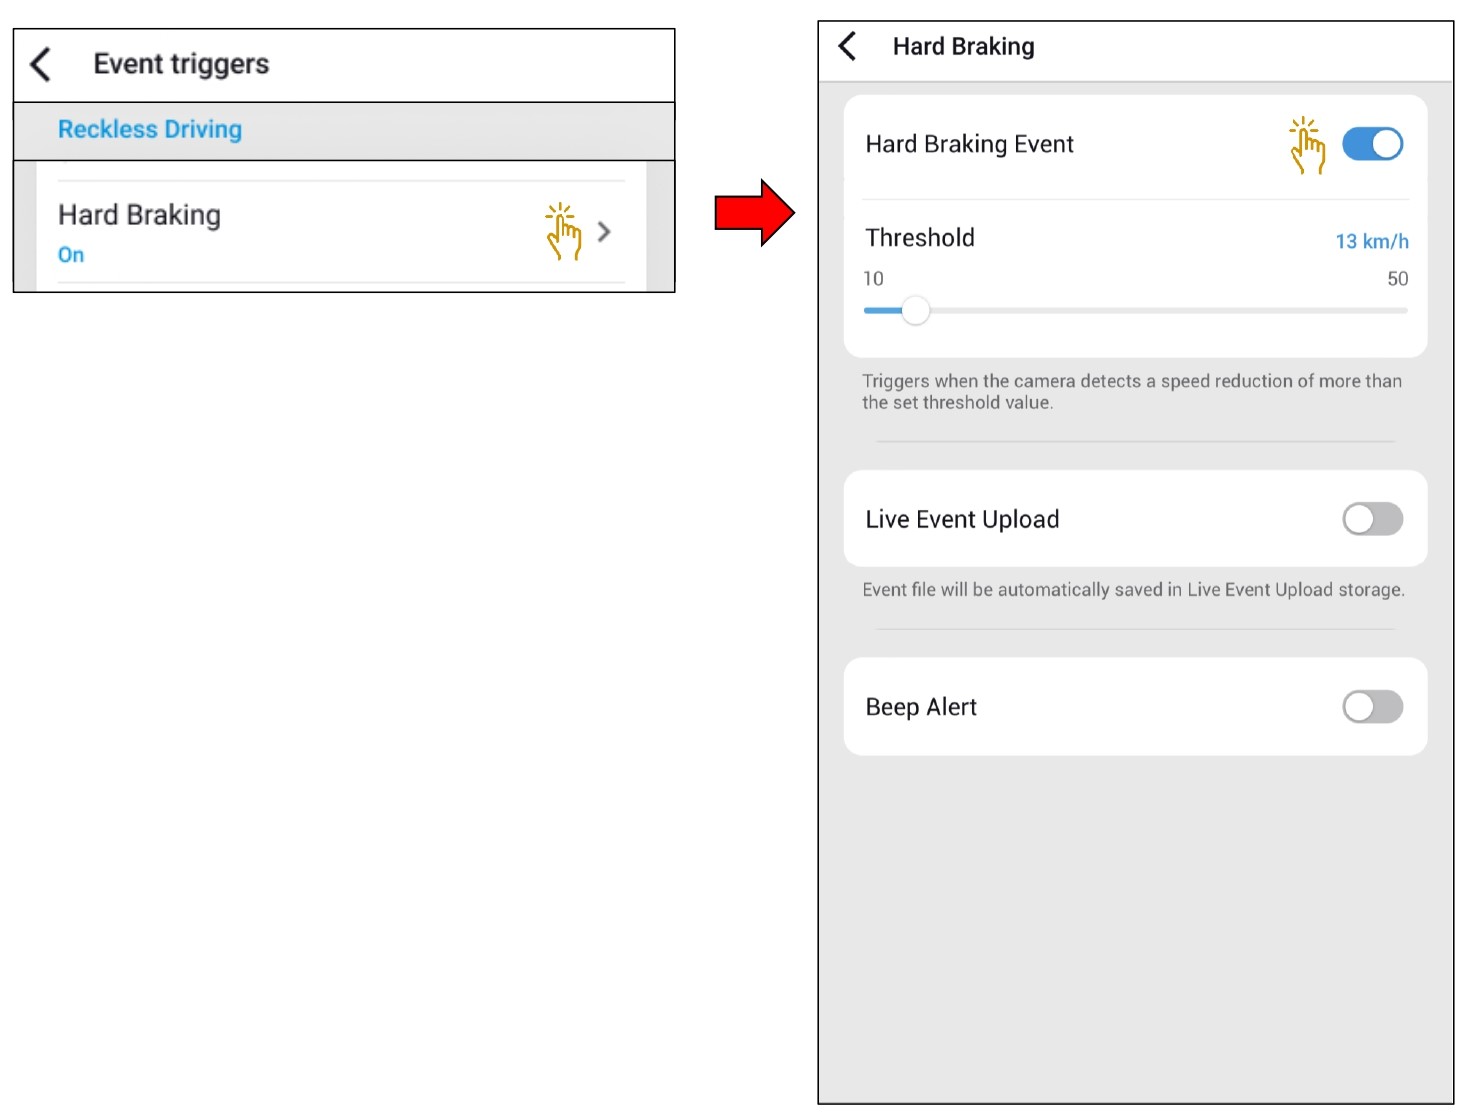
Hard braking event
When enabled, an event file is recorded when the camera detects a speed reduction of more than the set threshold value.
Live event upload
Enabling Live event upload automatically uploads event files to live event upload storages.
Beep alert
Enable Beep alert to hear beep alert when Hard braking event has occurred.
1.5.2.5 Hard Cornering
Camera Settings > Event Triggers > Reckless Driving > Hard Cornering
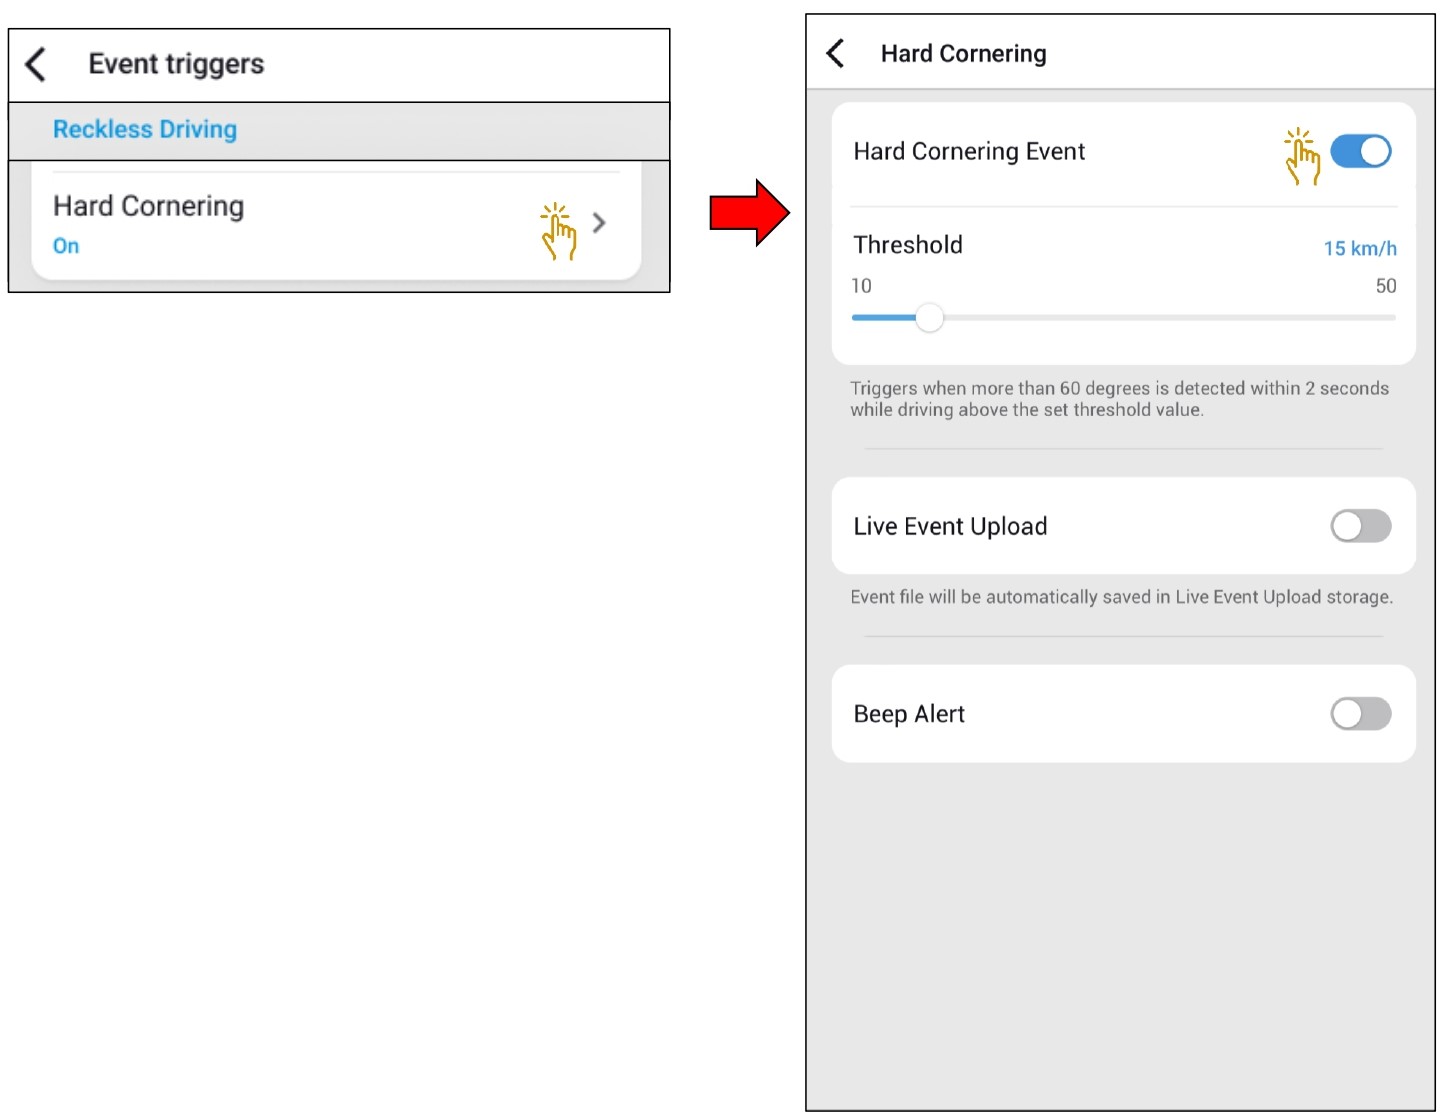
Hard cornering event
When enabled, an event file is recorded when more than 60 degrees is detected within 2 seconds while driving above the set threshold value.
Live event upload
Enabling Live event upload automatically uploads event files to live event upload storages.
Beep alert
Enable Beep alert to hear beep alert when Hard cornering event has occurred.
1.5.3 Live Event Upload
Camera Settings > Event Triggers > Live Event Upload > Video Source
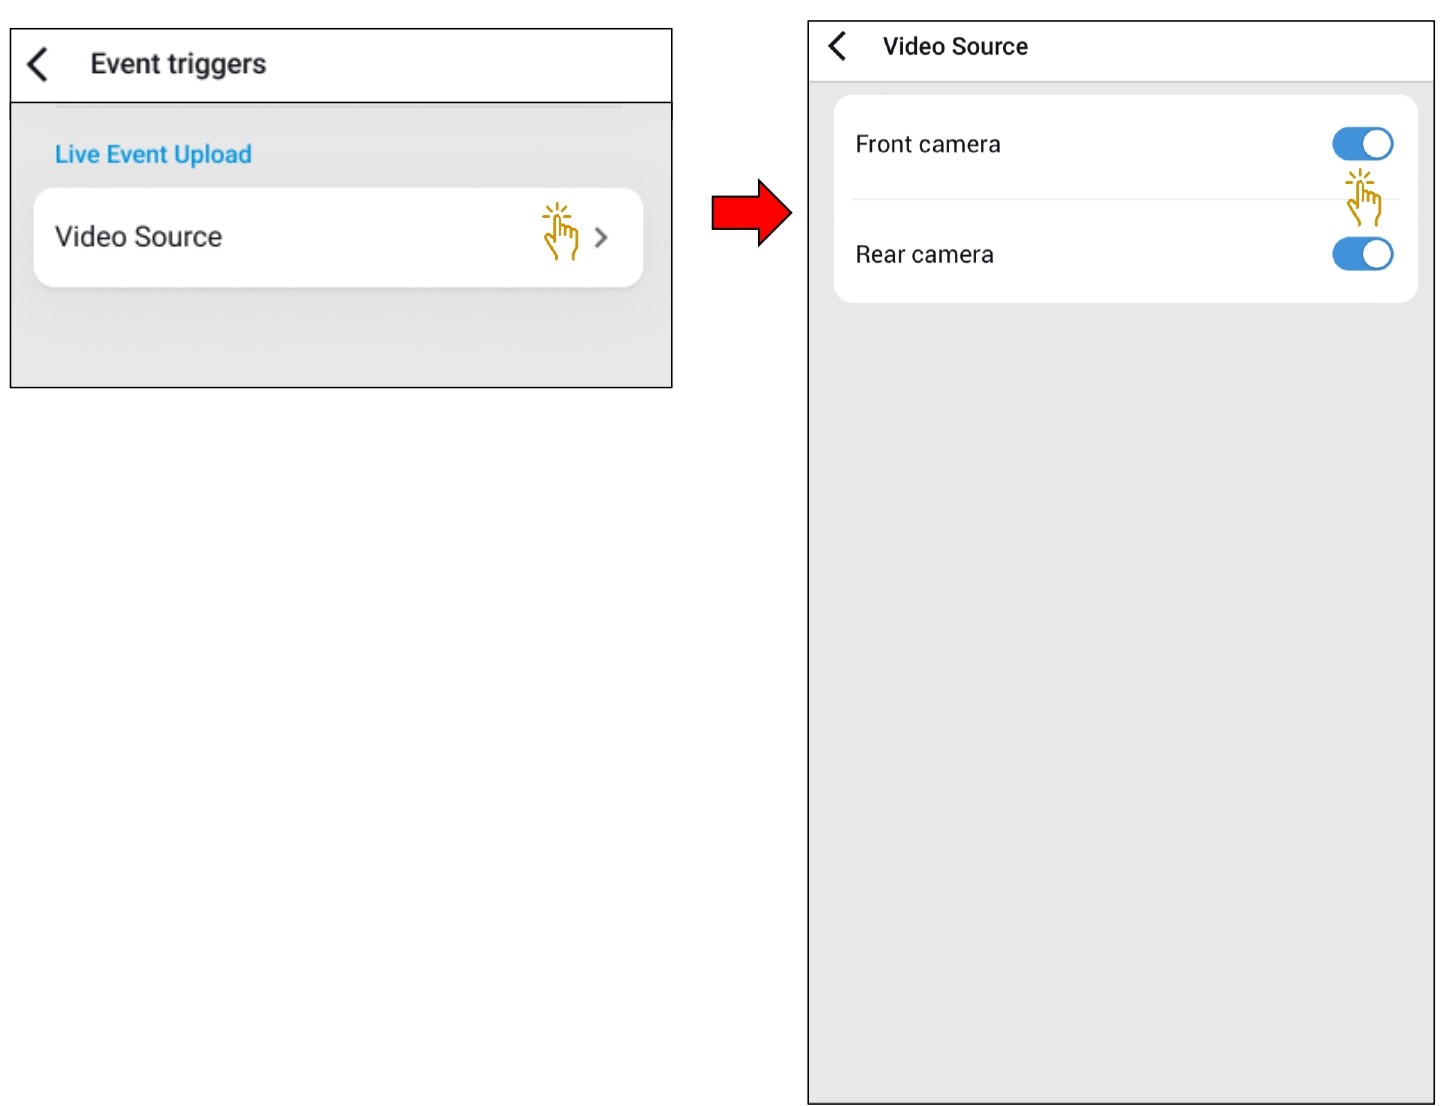
Video Source
Front camera
When enabled, recorded videos from the front camera uploads event files to live event upload storages.
Rear camera
When enabled, recorded videos from the rear camera uploads event files to live event upload storages.
1.6 DMS
Only applicable for DR770X-2CH DMS
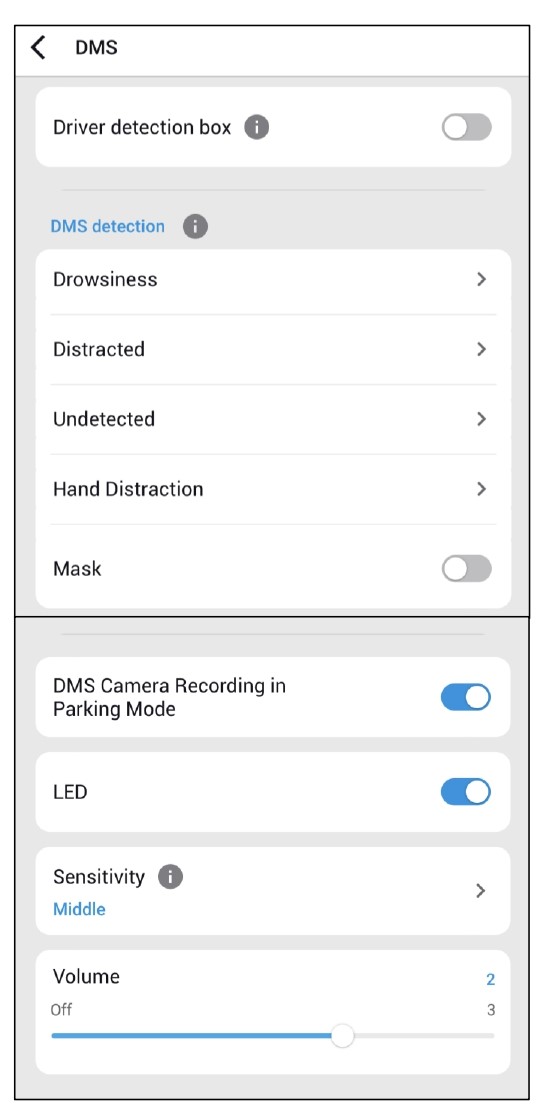
1.6.1 DMS detection
Camera Settings > DMS > Driver detection box
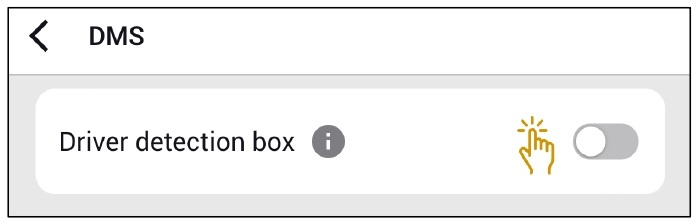
Driver detection box
The DMS system has two major event detection systems, visualizing the detection area according to each system as a box.
One for face detection: Detected, Undetected, Distracted, Drowsy, Mask off,
The other for motion detection: Hand distraction
1.6.2 DMS Detection
1.6.2.1 Drowsiness/Distracted/Undetected/Hand Distraction/Mask
Camera Settings > DMS > DMS detection > Drowsiness/Distracted/Undetected/Hand Distraction/Mask
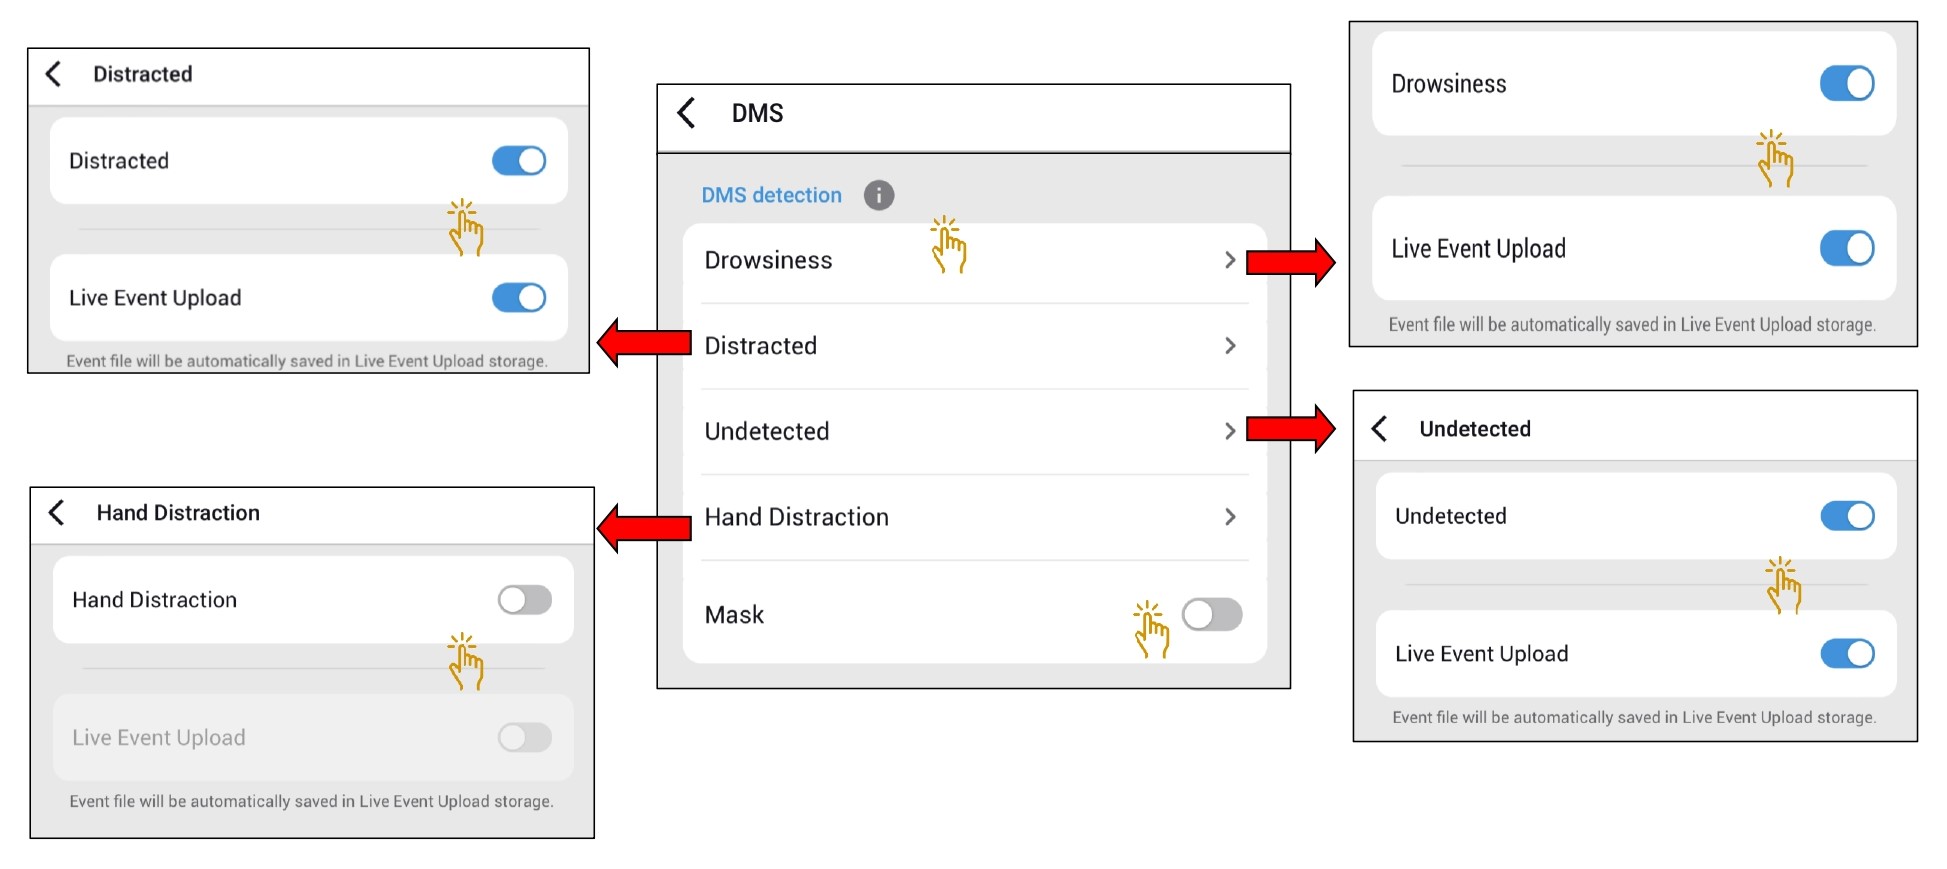
DMS detection
Criteria for DMS detection events.
Drowsy: Occurs when a driver either closes eyes for 1 or more seconds or yawns for 2 or more seconds.
Distracted: Occurs when a driver deviates more than 50 degrees from the DMC 200.
Undetected: Occurs when a driver is not detected in front of the camera for a minute.
Hand distraction: Occurs when a driver takes one hand off from the steering wheel.
Mask off:
A: occurs when a driver gets in a car without wearing a mask.
B: occurs when a driver takes mask off while driving.
1.6.3 DMS Camera Recording in Parking Mode
Camera Settings > DMS > DMS Camera Recording in Parking Mode
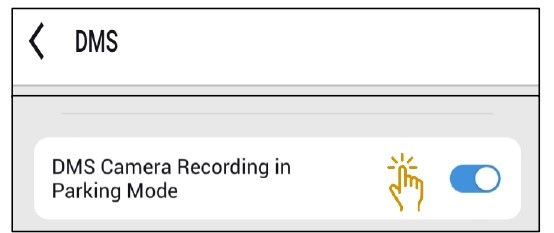
DMS camera recording in parking mode
On: Normal recording works while power is maintained in parking mode
Off: DMS power off after 5 minutes when entering parking mode, Normal recording works until just before off
1.6.4 LED
Camera Settings > DMS > LED
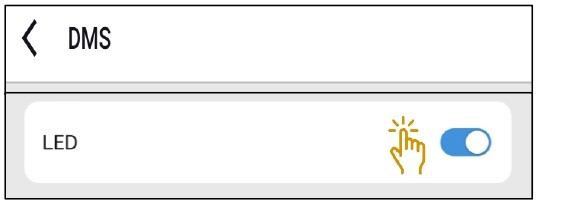
LED
Signals for each DMS detection event.
1.6.5 Sensitivity
Camera Settings > DMS > Sensitivity
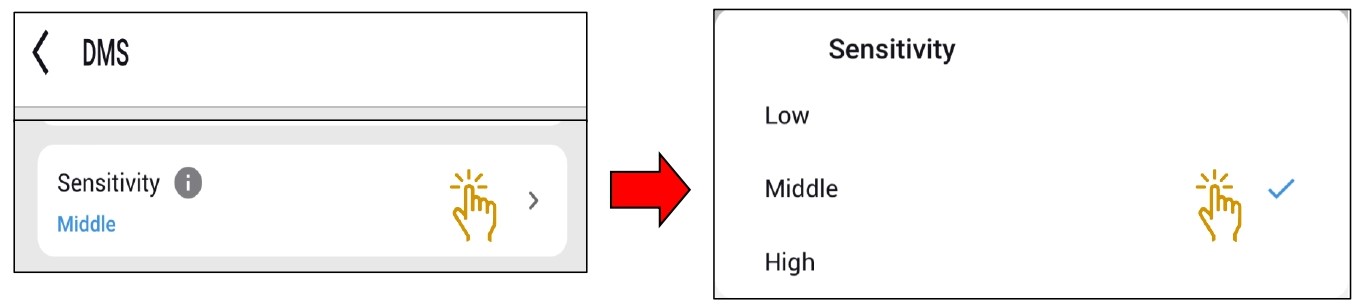
Sensitivity
Sensitivity settings only apply to both Drowsy and Distracted detections.
- Sensitivity of Drowsy is measured by the period of a driver’s eye blinking.
- Sensitivity of Distracted is measured by the angle of a driver’s head and its duration.
1.6.6 Volume
Camera Settings > DMS > Volume

Volume
You can adjust the volume of the DMS beep alert.
1.7 Camera Connectivity
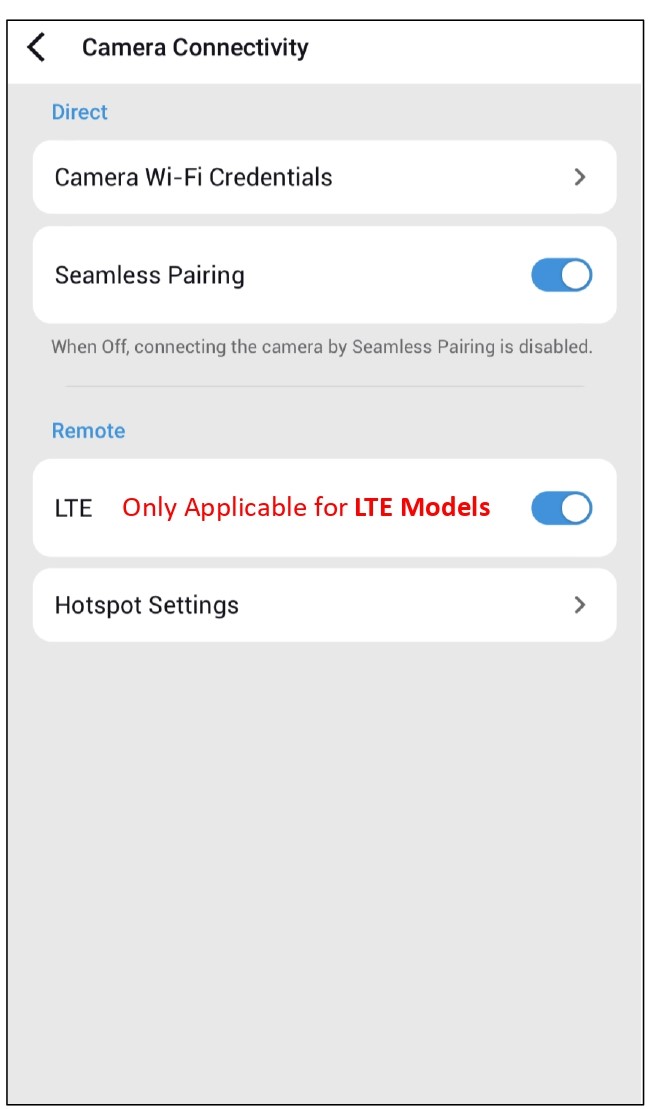
1.7.1 Direct
1.7.1.1 Camera Wi-Fi Credentials
Camera Settings > Camera Connectivity > Direct < Camera Wi-Fi Credentials
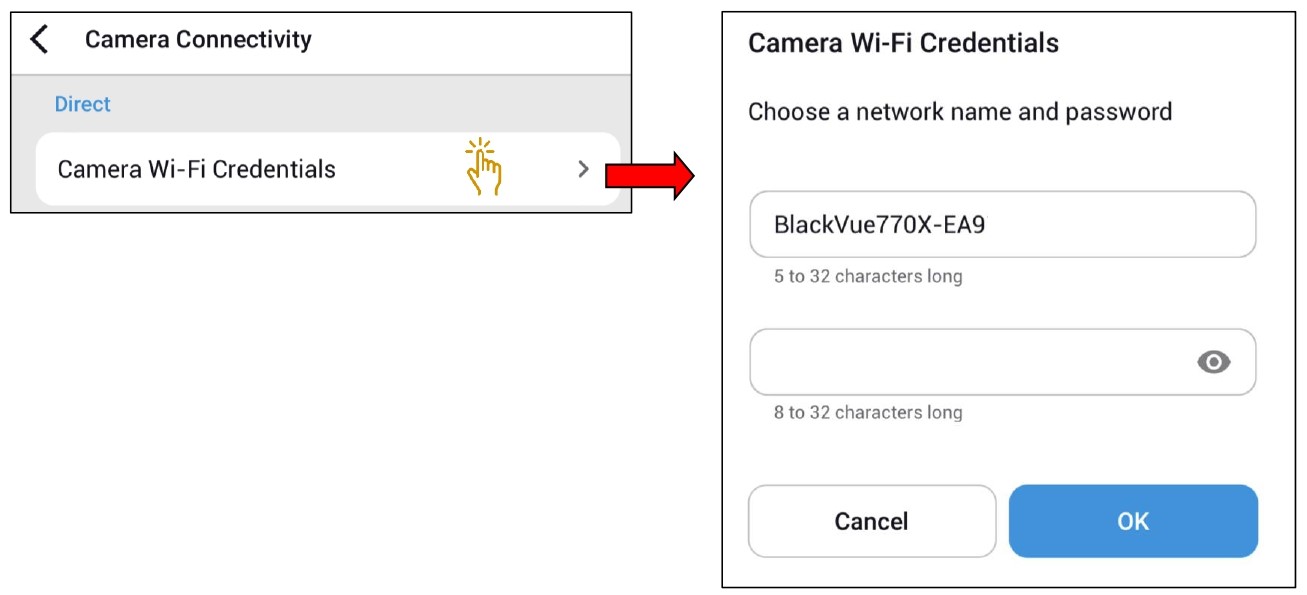
Camera Wi-Fi credentials
You can change the dashcam’s SSID and Wi-Fi login password.
1.7.1.2 Seamless Pairing
Camera Settings > Camera Connectivity > Seamless Pairing
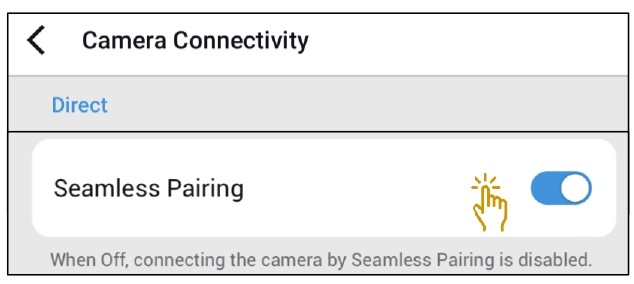
Seamless pairing
When disabled, connecting camera by seamless pairing is disabled.
1.7.2 Remote
1.7.2.1 LTE
Camera Settings > Camera Connectivity > Remote > LTE
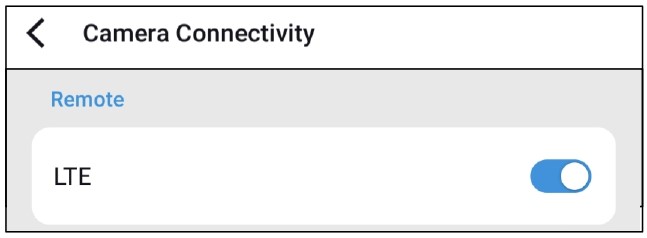
LTE
Only applicable for BlackVue LTE models.
Turn "ON" LTE to activate the built in SIM card slot functions.
1.7.2.2 Hotspot Settings
Camera Settings > Camera Connectivity > Remote > Hotspot Settings

Hotspot settings
Choose your Wi-Fi hotspot from the list and enter the password. The camera will use the selected Wi-Fi hotspot to connect to the cloud.