DR970X BOX- 2CH PLUS - Using BlackVue Apps to add camera_updated 21 May 25
Table of Contents
1. BLACKVUE APPS VERSION
- To ensure seamless and secure user experience, a BlackVue account will be required to access your camera. This change allows for better integration with connected services and personalized app functionality
- Click on the below link on how to create BlackVue account
2. ADD CAMERA - SEAMLESS PAIRING DASHCAM MODEL
2.1 STEPS ON ADDING SEAMLESS PAIRING DASHCAM MODEL
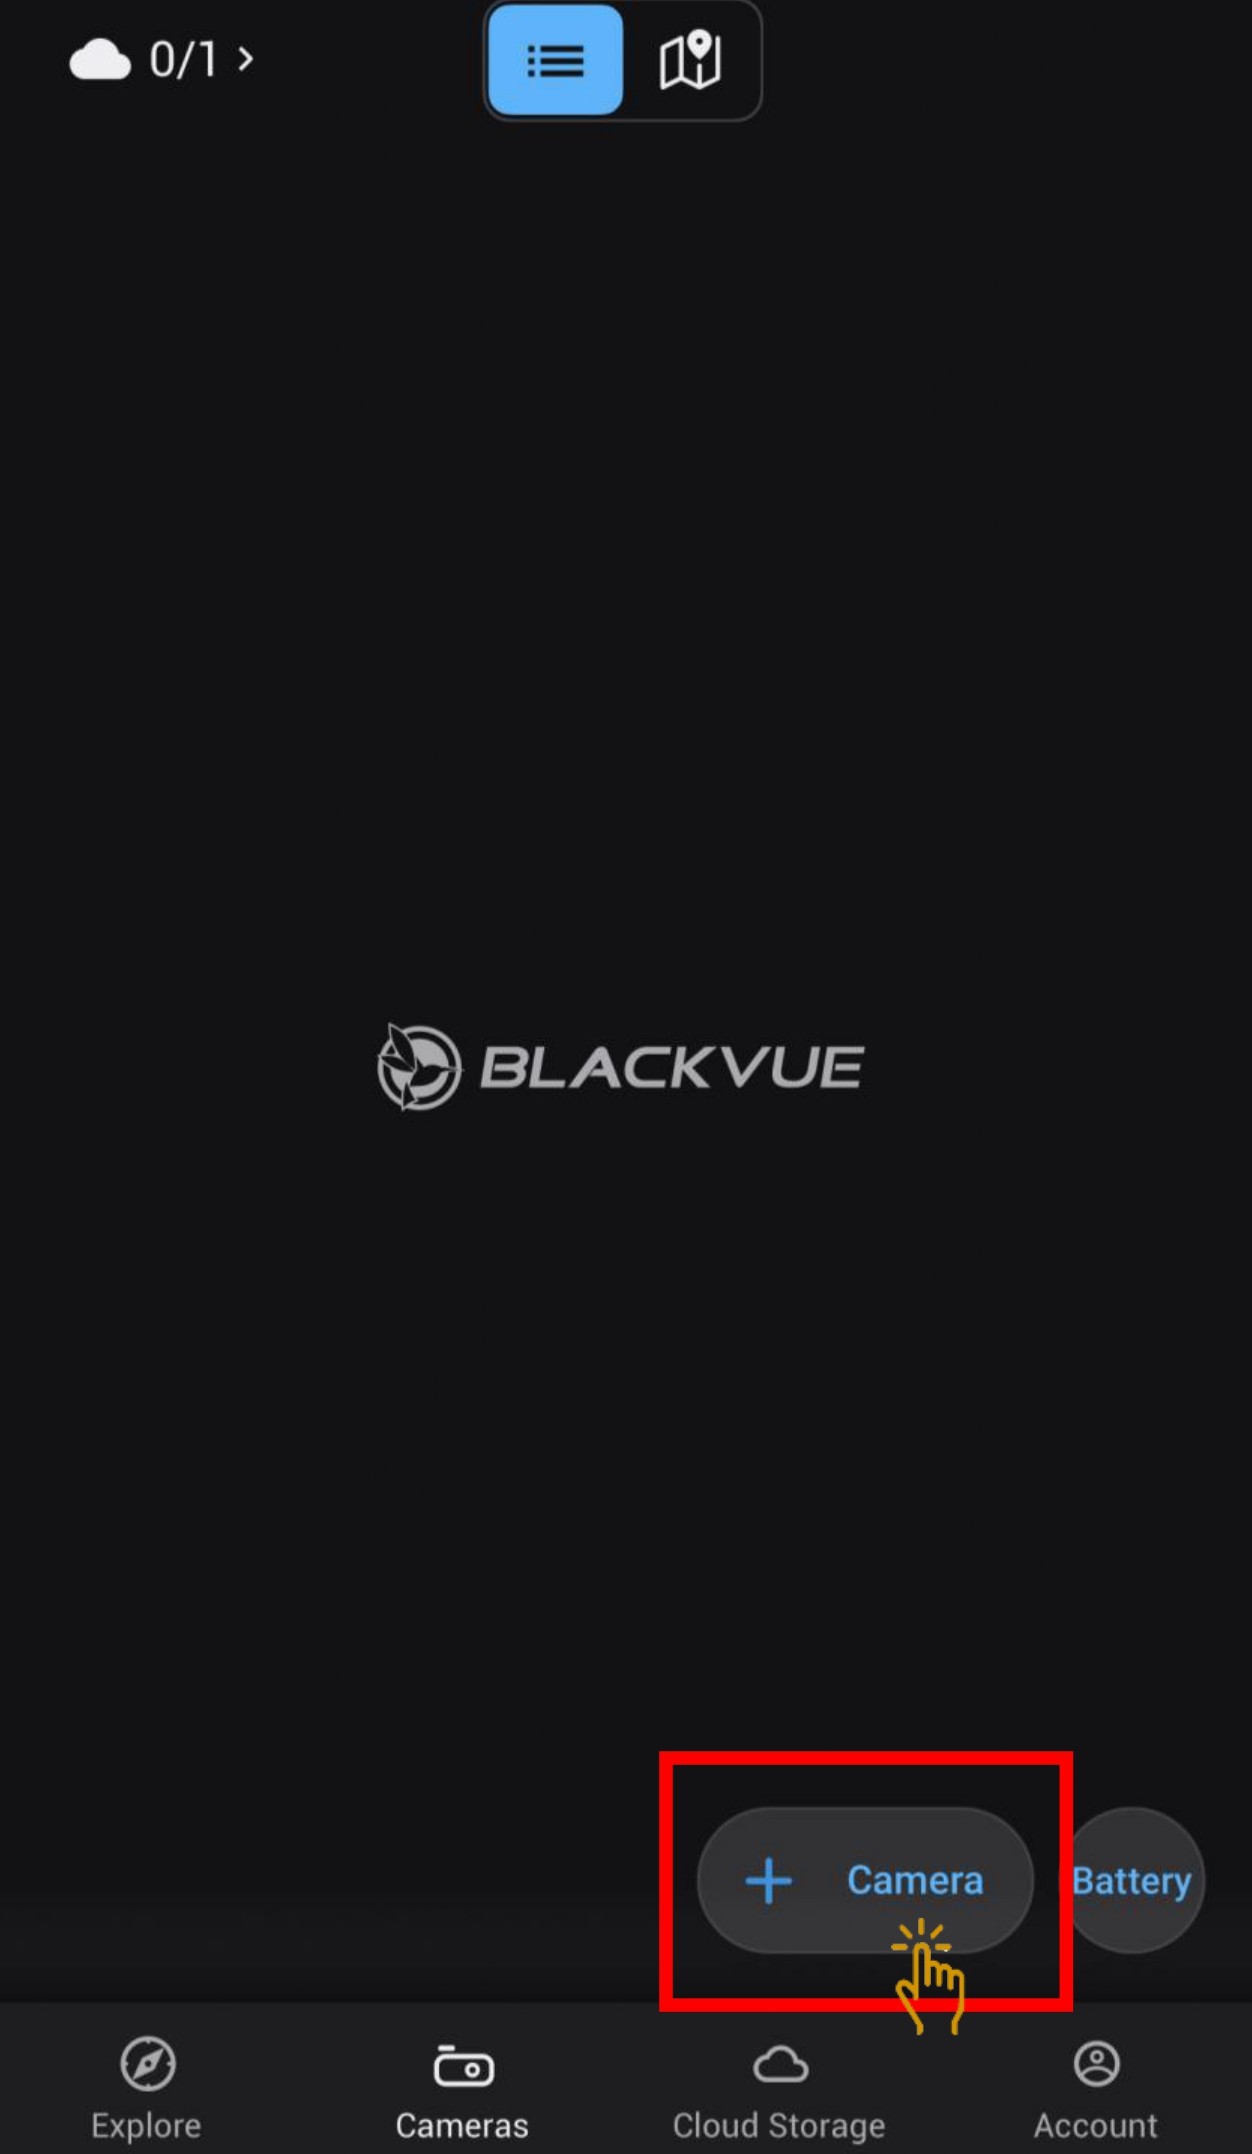
- Click on the "+ Camera"
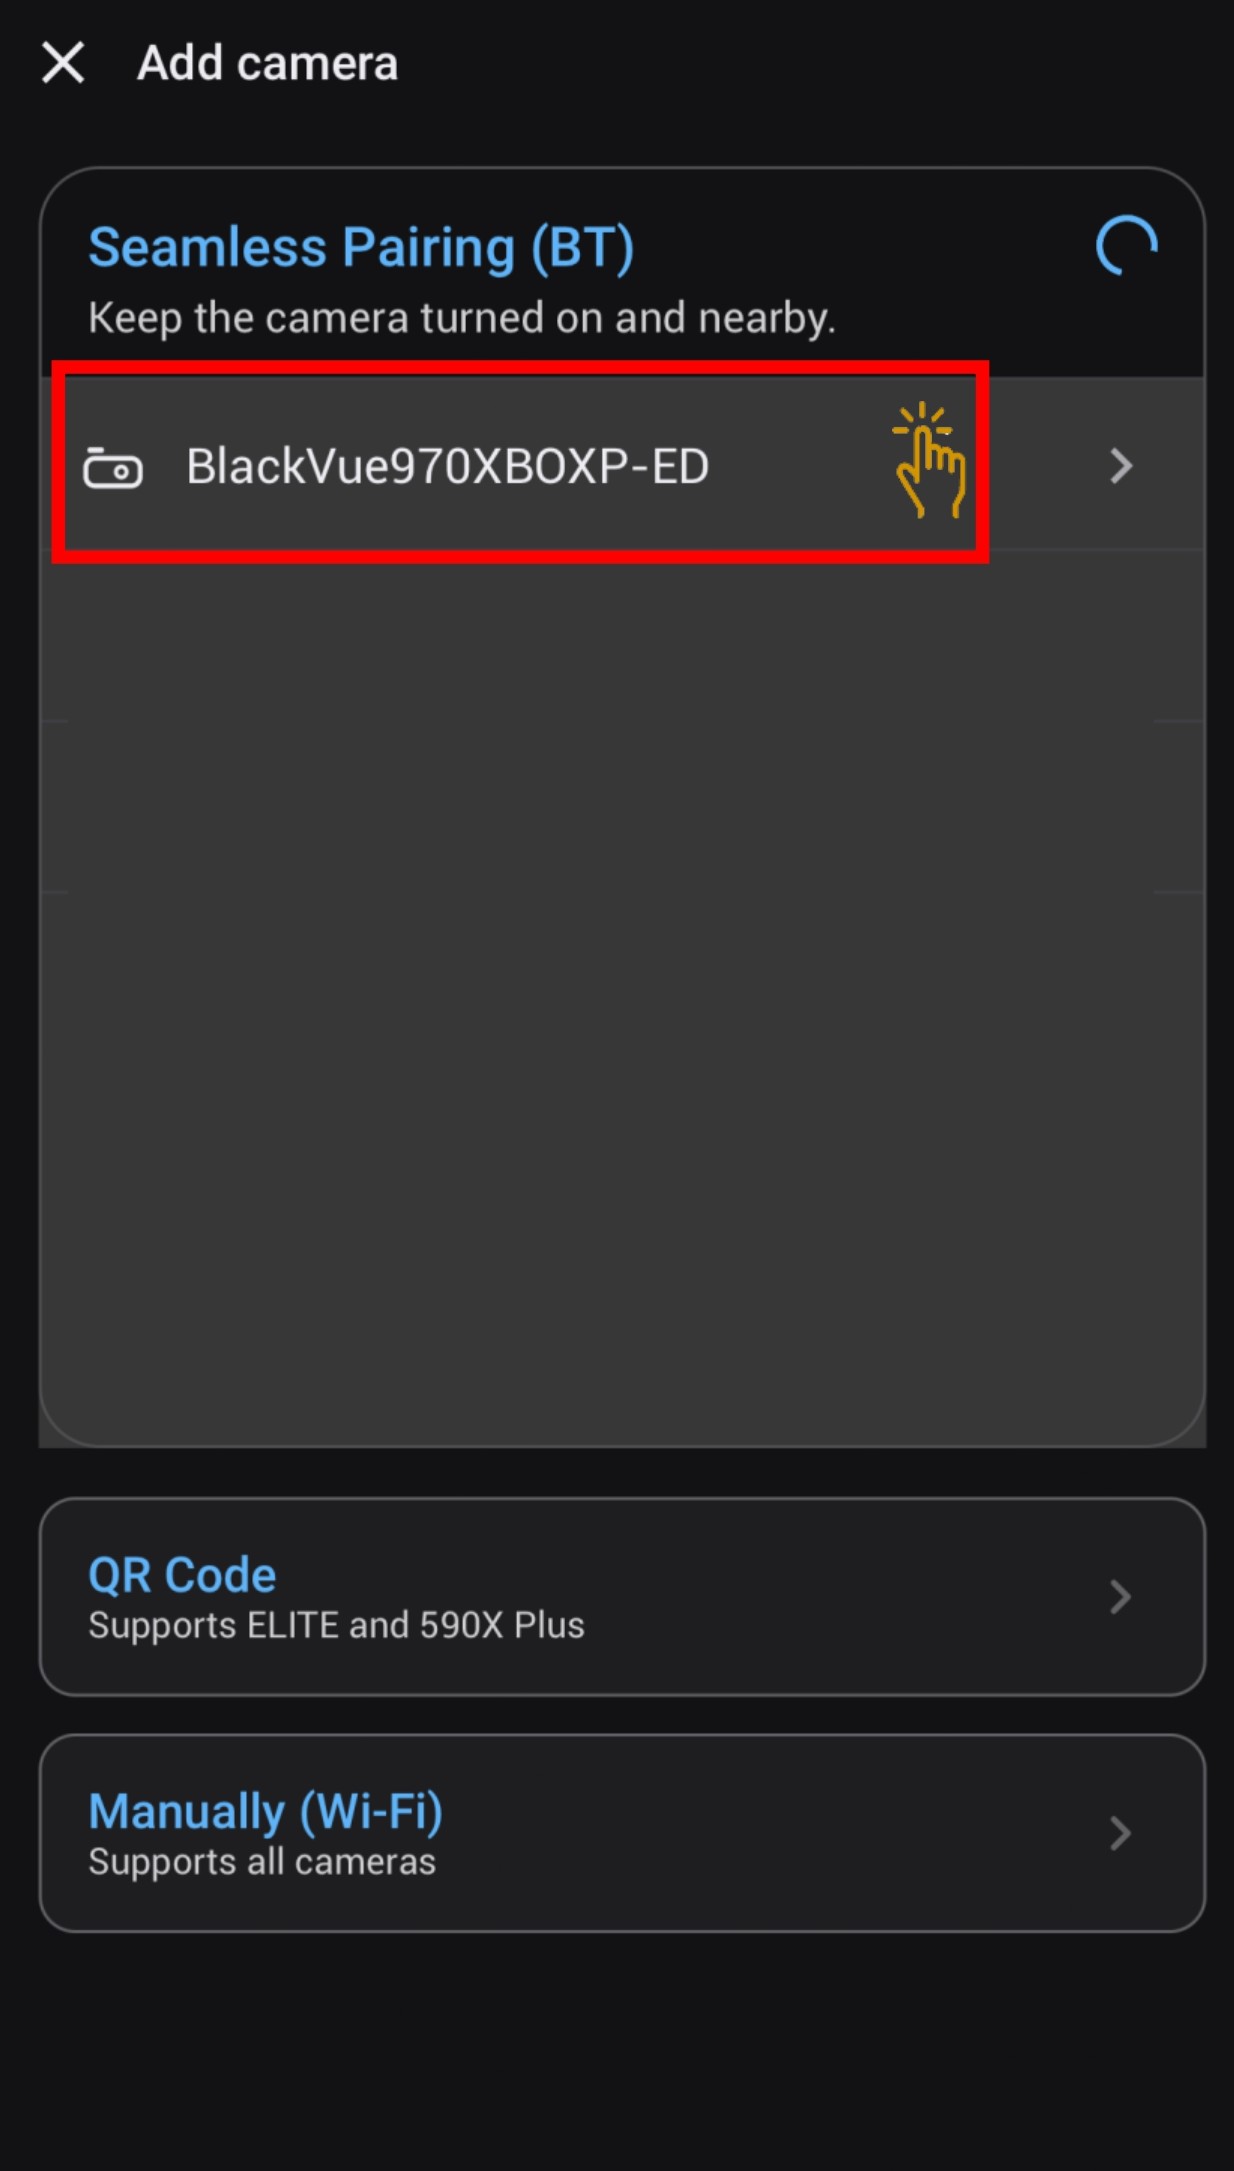
- Under Seamless Pairing (BT), click on your BlackVue dashcam from the detected camera list.
2.1.1 Using Scan QR Code
-
To connect to the main unit, scan the QR code.
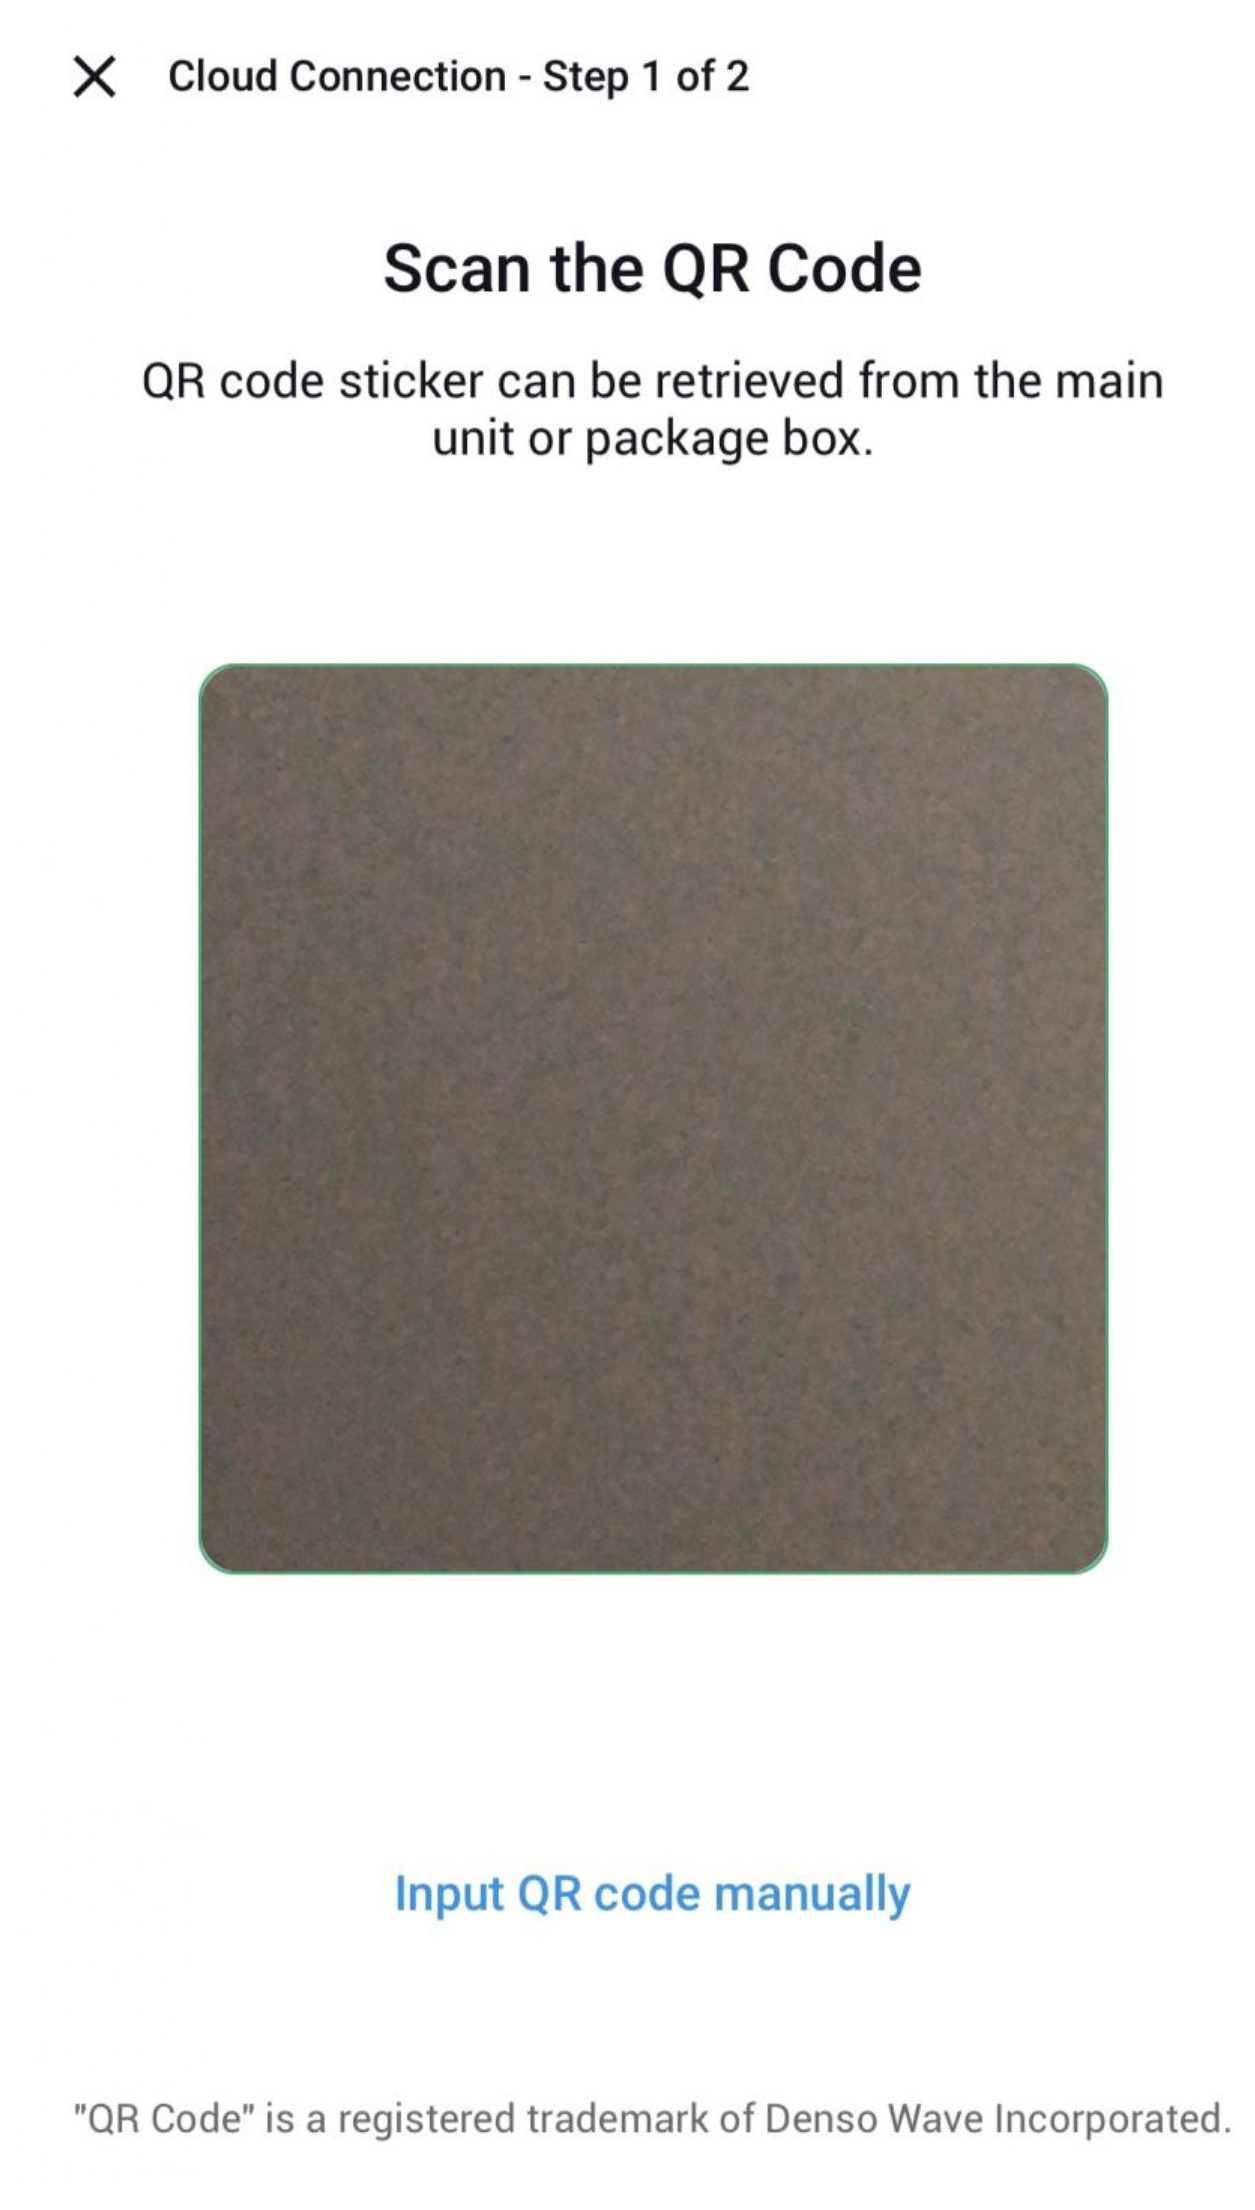
- QR code can be located at
a. Package itself.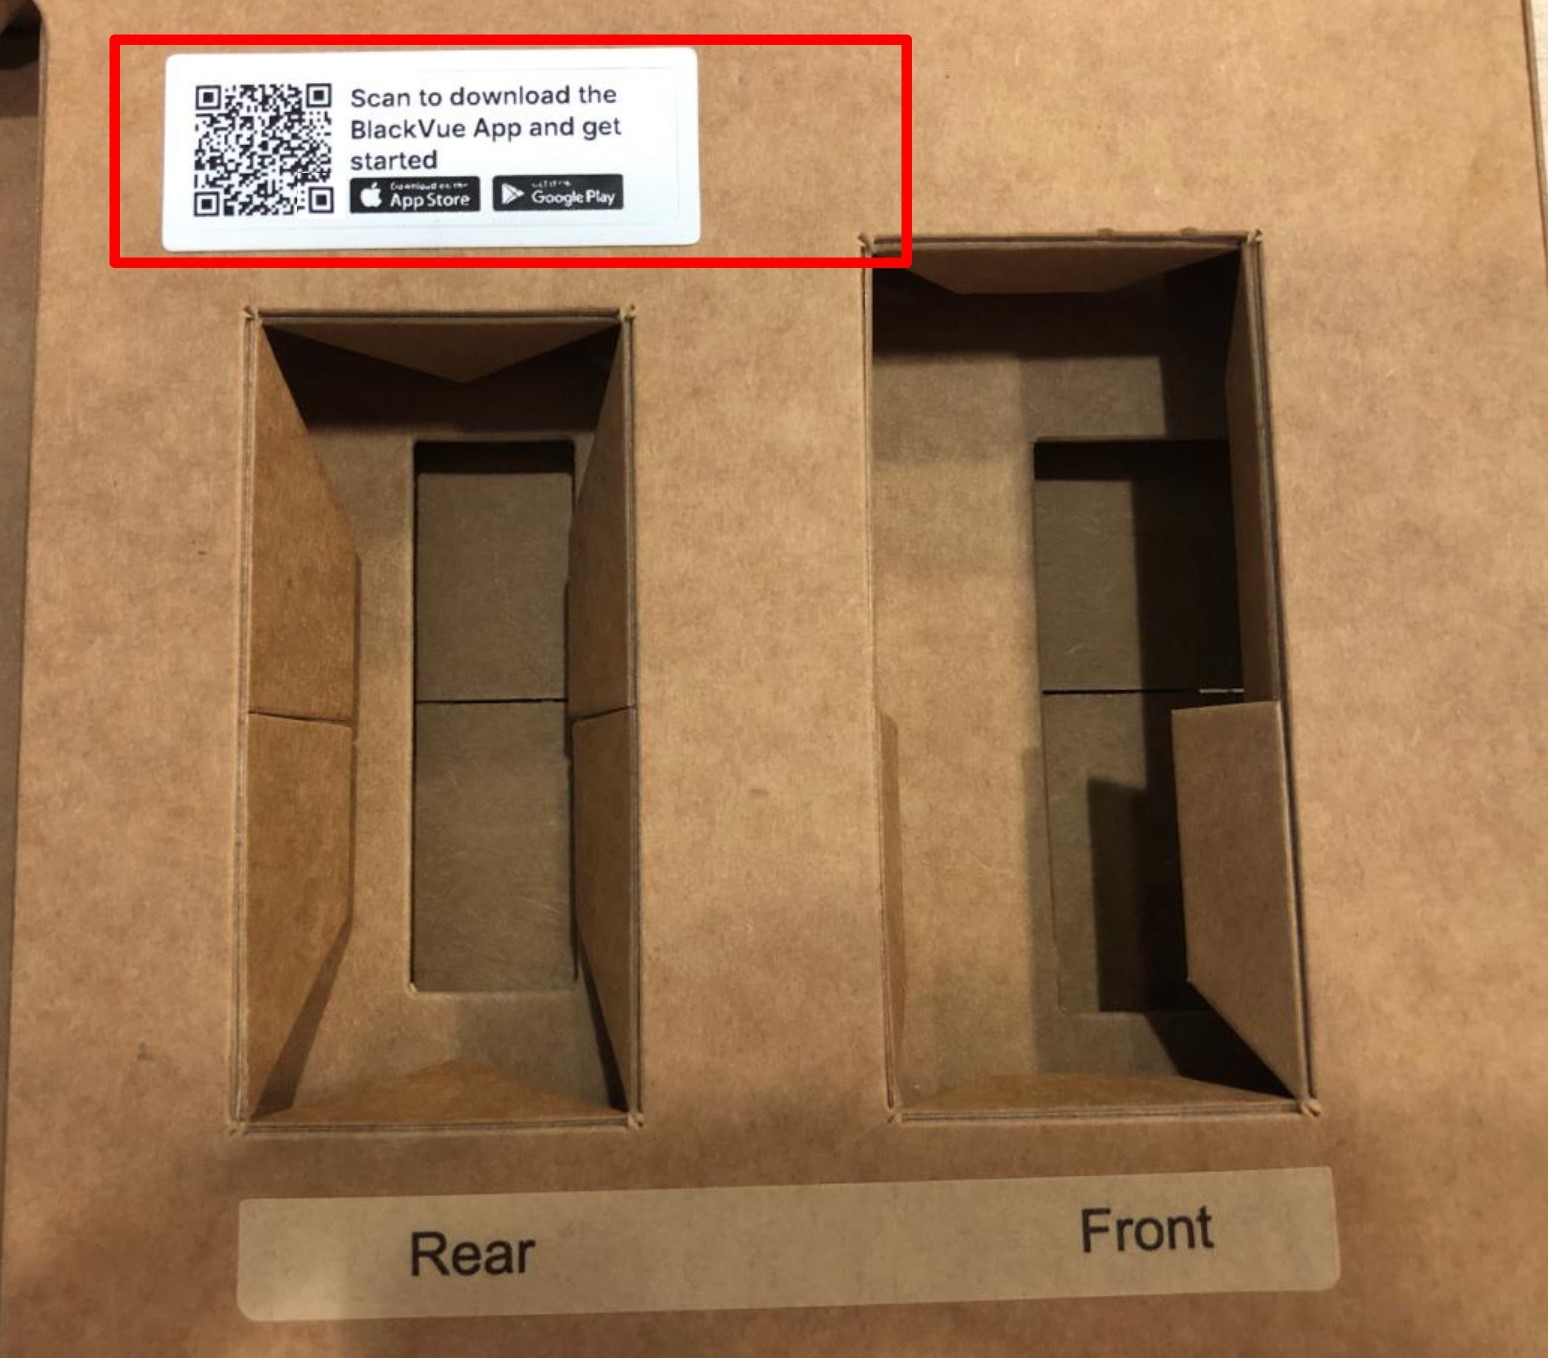
b. Front camera.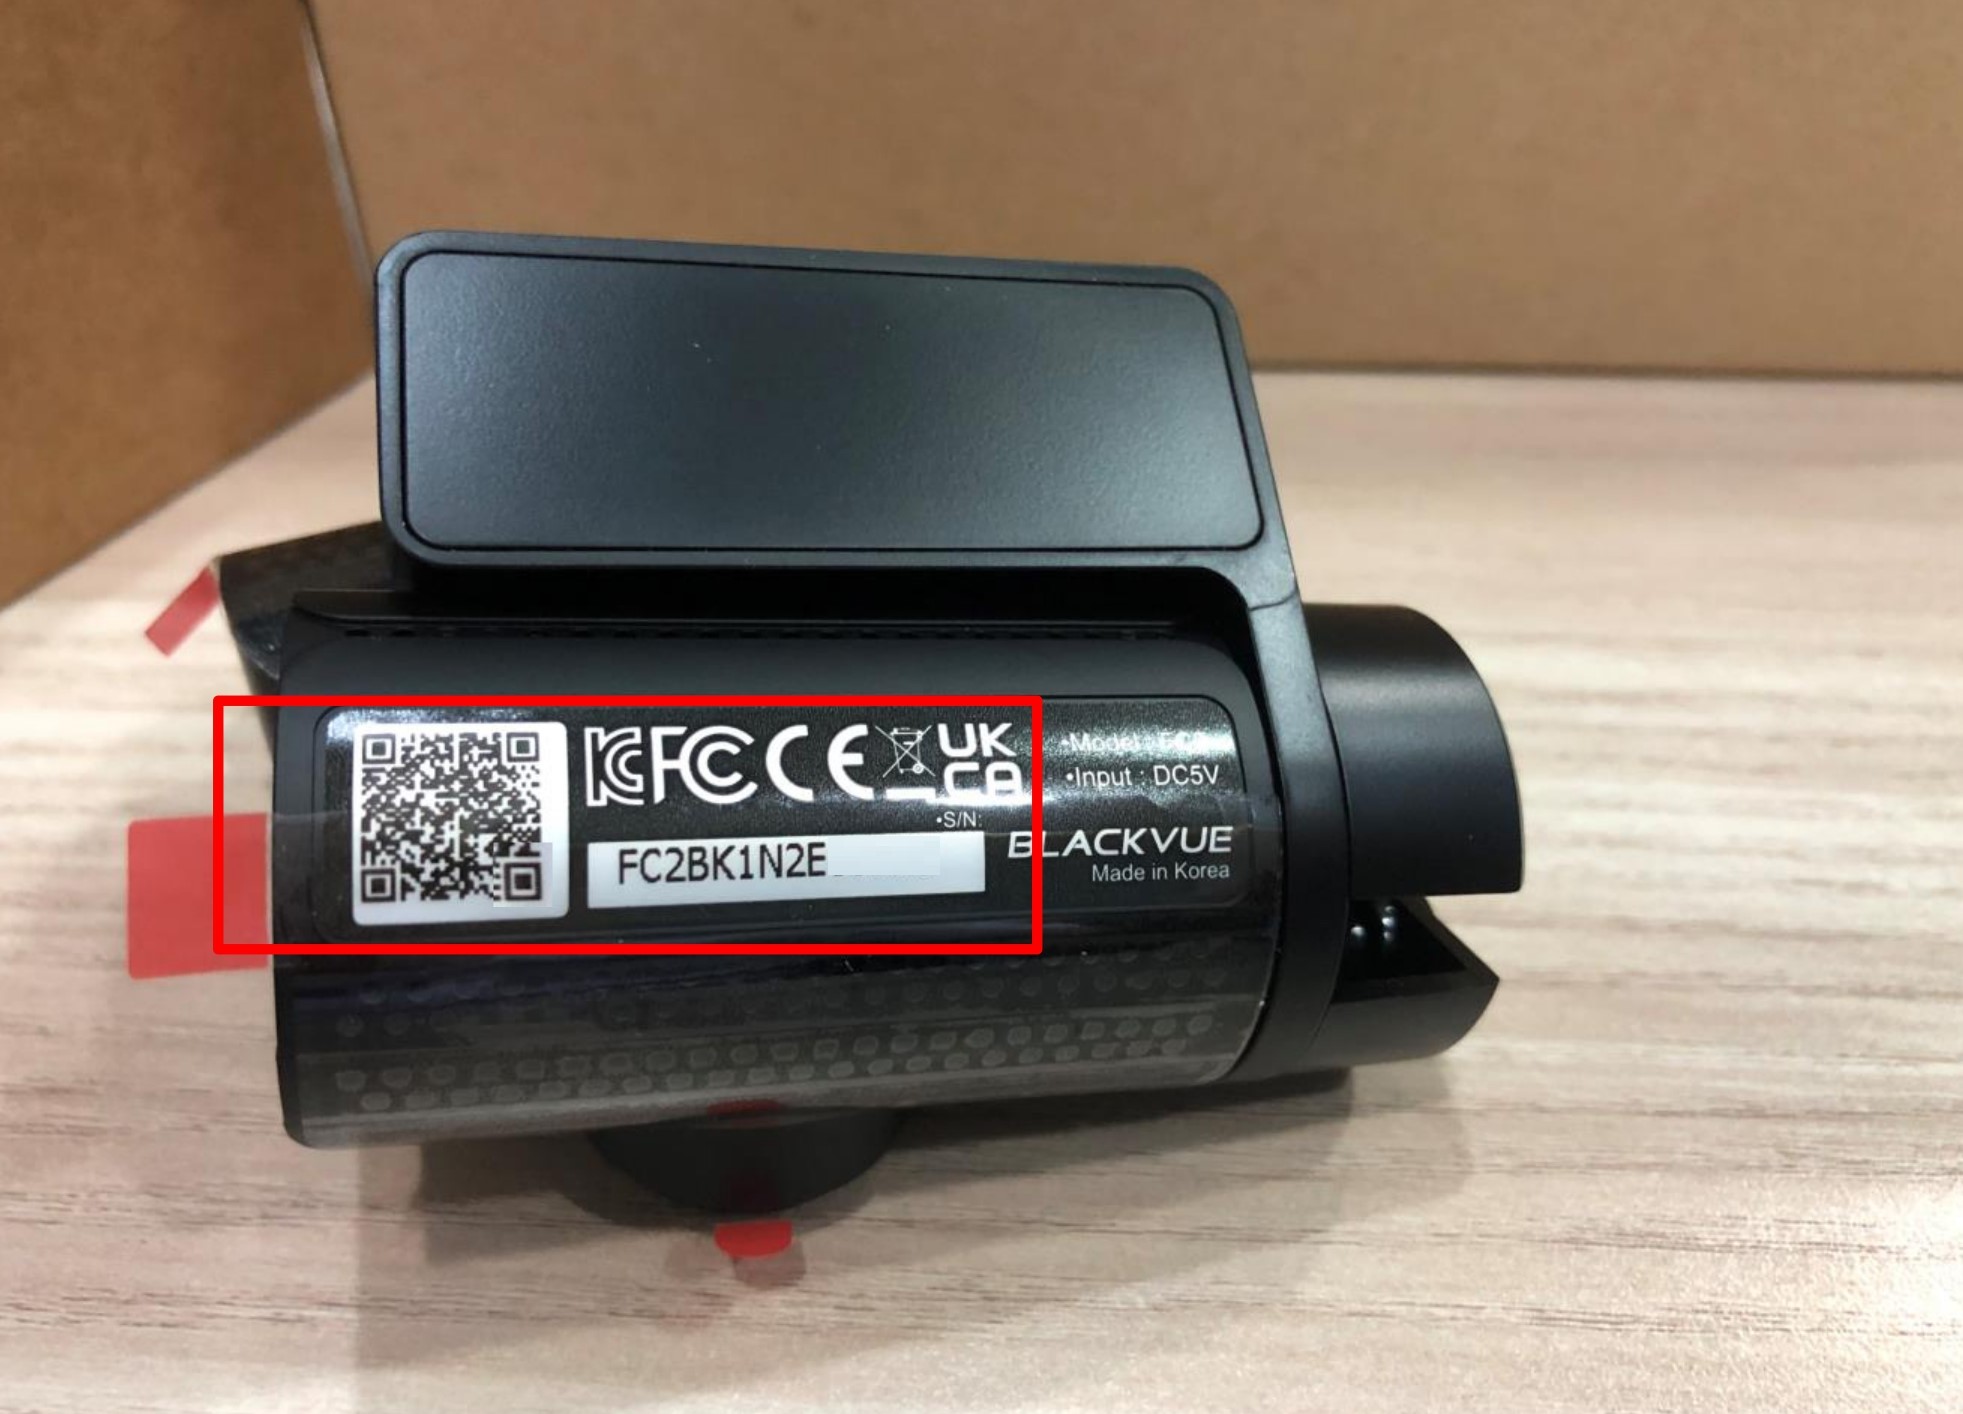
c. Main unit.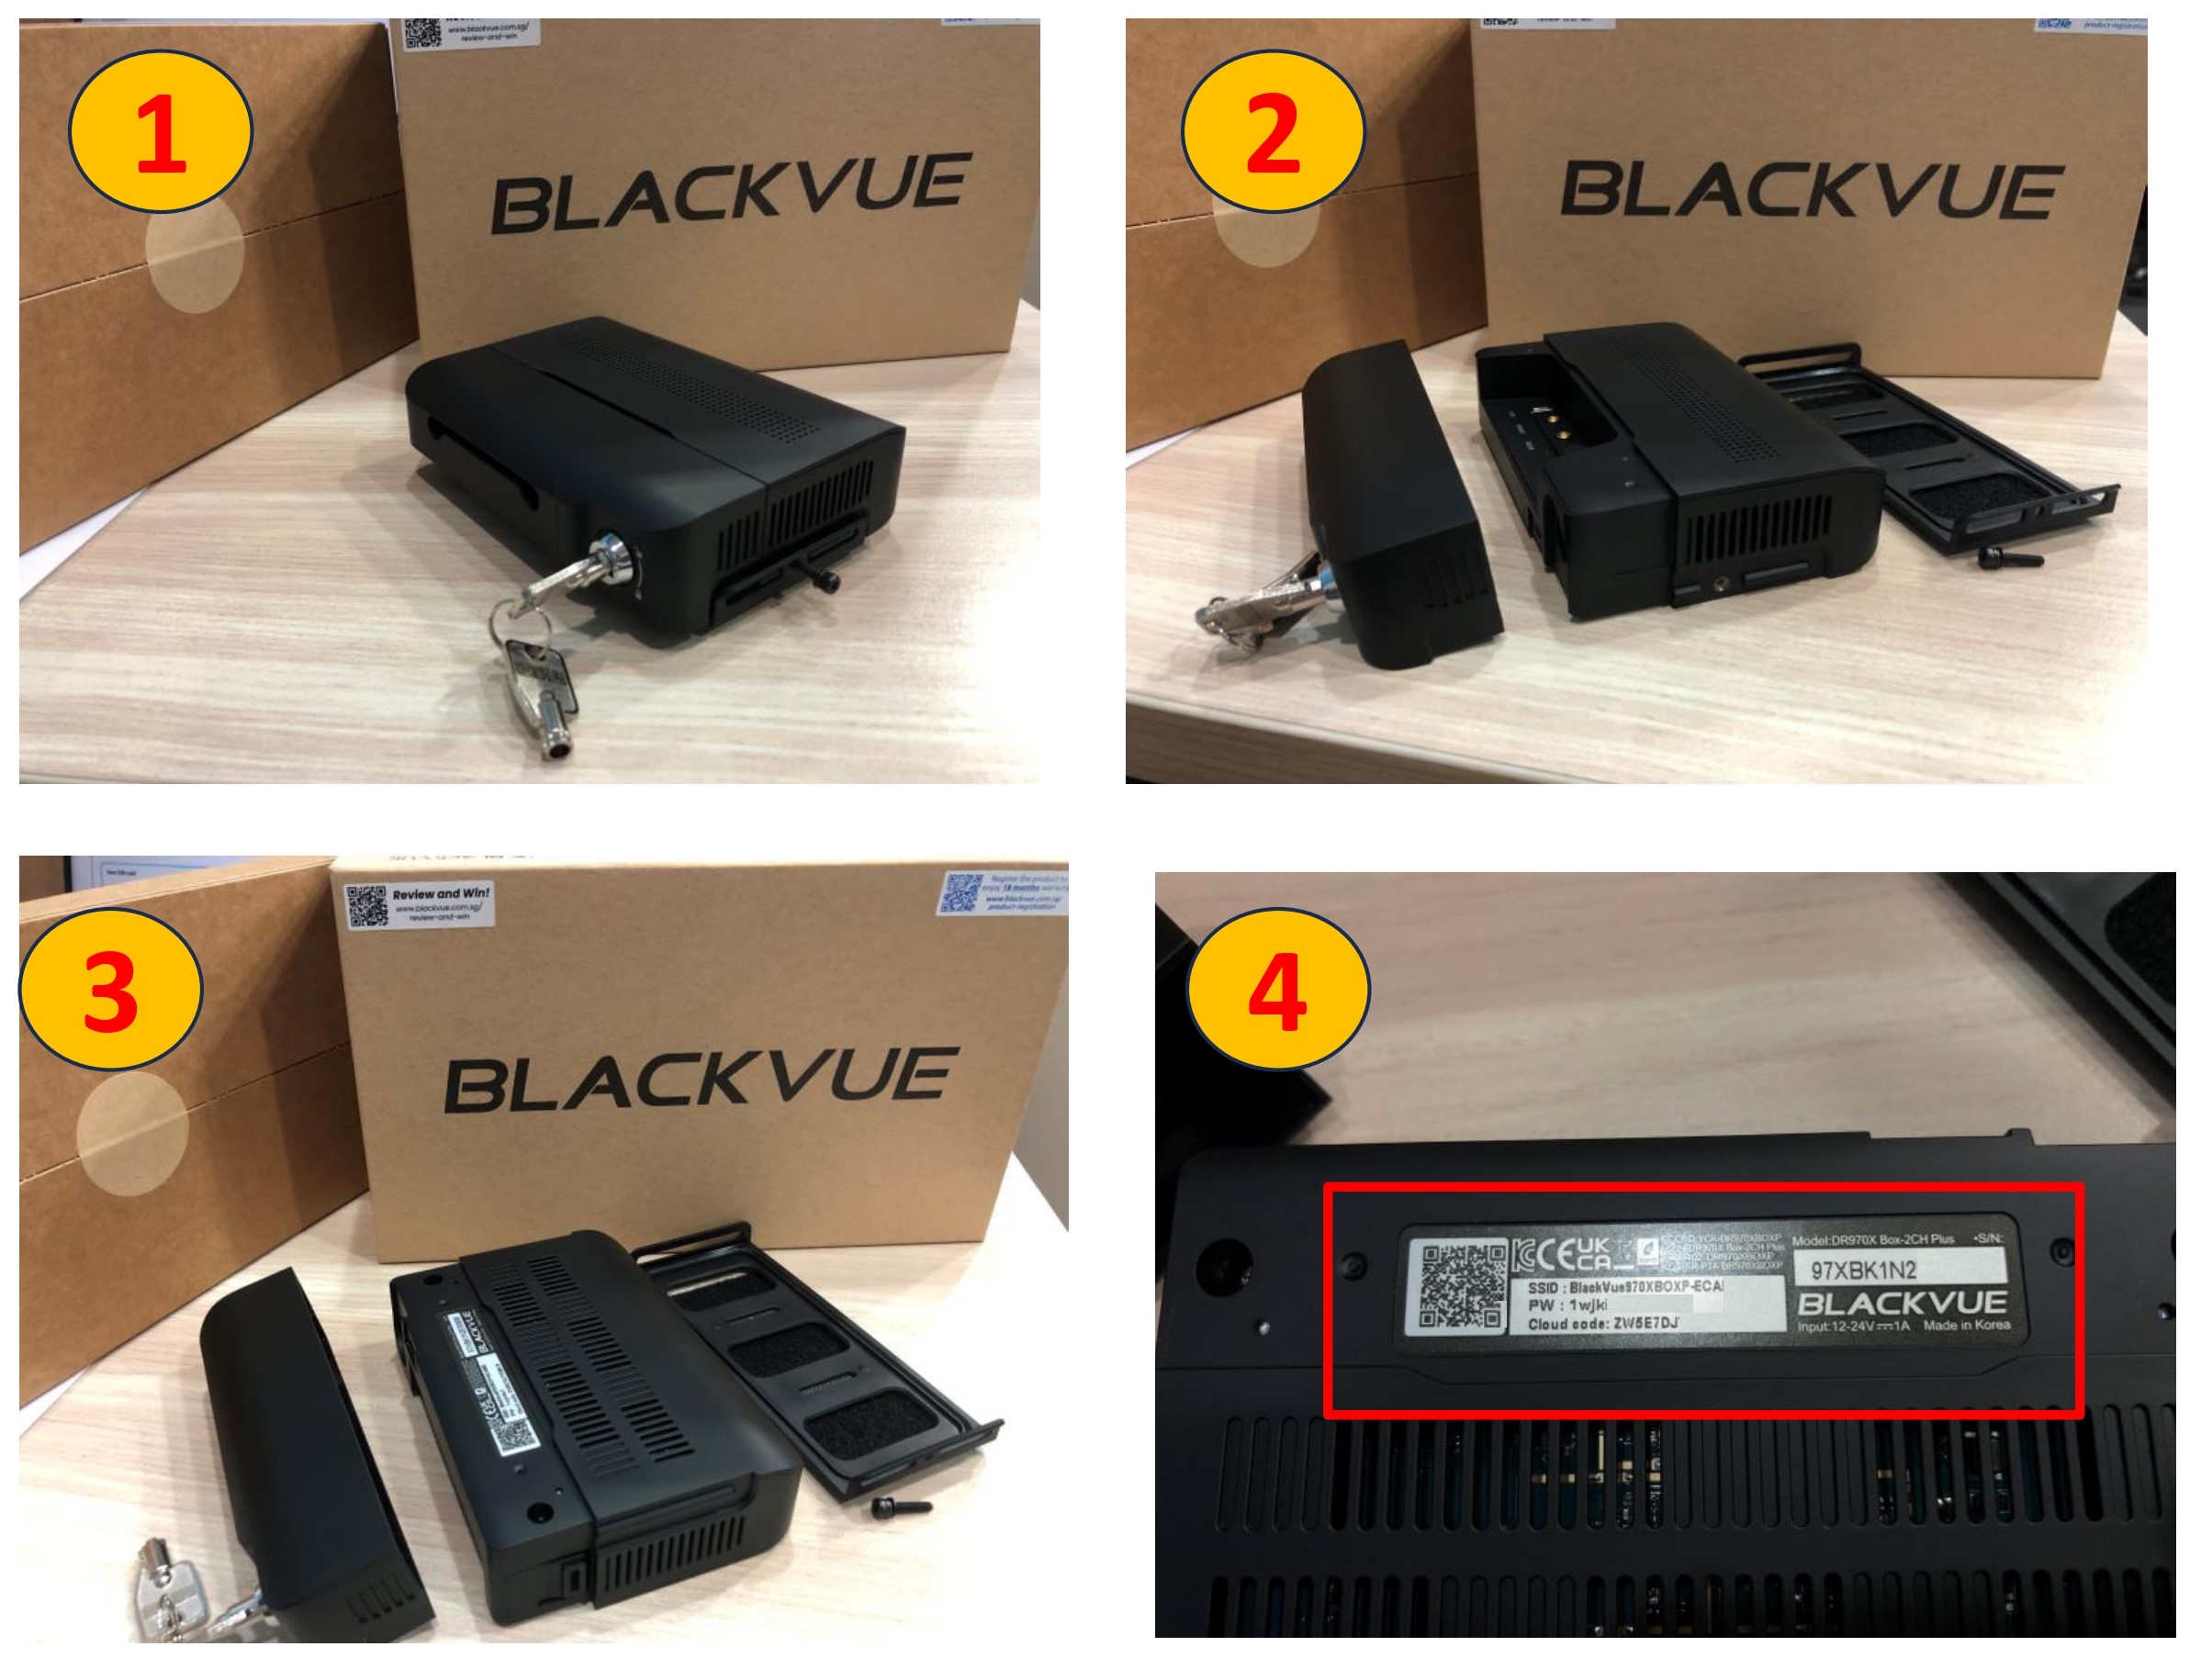
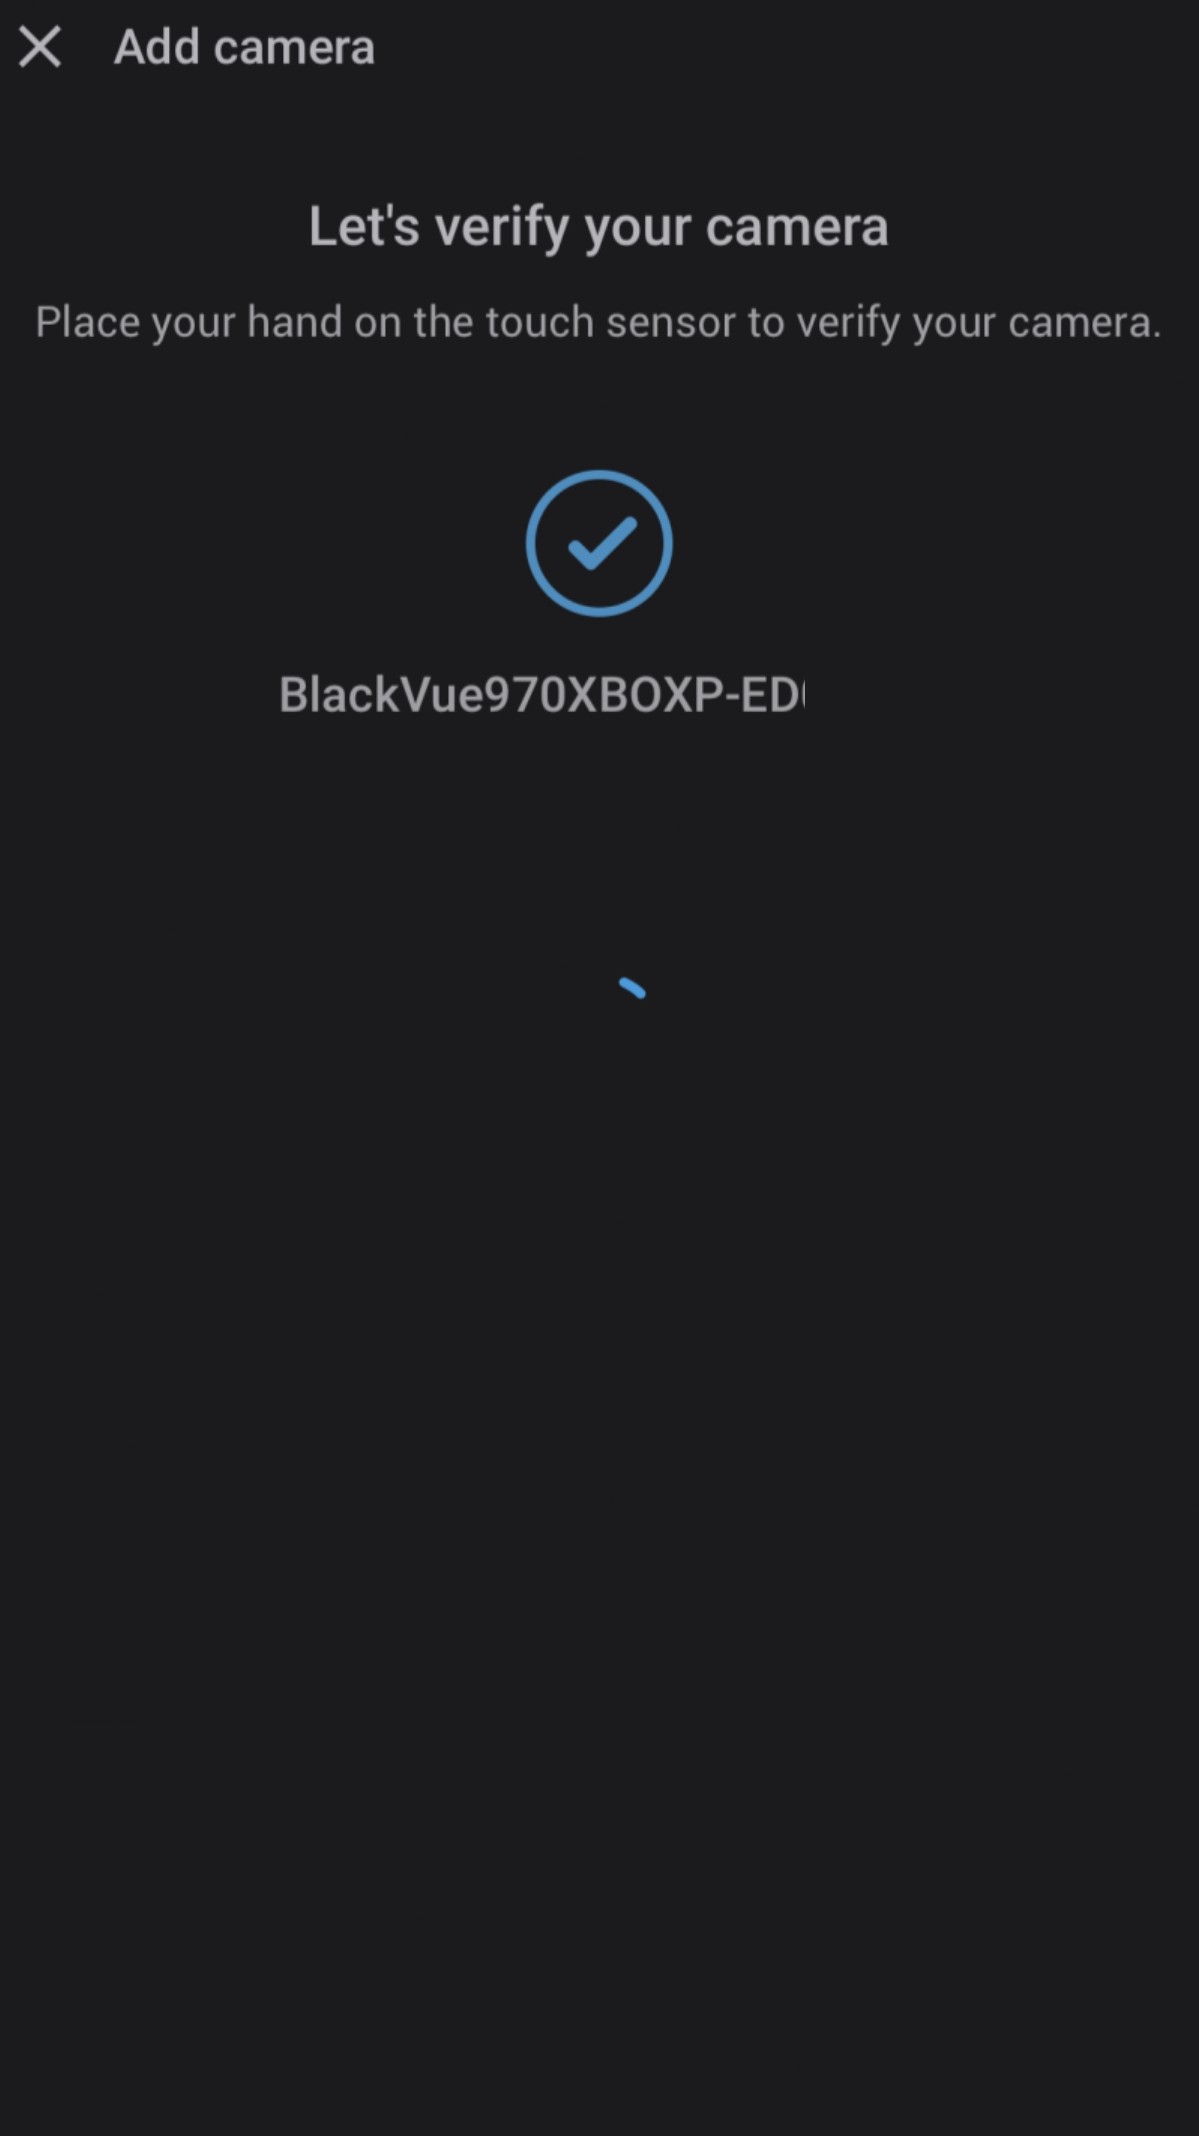
- Once successfully scanned, the camera is verified.
- Camera will be added to your account. Click "OK"
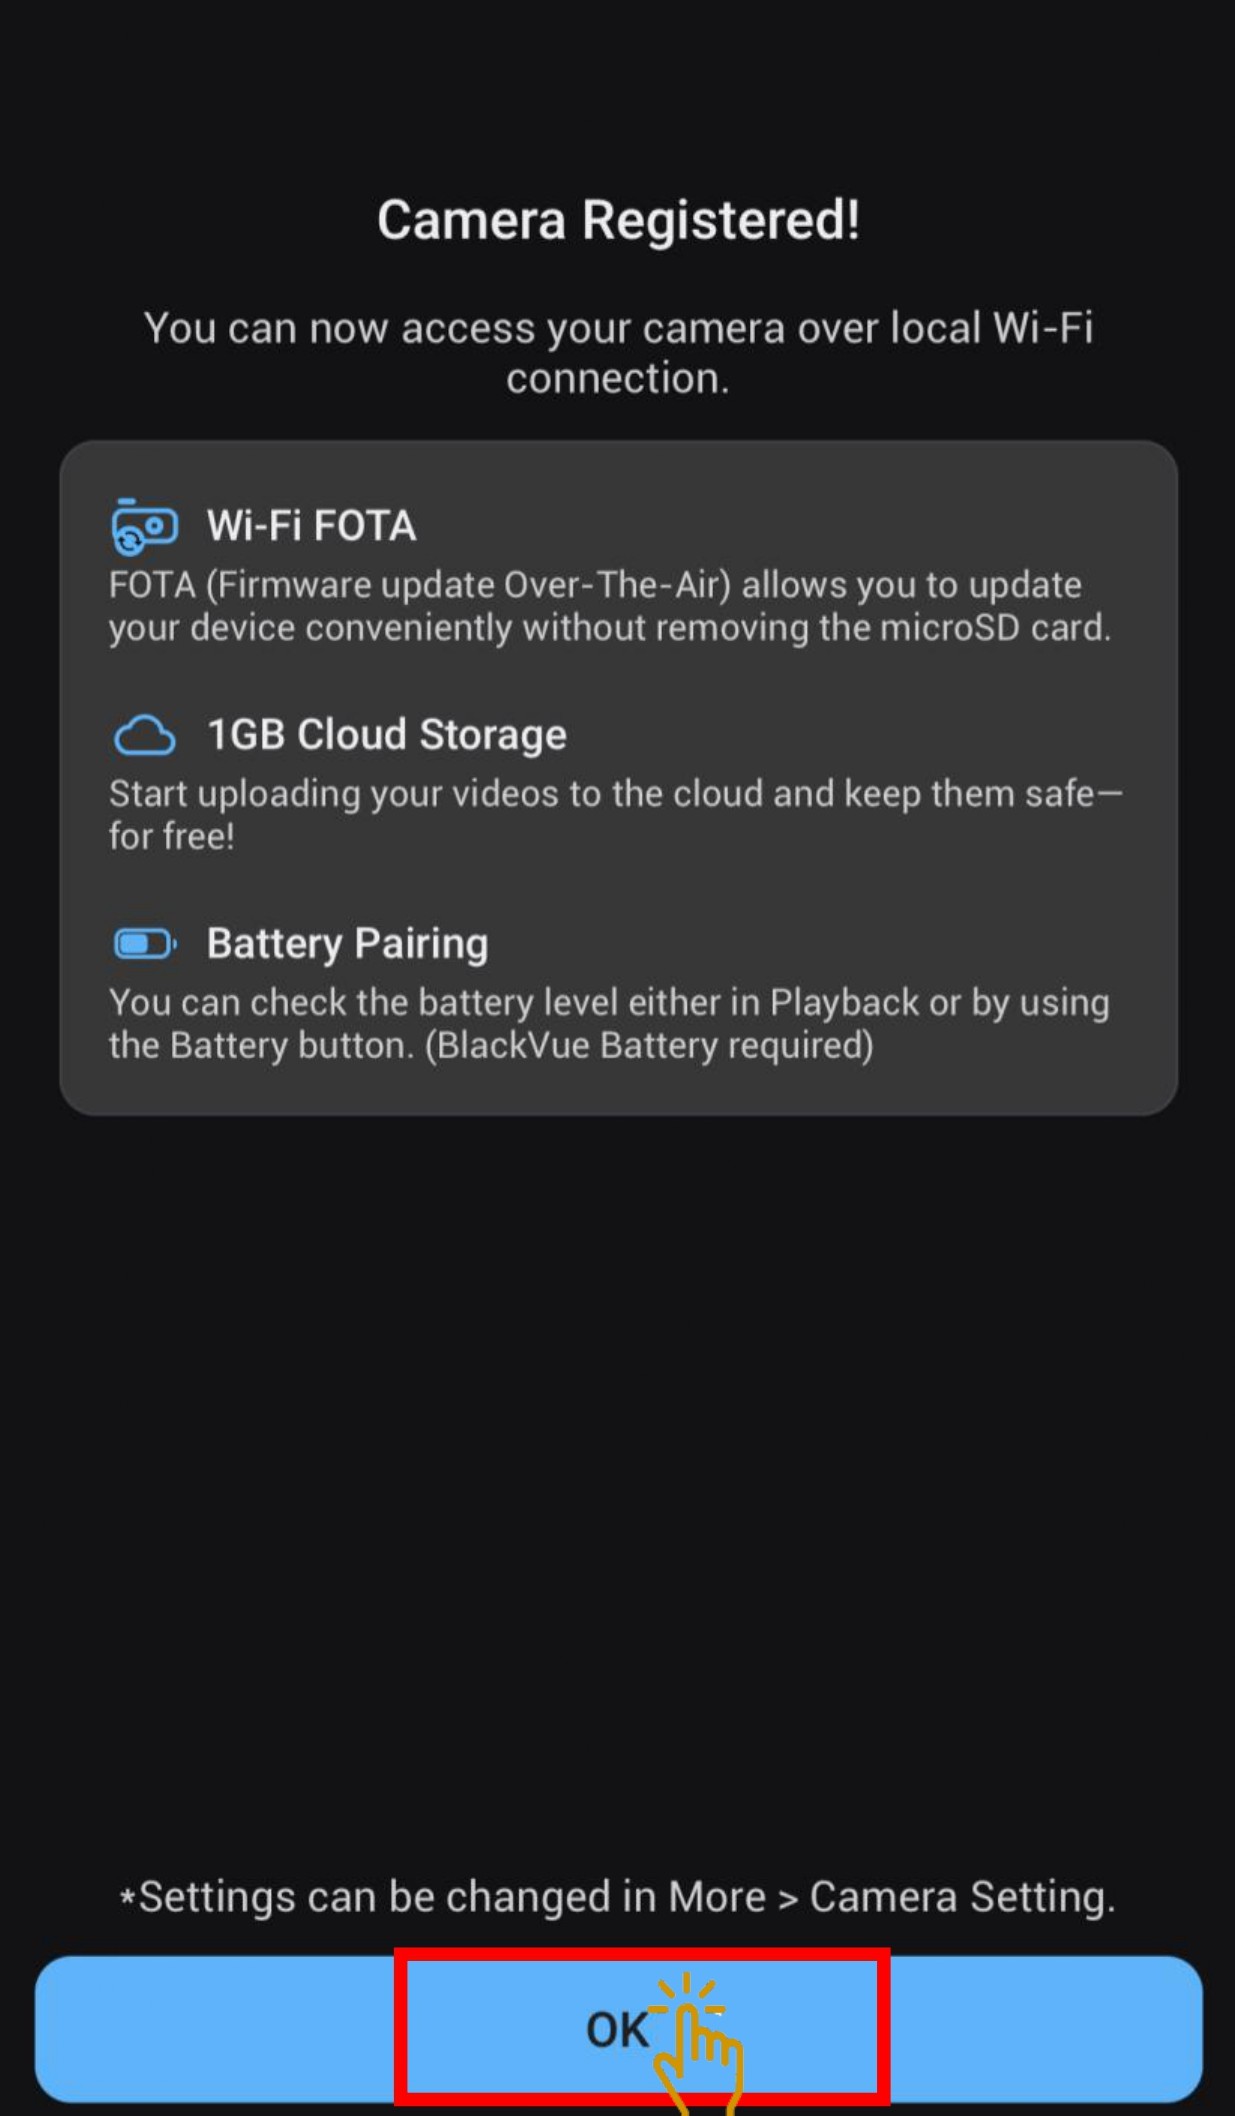
- Camera has successfully added to the account
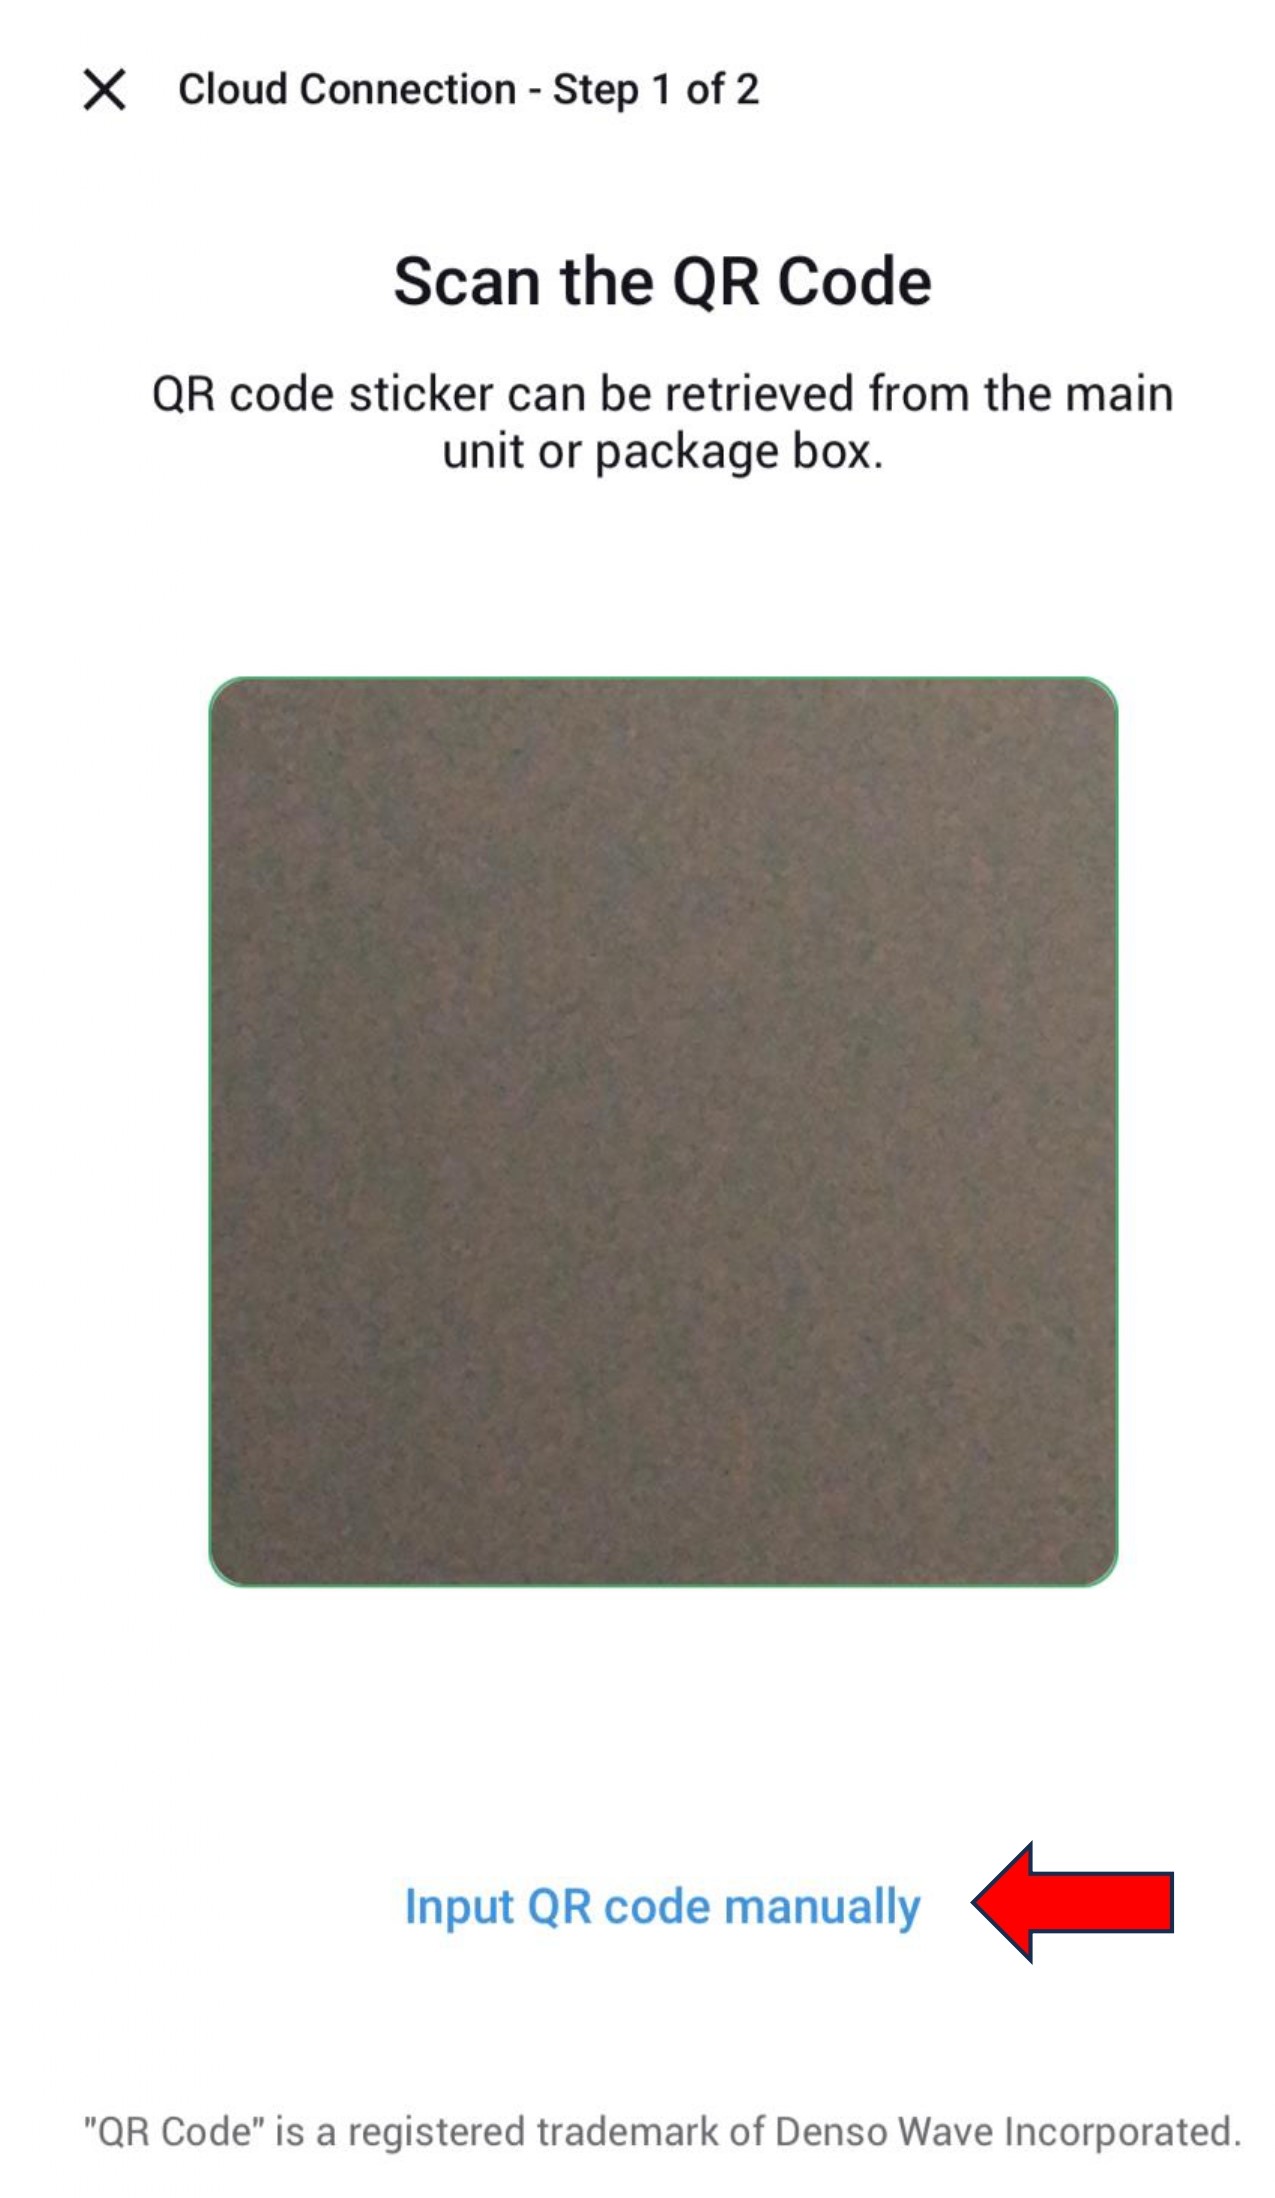
2.1.2 Manually Input QR Code
-
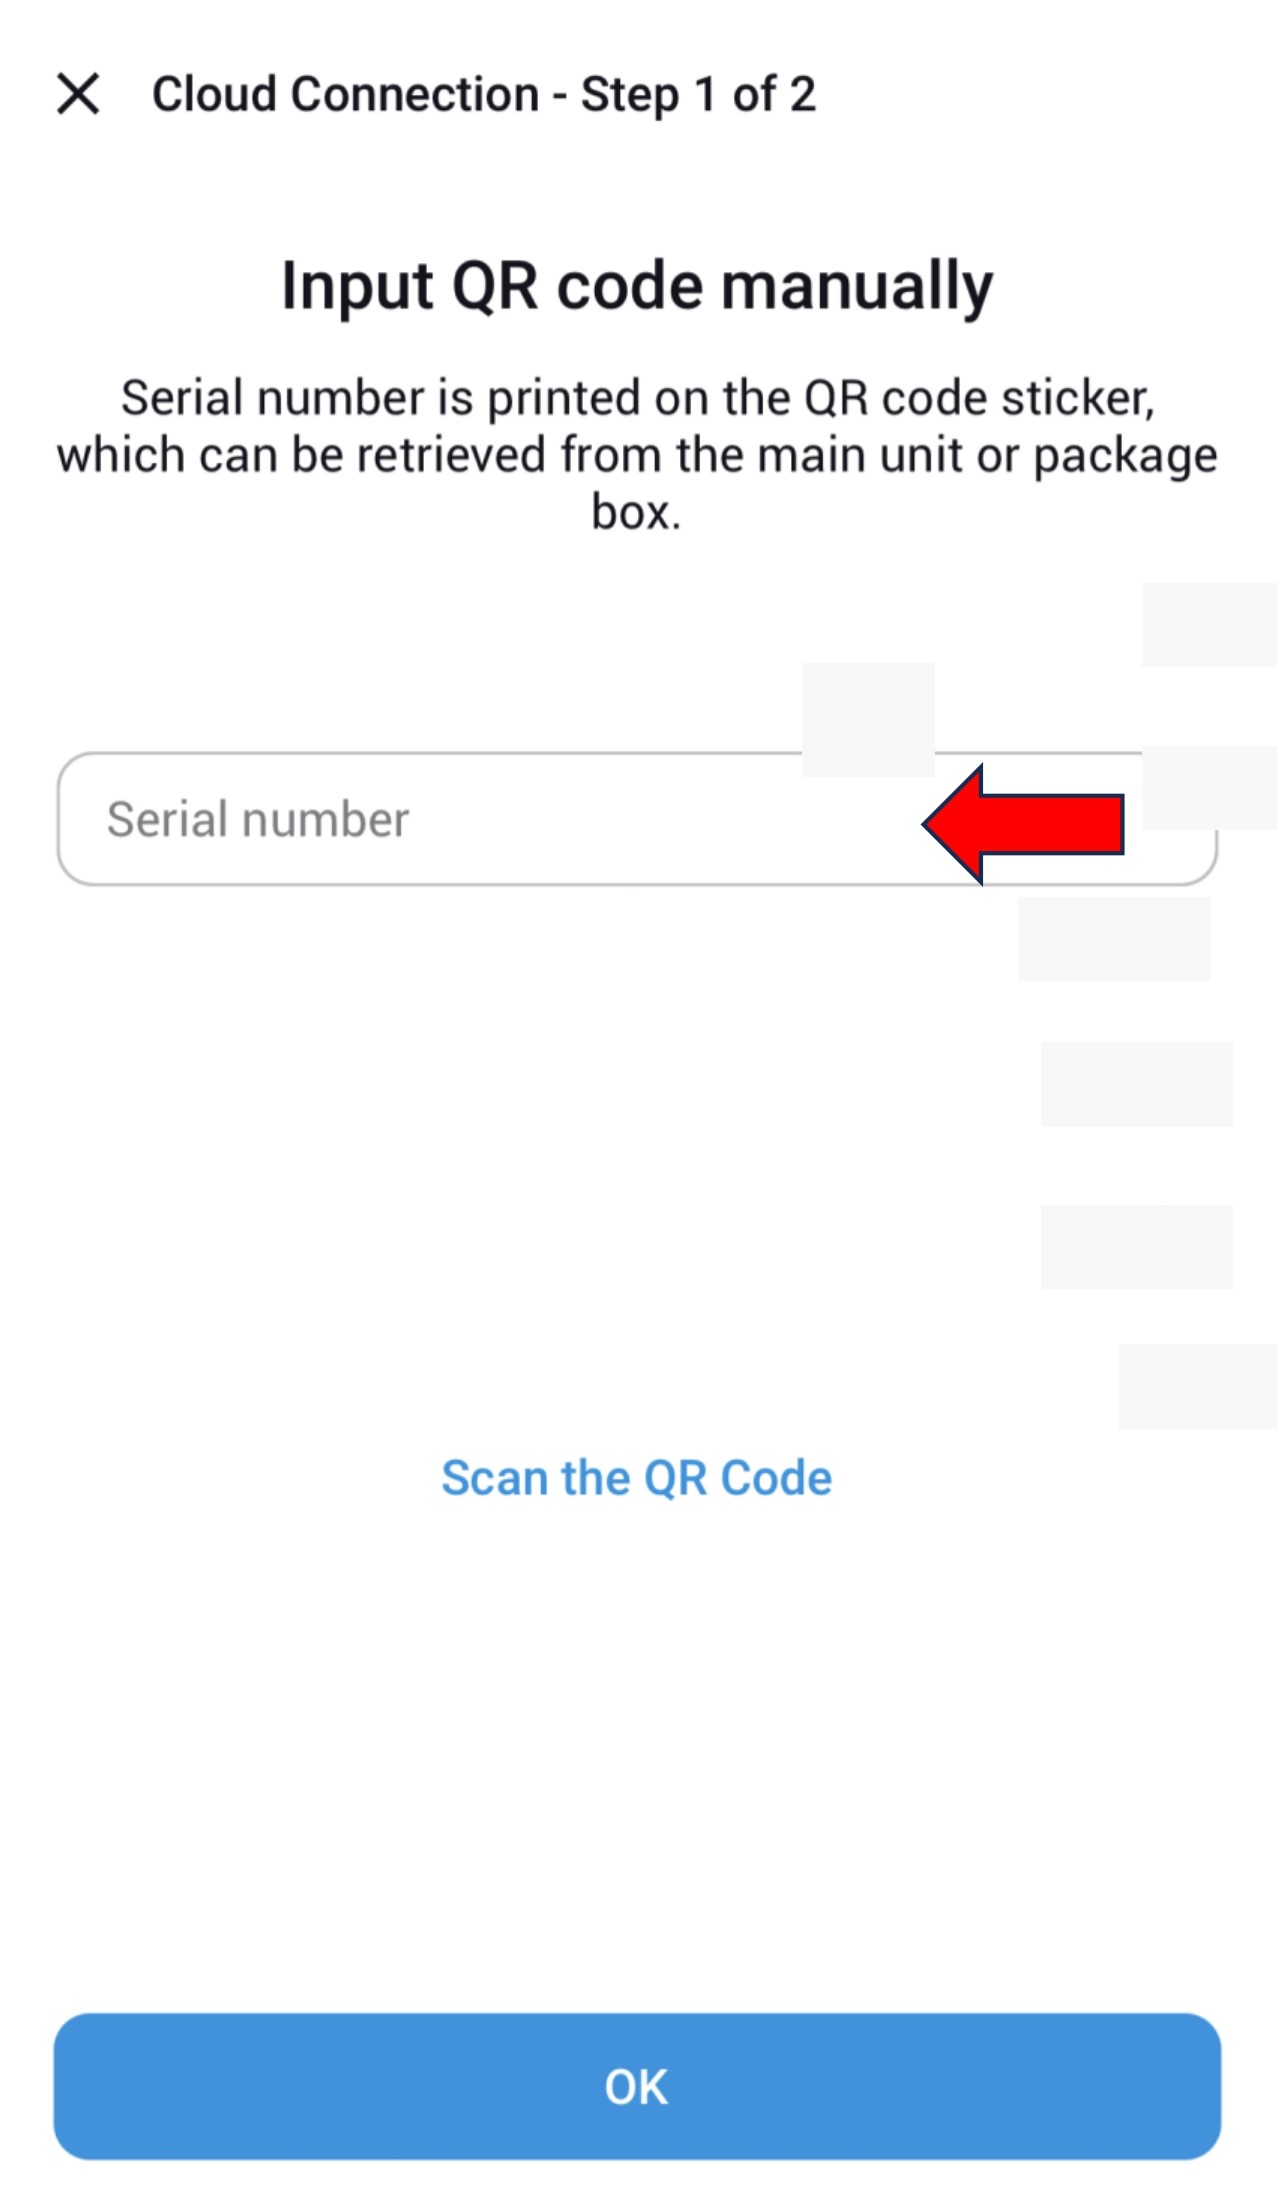
Instead of scanning the QR code, user can input the dashcam serial number manually.
- Serial number can be located at the main unit.
- Input the serial number of the dashcam.
- Once successfully scanned, the camera is verified.
- Camera will be added to your account. Click "OK"
- Camera has successfully added to the account
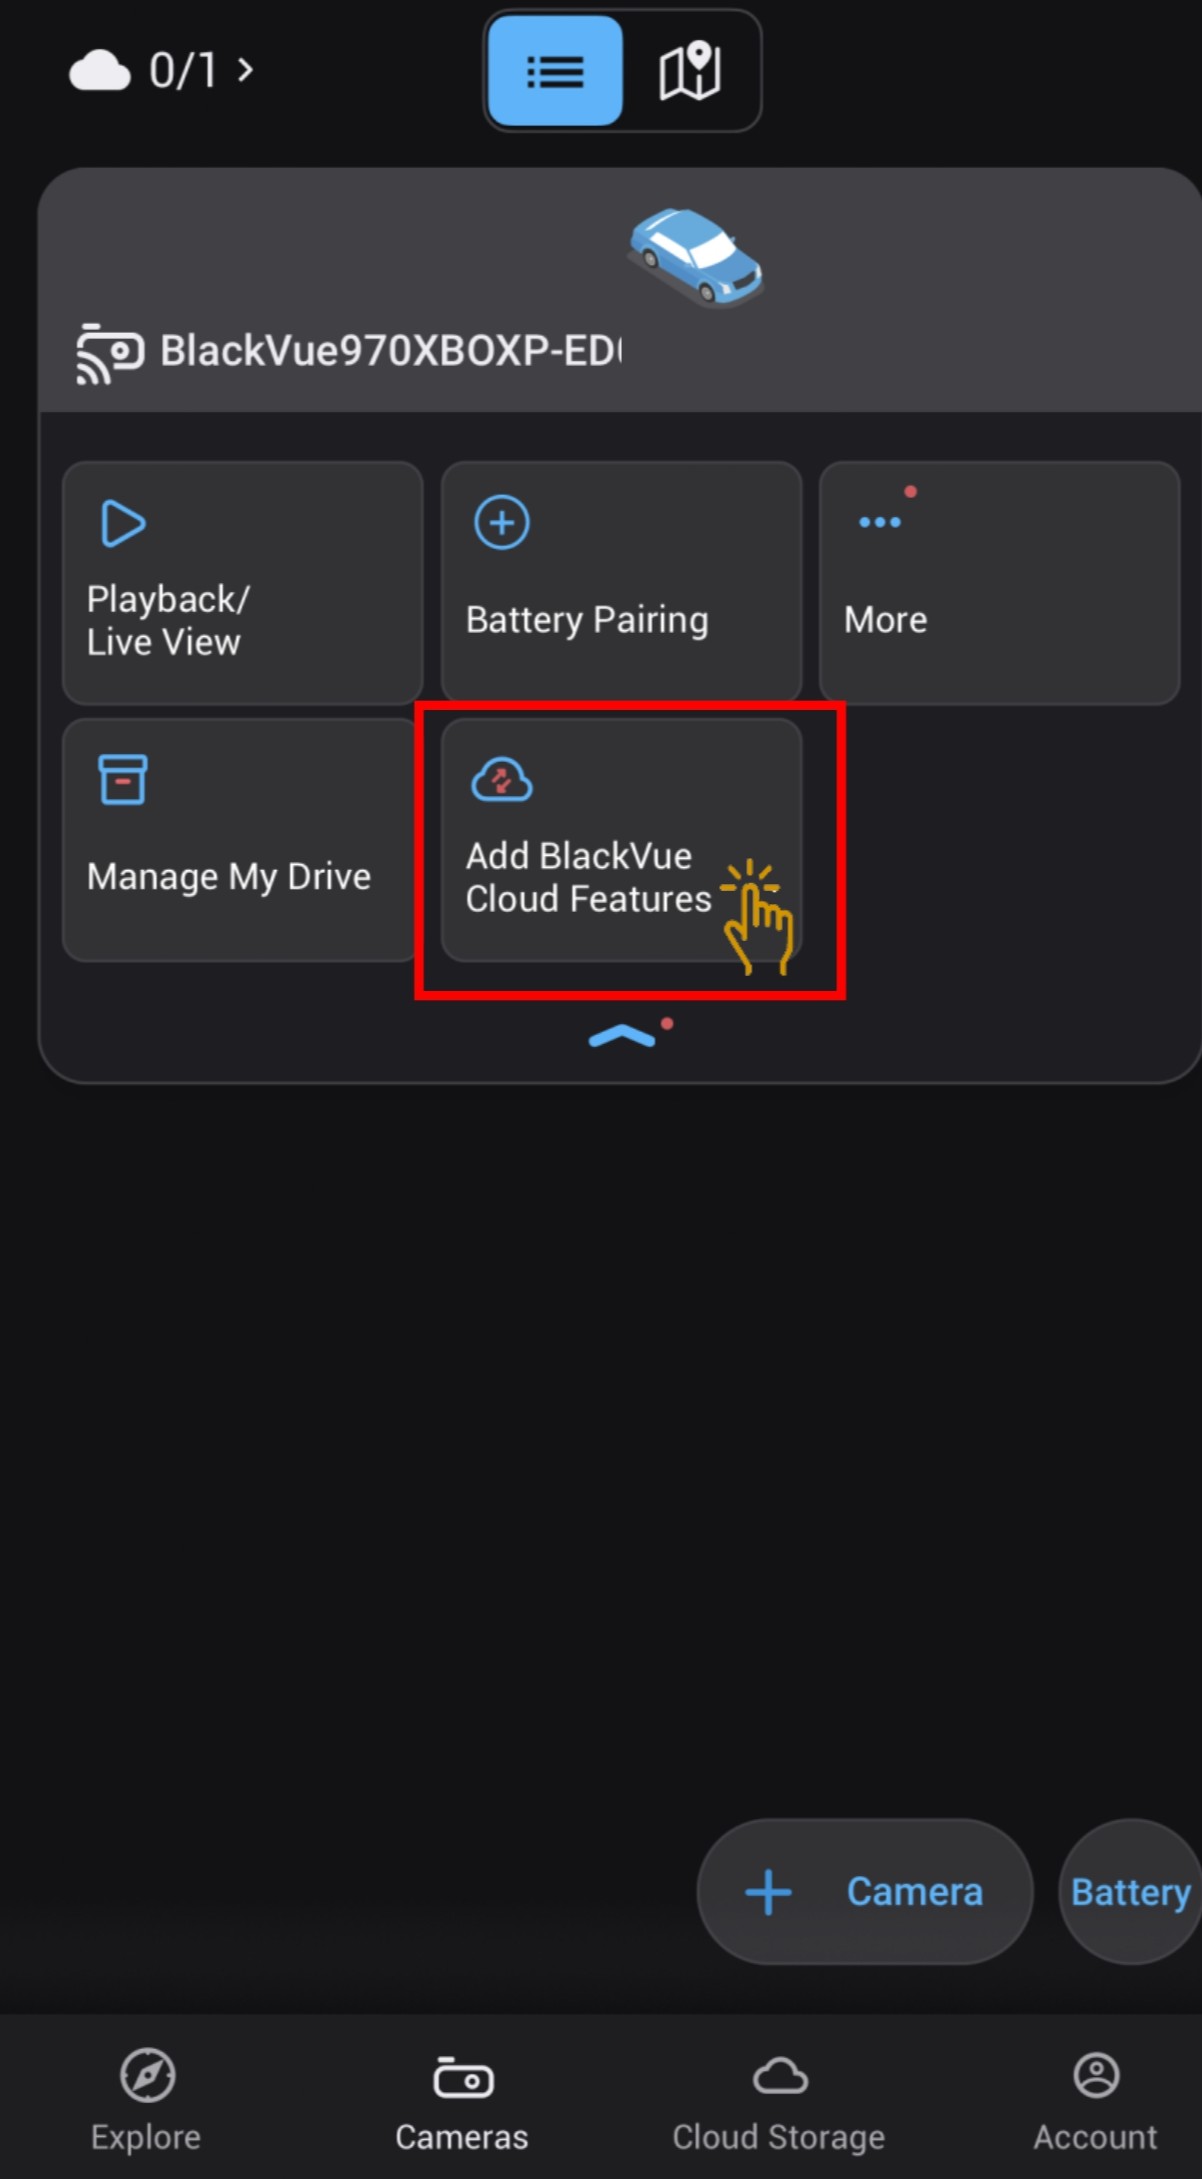
2.2 CLOUDS CONNECTION
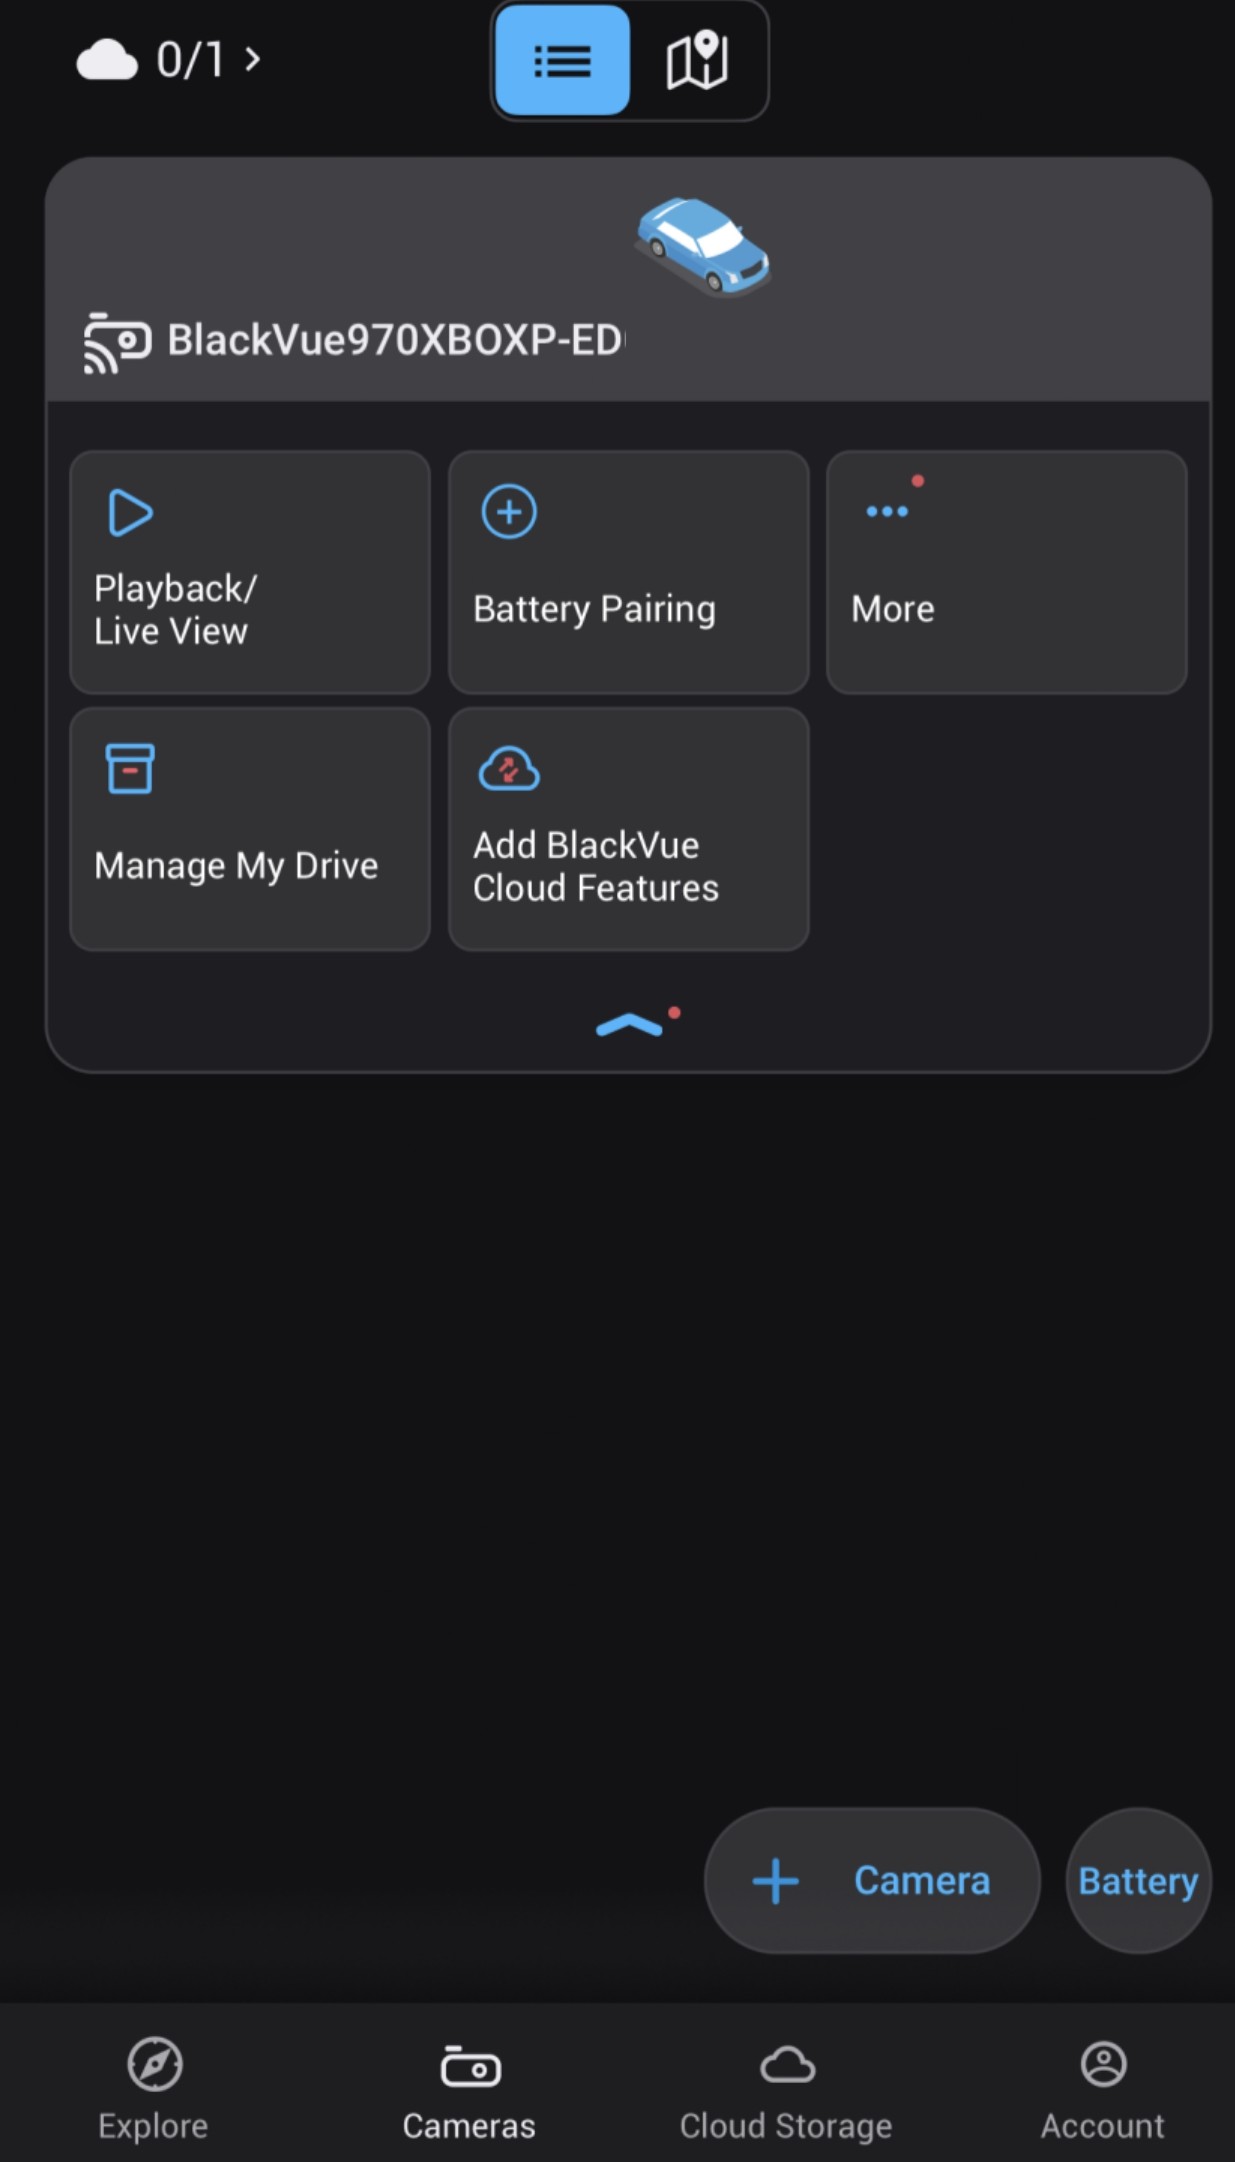
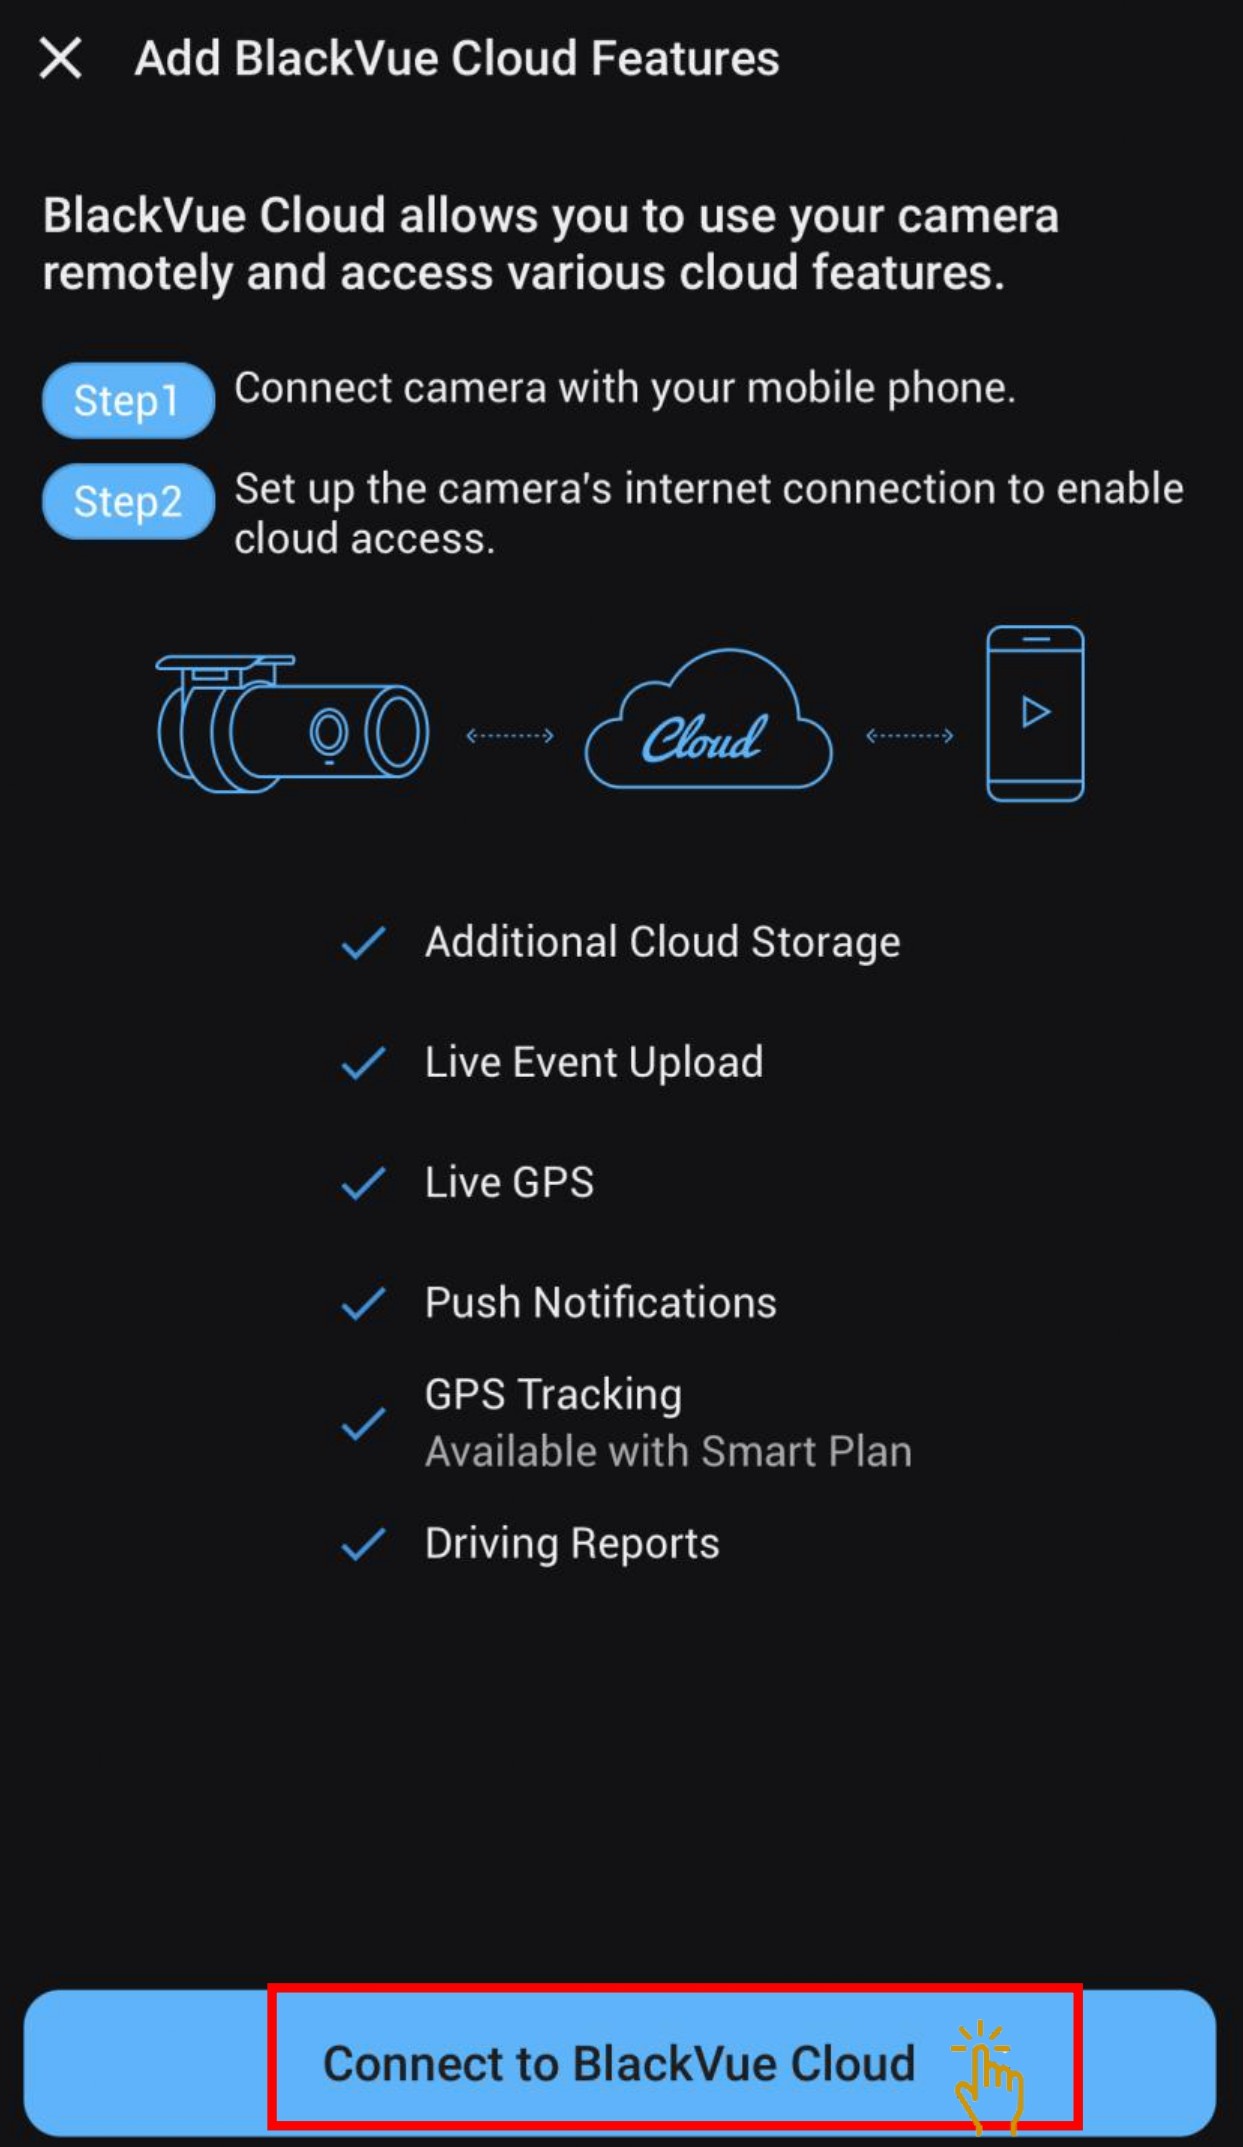
- To set the Cloud Connection, click on "Add BlackVue Cloud Features".
- Click on "Connect to BlackVue Cloud".
2.2.1 SIM Card Configuration
- Select "SIM card" to set the SIM card setting then click "Next".
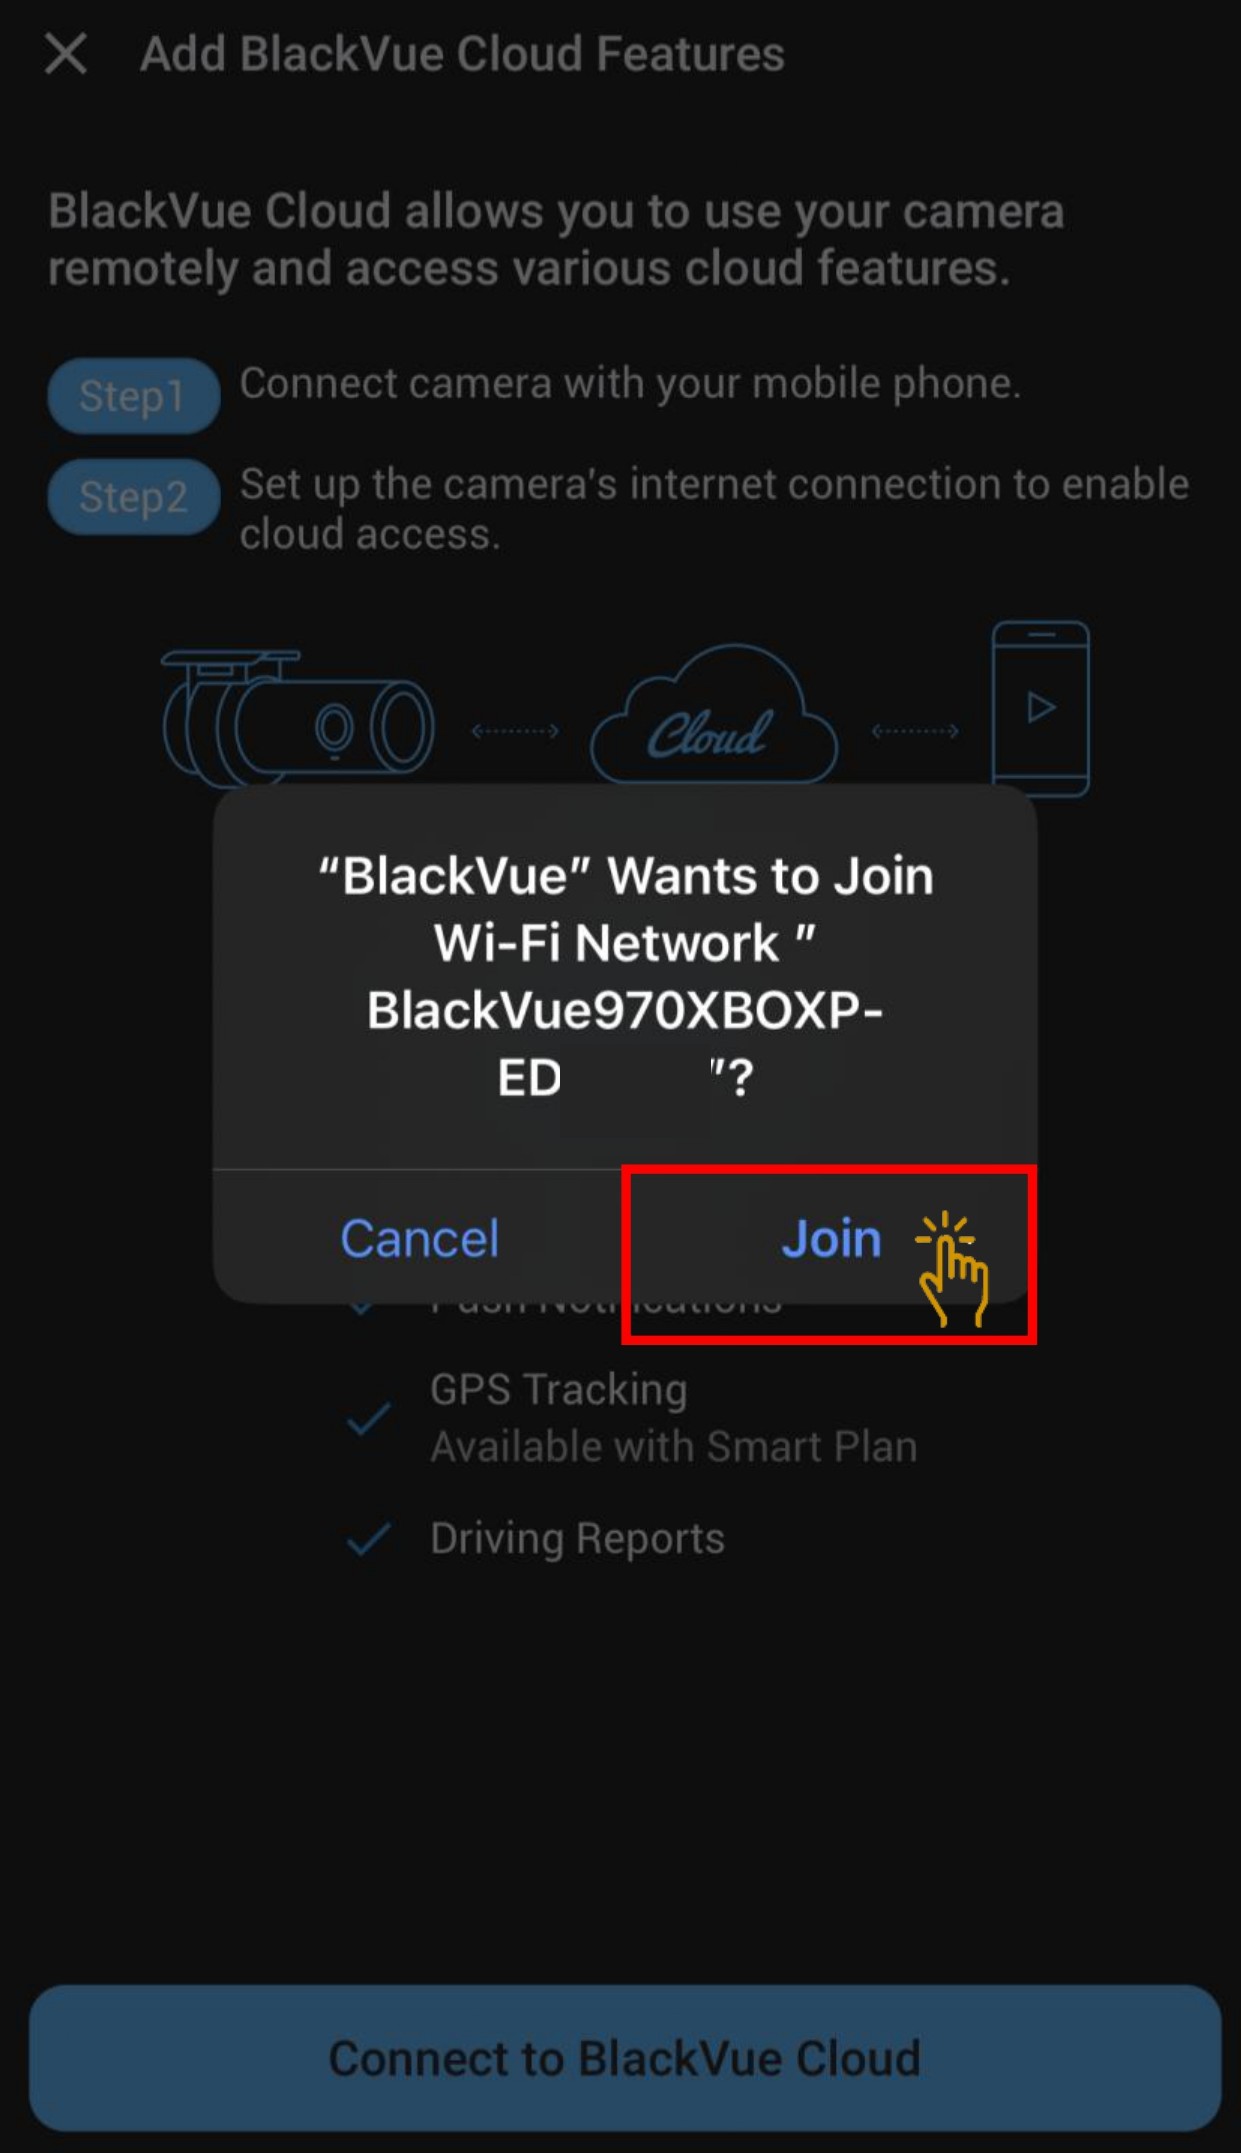
Please ensure the SIM card is inserted into the Built-in SIM card reader or CM100LTE Module. - Click on "Join" on your dashcam network.
- Input the SIM card Telco APN and click "Done".
Example: Telco: M1 APN: sunsurf
Telco: Singtel APN: e-ideas
Please refer to the below link for more Telco's APN
Telco's APN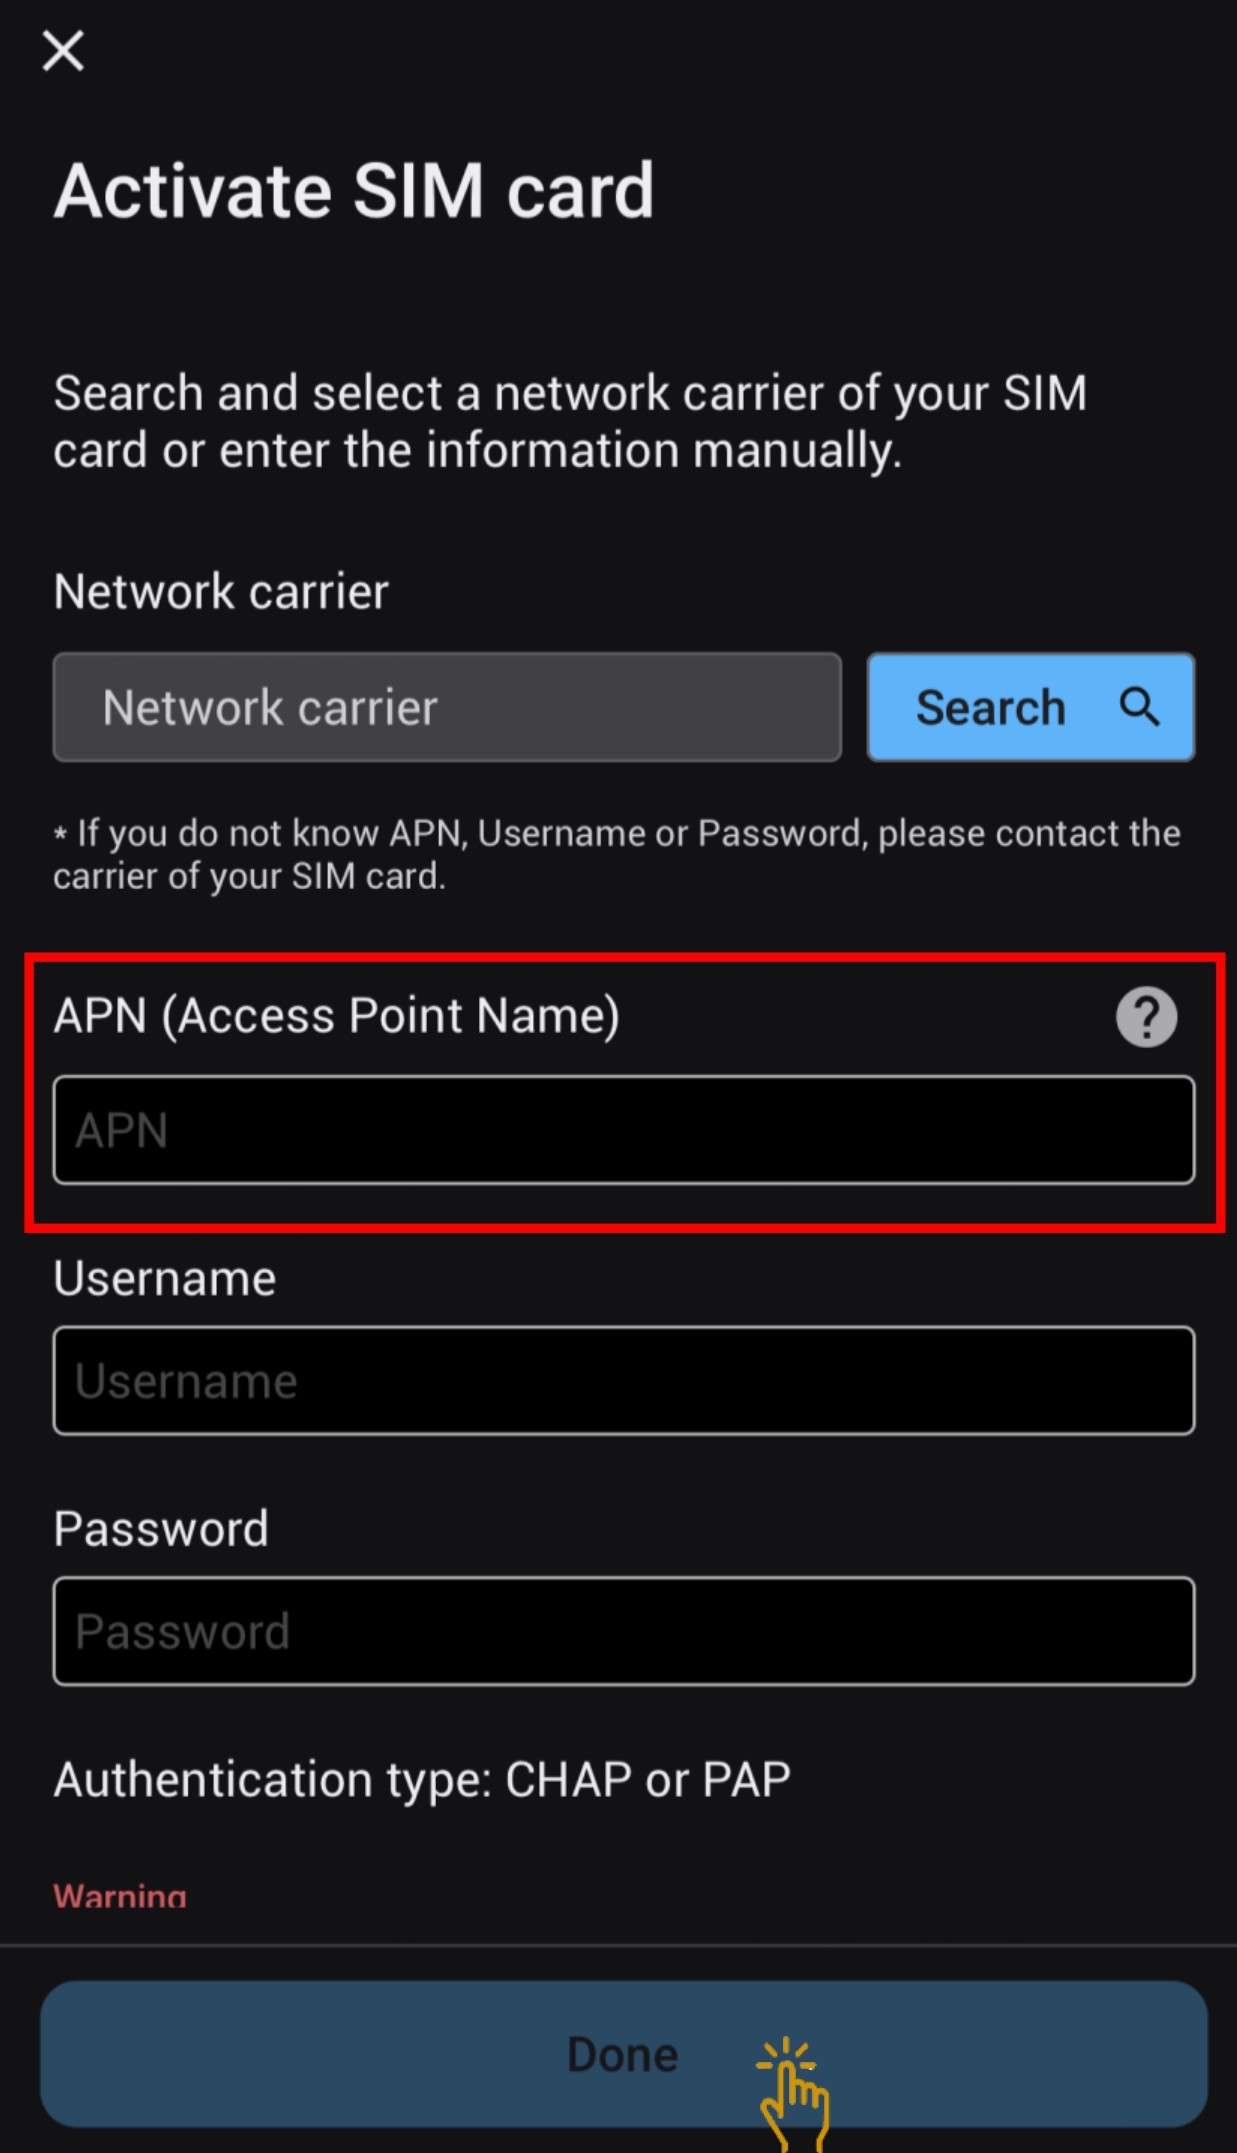
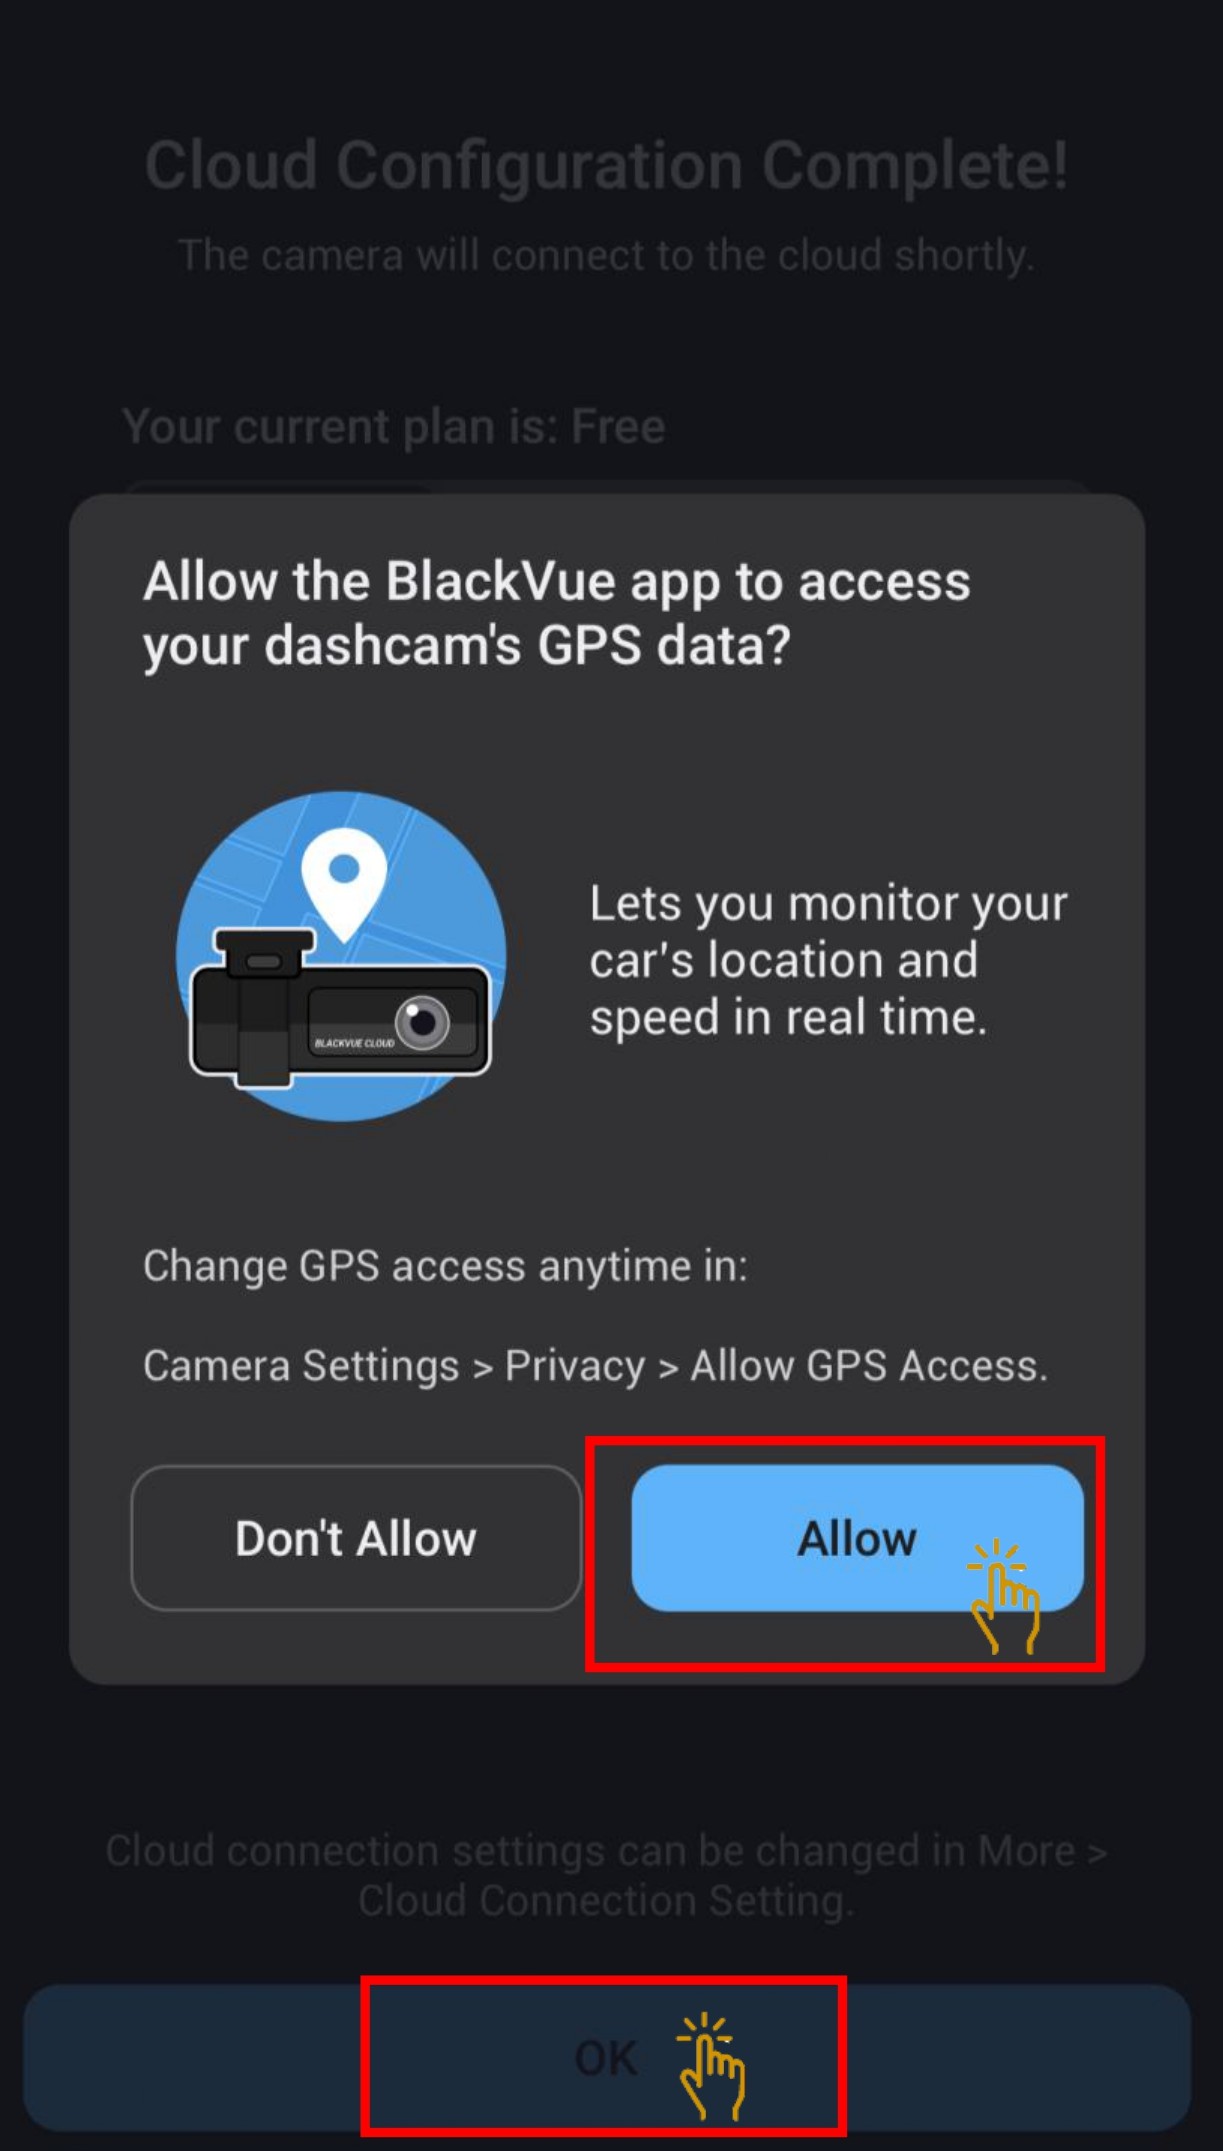
- Once SIM card is activated, cloud connection is established. Click "Allow" for GPS data to access. Then click "OK"
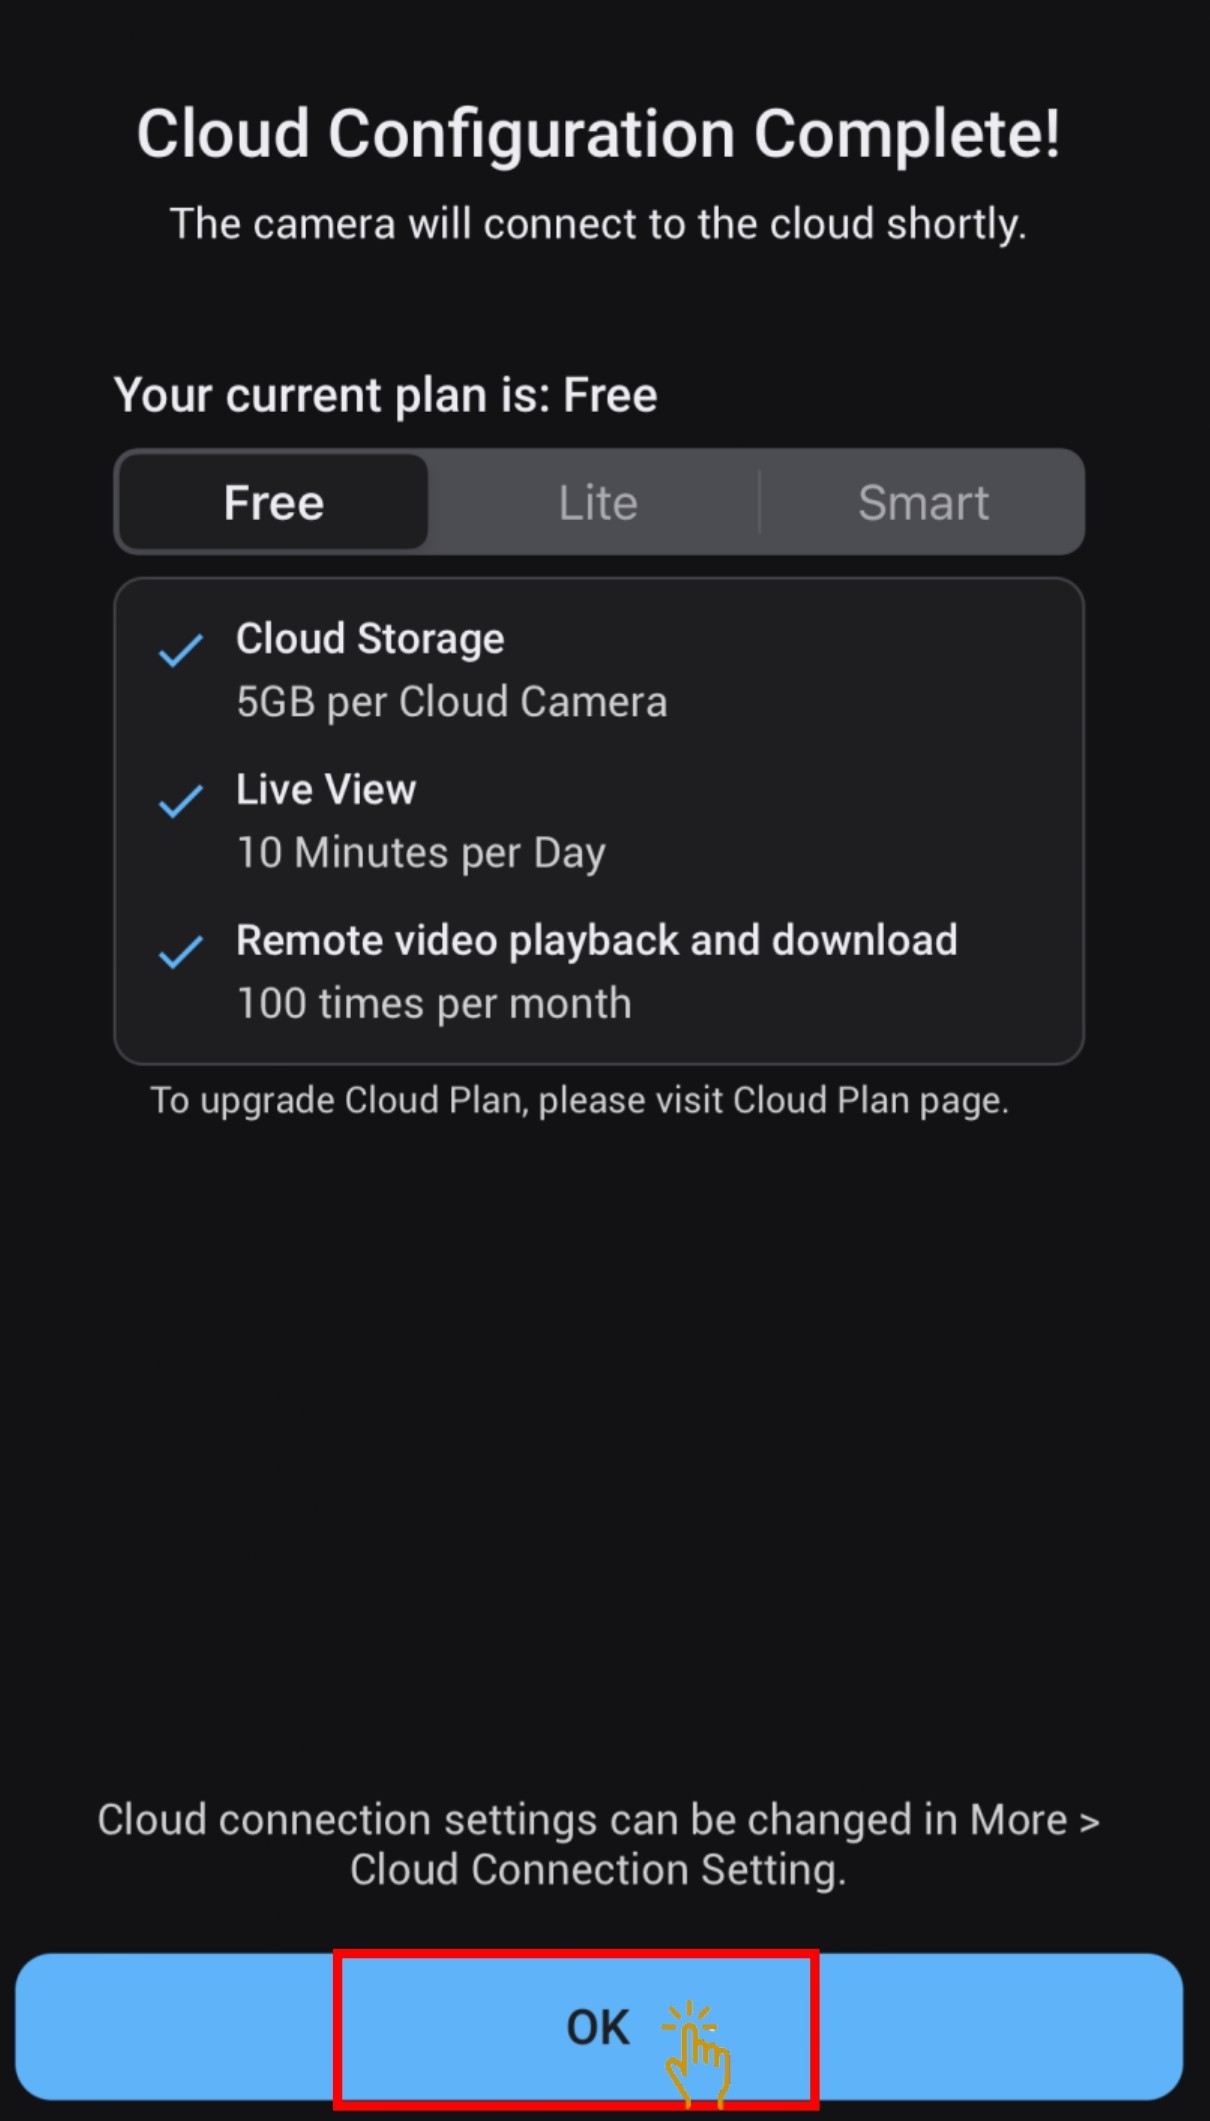
- Cloud configuration is completed. Click "OK".
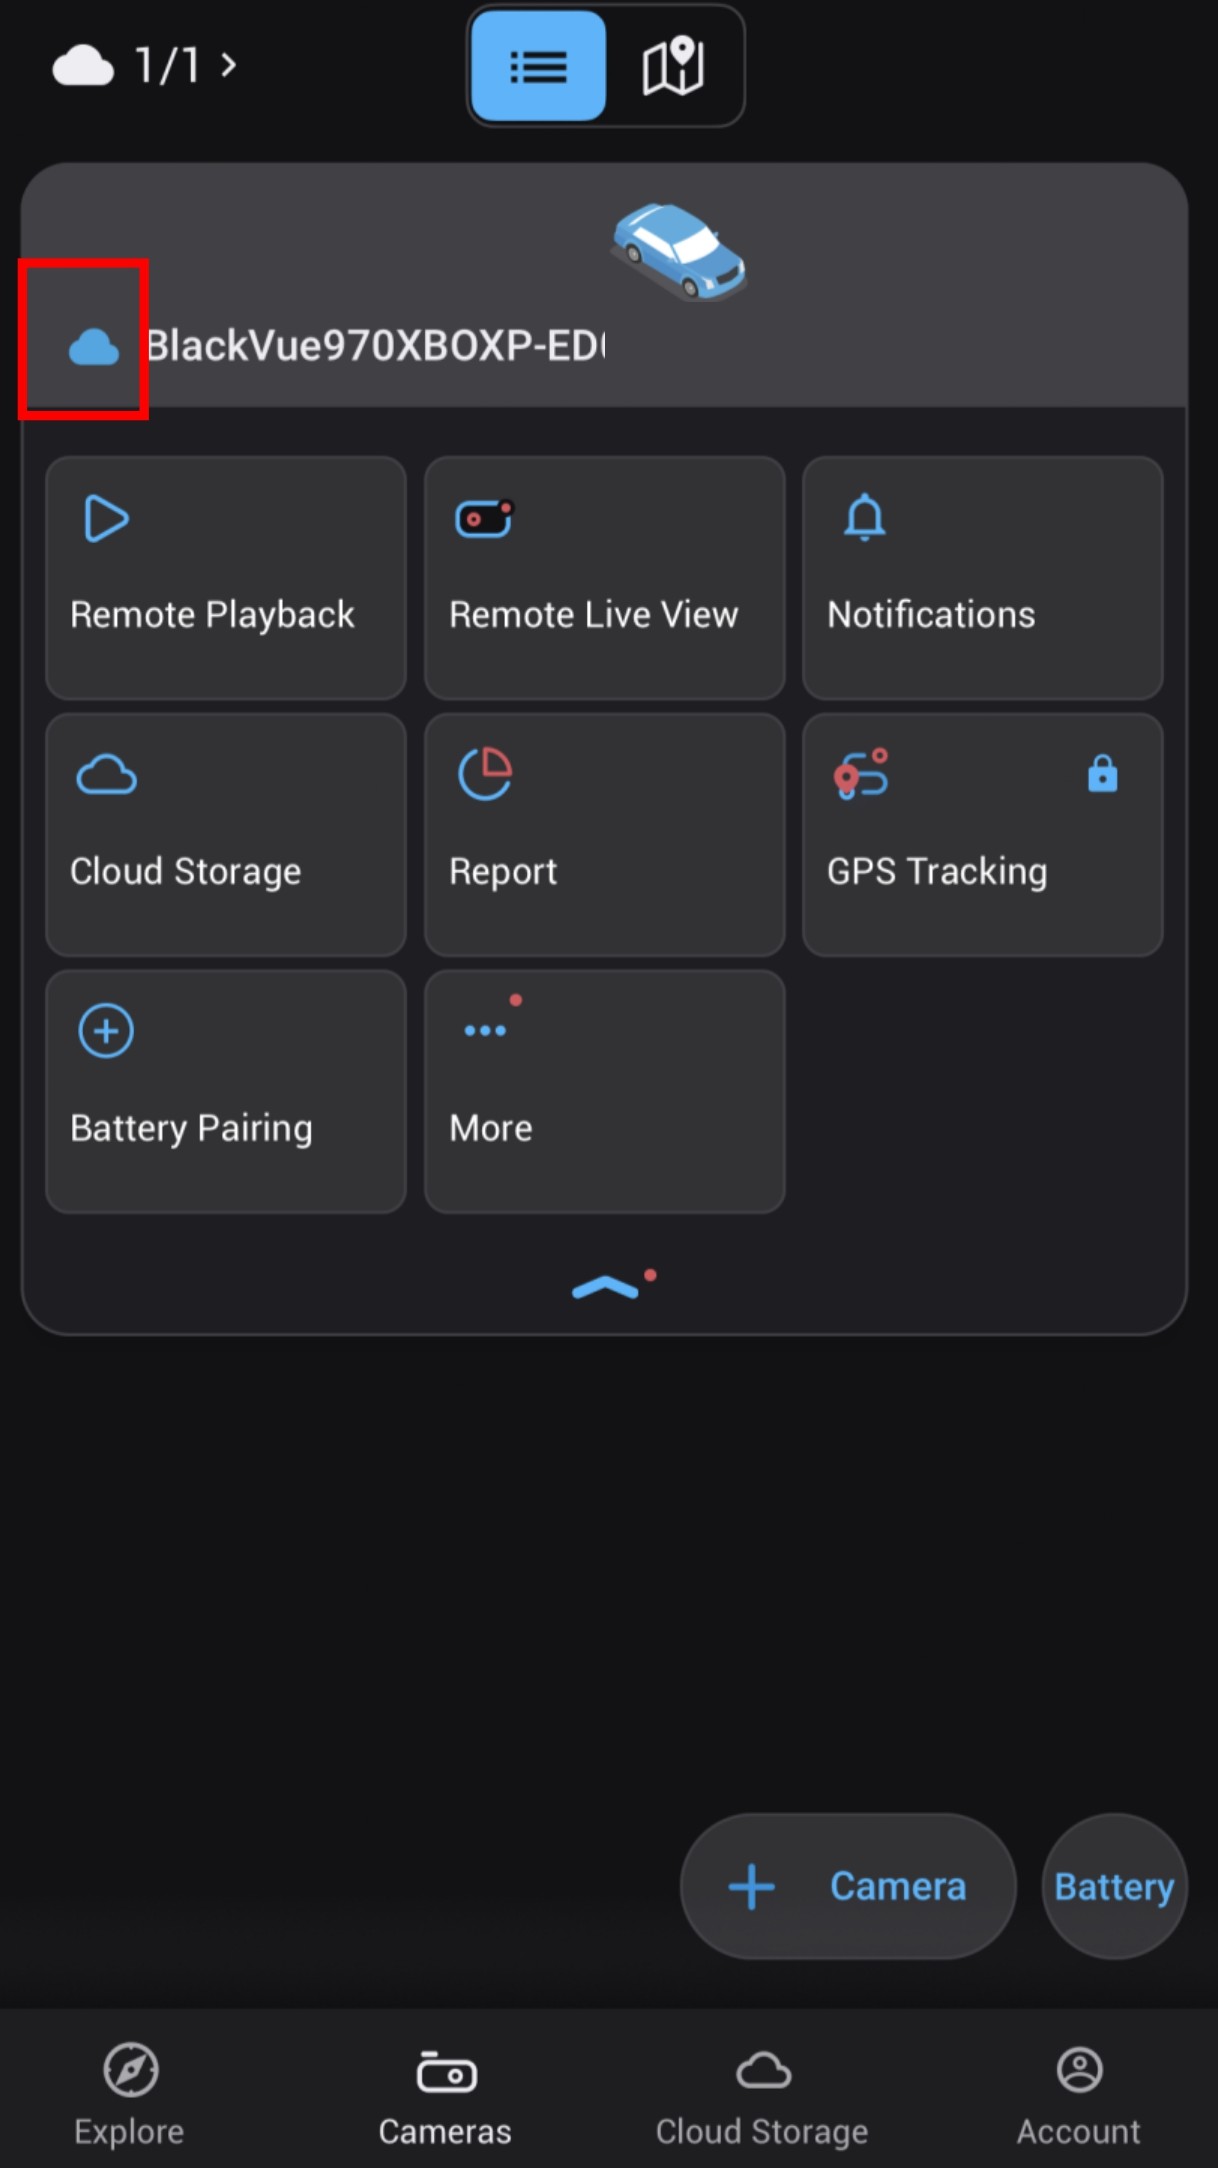
- Once the cloud connection is connected, the Cloud icon will in Blue color.
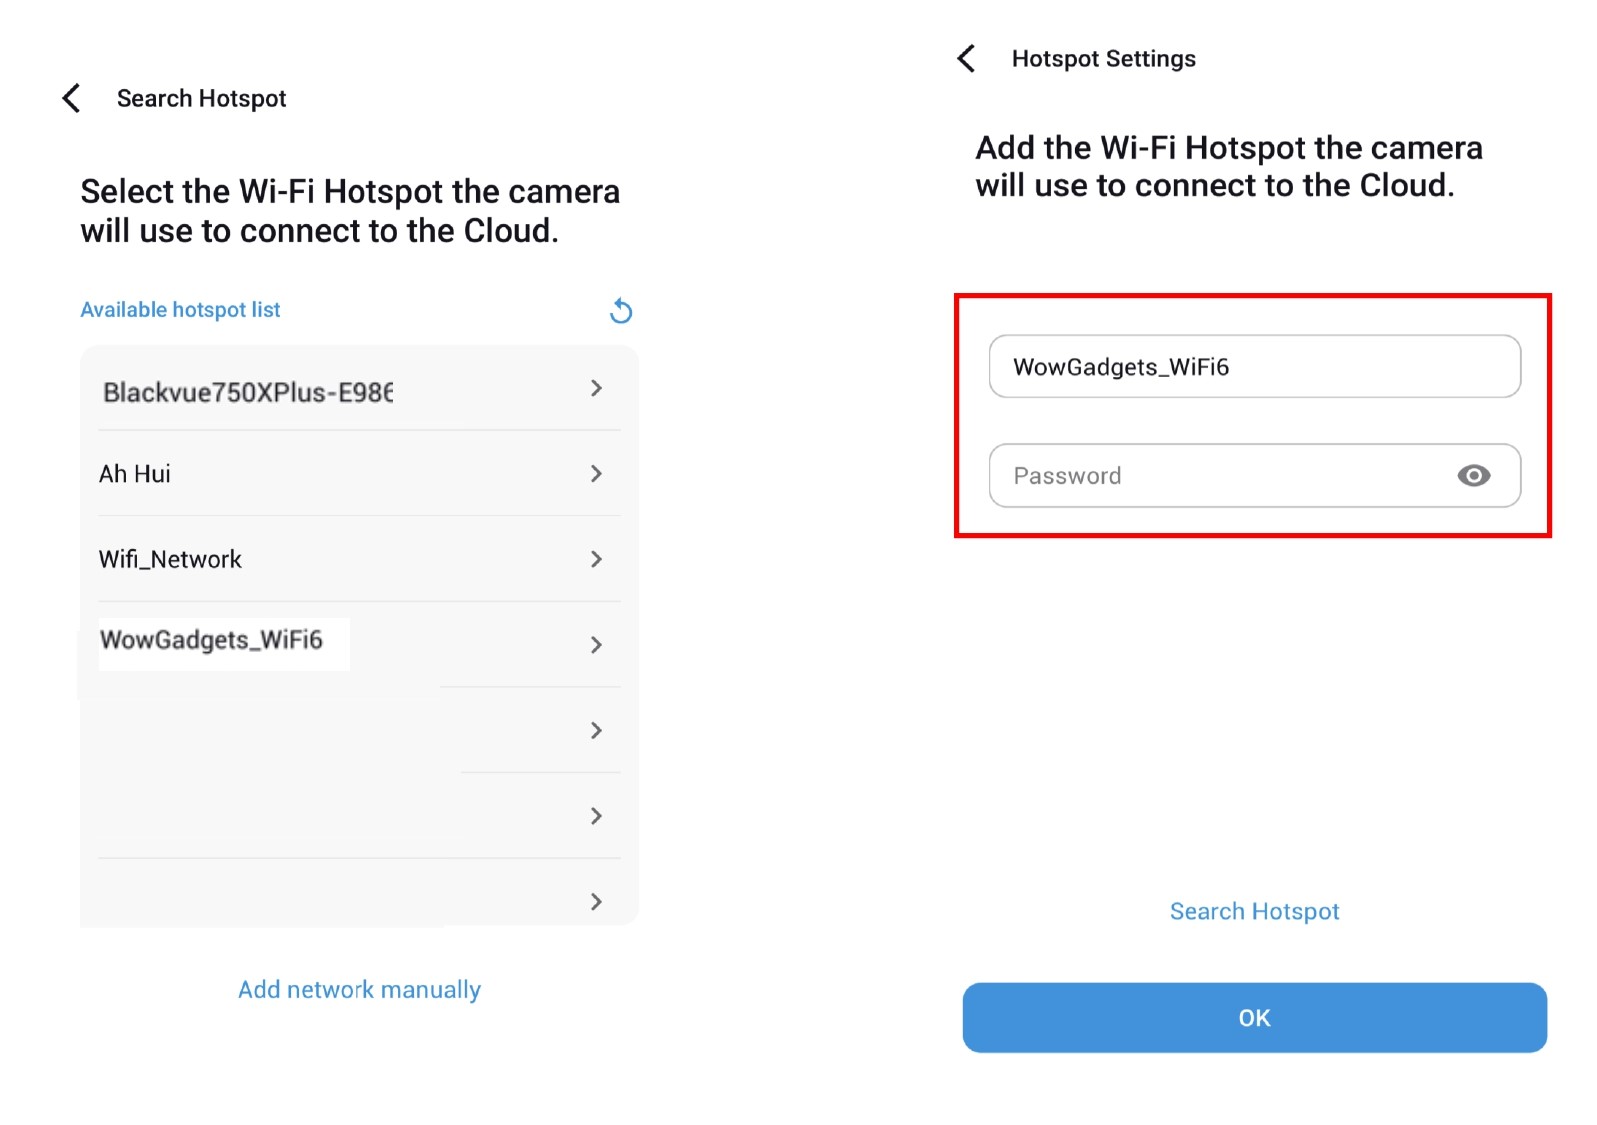
2.2.2 Wi-Fi Hotspot Configuration
- Choose the Wi-Fi hotspot and input the password.
- Once SIM card is activated, cloud connection is established. Click "Allow" for GPS data to access. Then click "OK"
- Cloud configuration is completed. Click "OK".
- Once the cloud connection is connected, the Cloud icon will in Blue color.
3. ADD CAMERA - WI-FI MODELS BLACKVUE DASHCAM
3.1 STEPS ON ADDING BLACKVUE DASHCAM - WI-FI METHODS
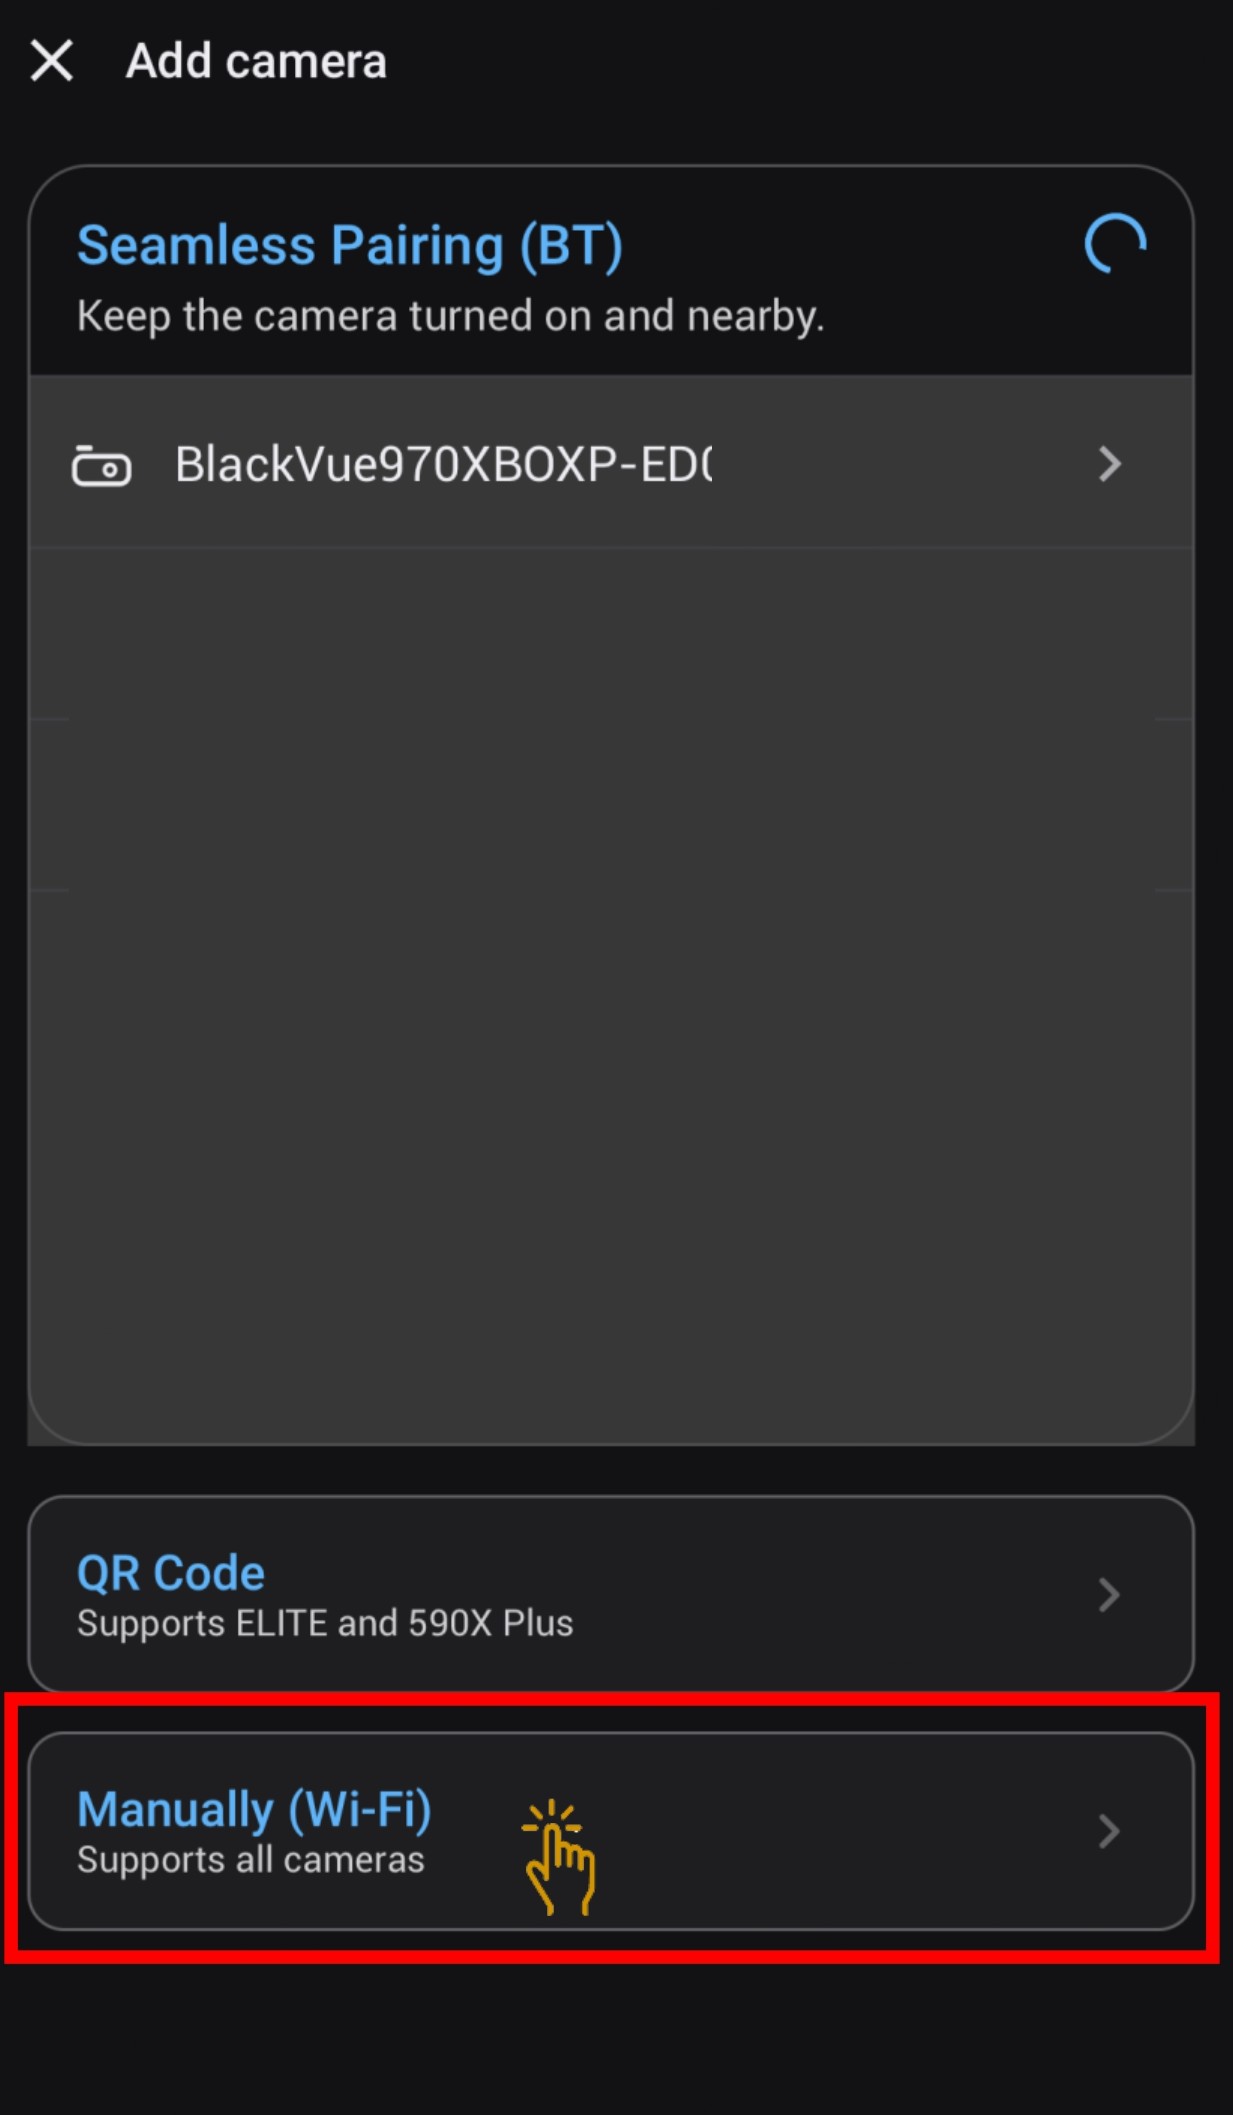
- Click on add camera "+Camera"
- Select "Manually Wi-Fi"
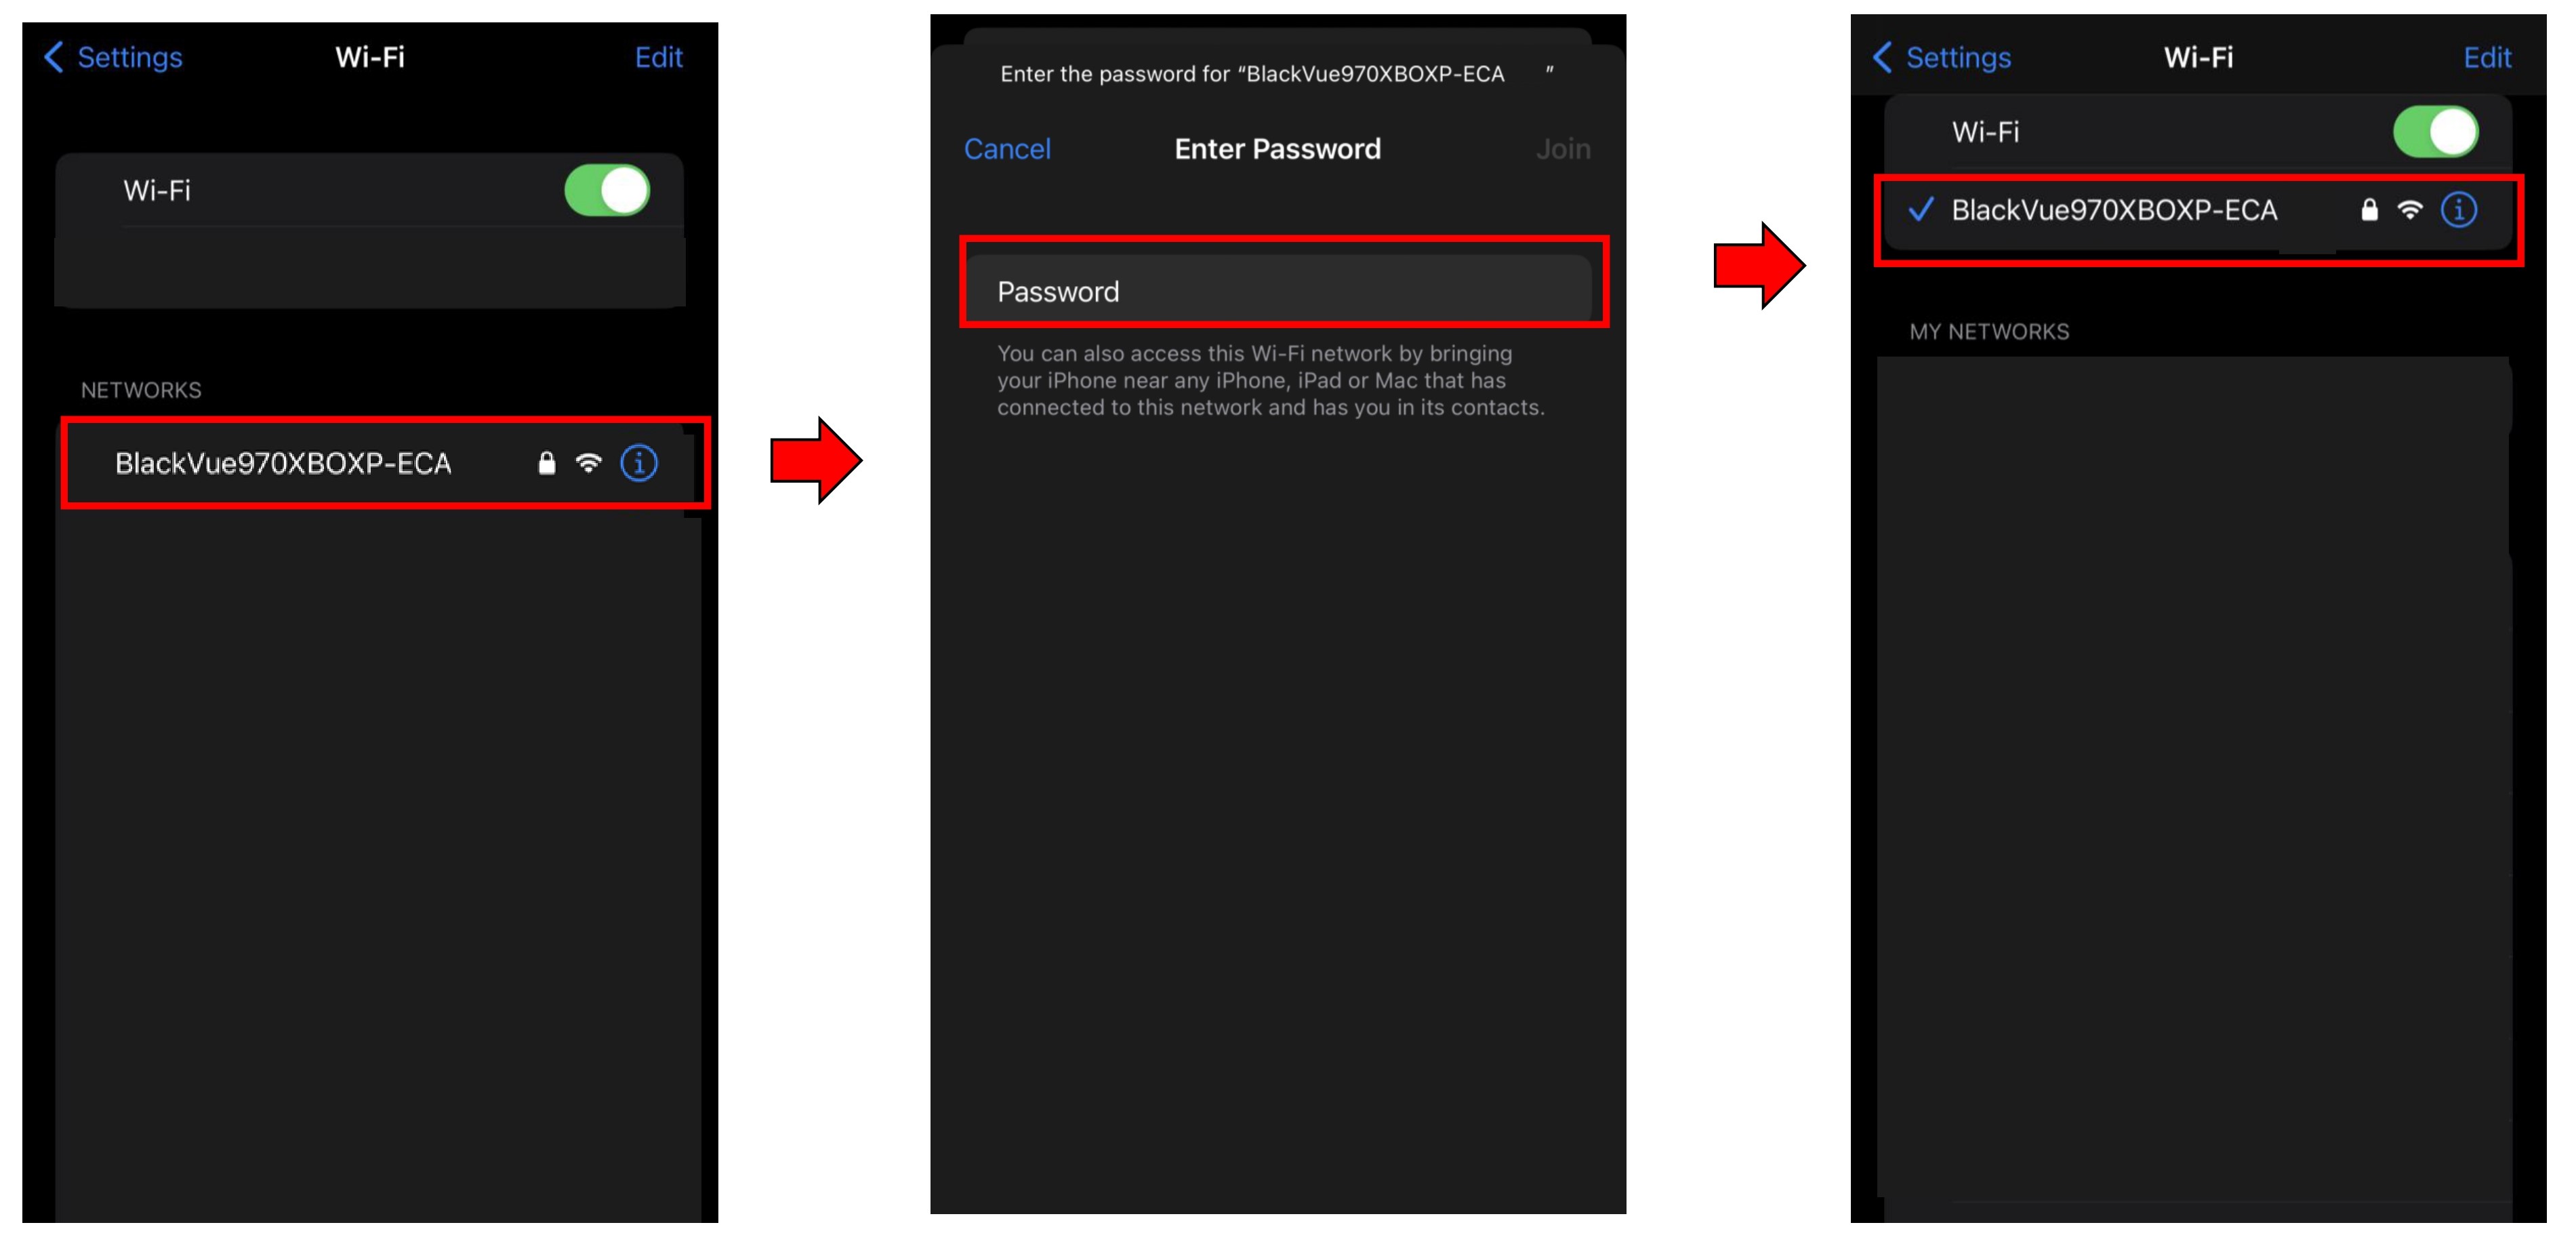
- Before clicking "Continue", Go to -Phone Setting - Wi-Fi connection
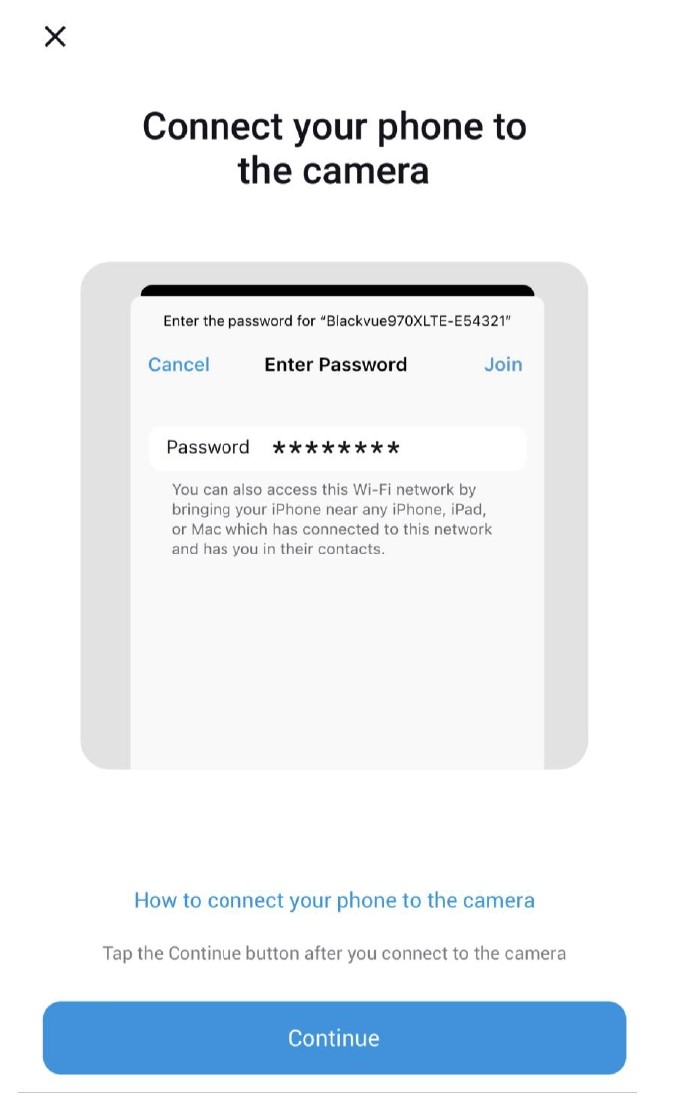
- Find the dashcam SSID that need to be connected.
- Input the password for the selected dashcam.
Password can be found at the main unit. - Dashcam is connected once password is verified.
- Go back BlackVue App and click "Continue".
- Camera will be added to your account. Click "OK"
- Camera has successfully added to the account
4. QUICK SETTINGS
4.1 OVERVIEW QUICK SETTINGS
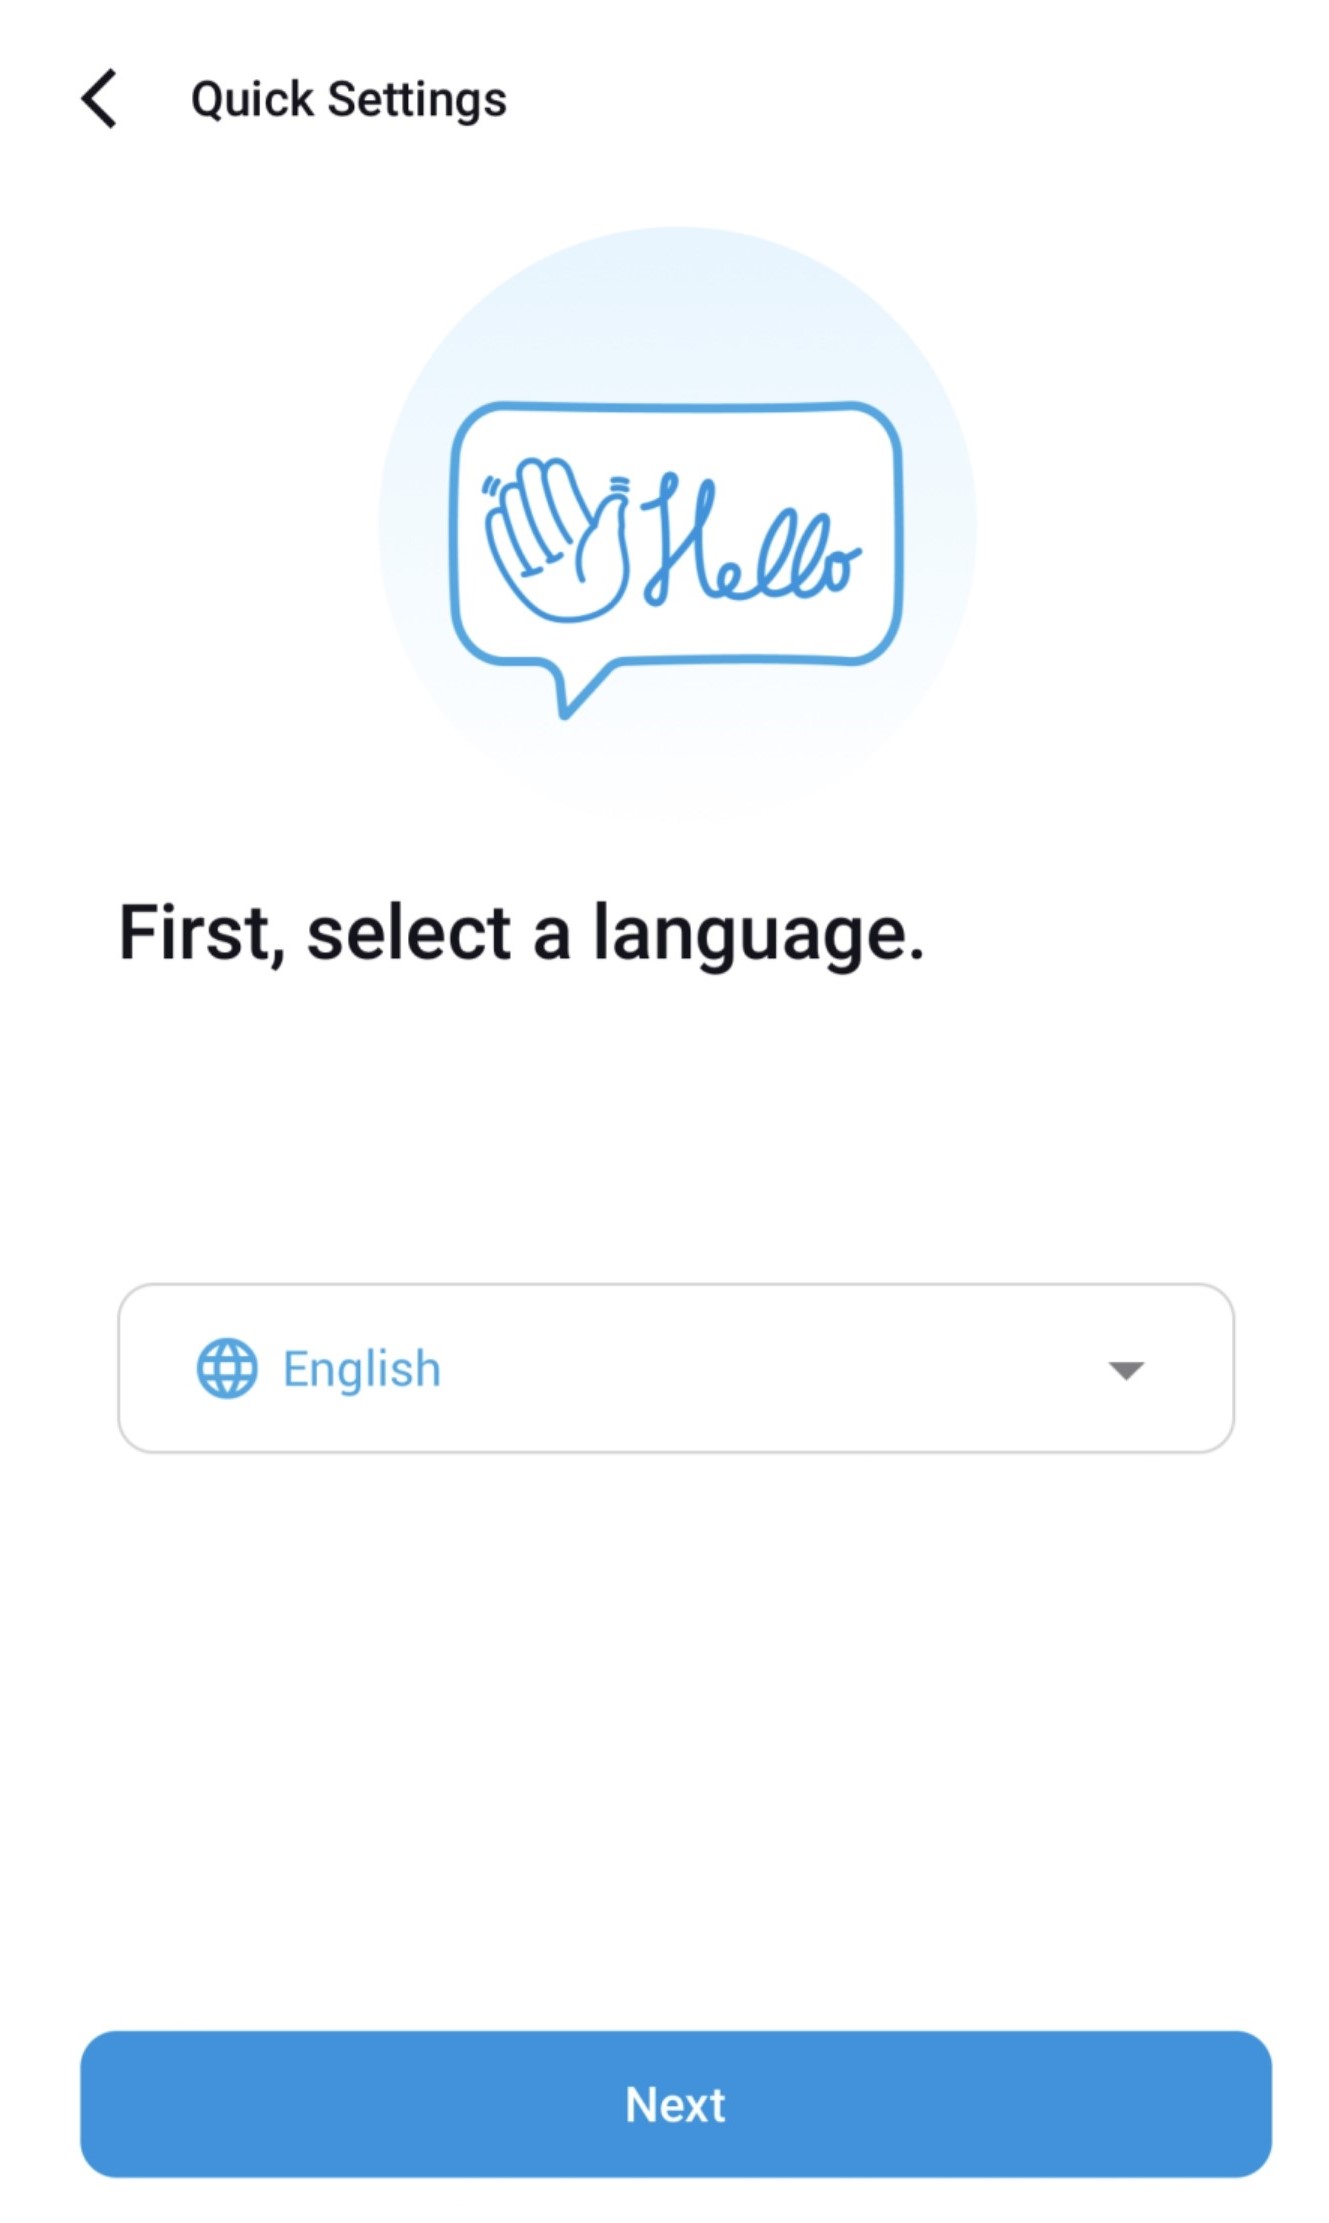
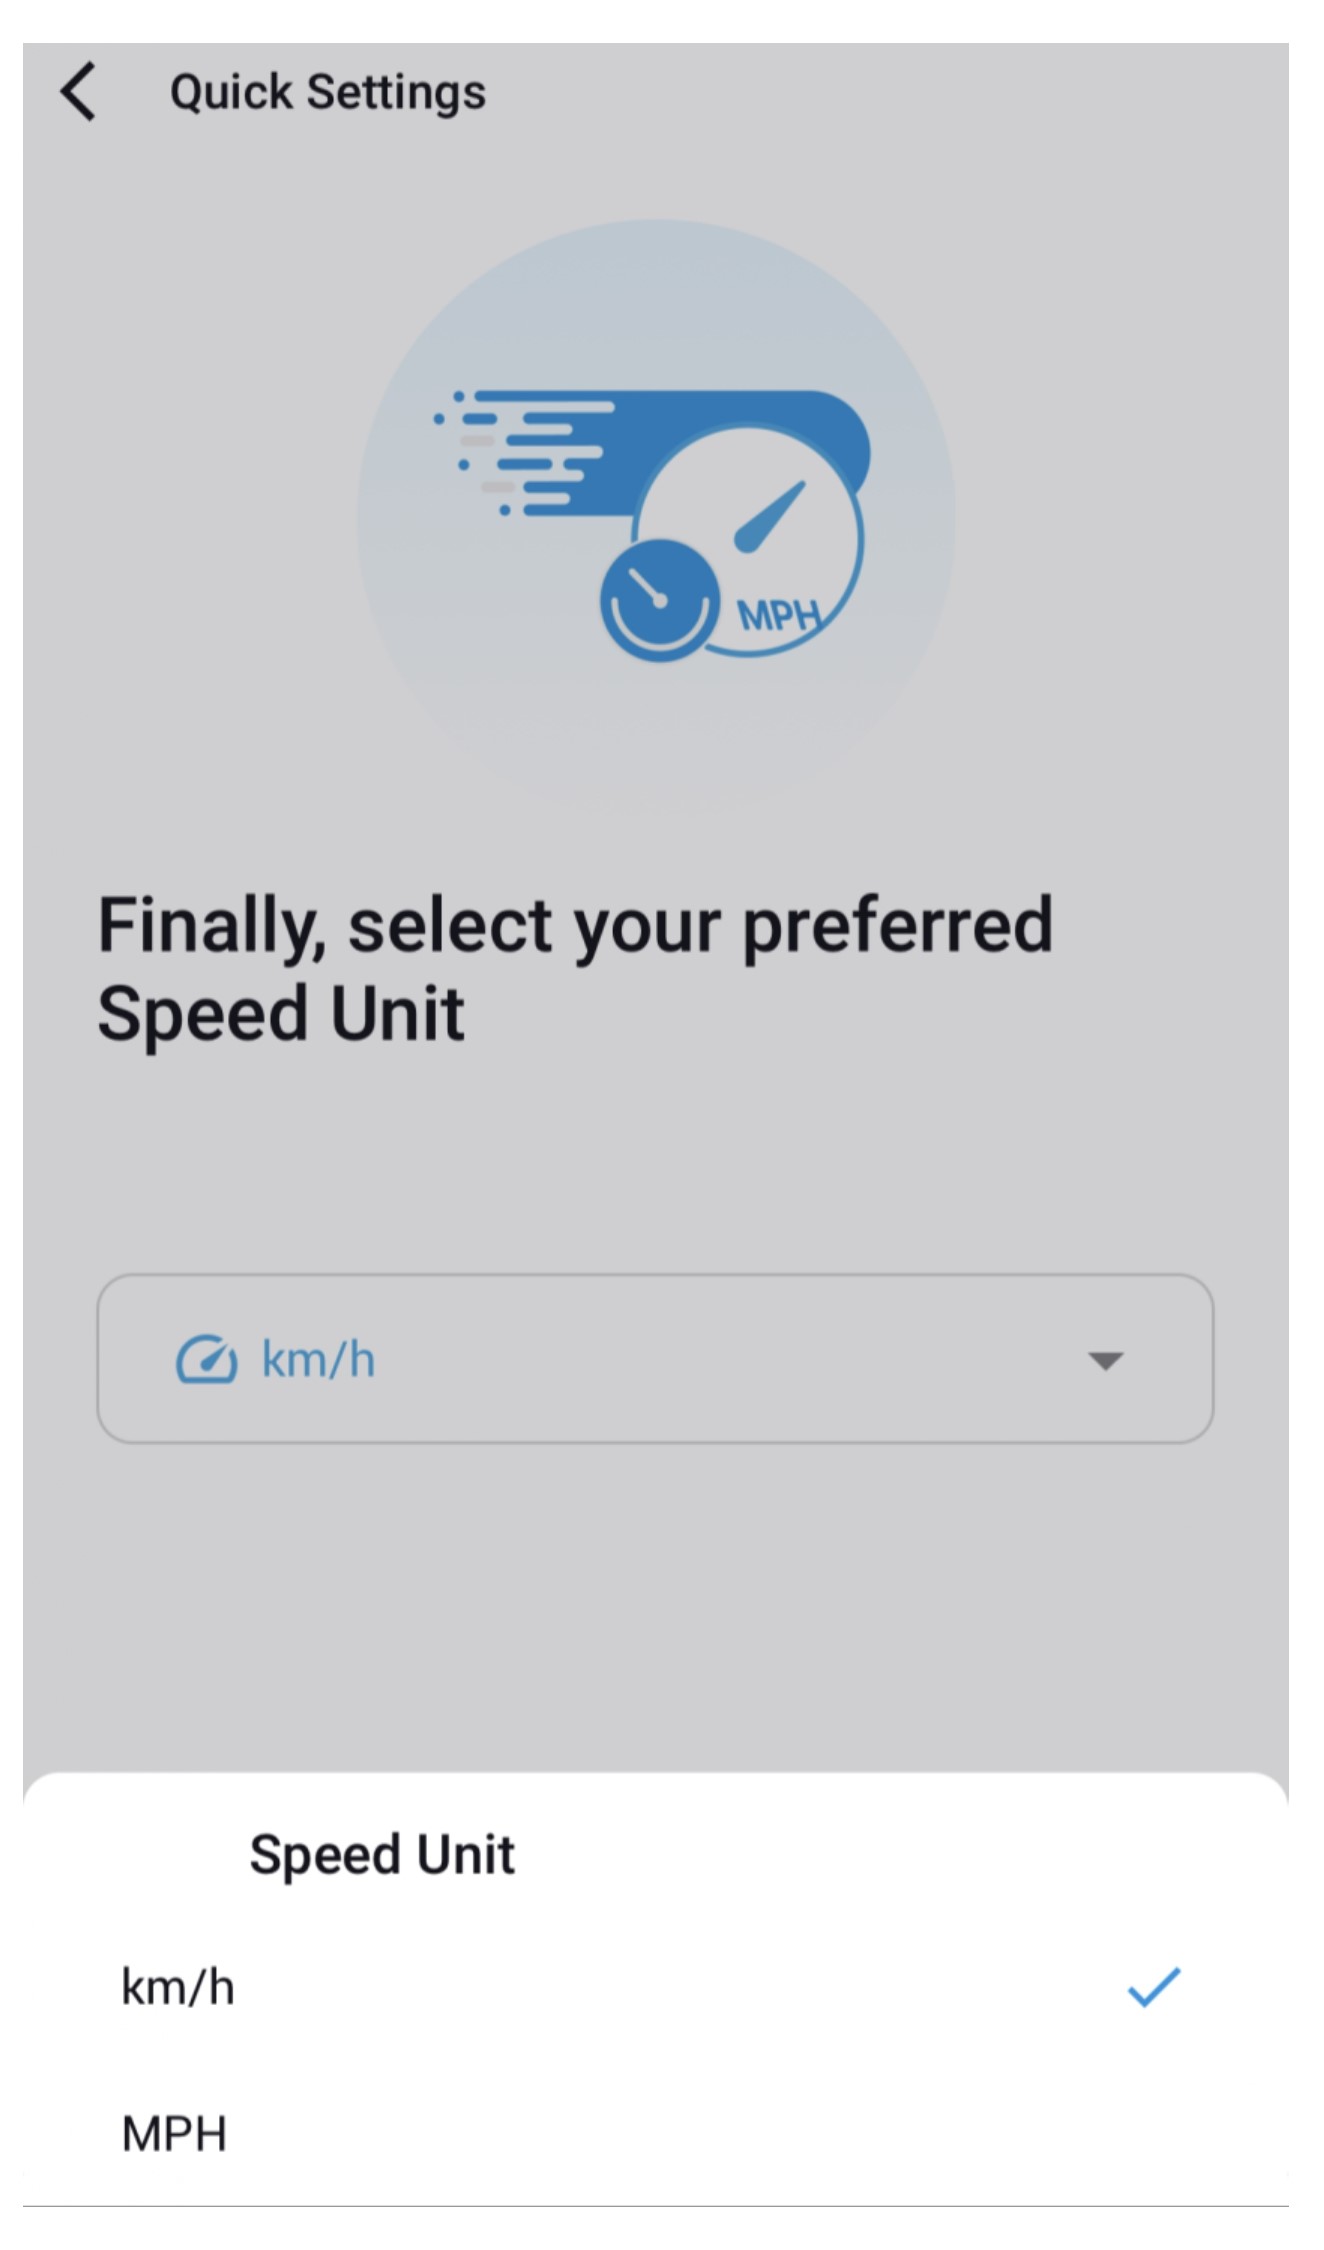
- Quick settings allow user to choose your firmware language, time zone and speed unit.
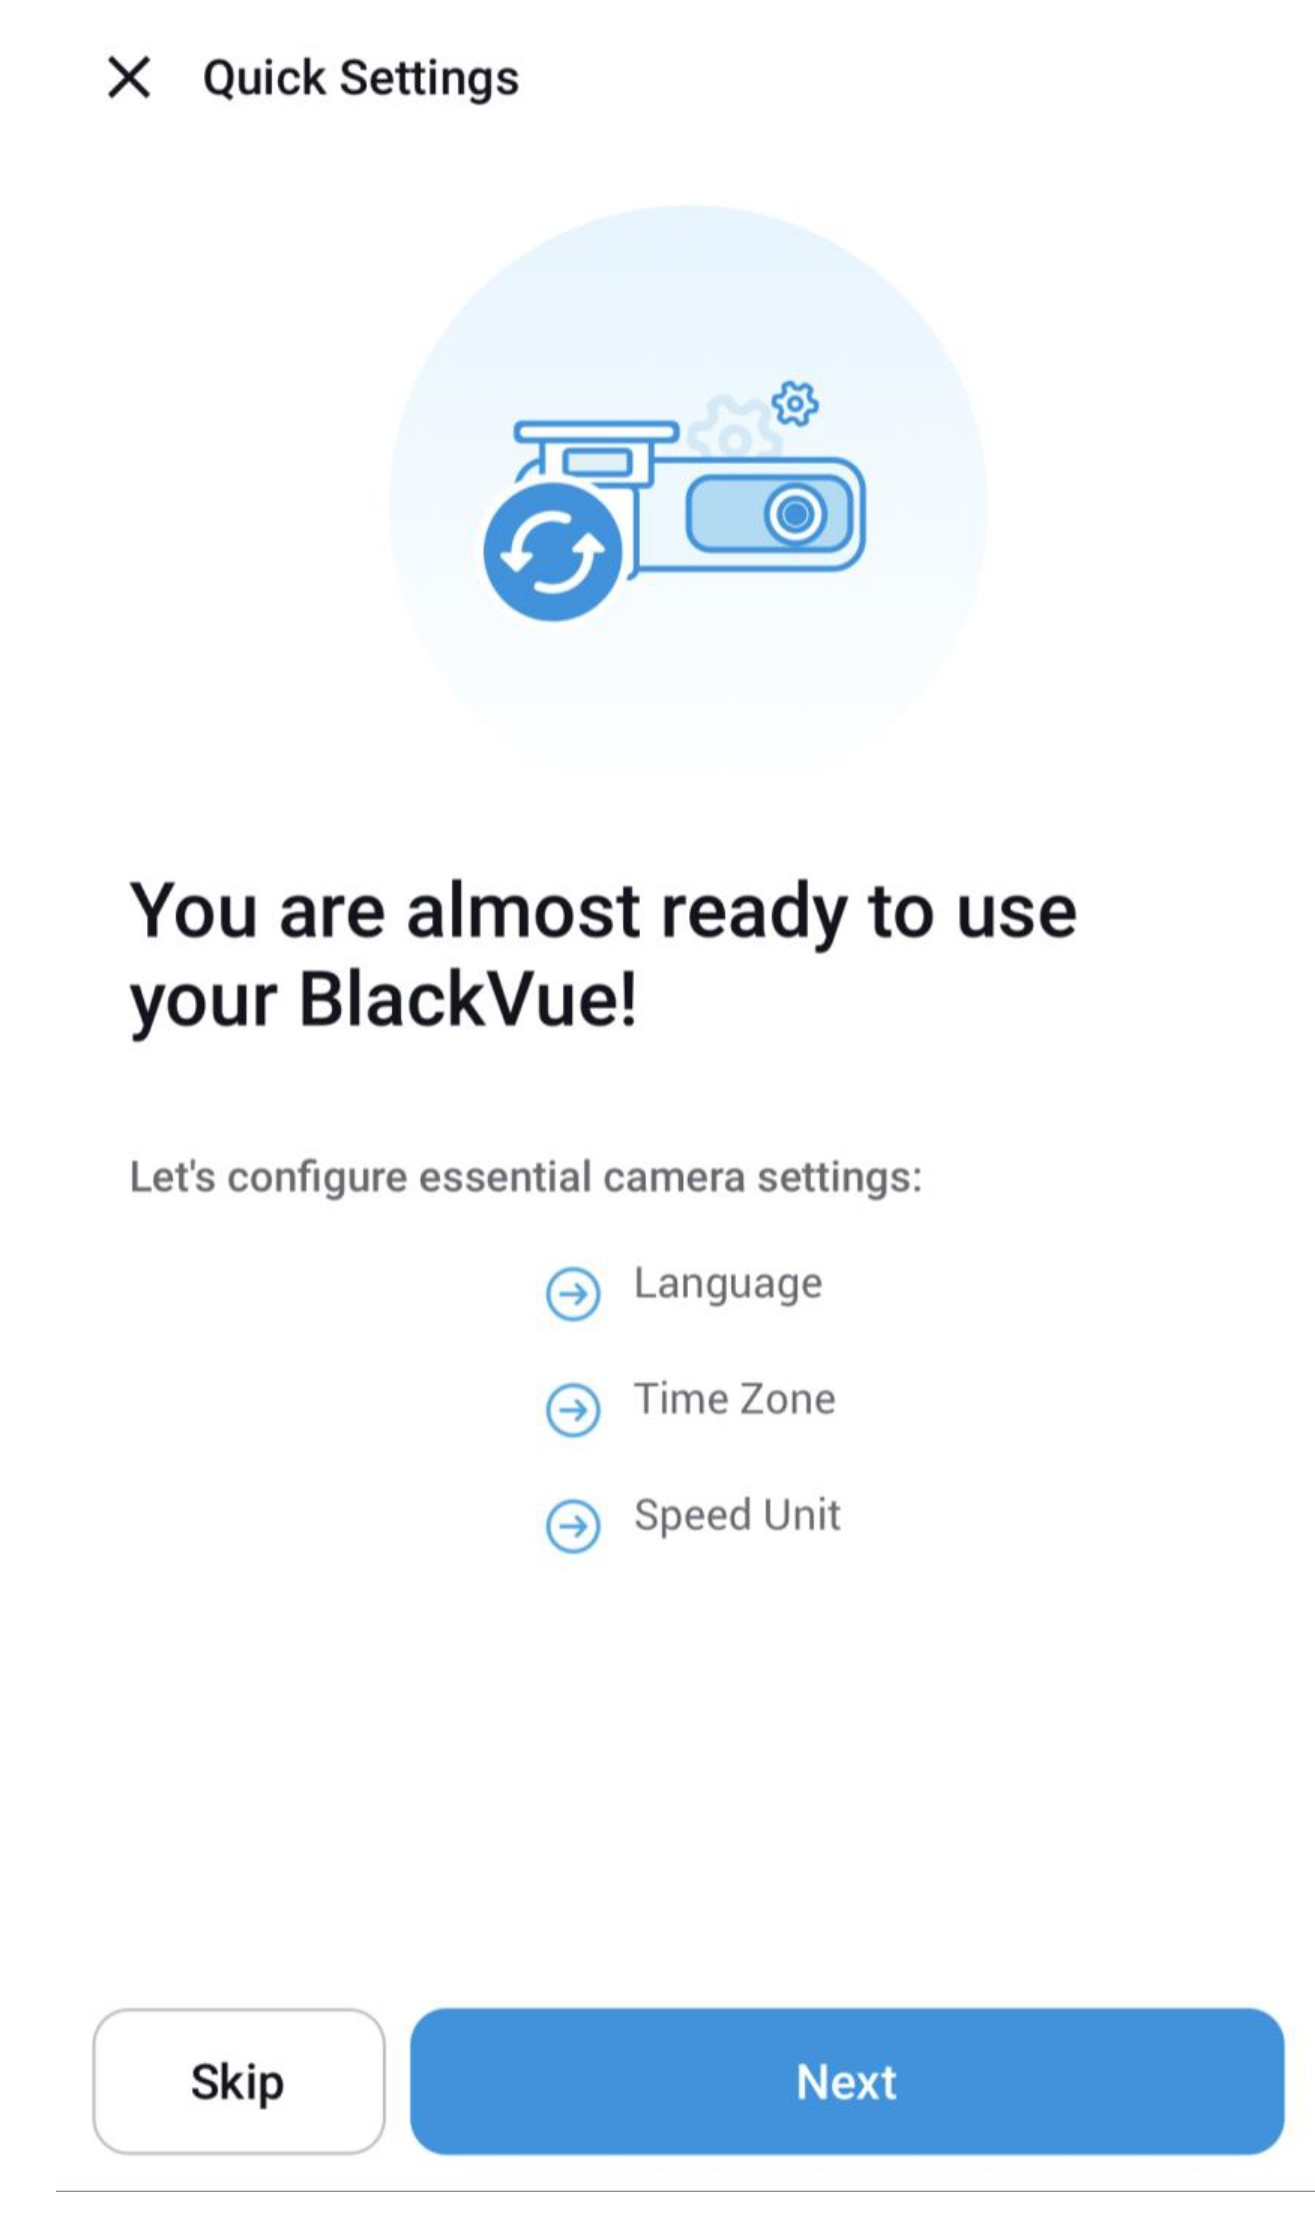
- Select the firmware language for your BlackVue dashcam. Once selected , click next.
- Select a time zone of user location. Click next.
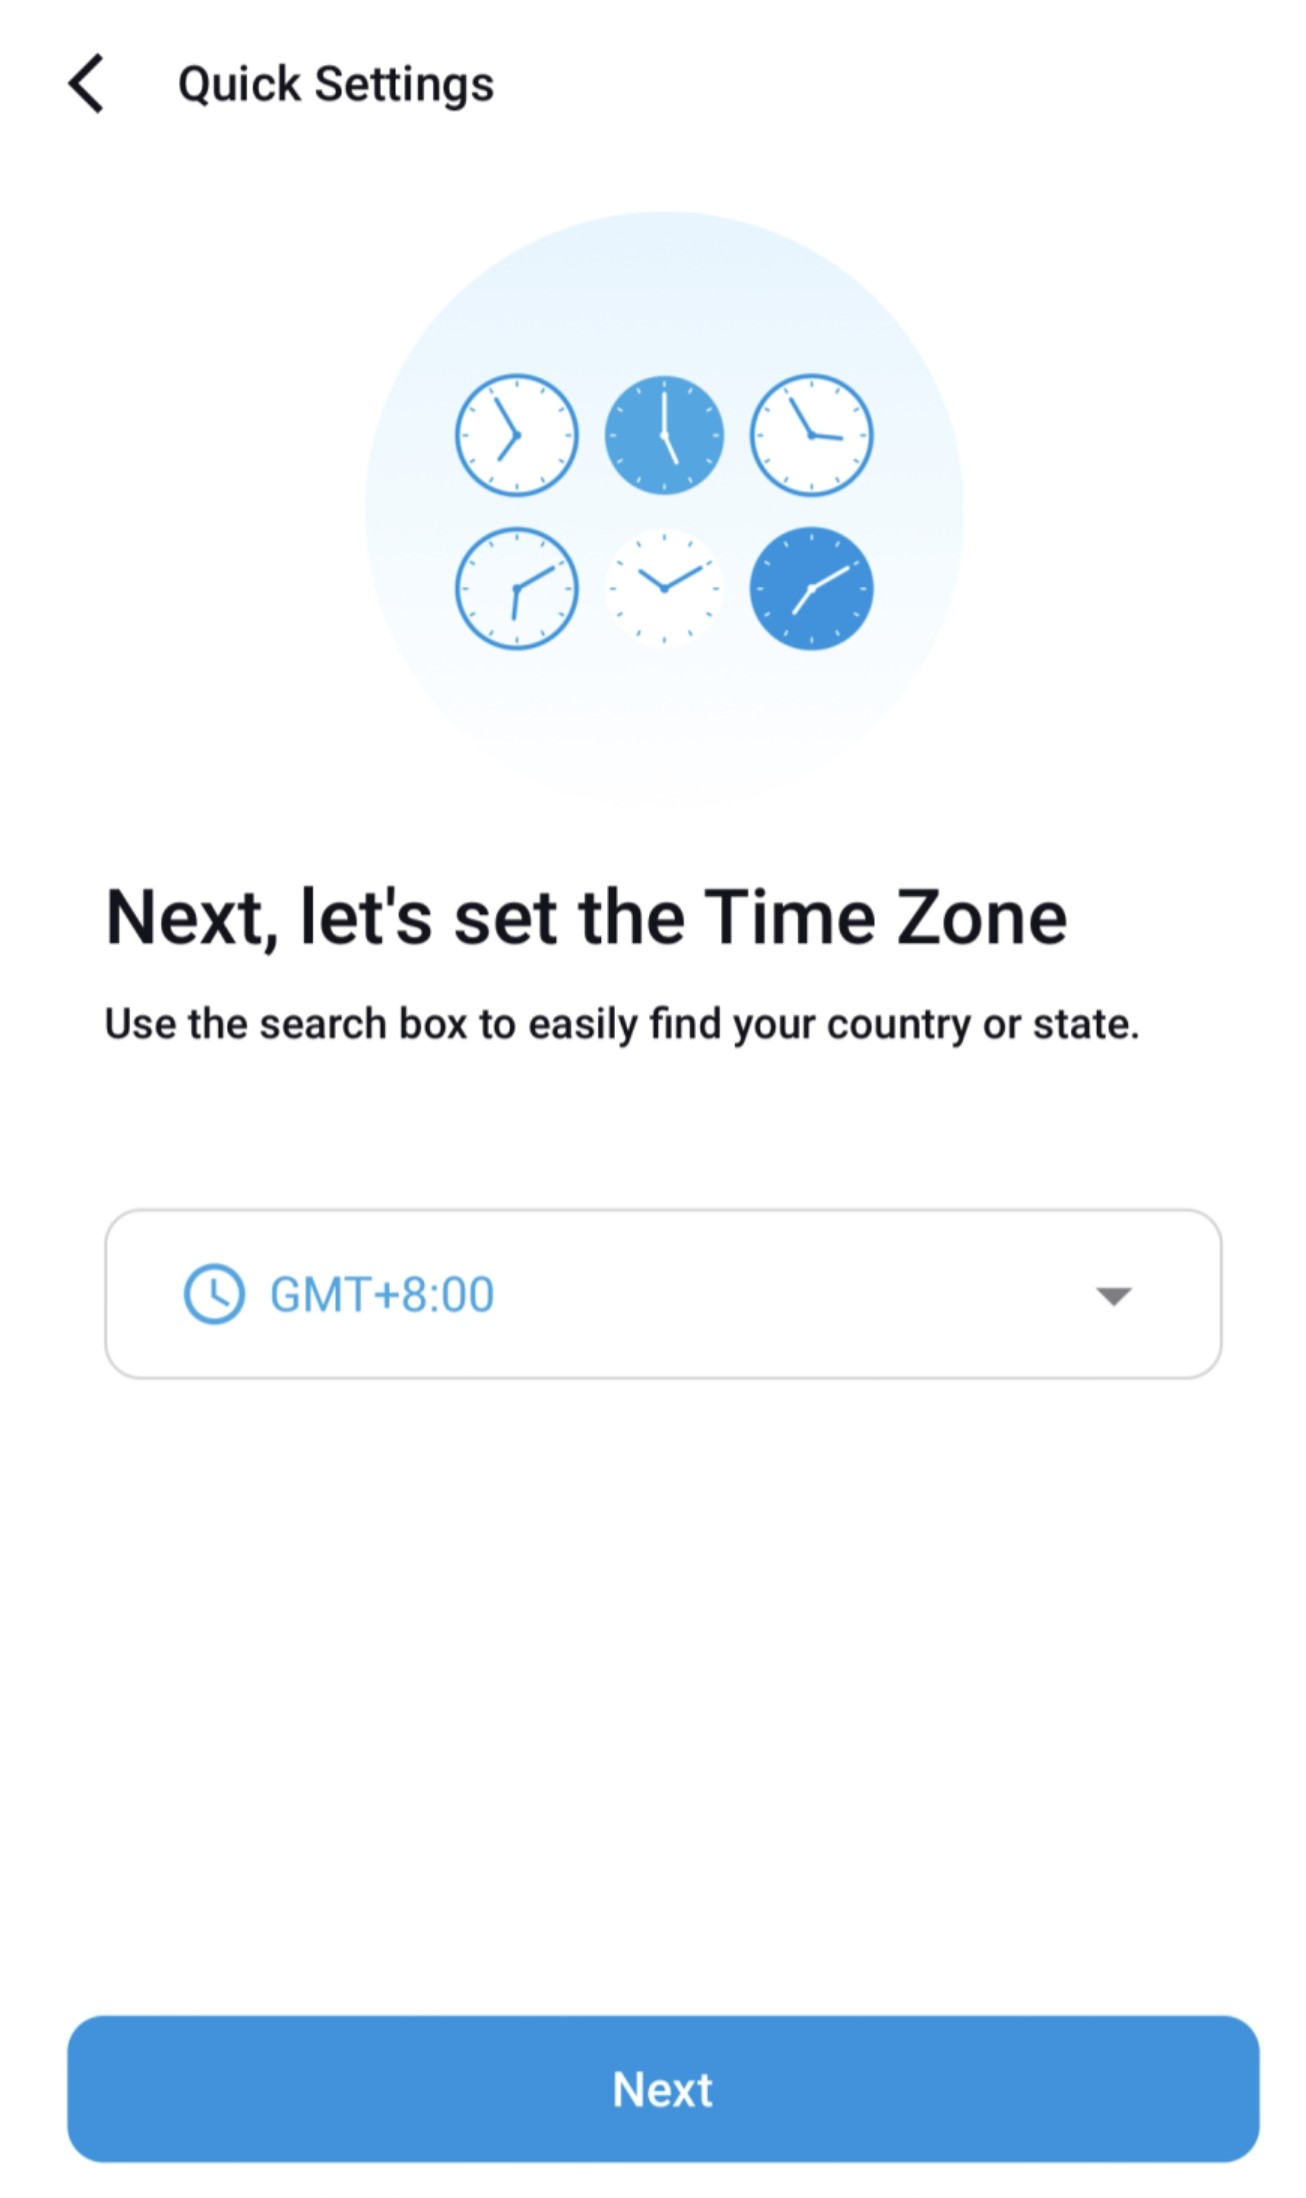
Please note that whenever time zone is setting is changed, the SD card is initialized to be formatted where all the
recorded videos will be deleted - Select the speed unit of your preference. Click next.
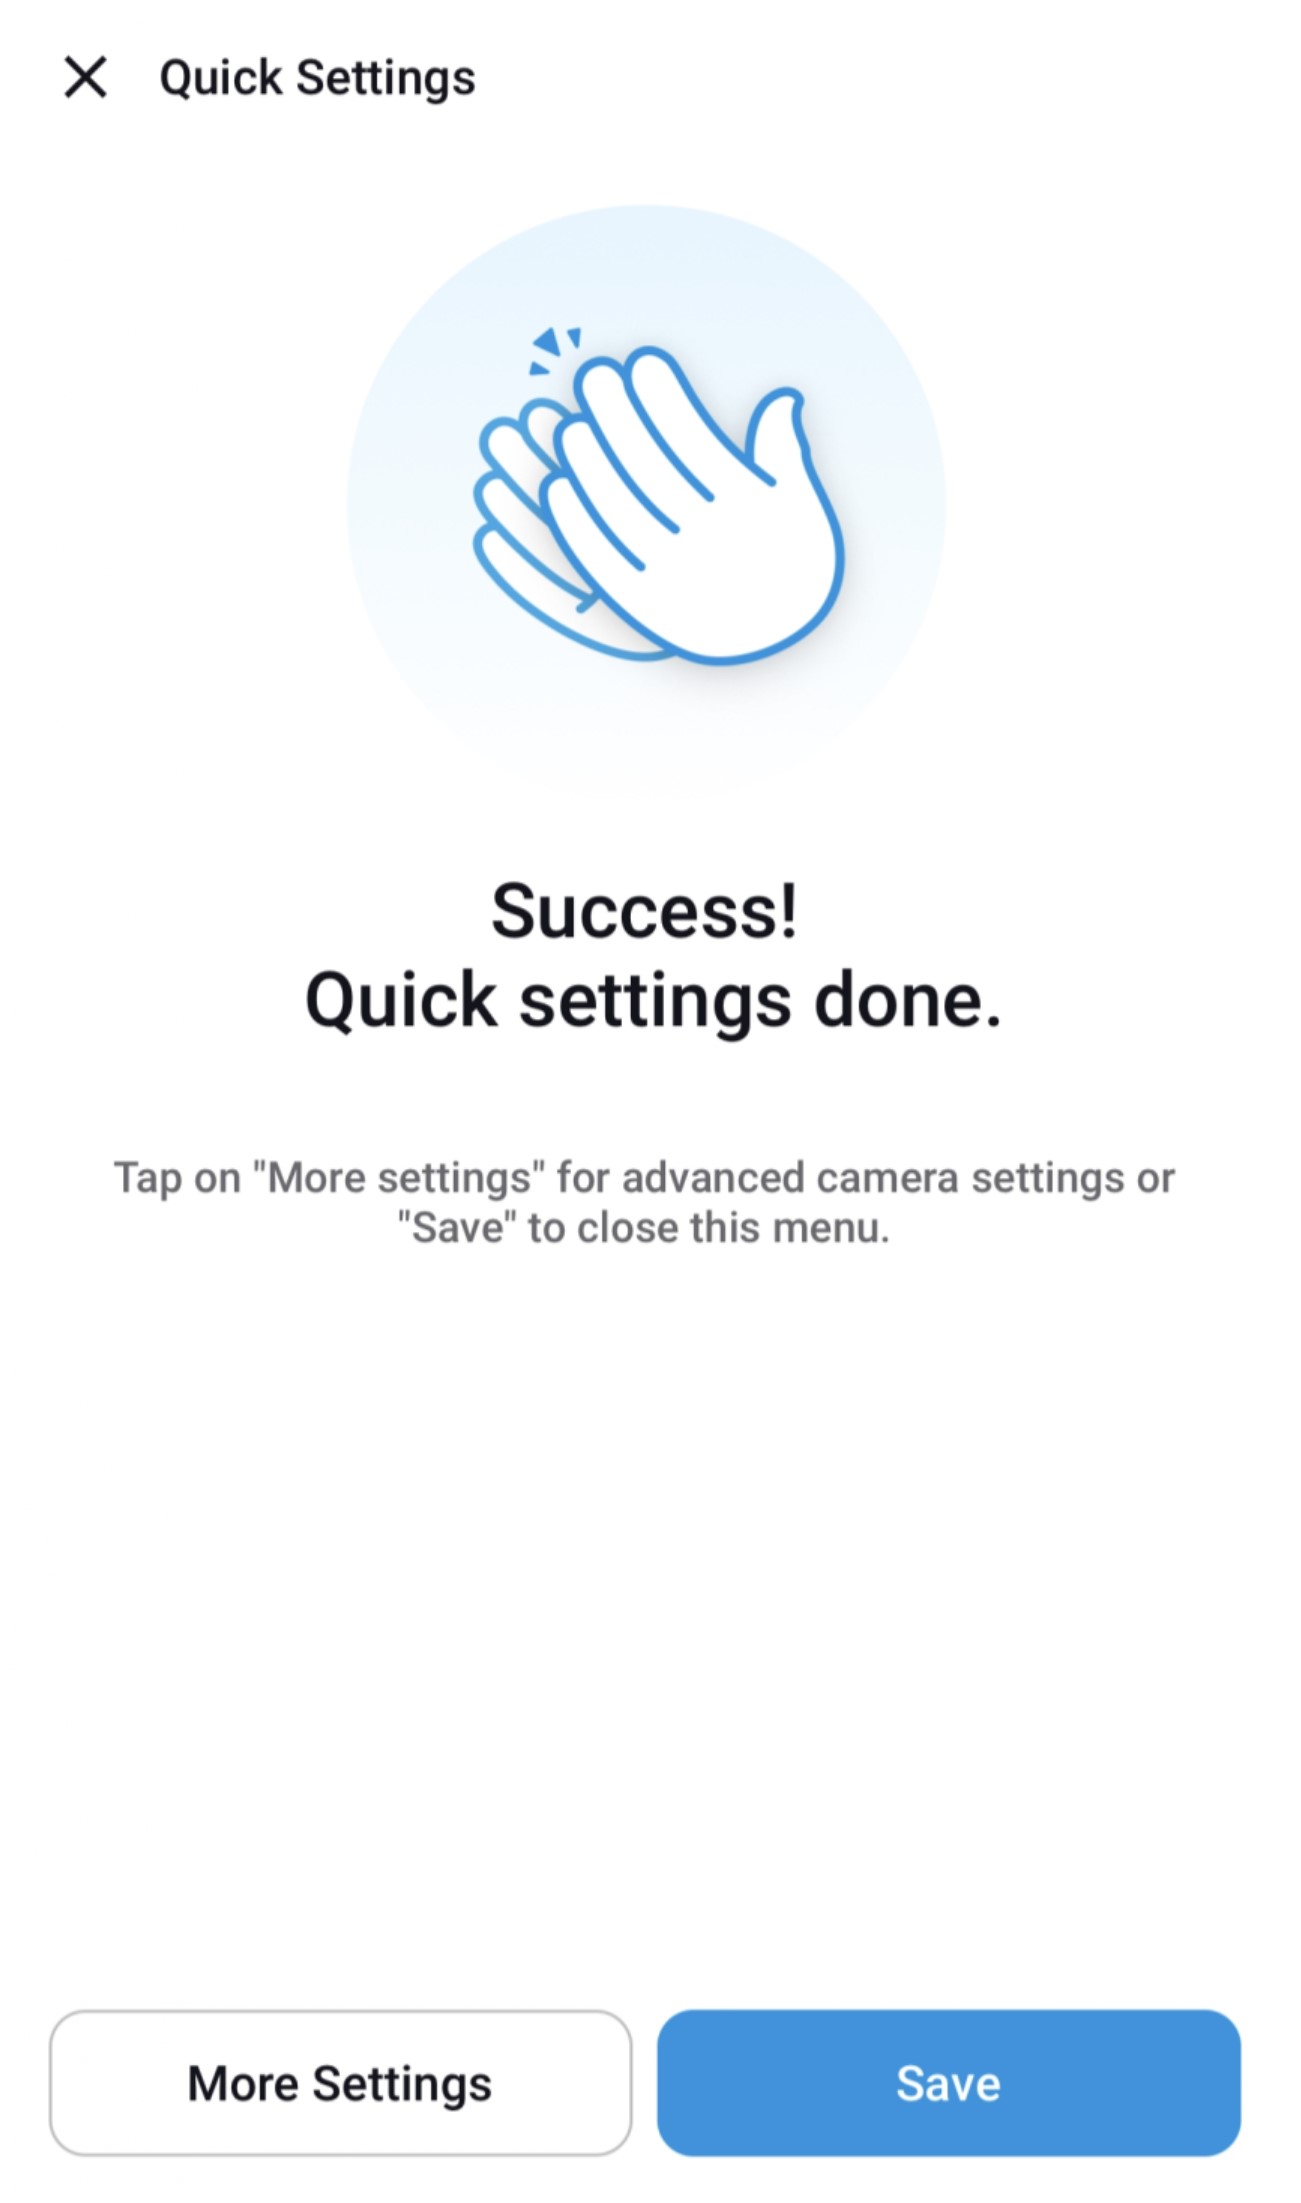
- BlackVue dashcam installation is complete.
Press "More settings" to access all of the oyher settings or press "Save".