BlackVue Smart Phone App Dashcam - Version (3.59 or Newer)
Table of Contents
1. BLACKVUE APPS VERSION 3.59
1.1 UPDATES
For the new updated version BlackVue Apps 3.59 (1 April 2025),
- To ensure a seamless and secure user experience, a BlackVue account will be required to access your camera. This change allows for better integration with connected services and personalized app functionality.
- While the initial creation of a BlackVue account is required, the app won’t require an internet connection once you are logged in. As long as you do not log out from the app, you will be able to use it without internet connection and connect locally to your dash cam anytime.
- A critical log-out error has been resolved, ensuring your login status remains active and consistent.
- Updated user interface (UI)
- Some features may require app and firmware updates to function properly. Ensure you update to the latest version when the rollout begins at the end of the month for the best experience.
Removed Features
To streamline the app experience, certain features will be removed:
- The Event Map feature will be discontinued.
- The Non-login Wi-Fi Mode will no longer be available.
- Any cameras previously registered in Wi-Fi Mode will automatically be added to your account once you log in.
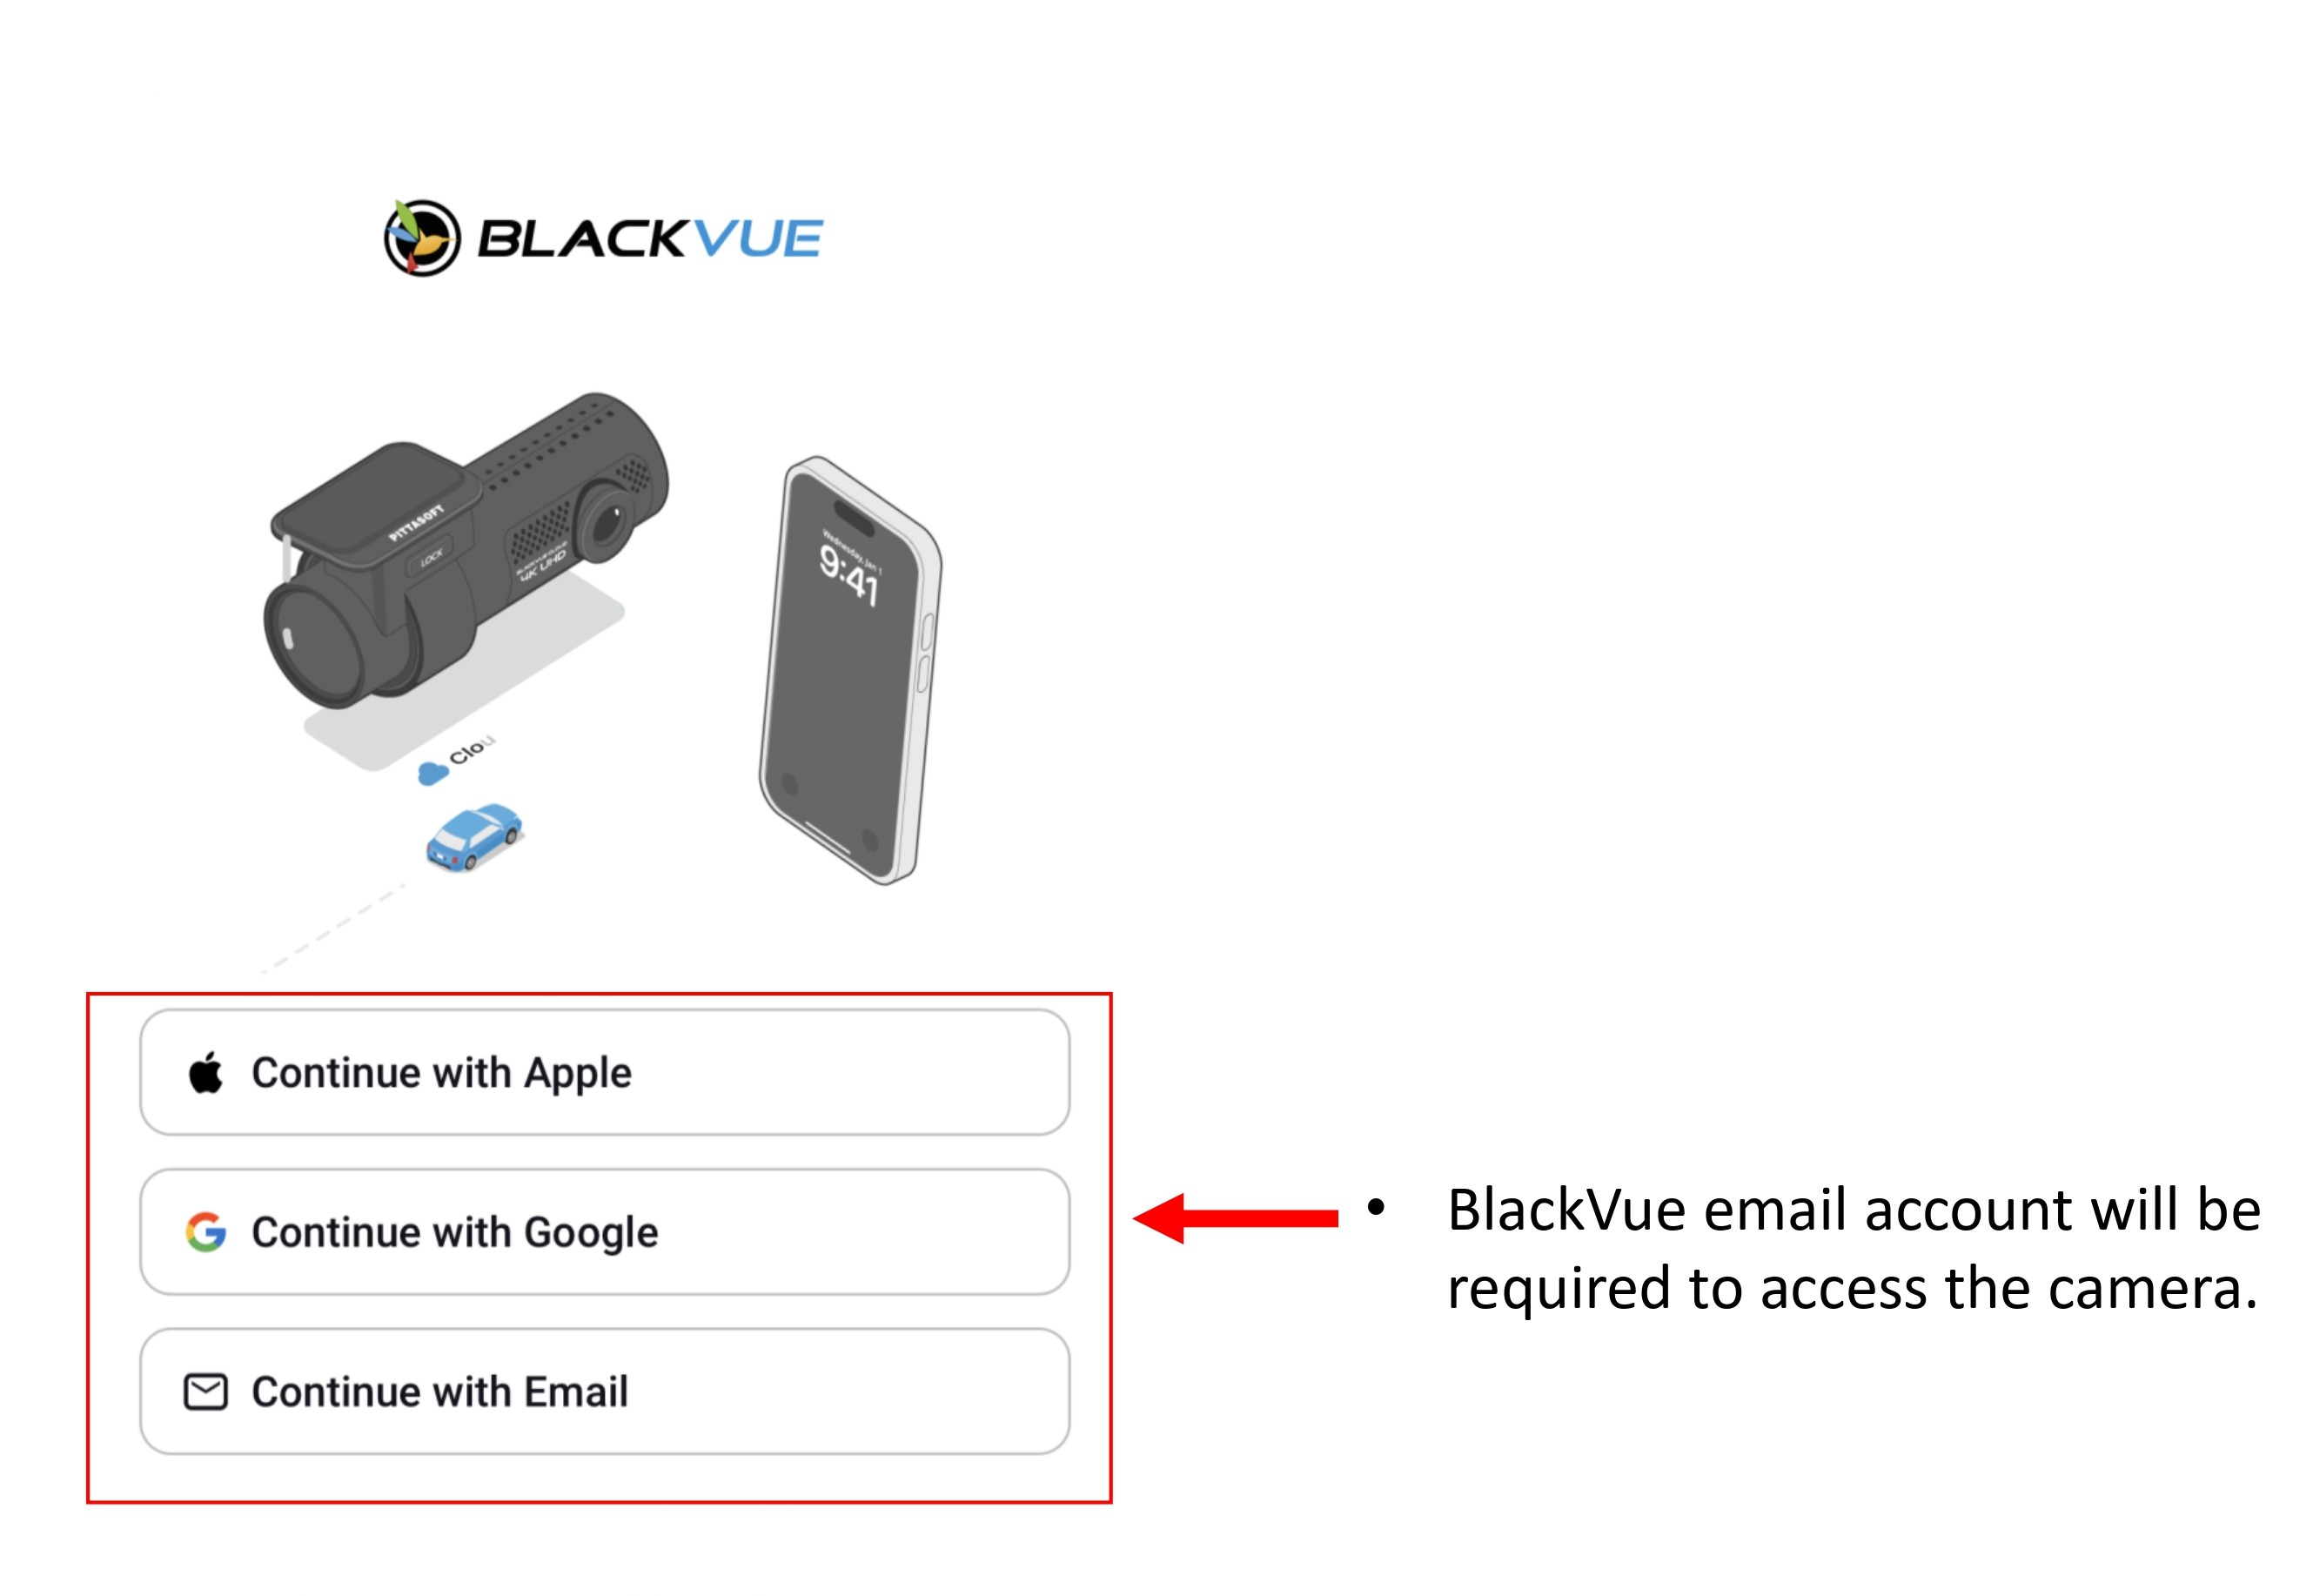
1.2 LOG IN WITH AN ACCOUNT
1.2.1 Log In Using Apple Account
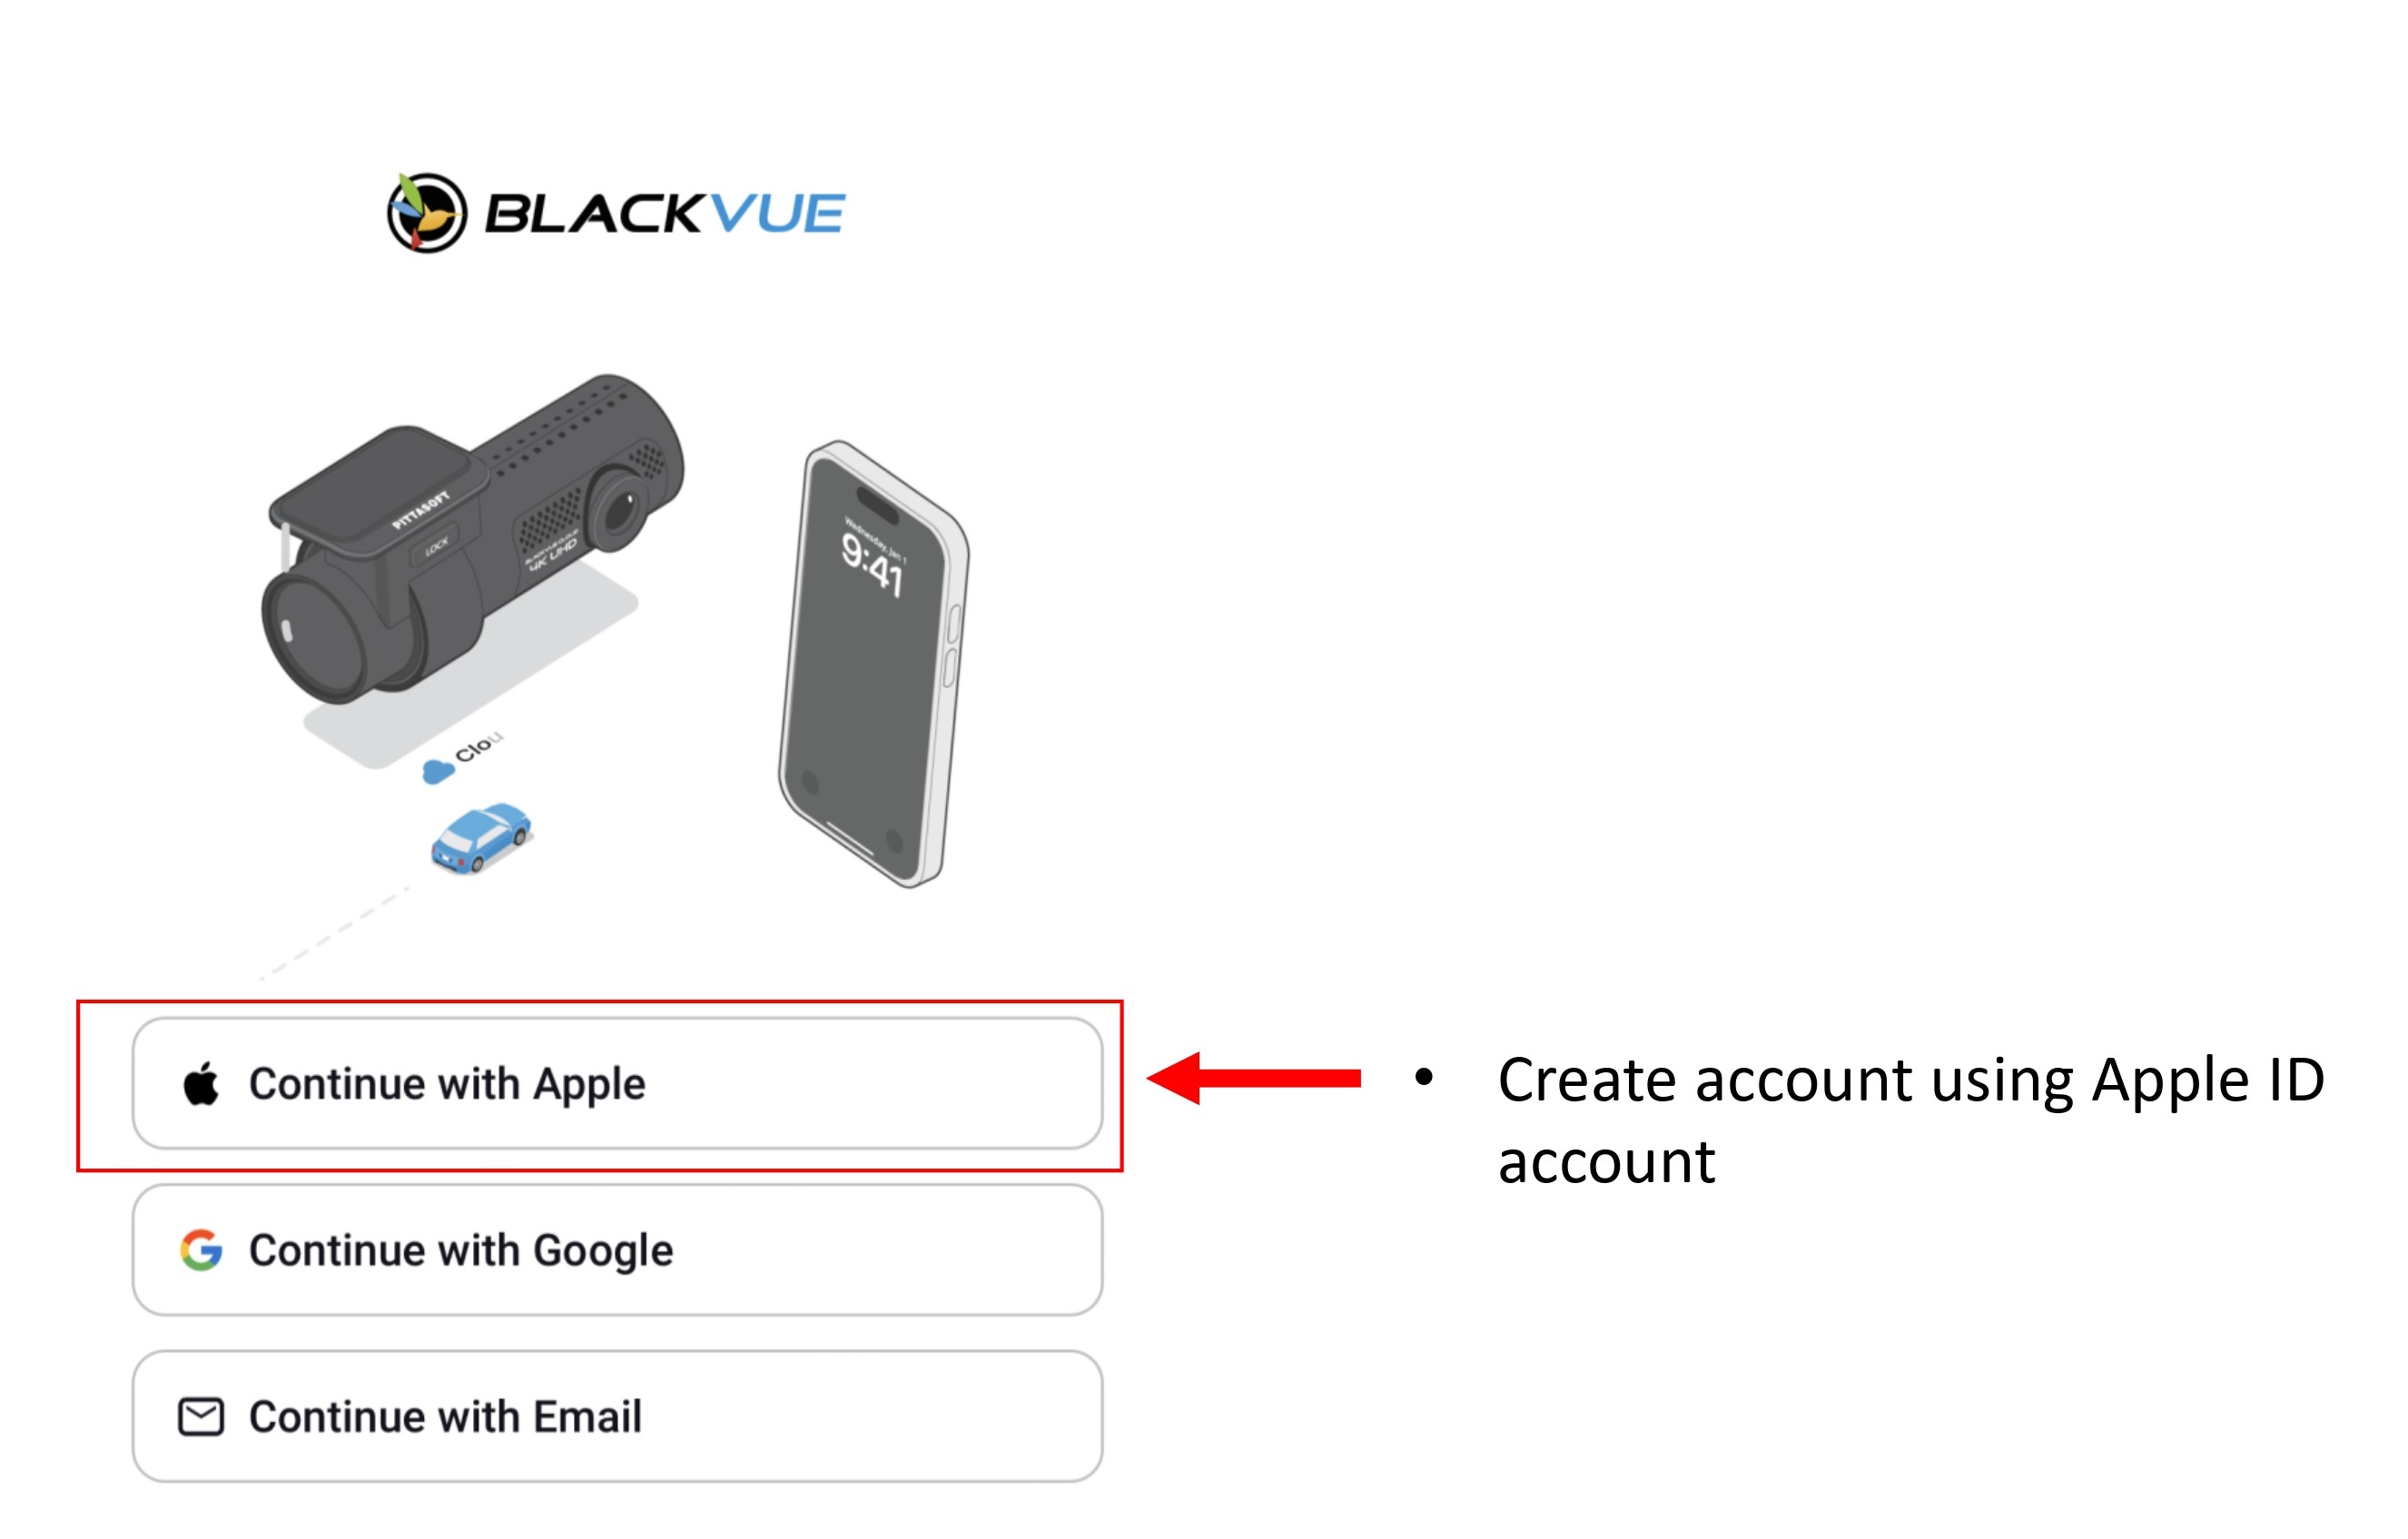
-
Click on "Continue with Apple".
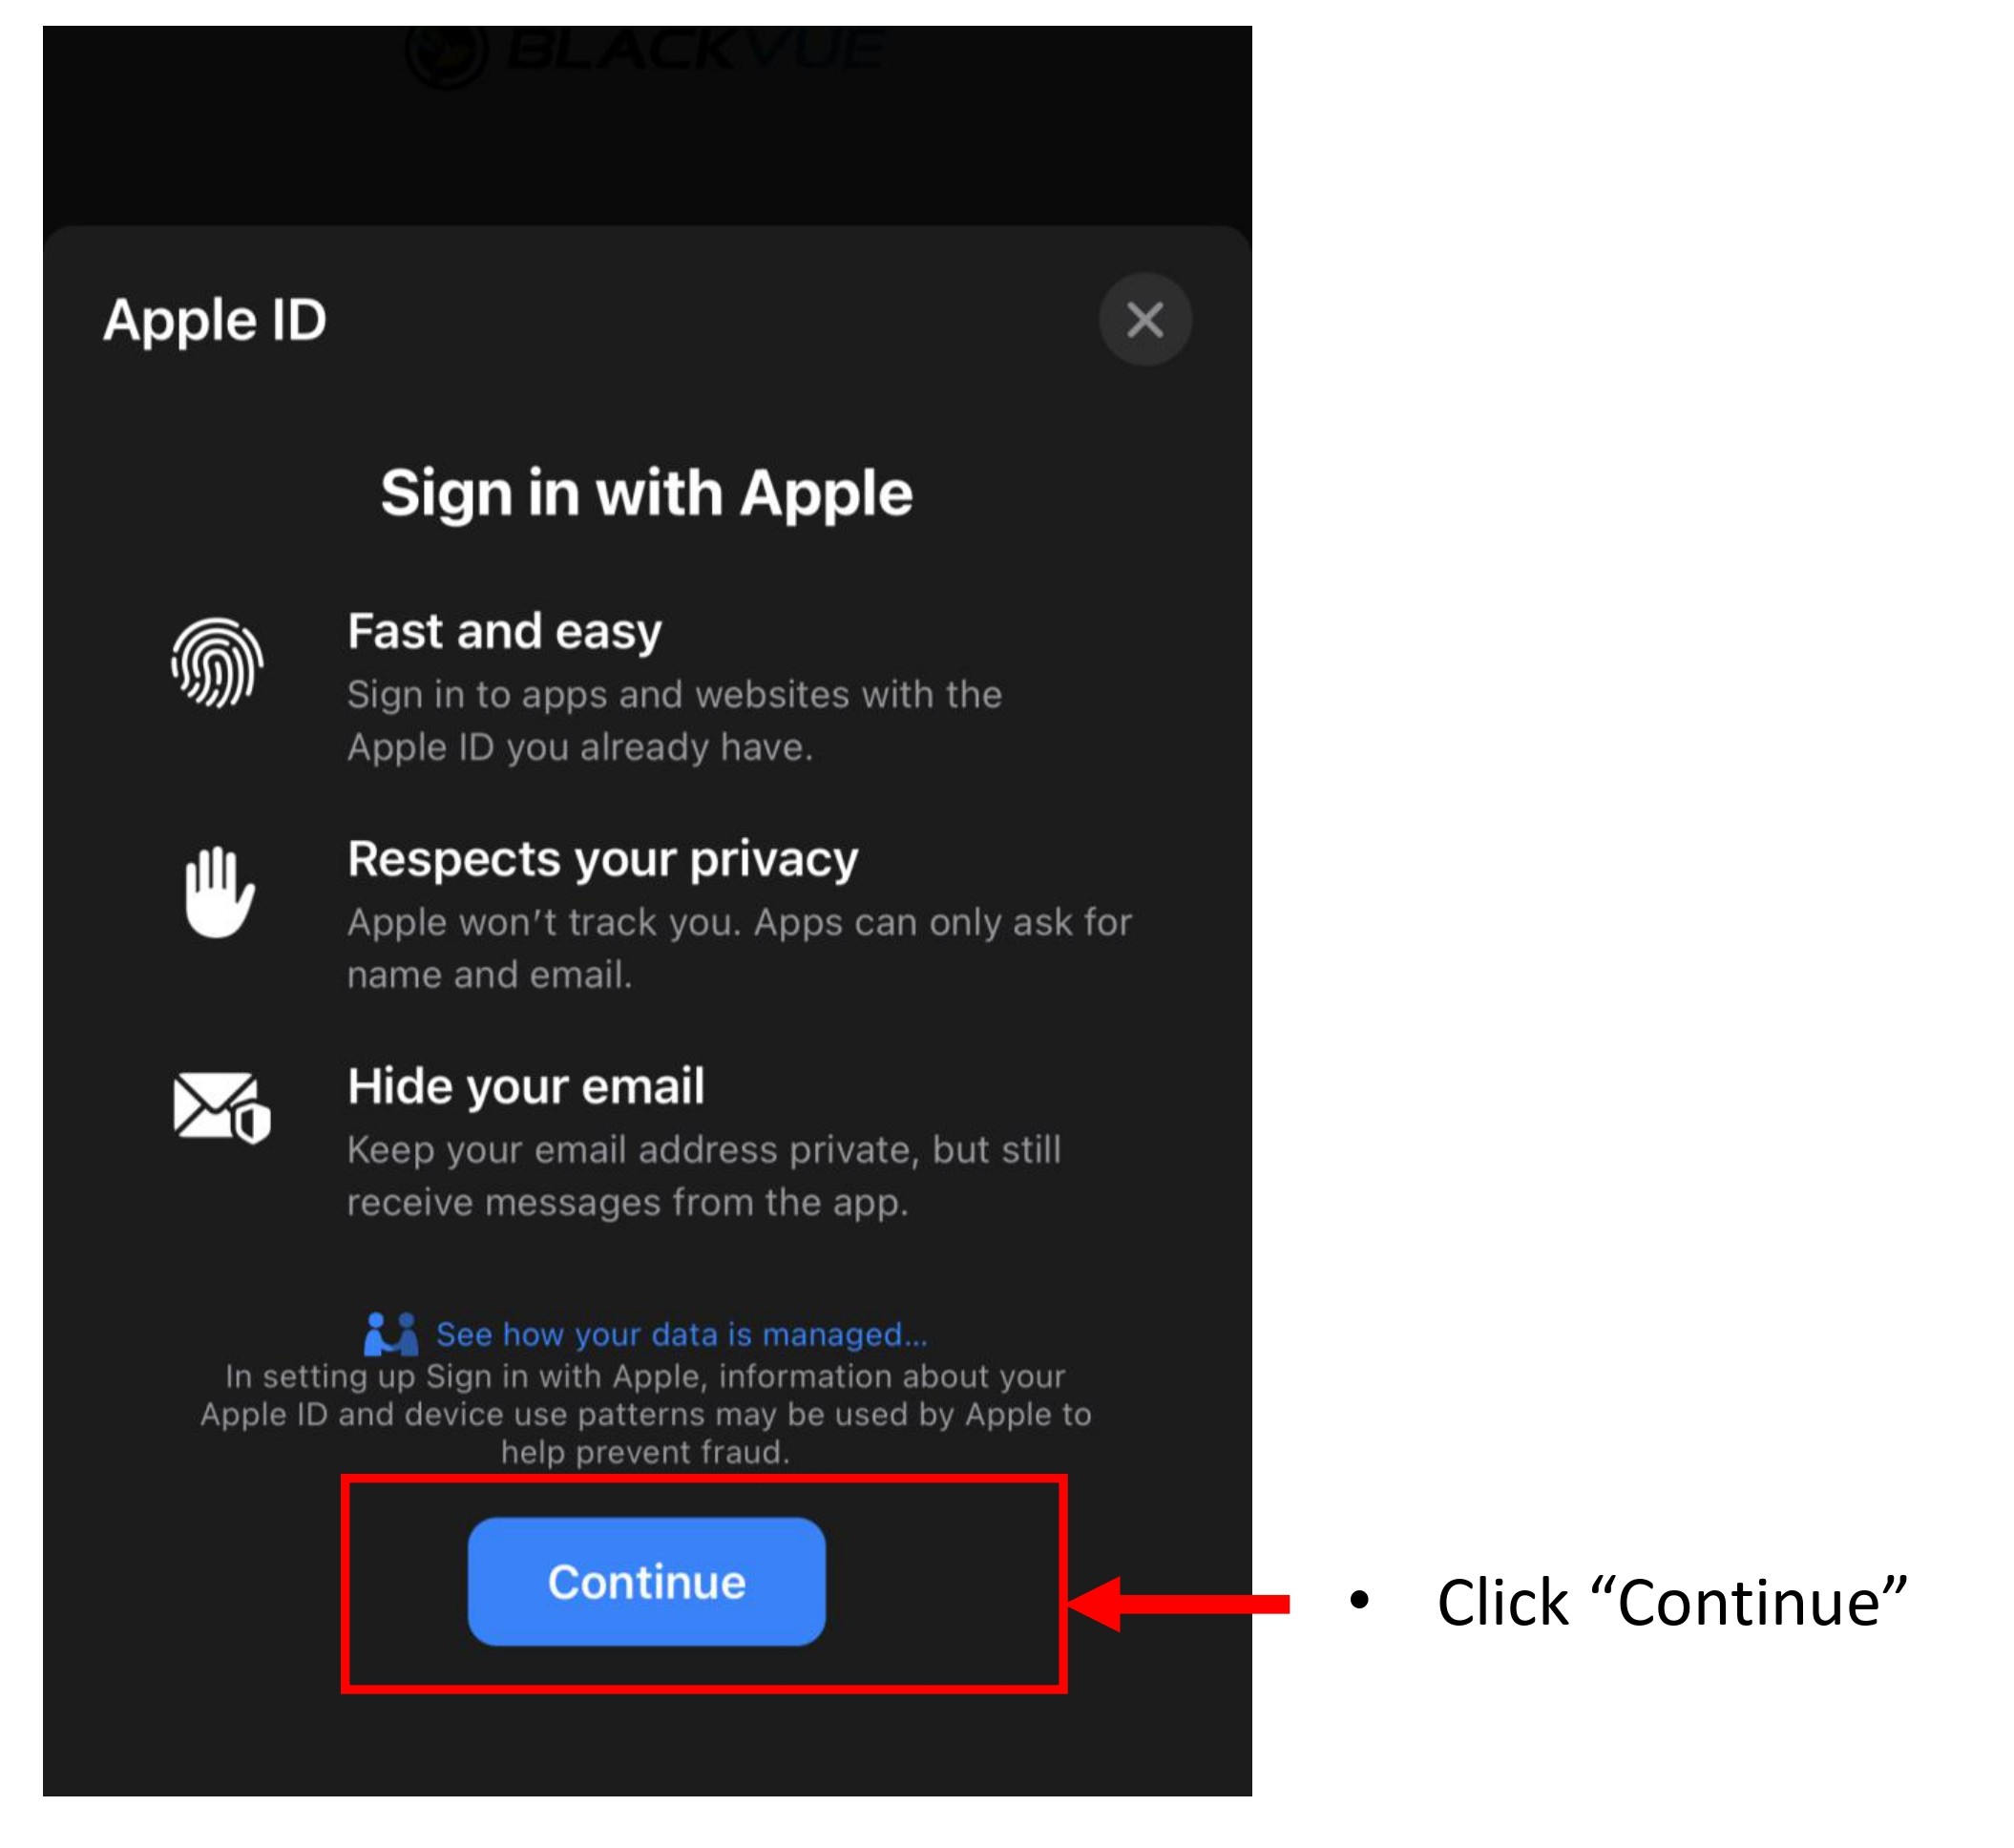
-
Click "Continue"
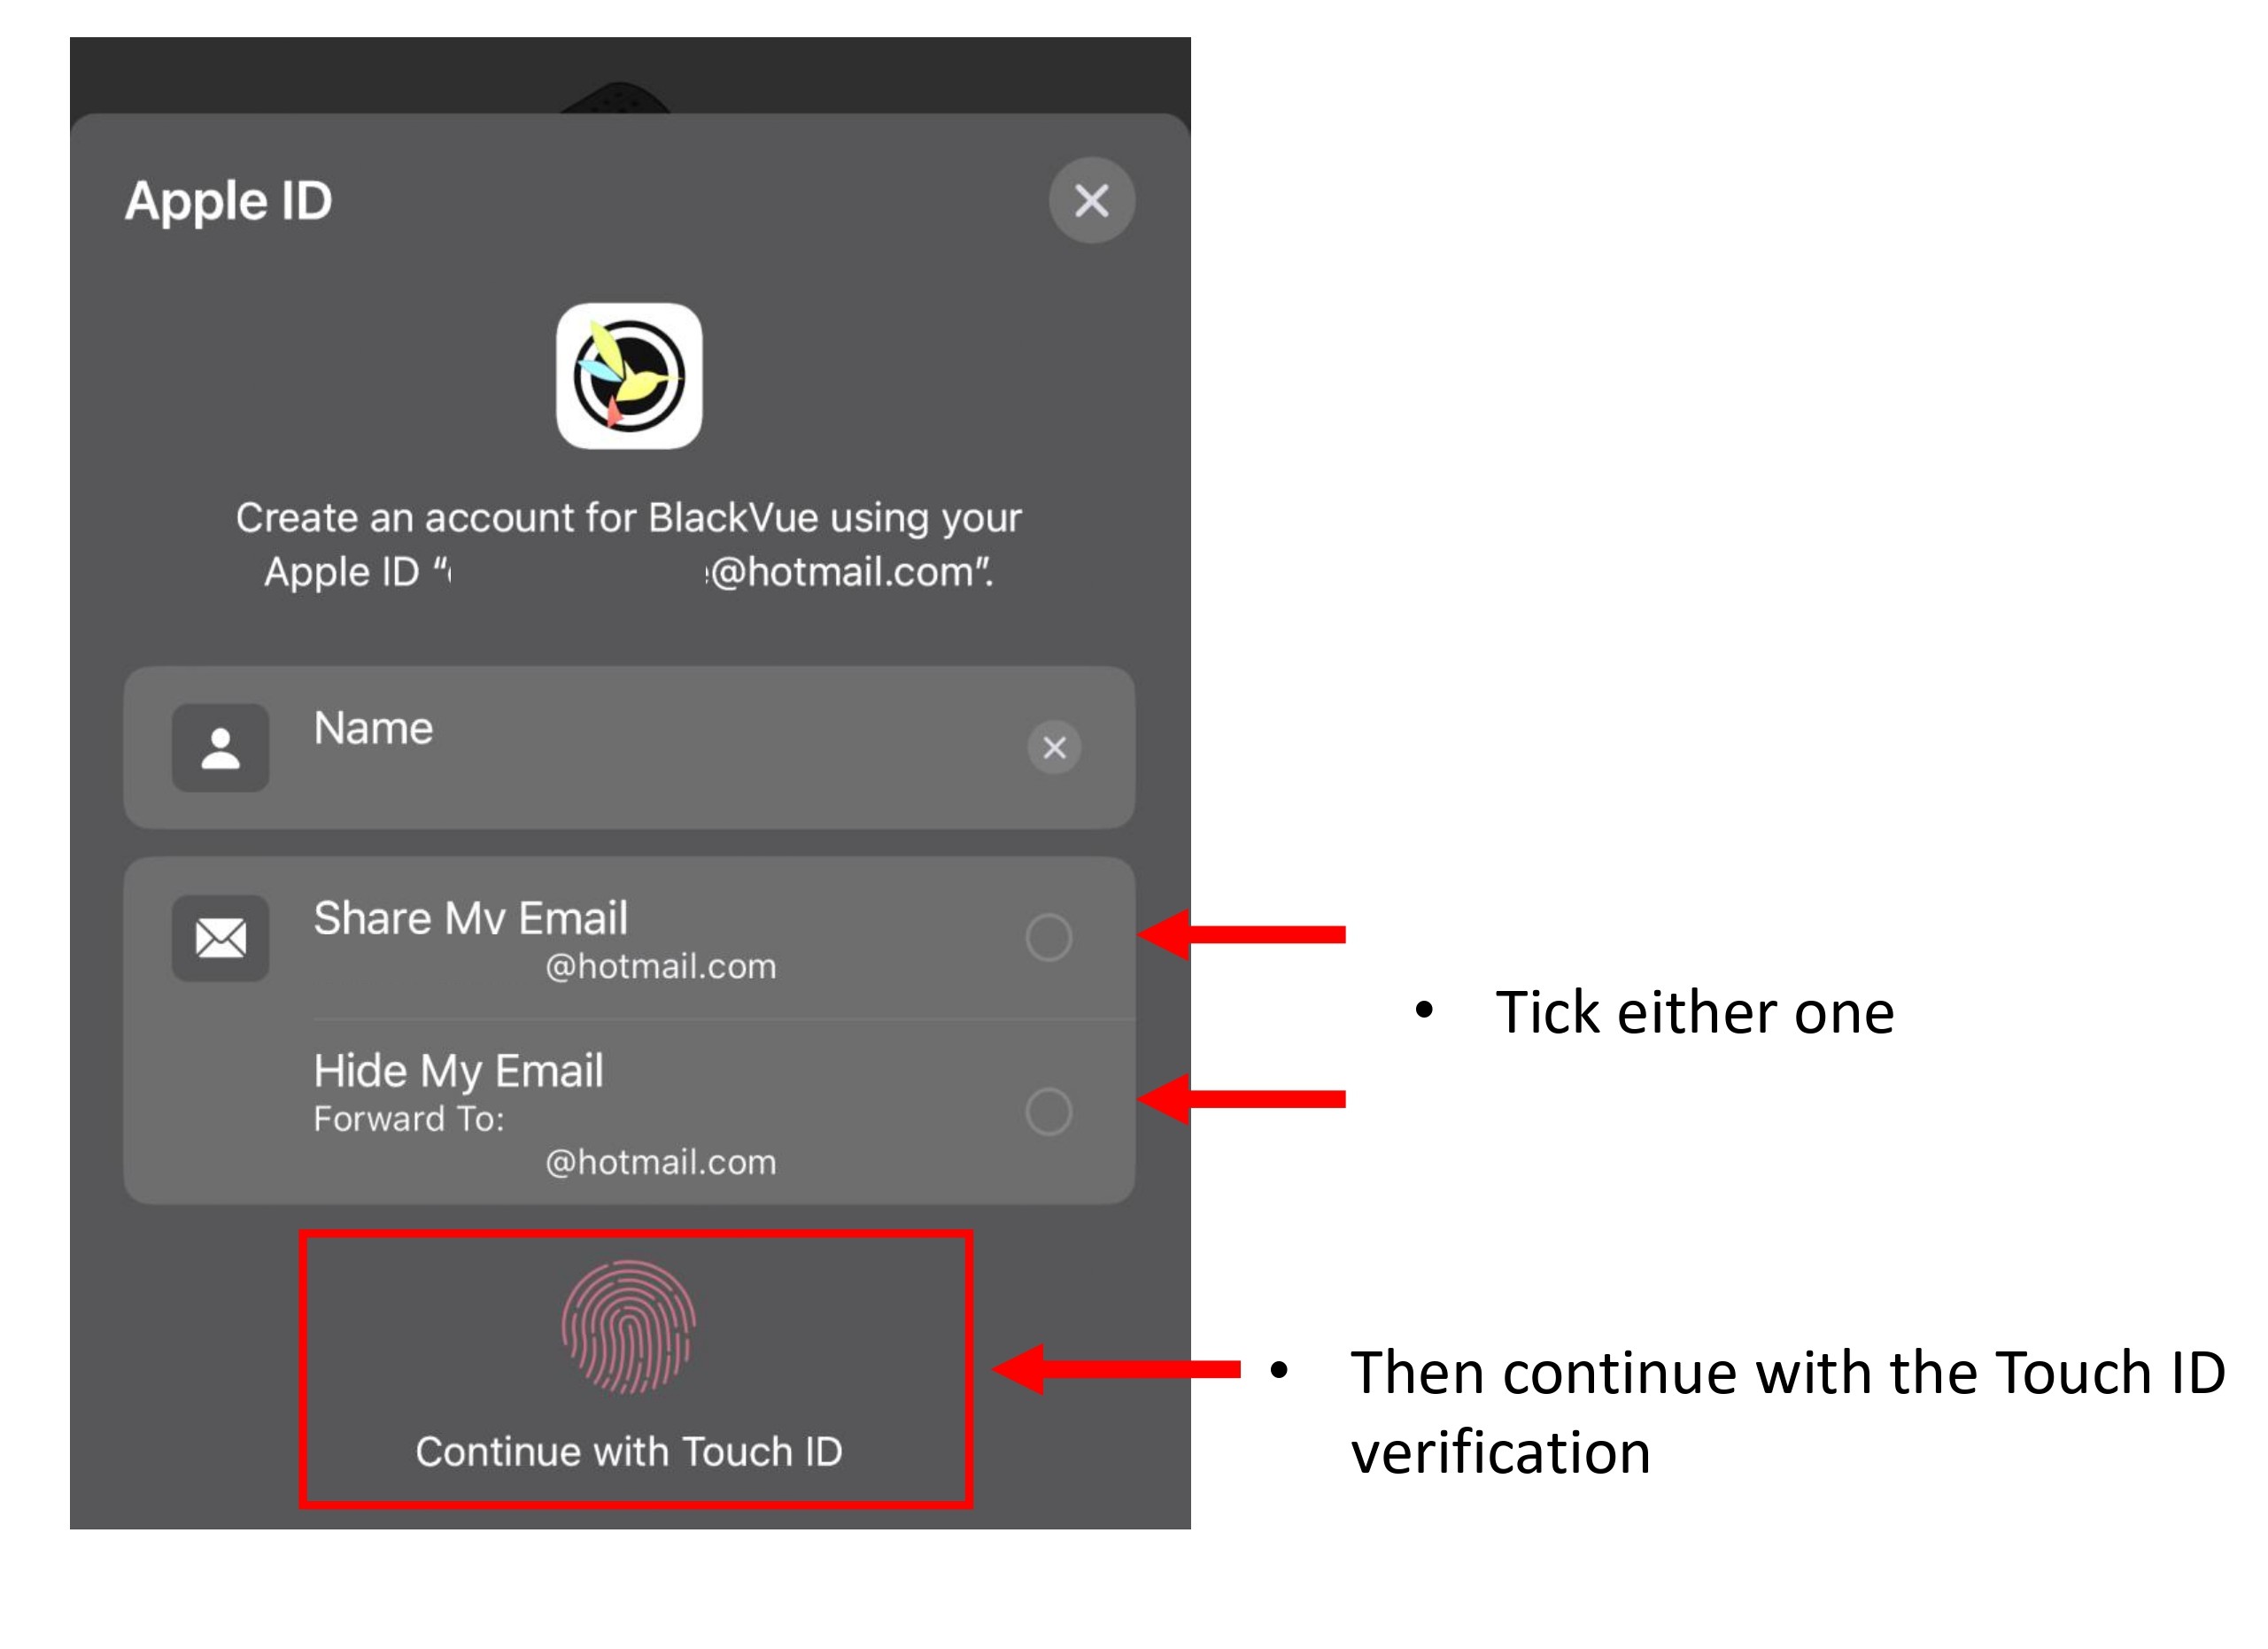
-
Choose the email to be use for BlackVue Account creation then continue with the verification.
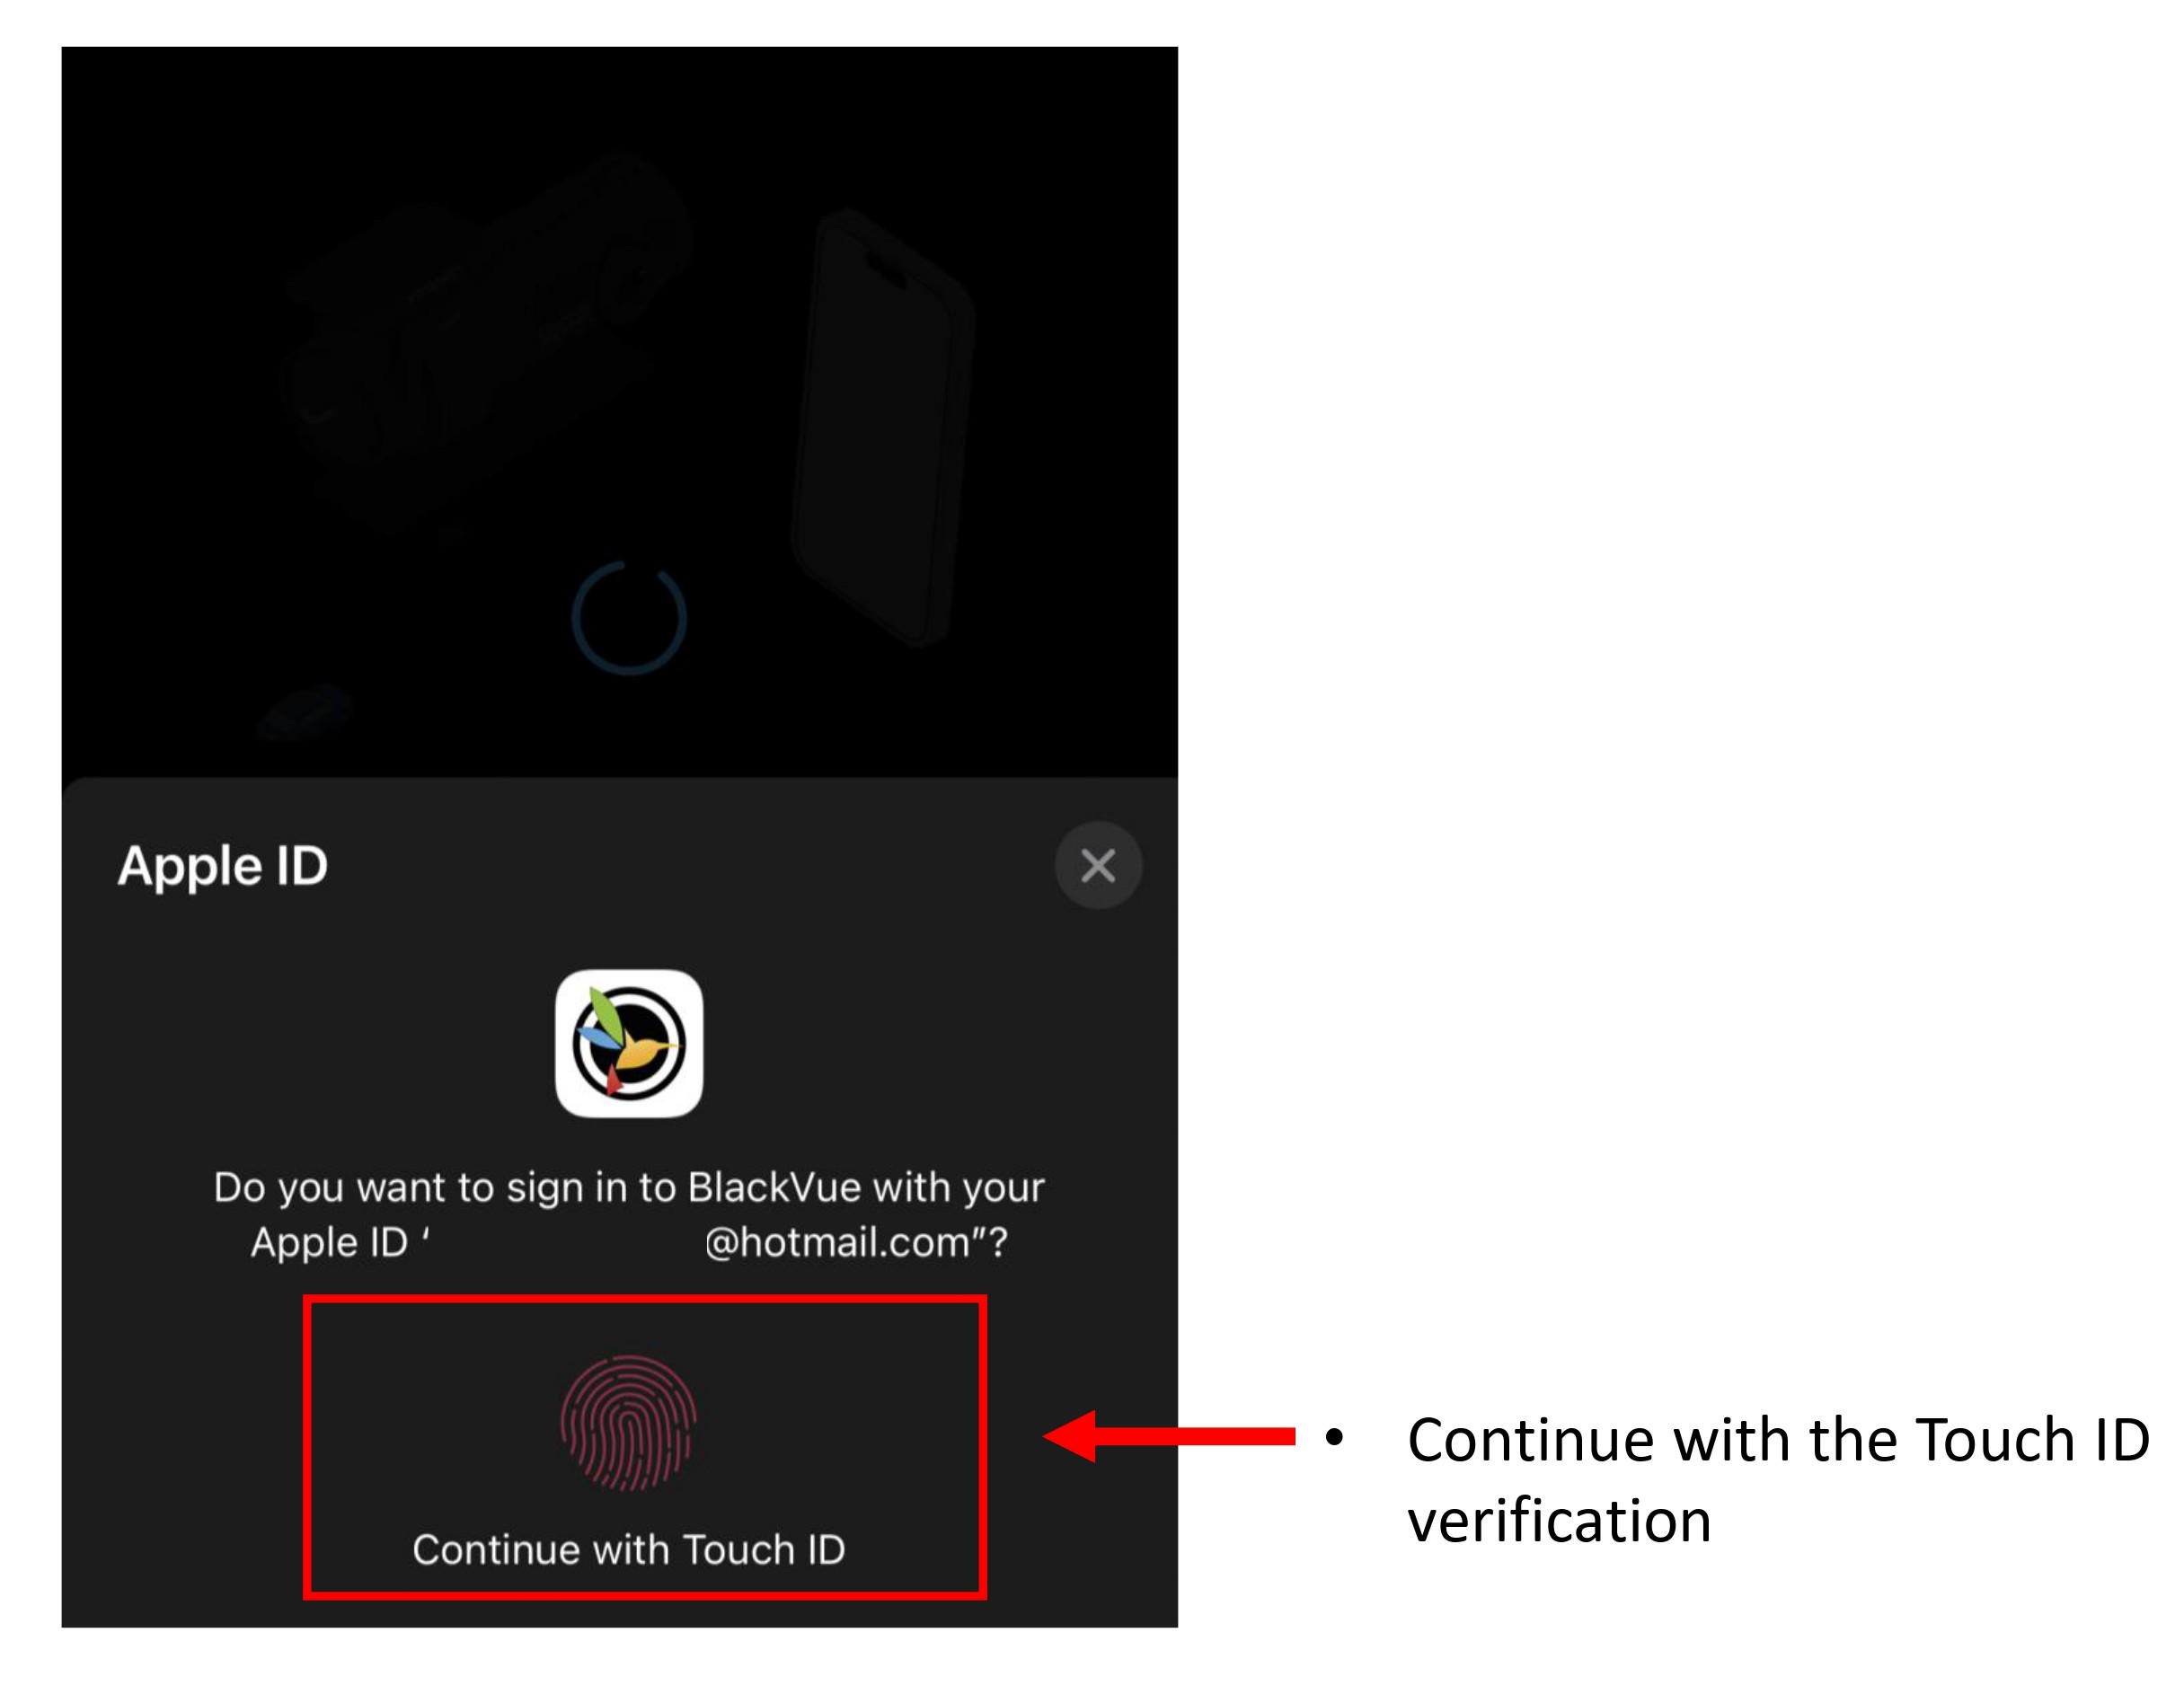
- Continue with the Touch ID verifications.
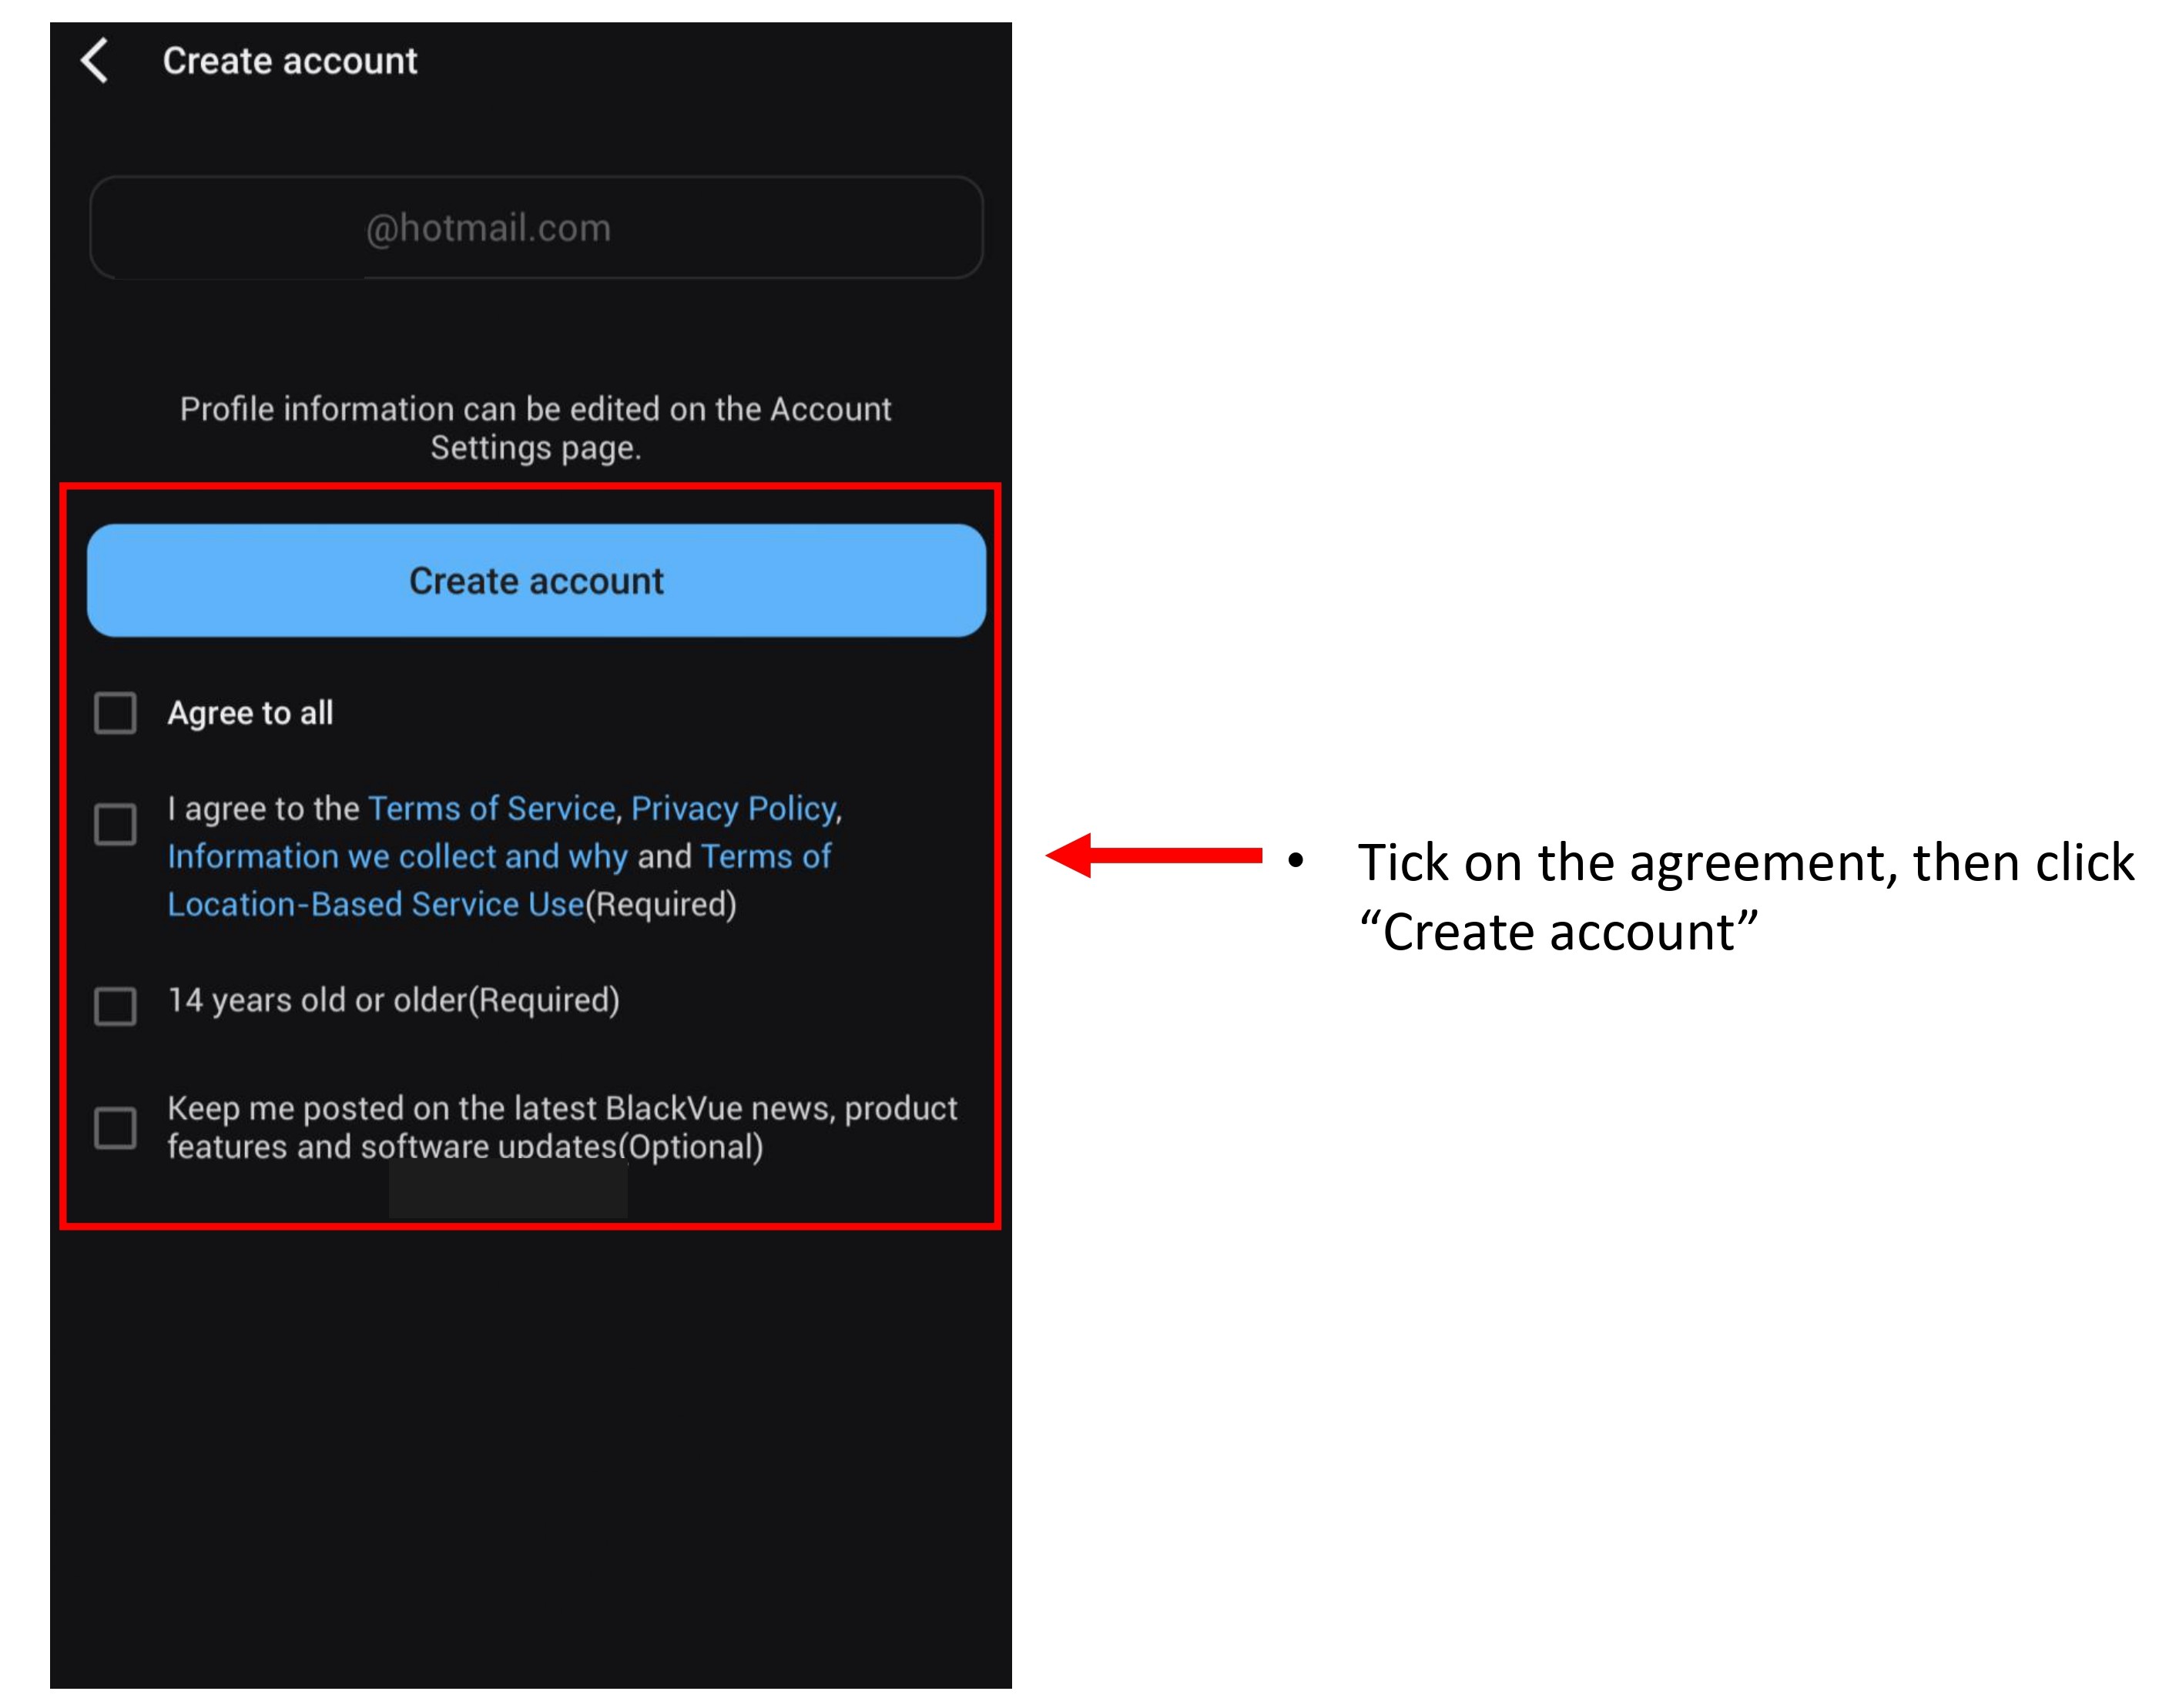
- Tick on the Terms and Agreement , then click "Create Account".
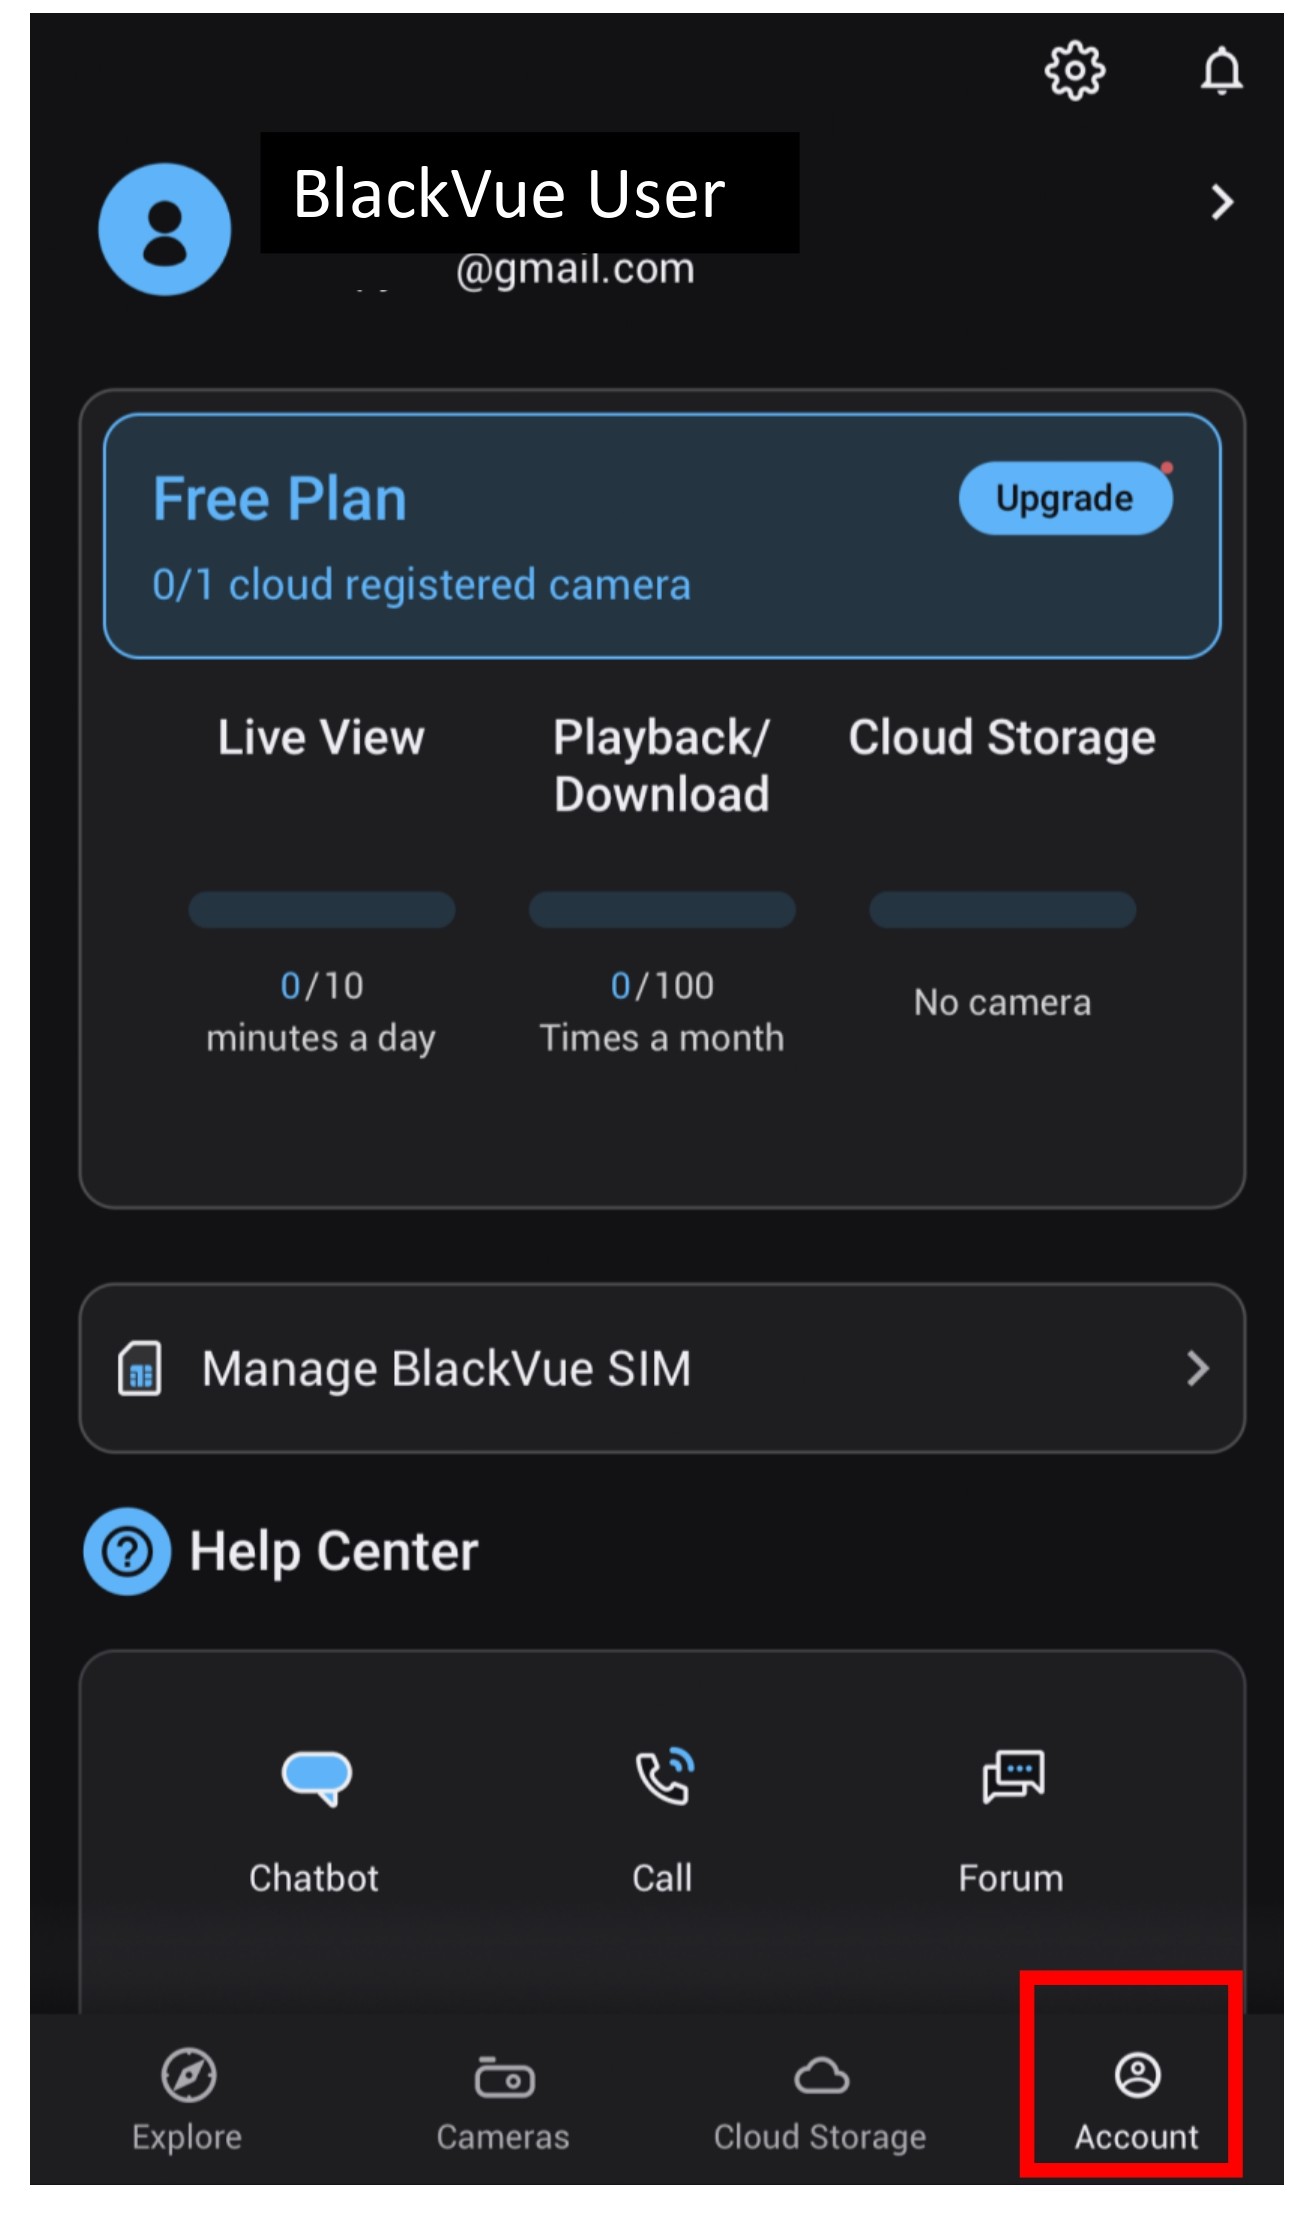
- You have successfully registered an account to access BlackVue Apps.
1.2.2 Log In Using Google Account
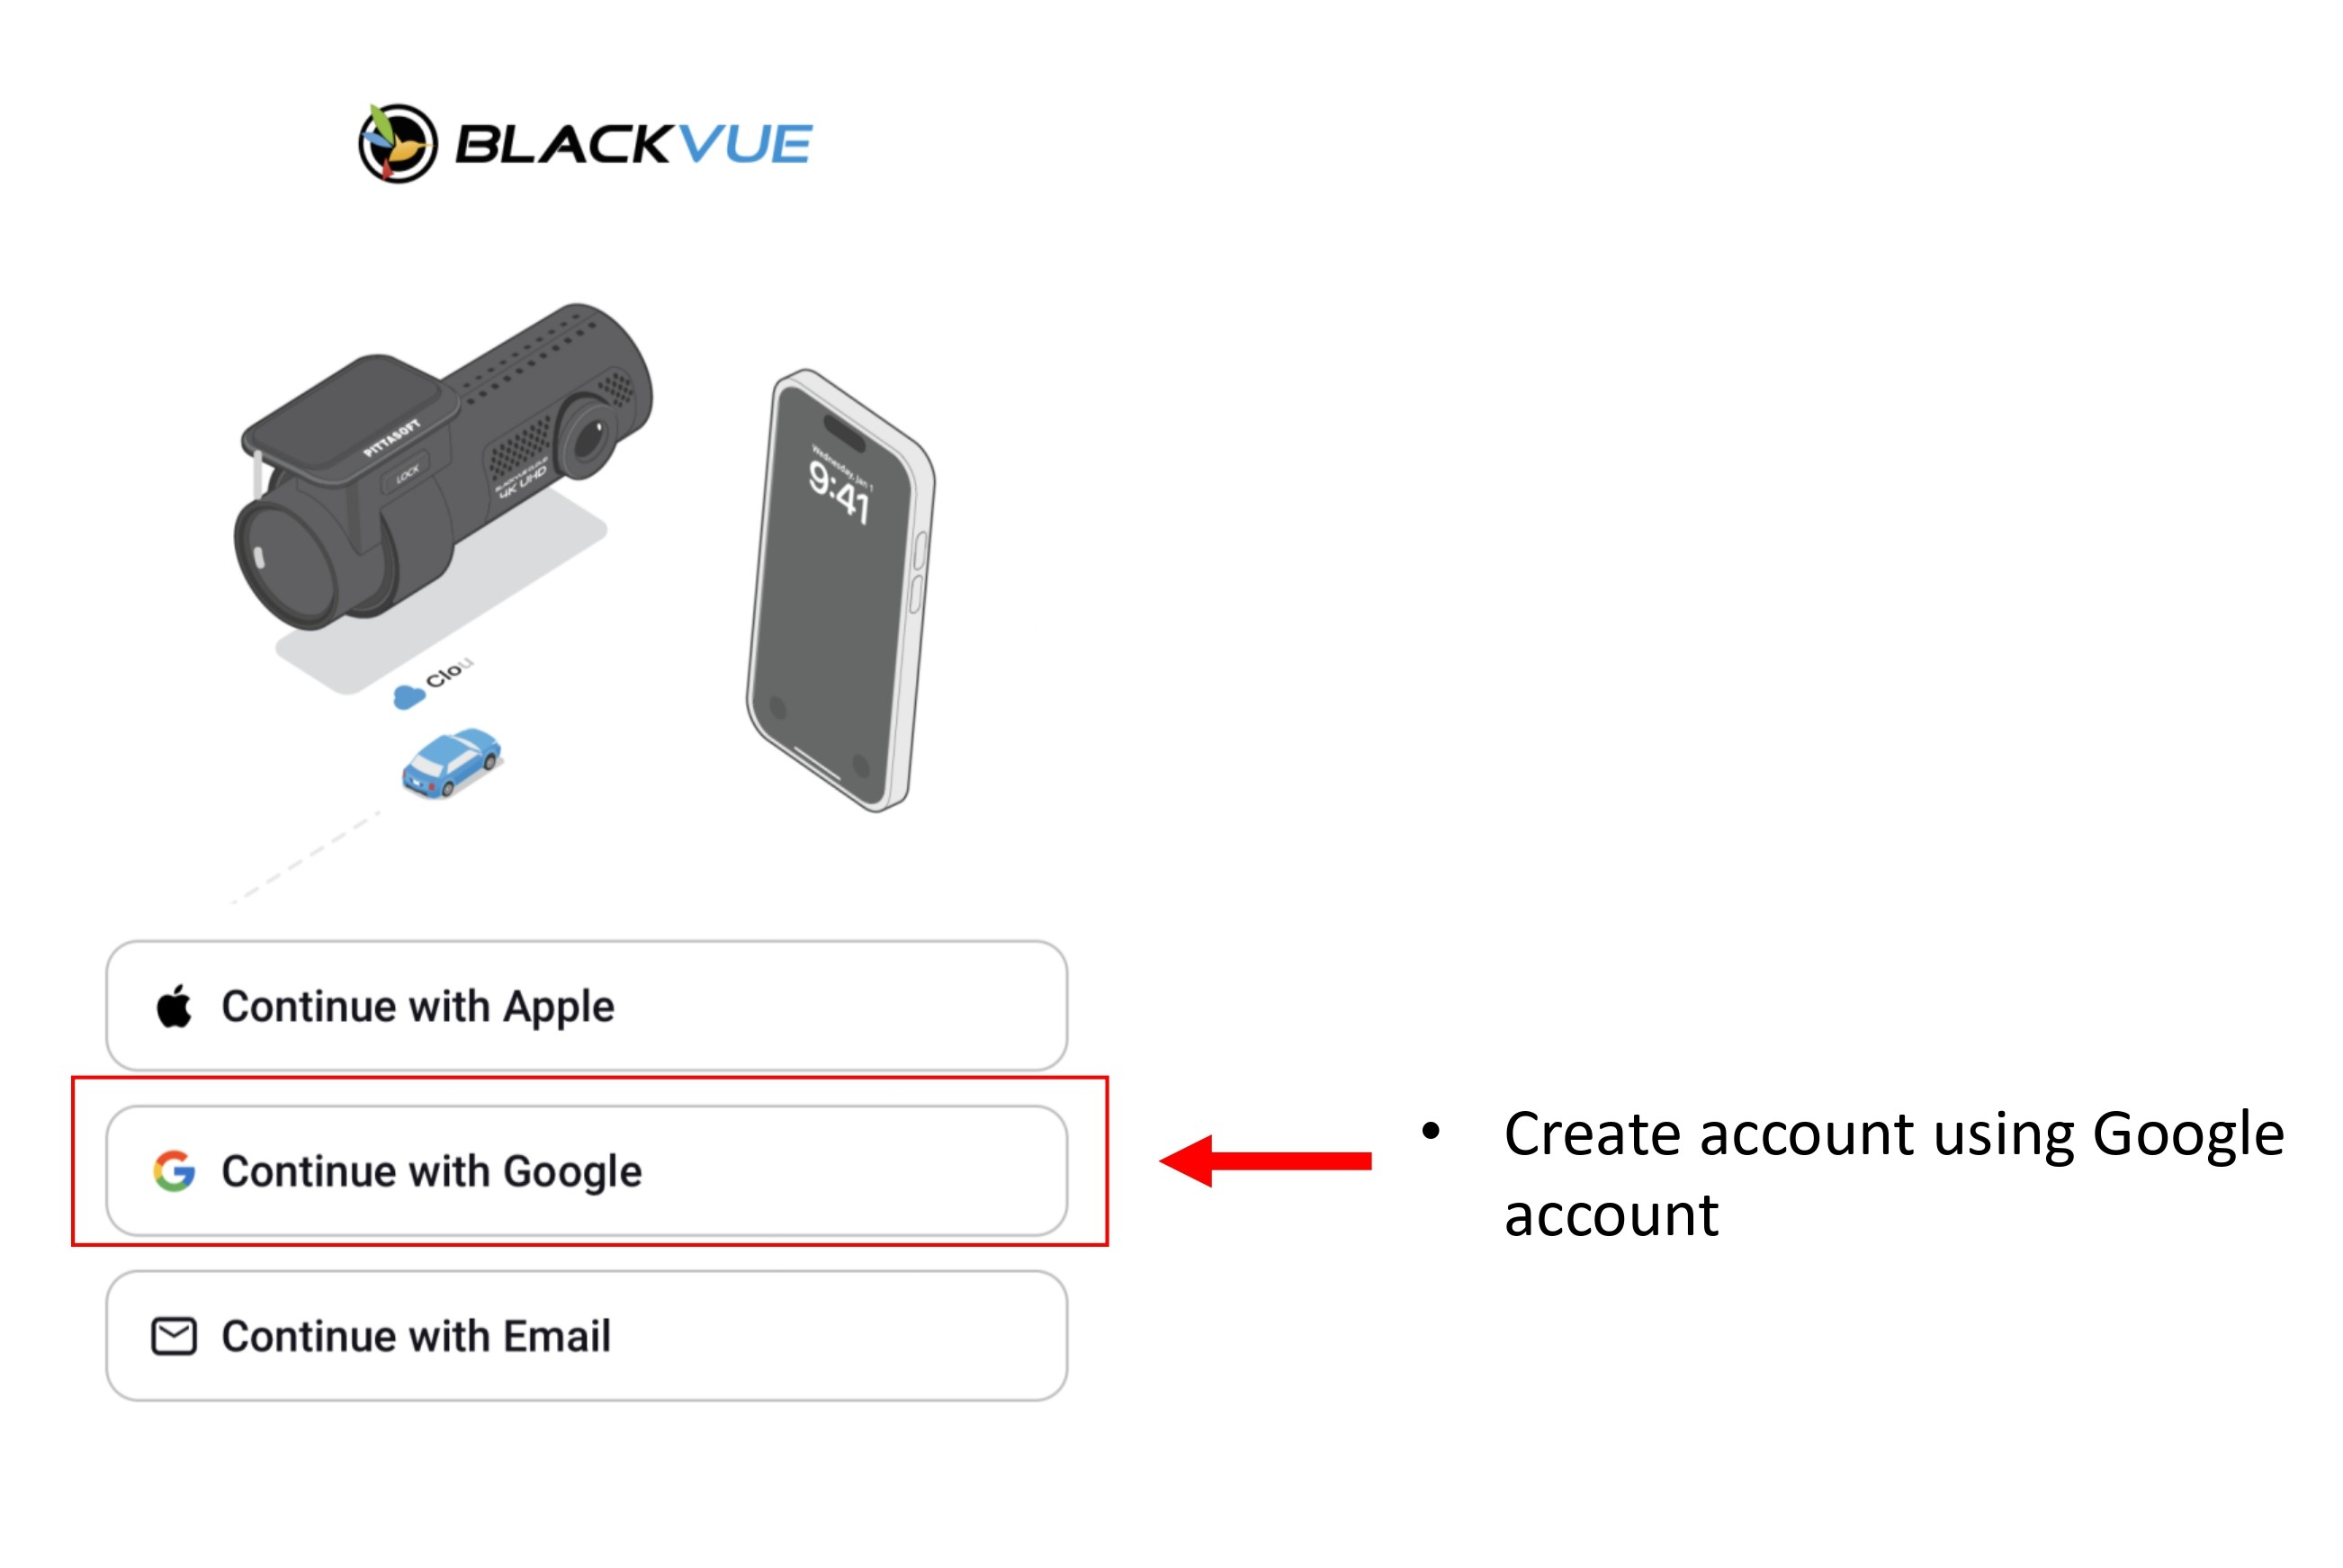
-
Click on "Continue with Google".
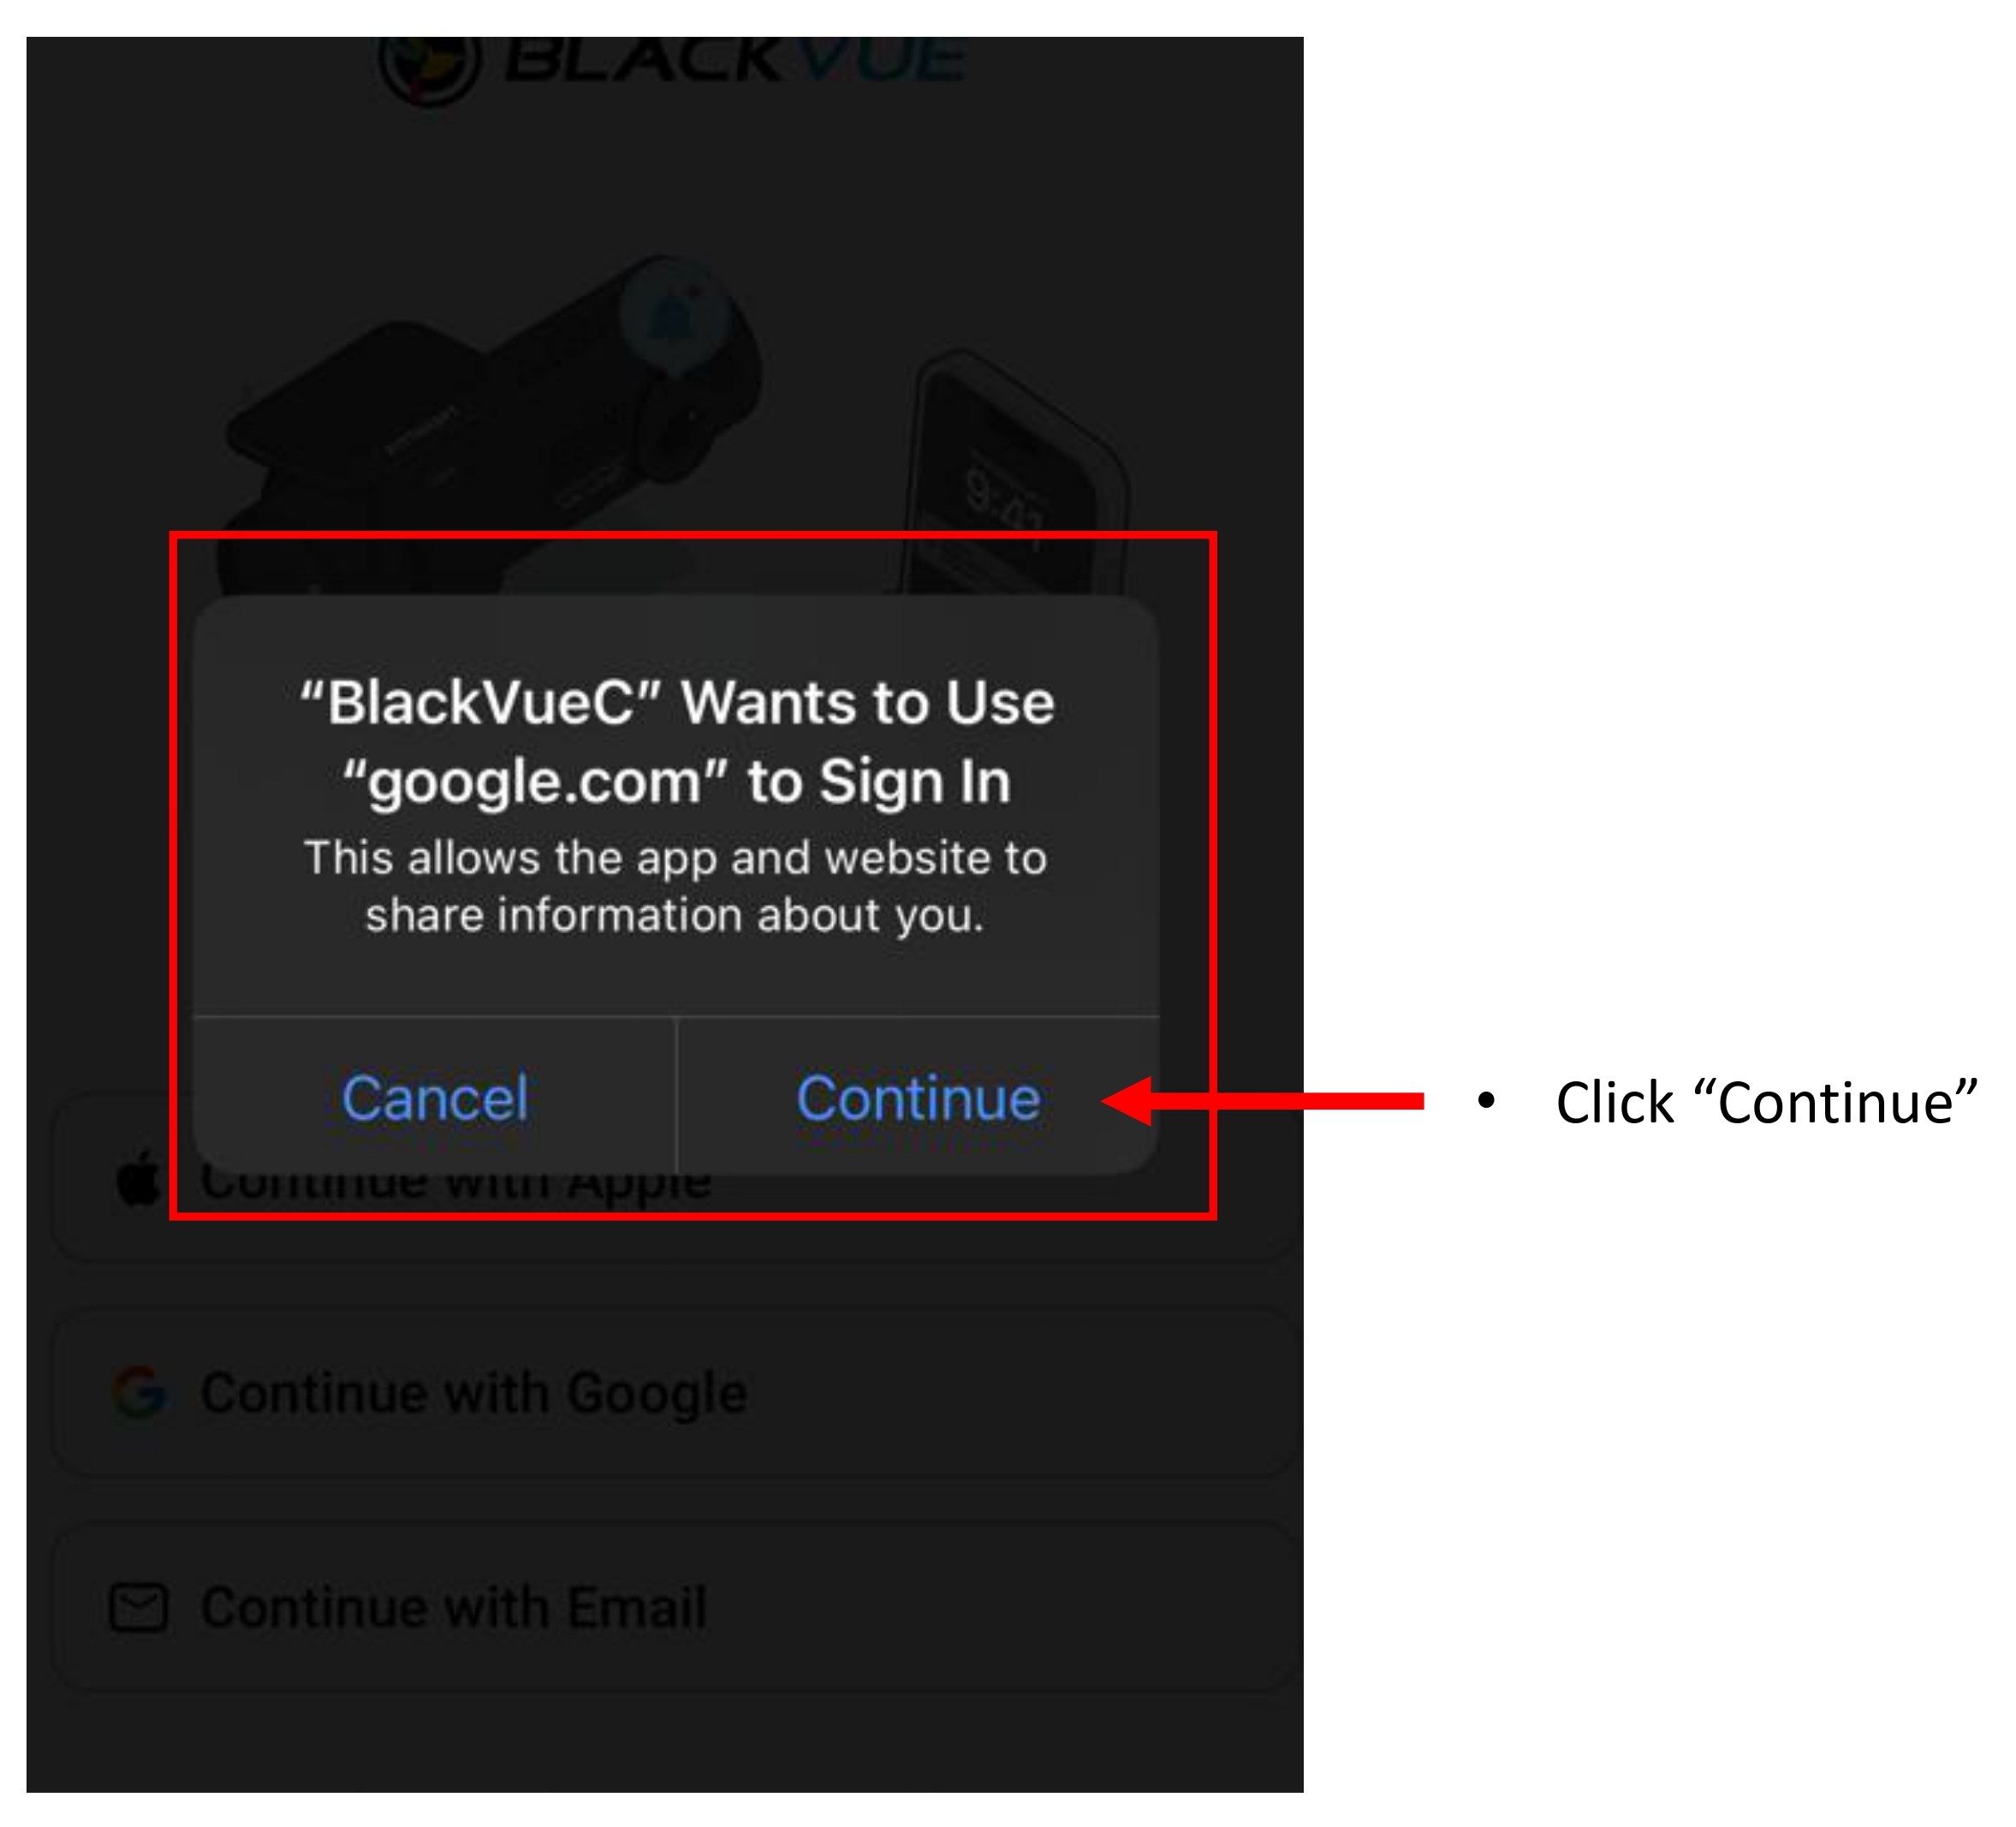
-
Click "Continue".
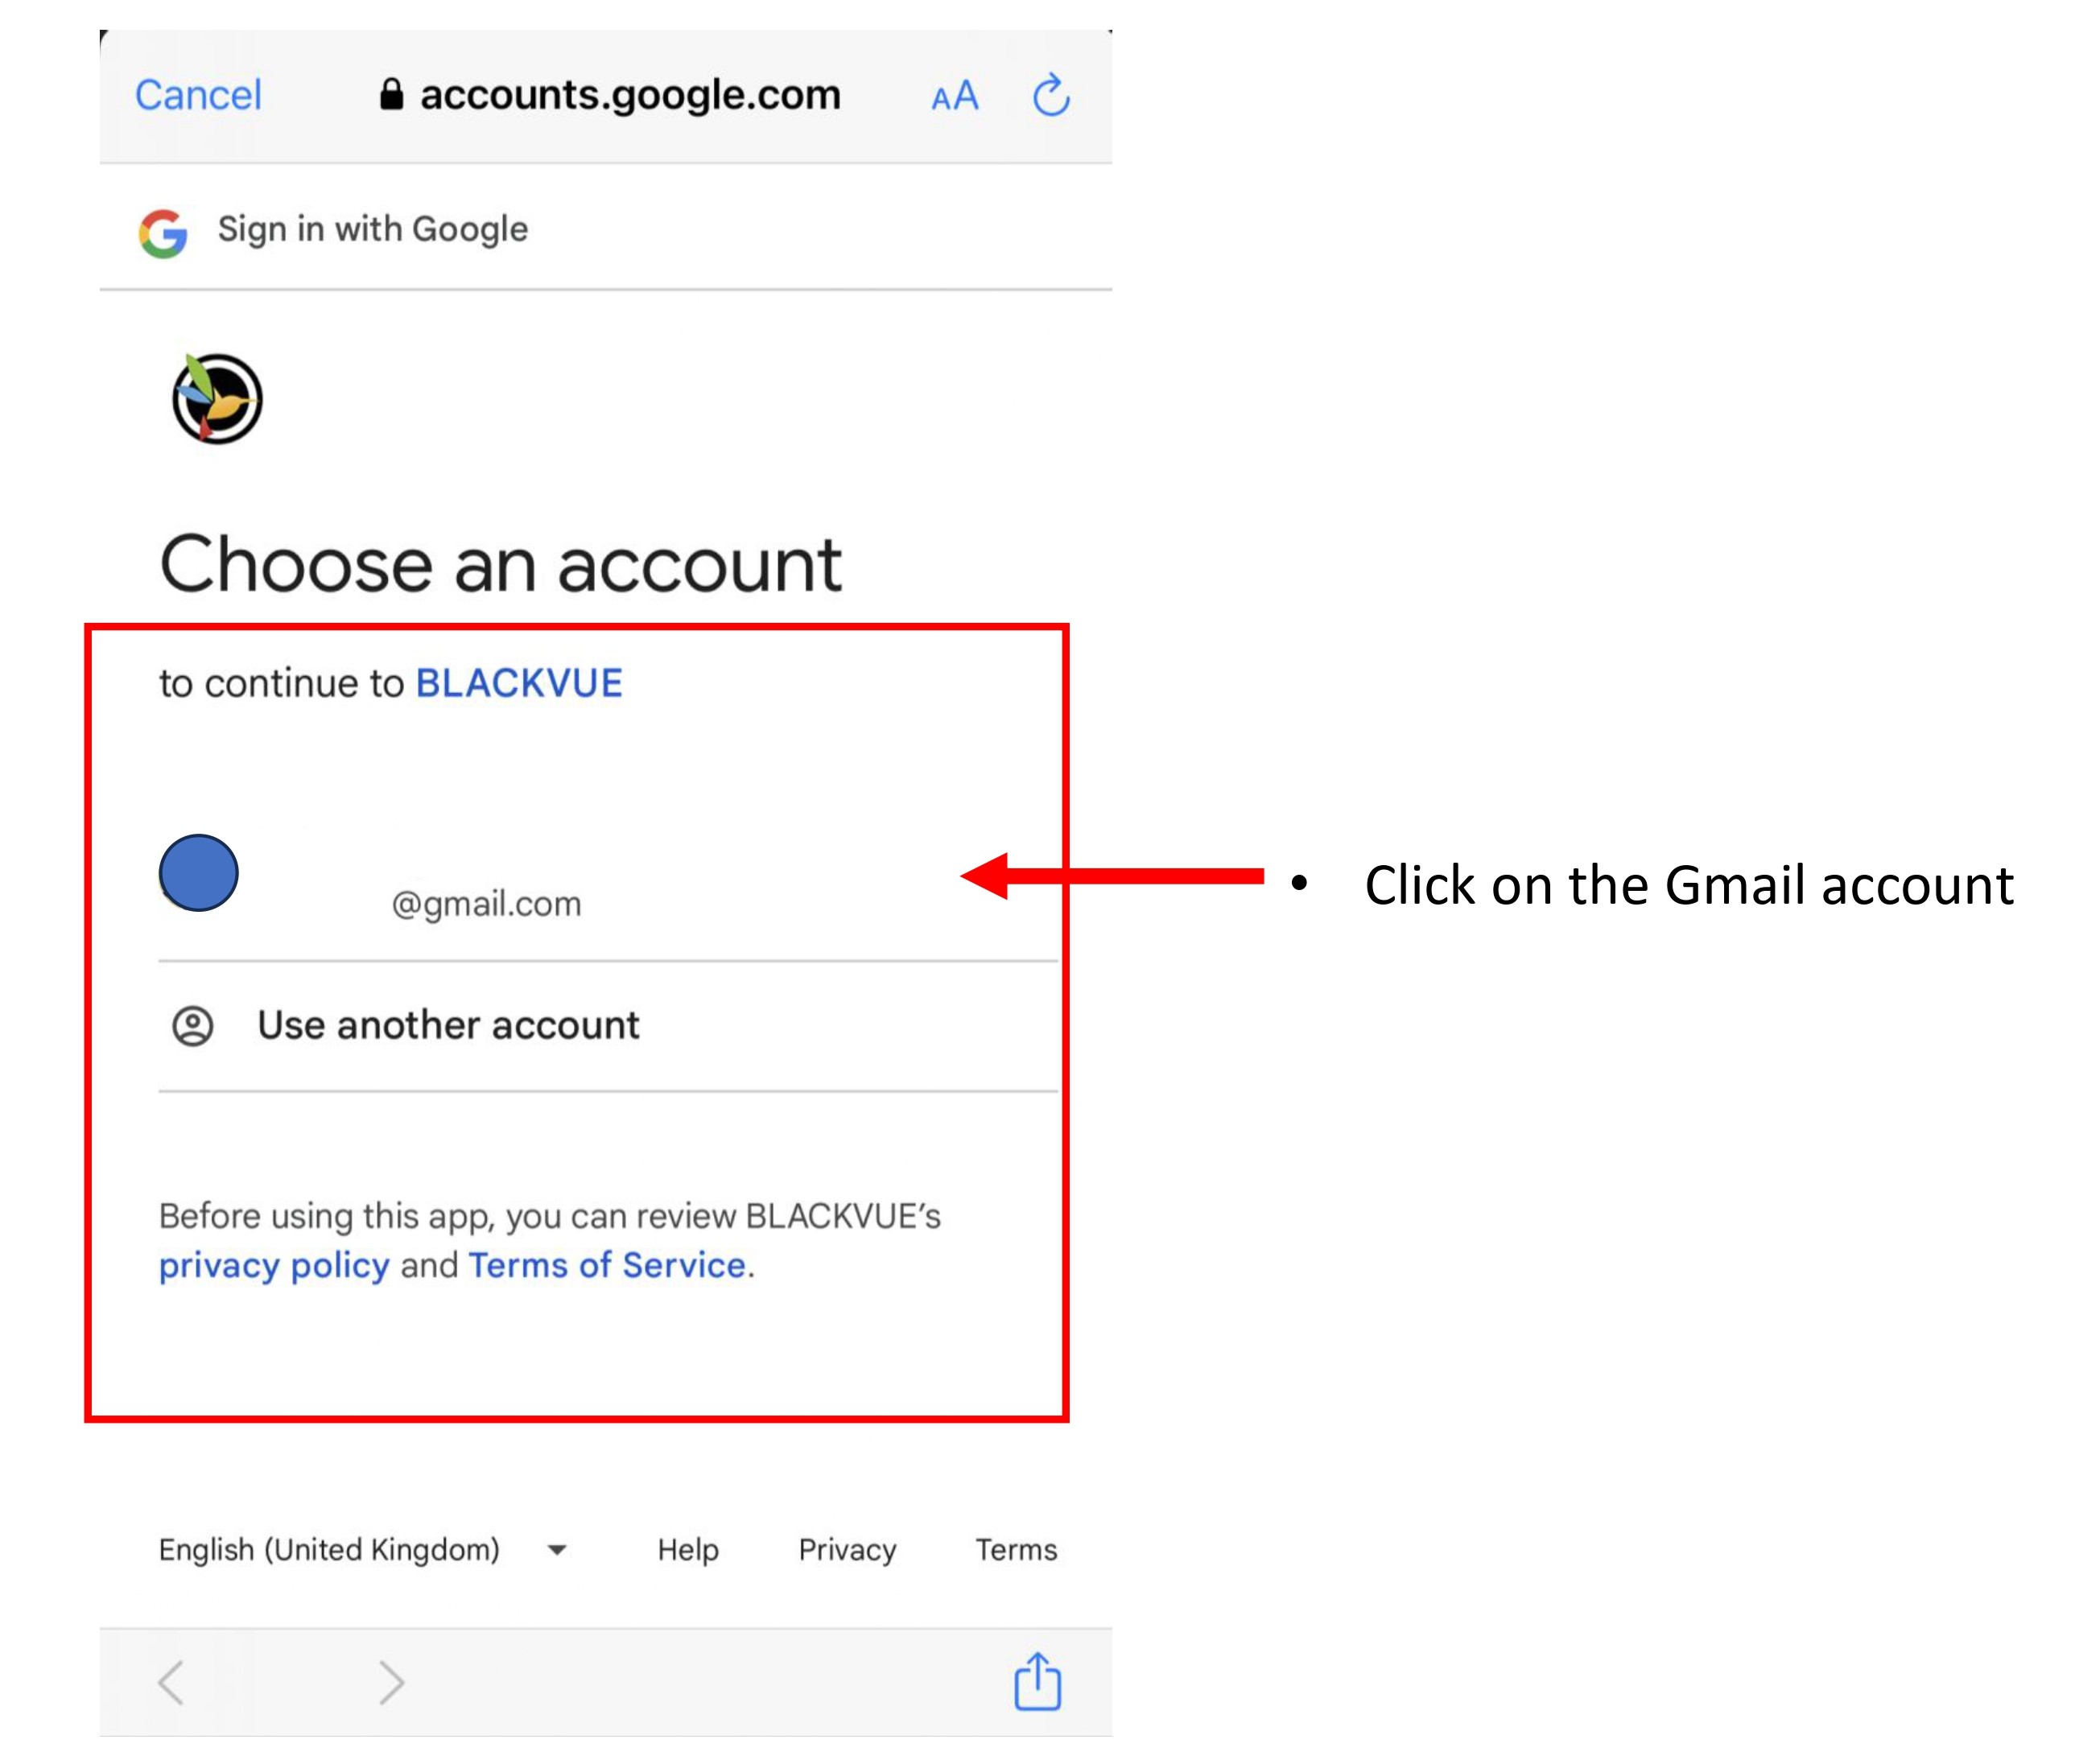
- Click on the email account that need to be use for BlackVue Apps account.
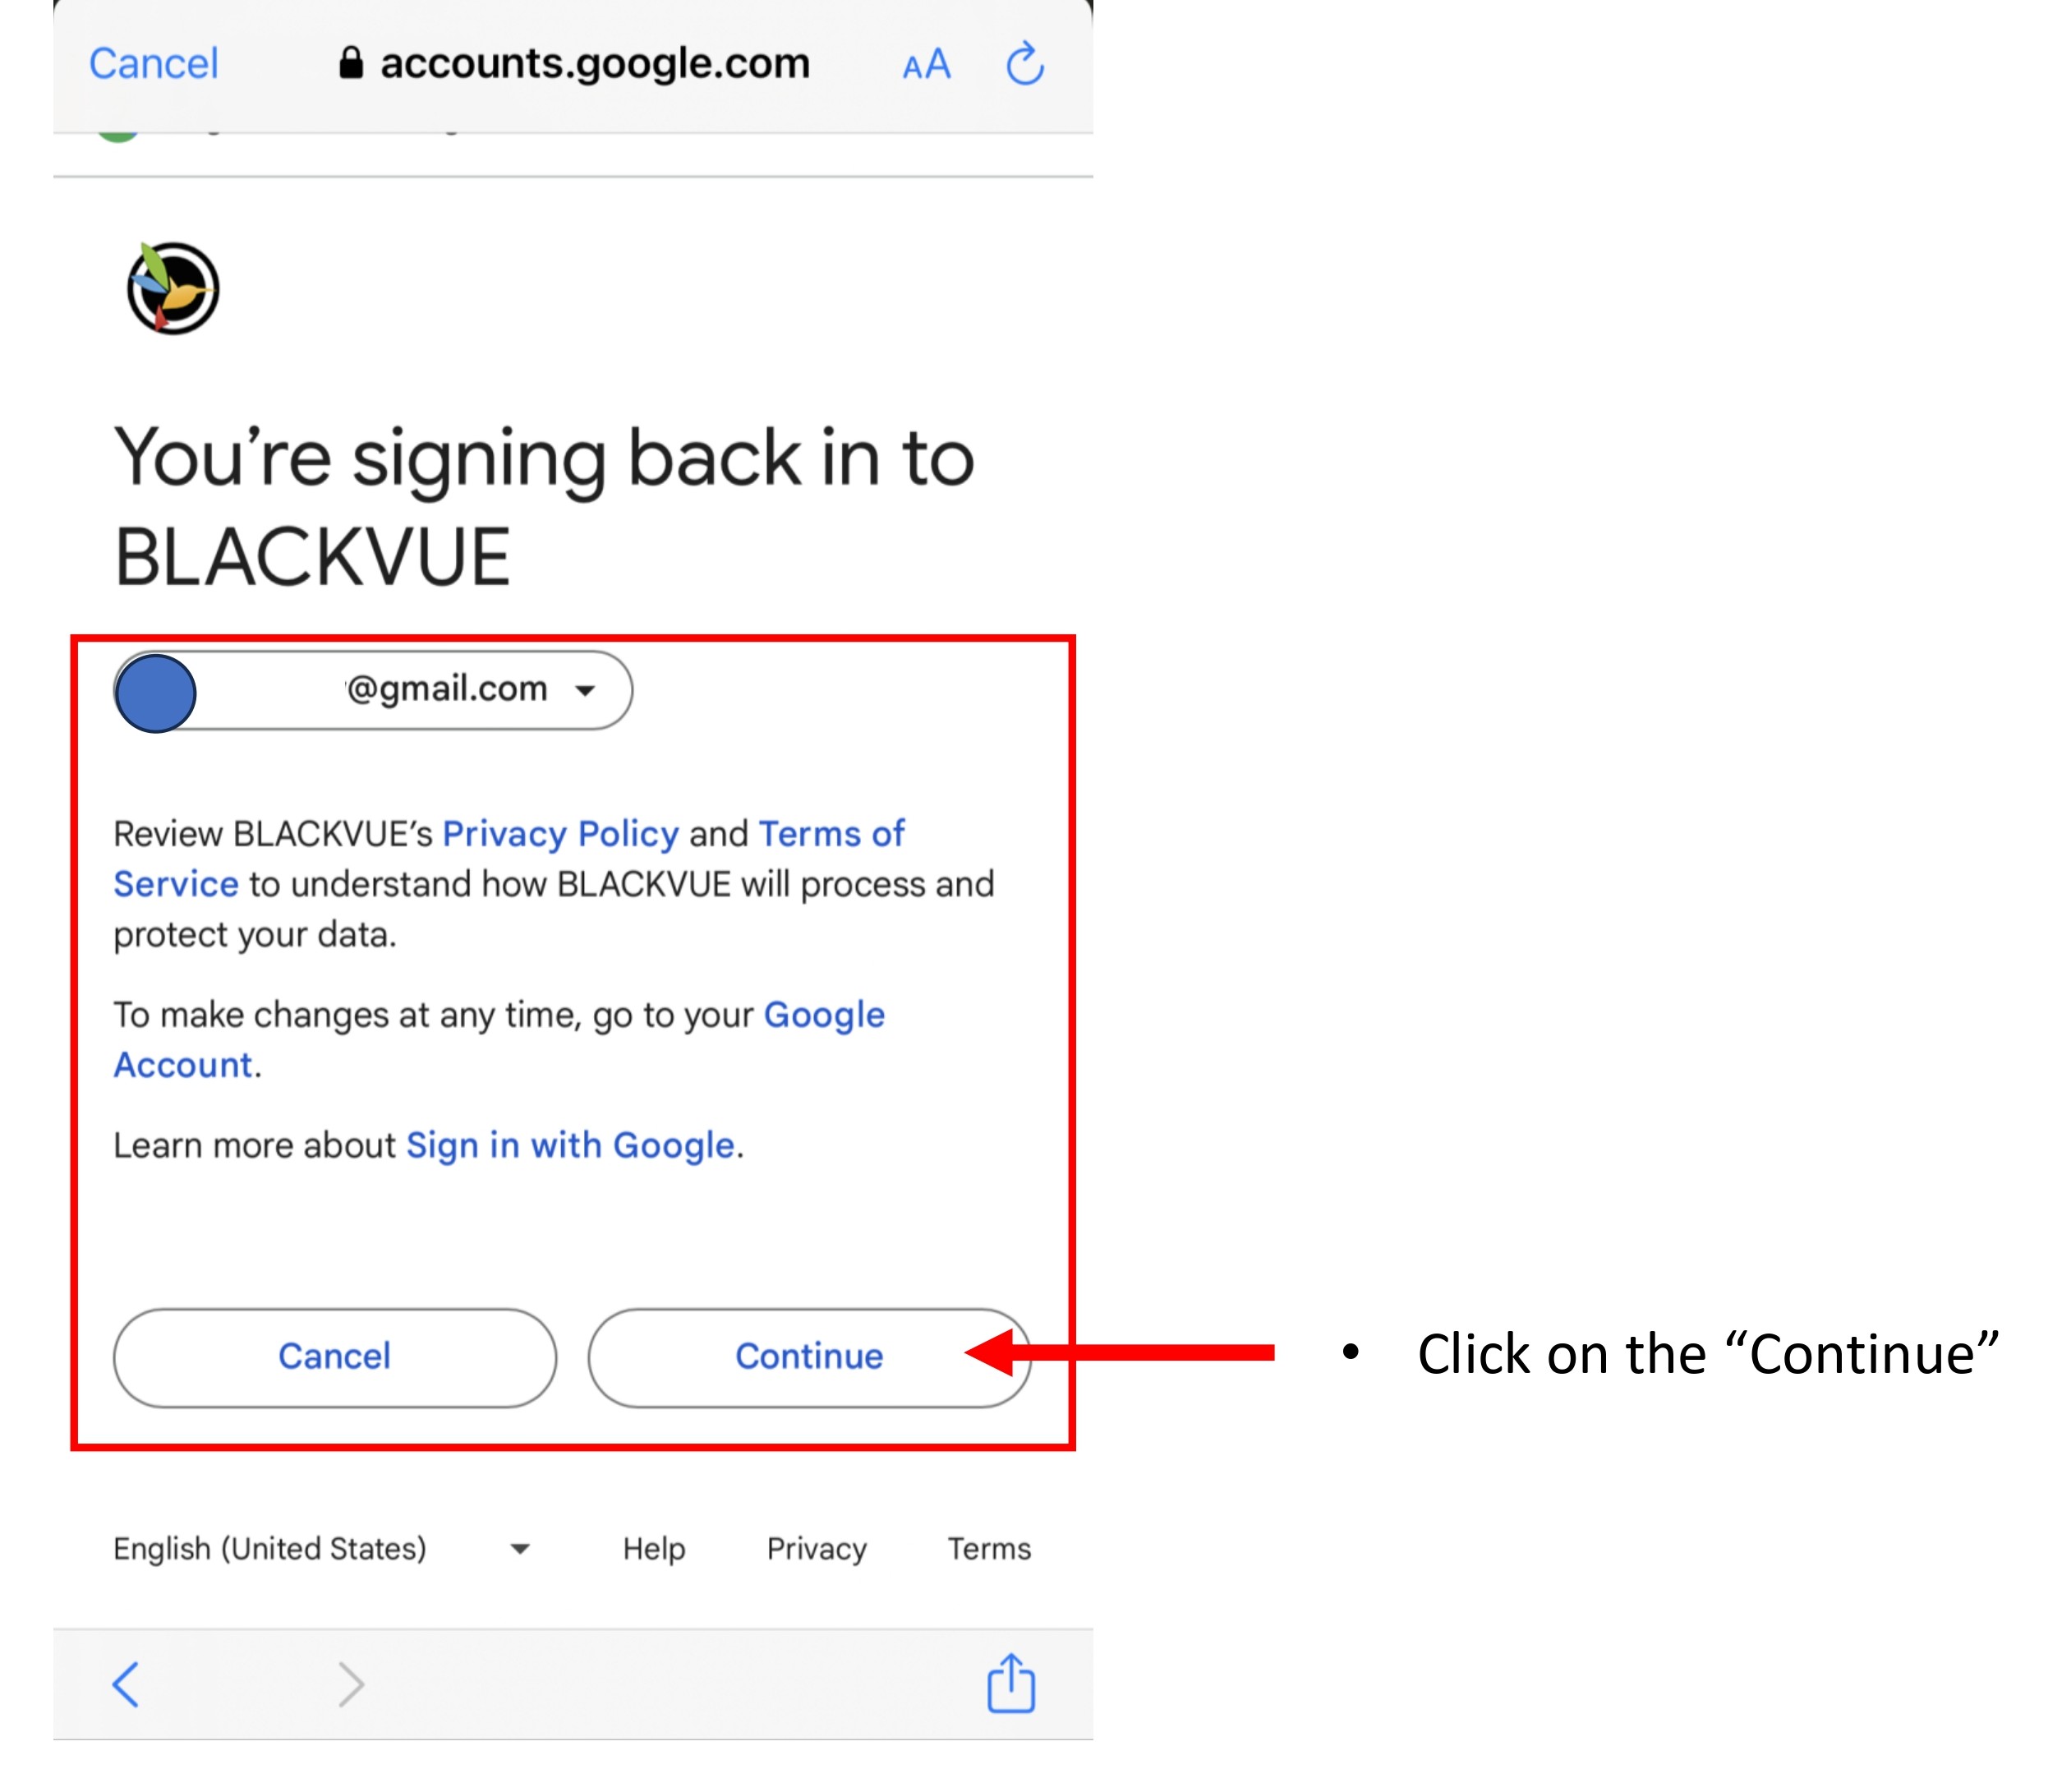
- Click "Continue".

- Tick on the Terms and Agreement , then click "Create Account".

- You have successfully registered an account to access BlackVue Apps.
1.2.3 Log In Using Email
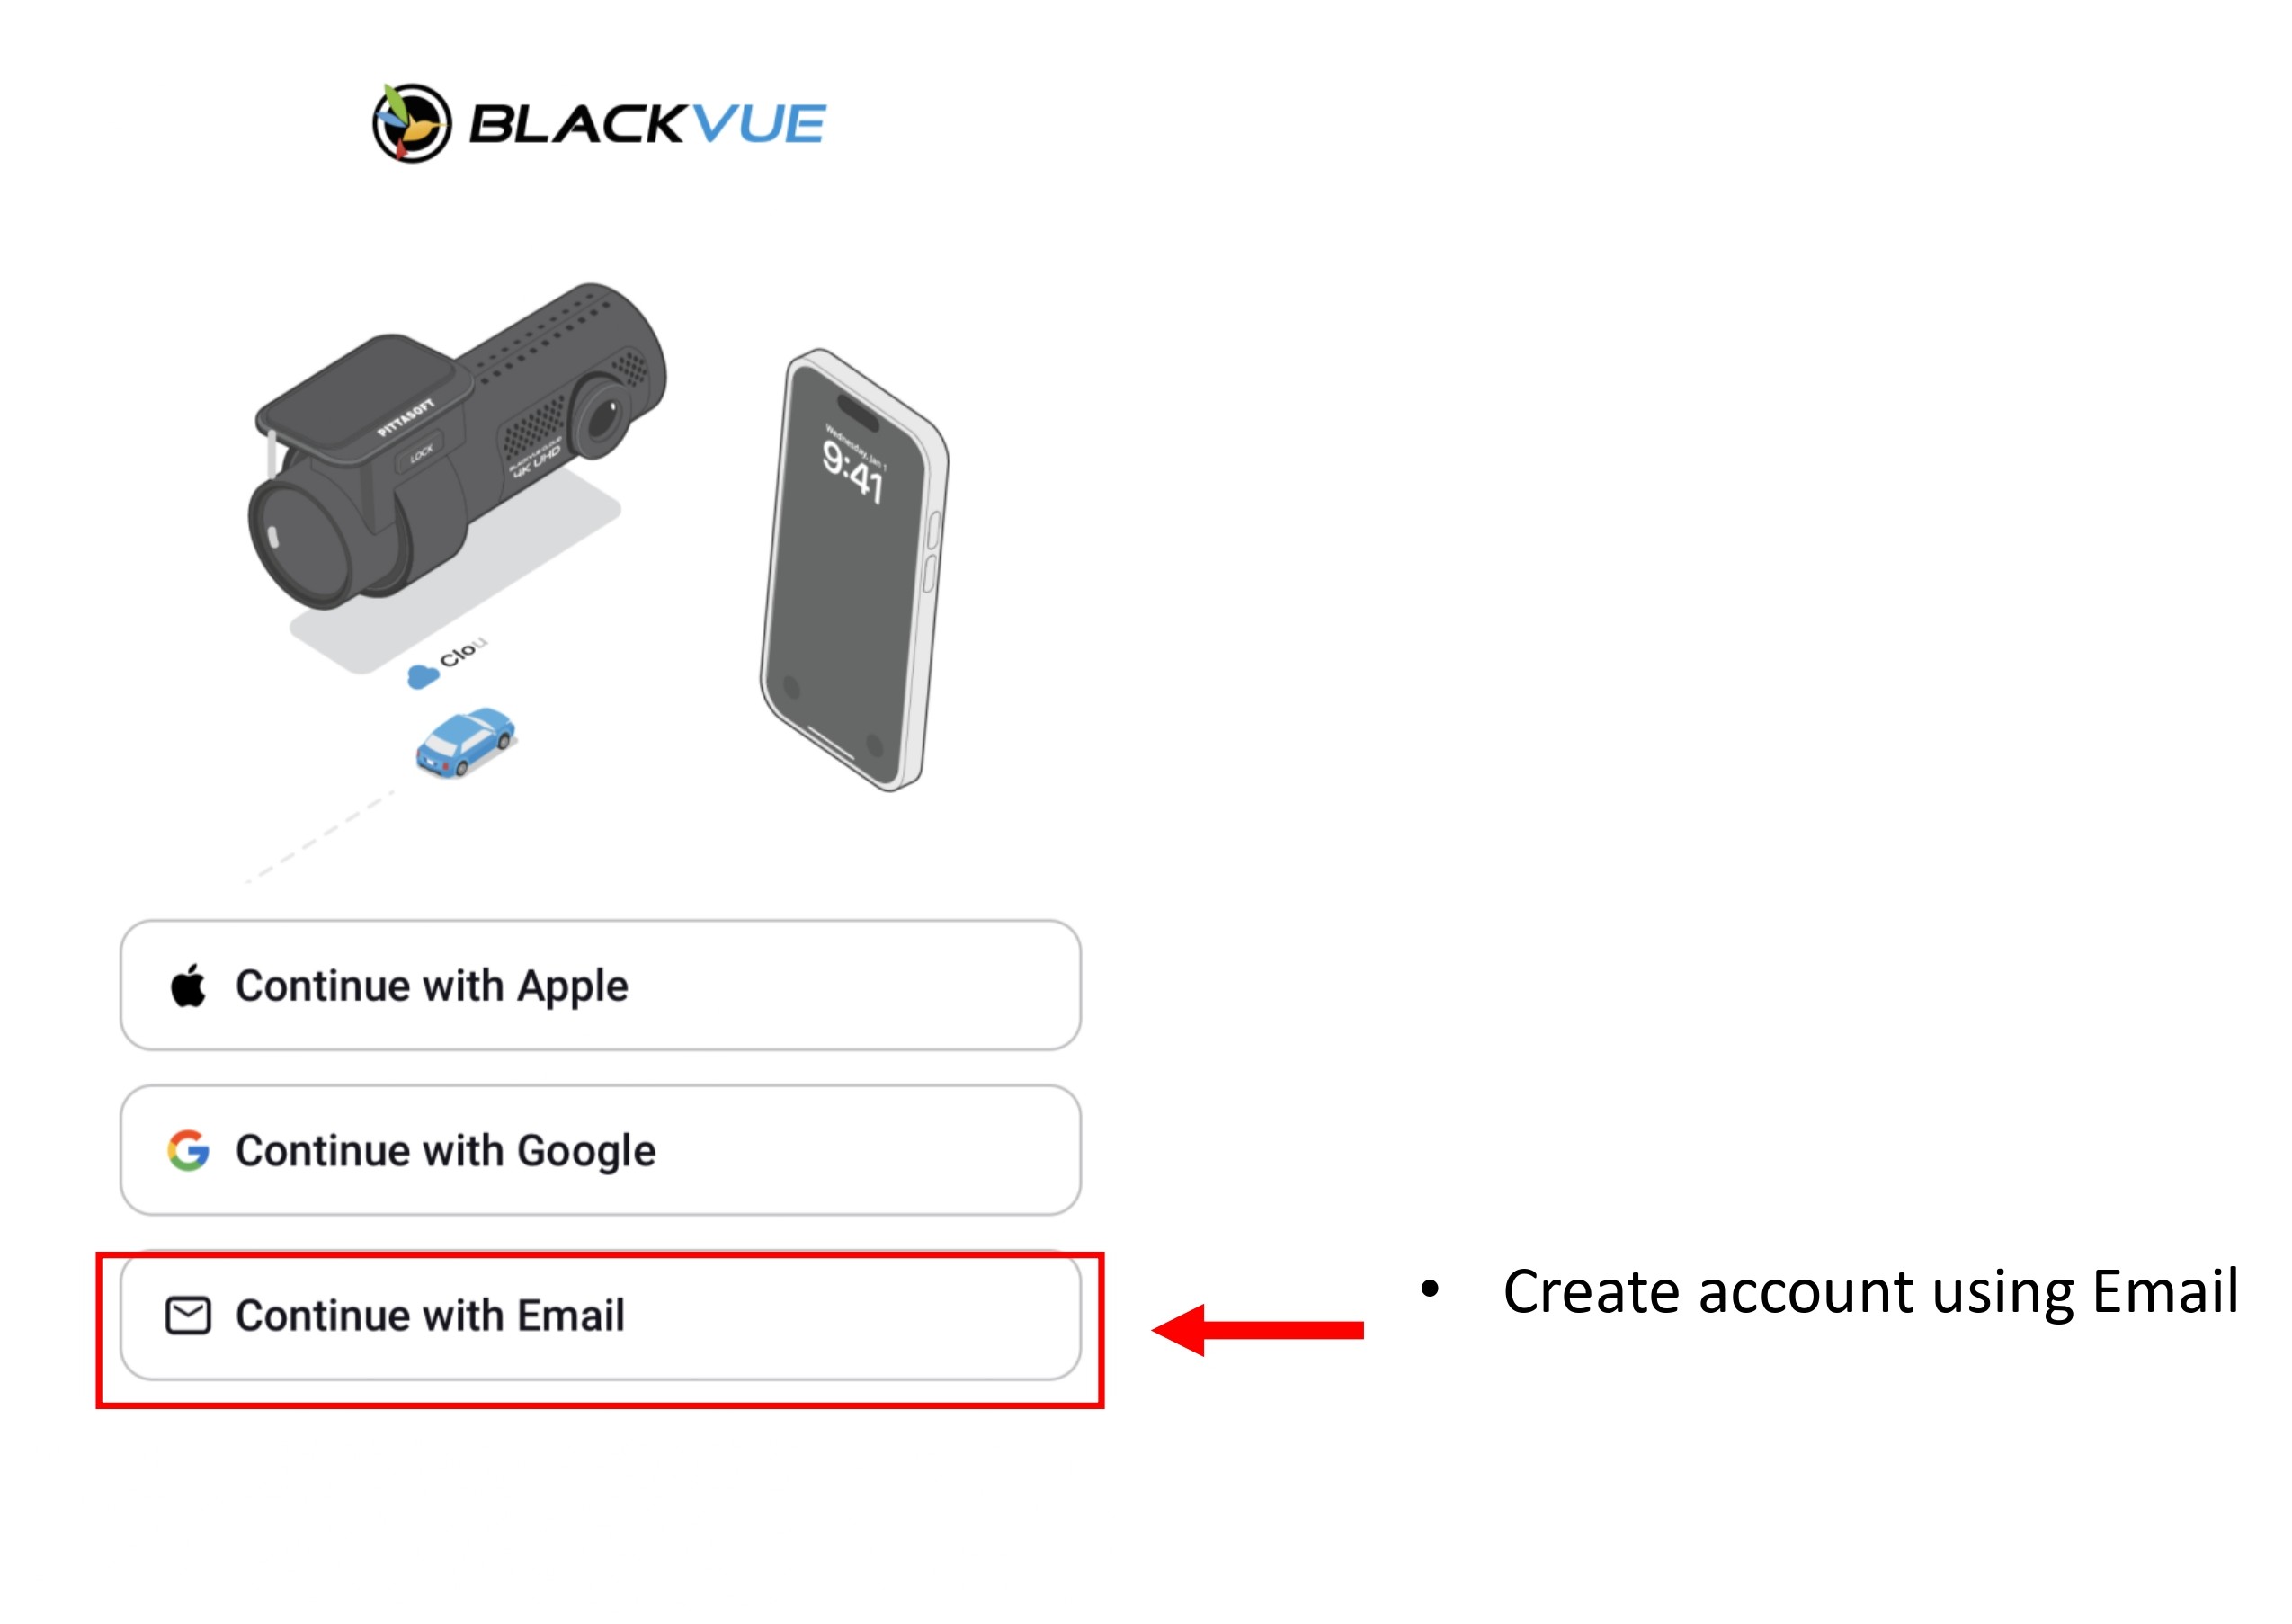
- Click "Continue with Email".
1.2.3.1 New BlackVue Apps Account
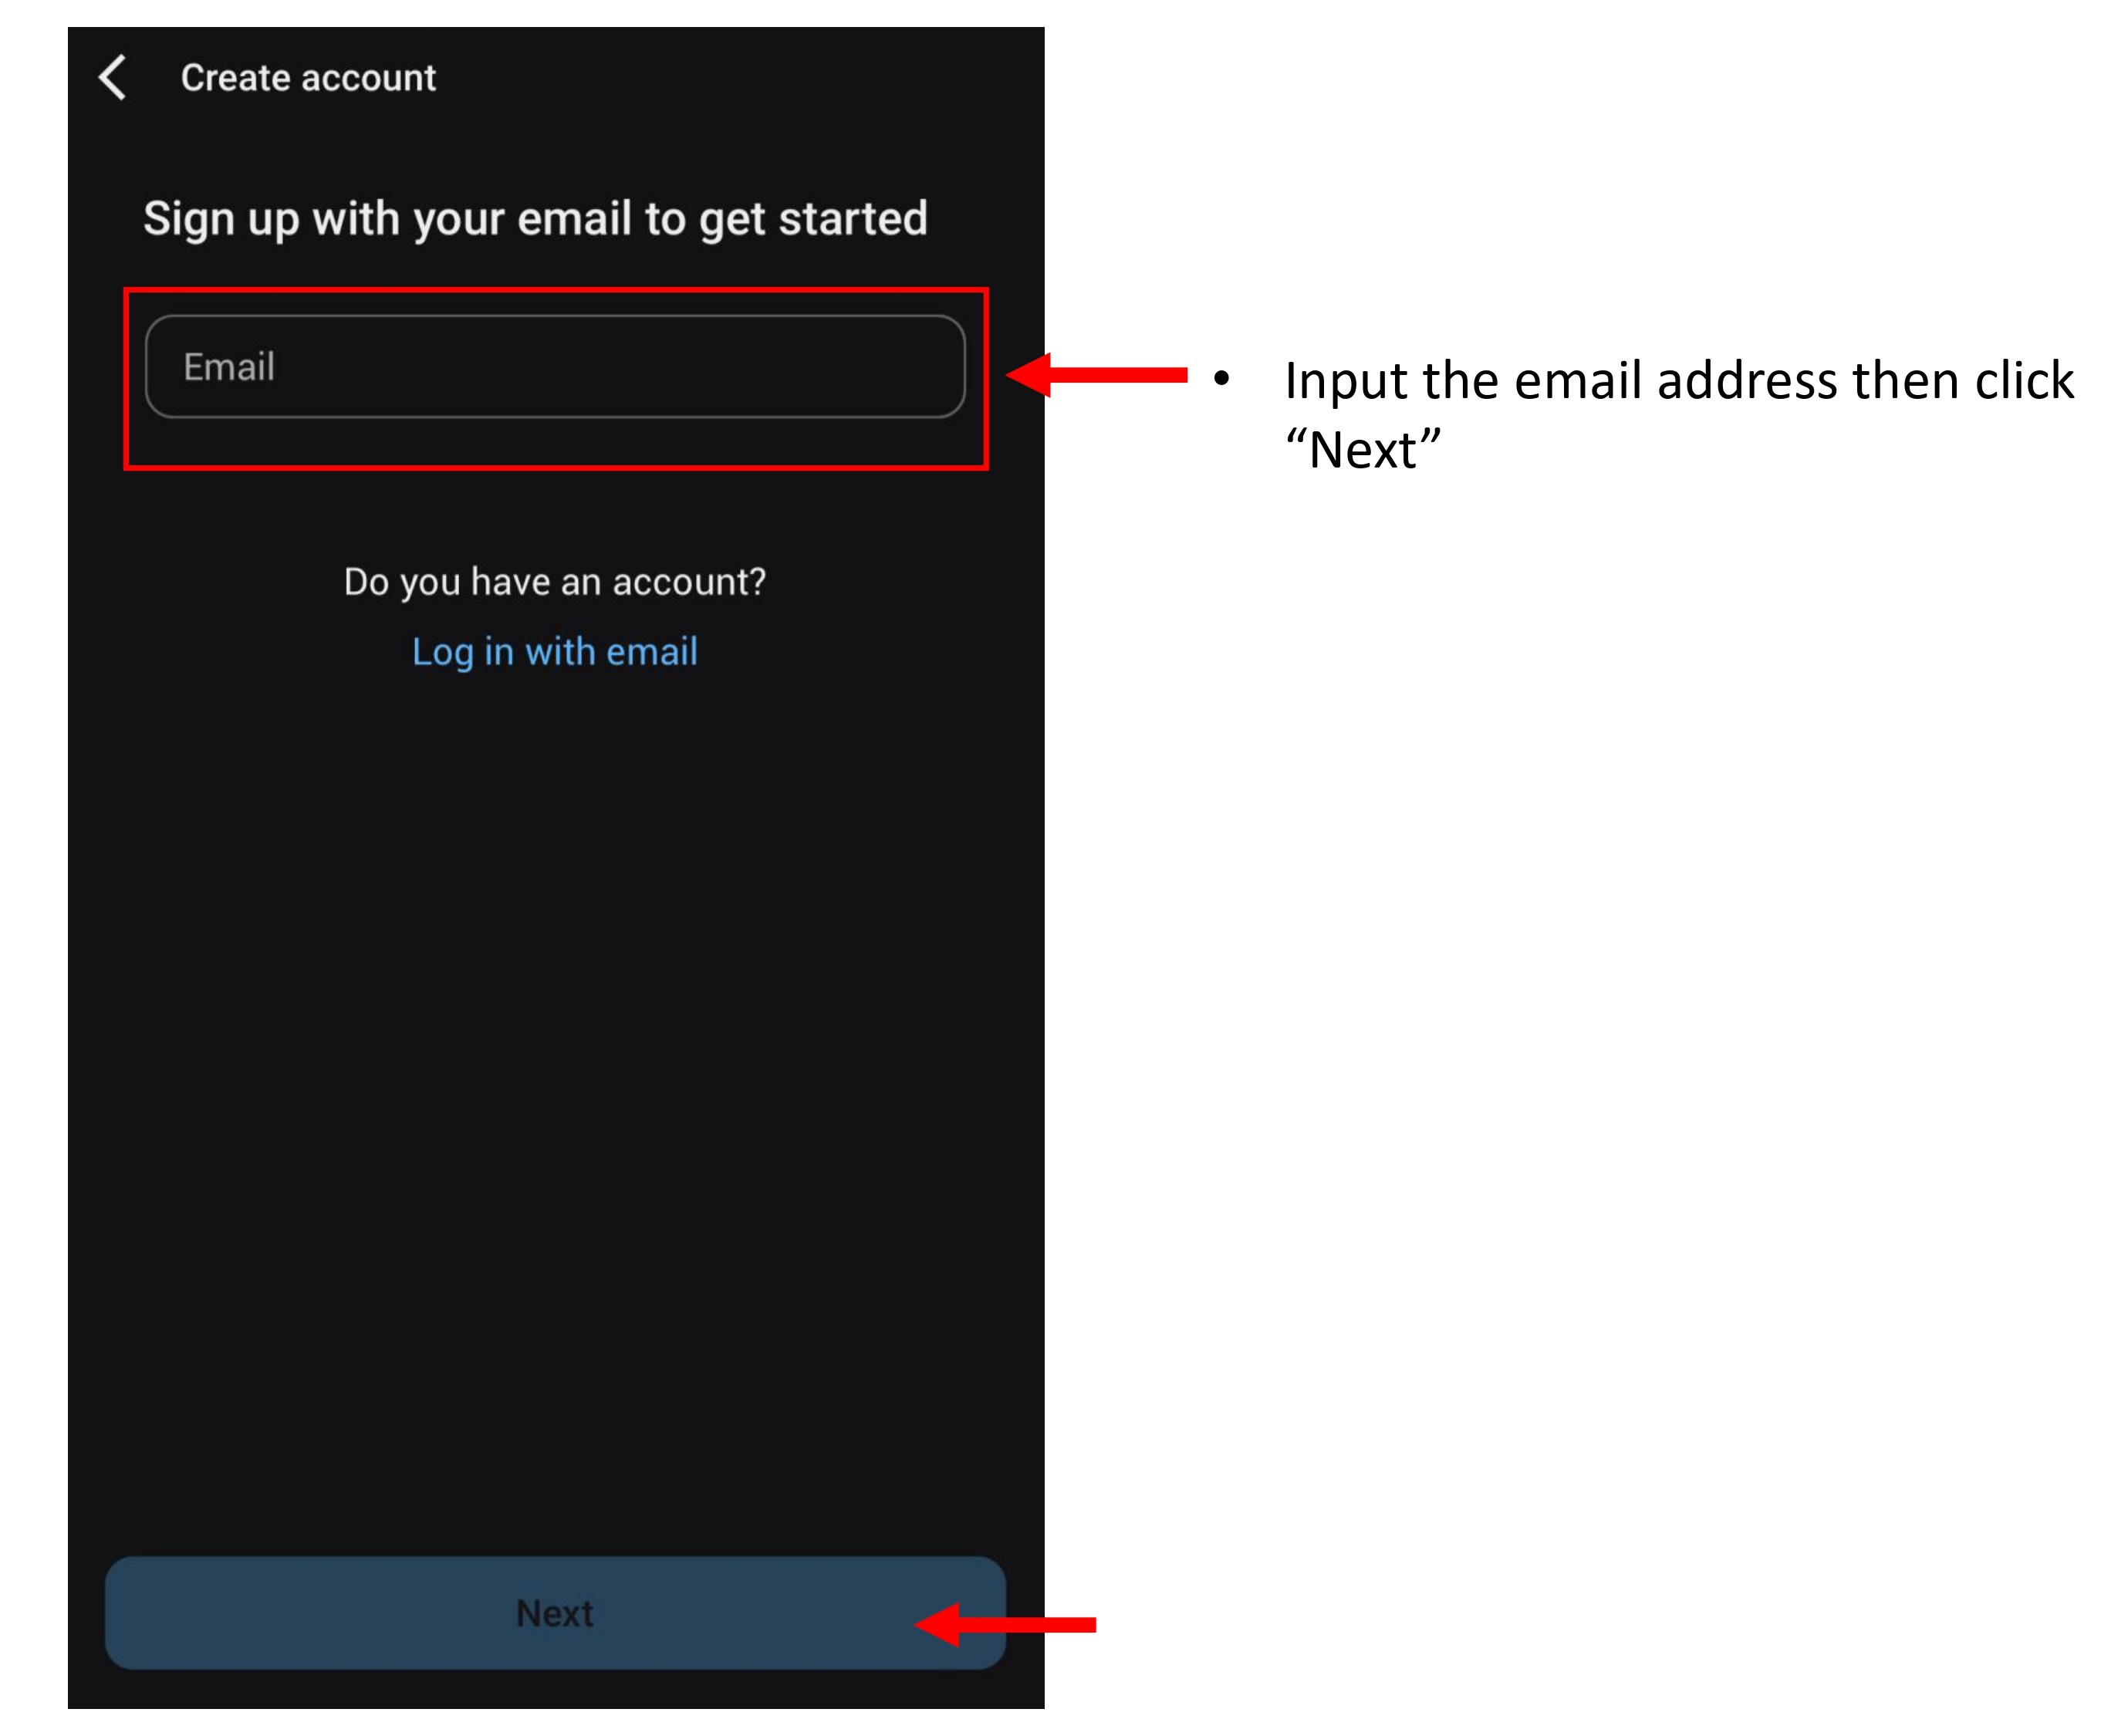
- Input the email address and click "Next".
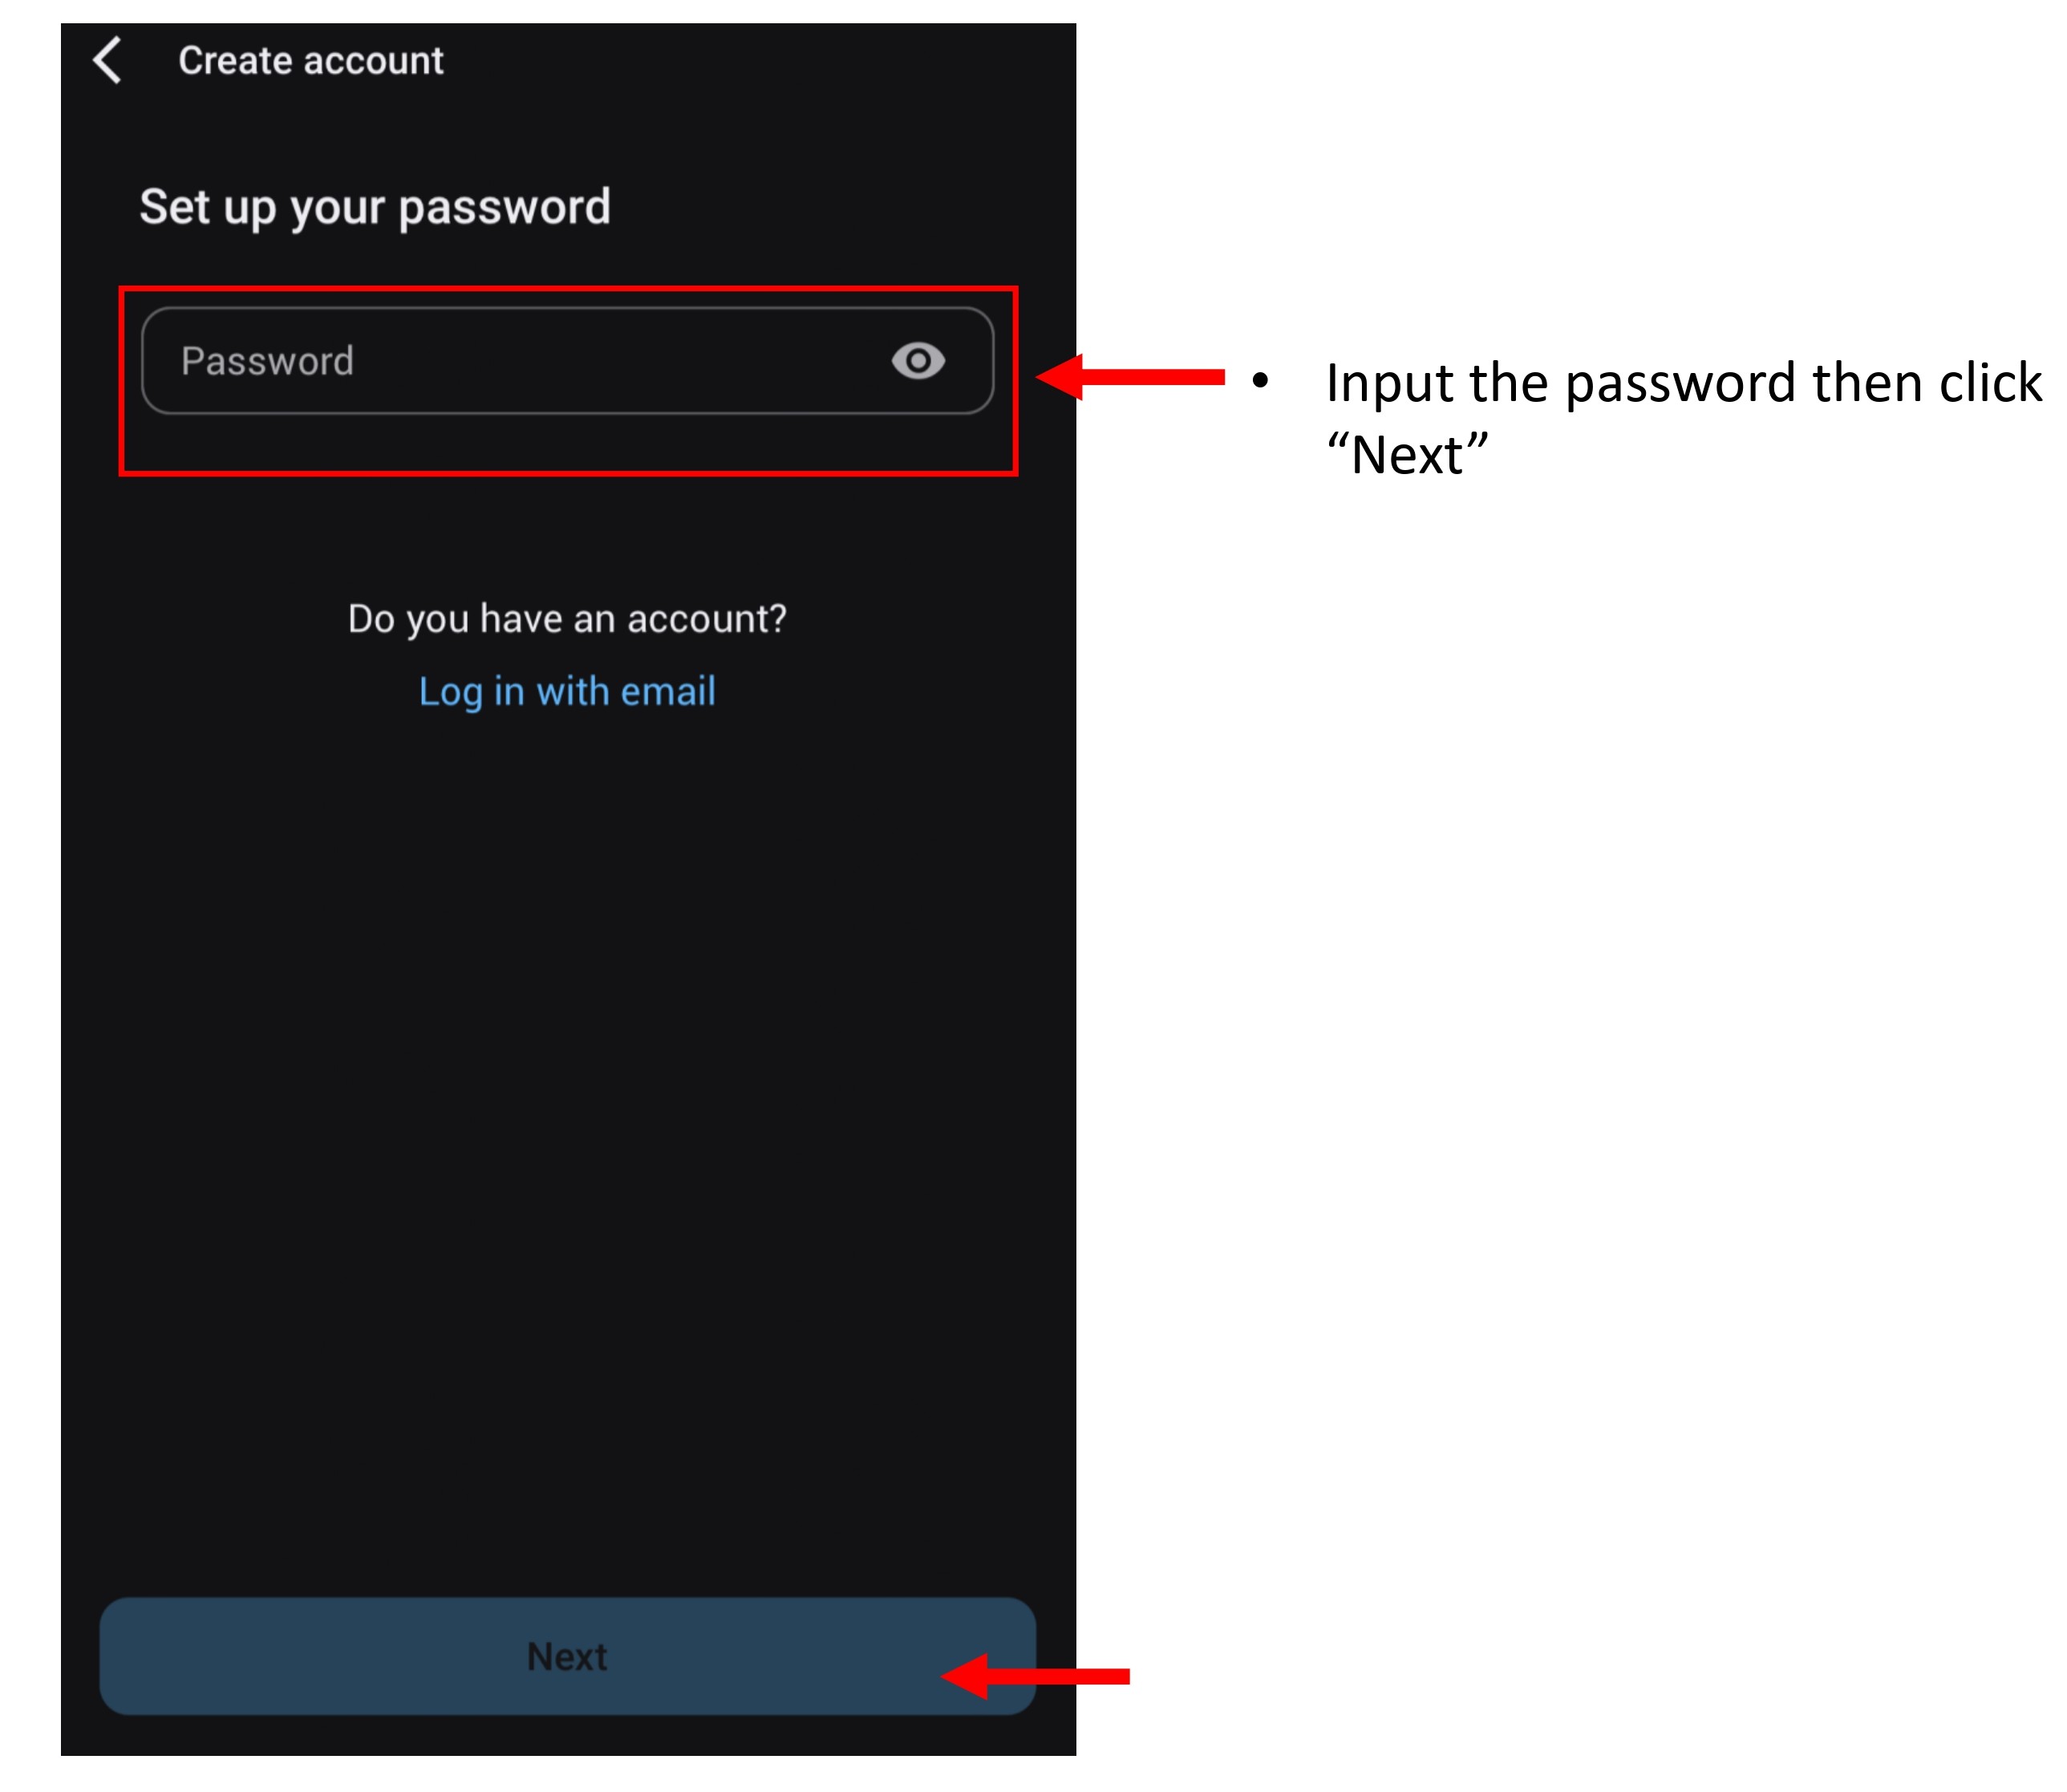
- Input the password and click "Next".

- Tick on the Terms and Agreement , then click "Create Account".
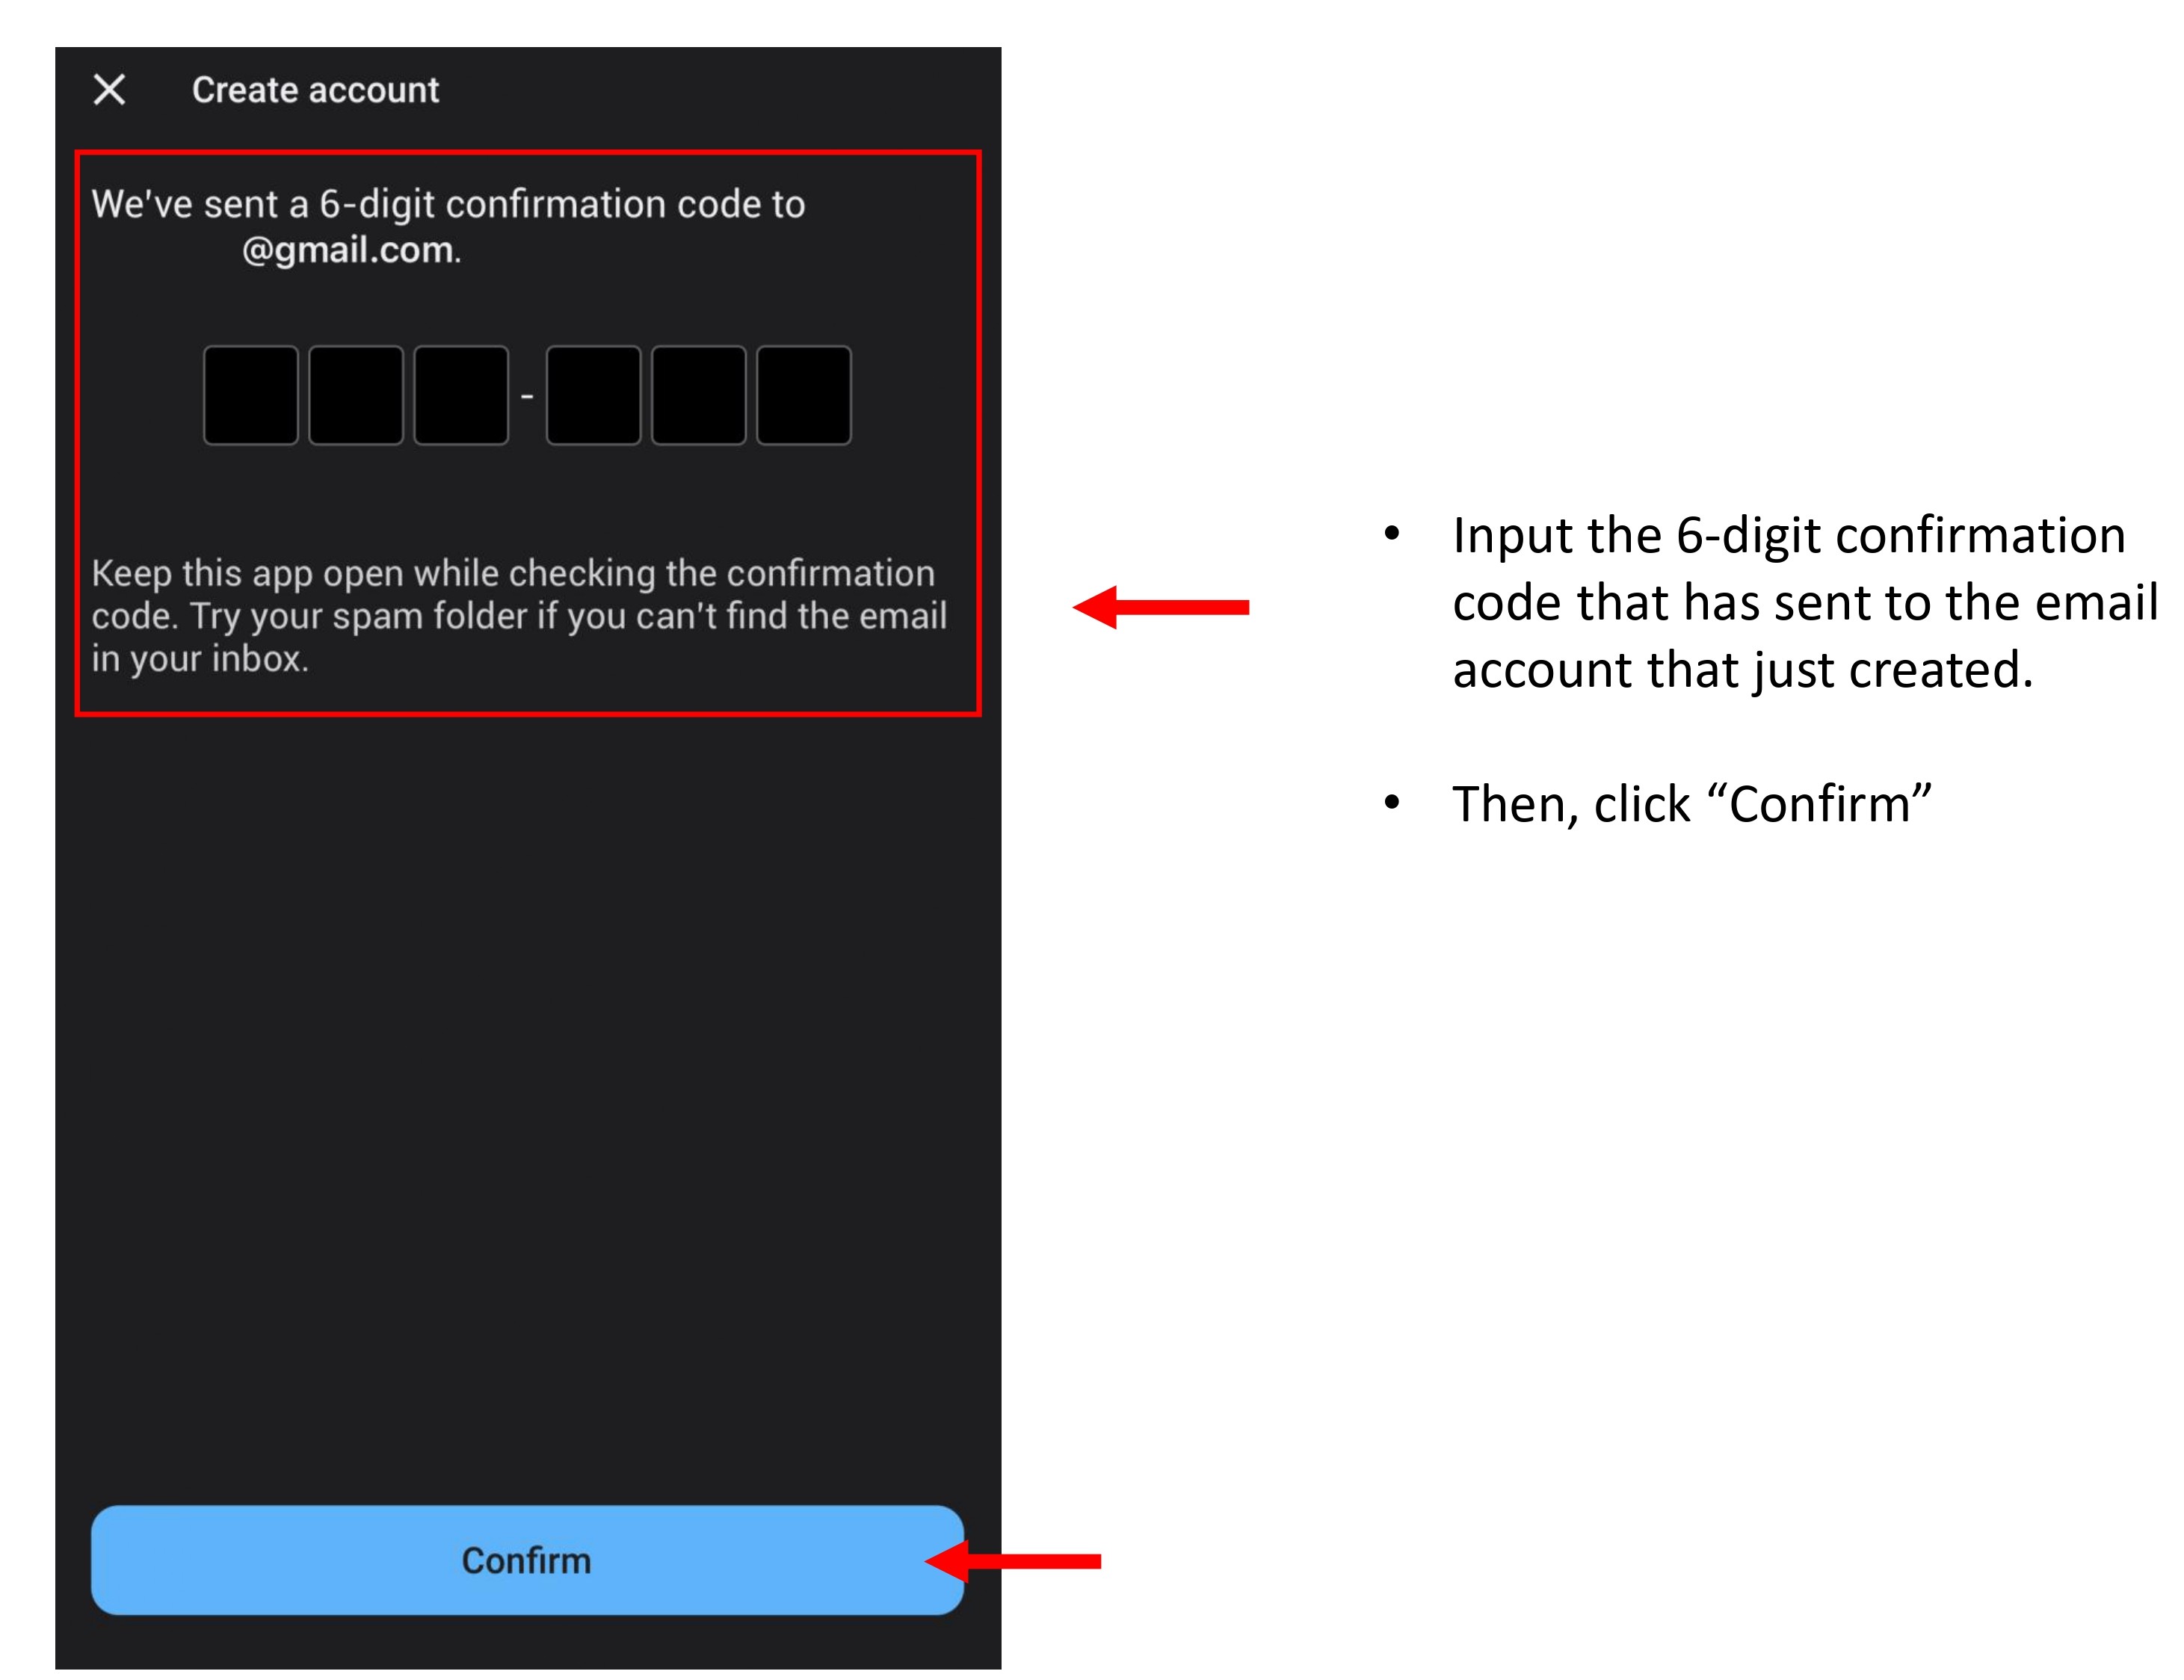
- Input the 6-digit confirmation that sent to the email address created. Then click "Confirm".

- You have successfully registered an account to access BlackVue Apps.
1.2.3.2 Existing BlackVue Apps Account
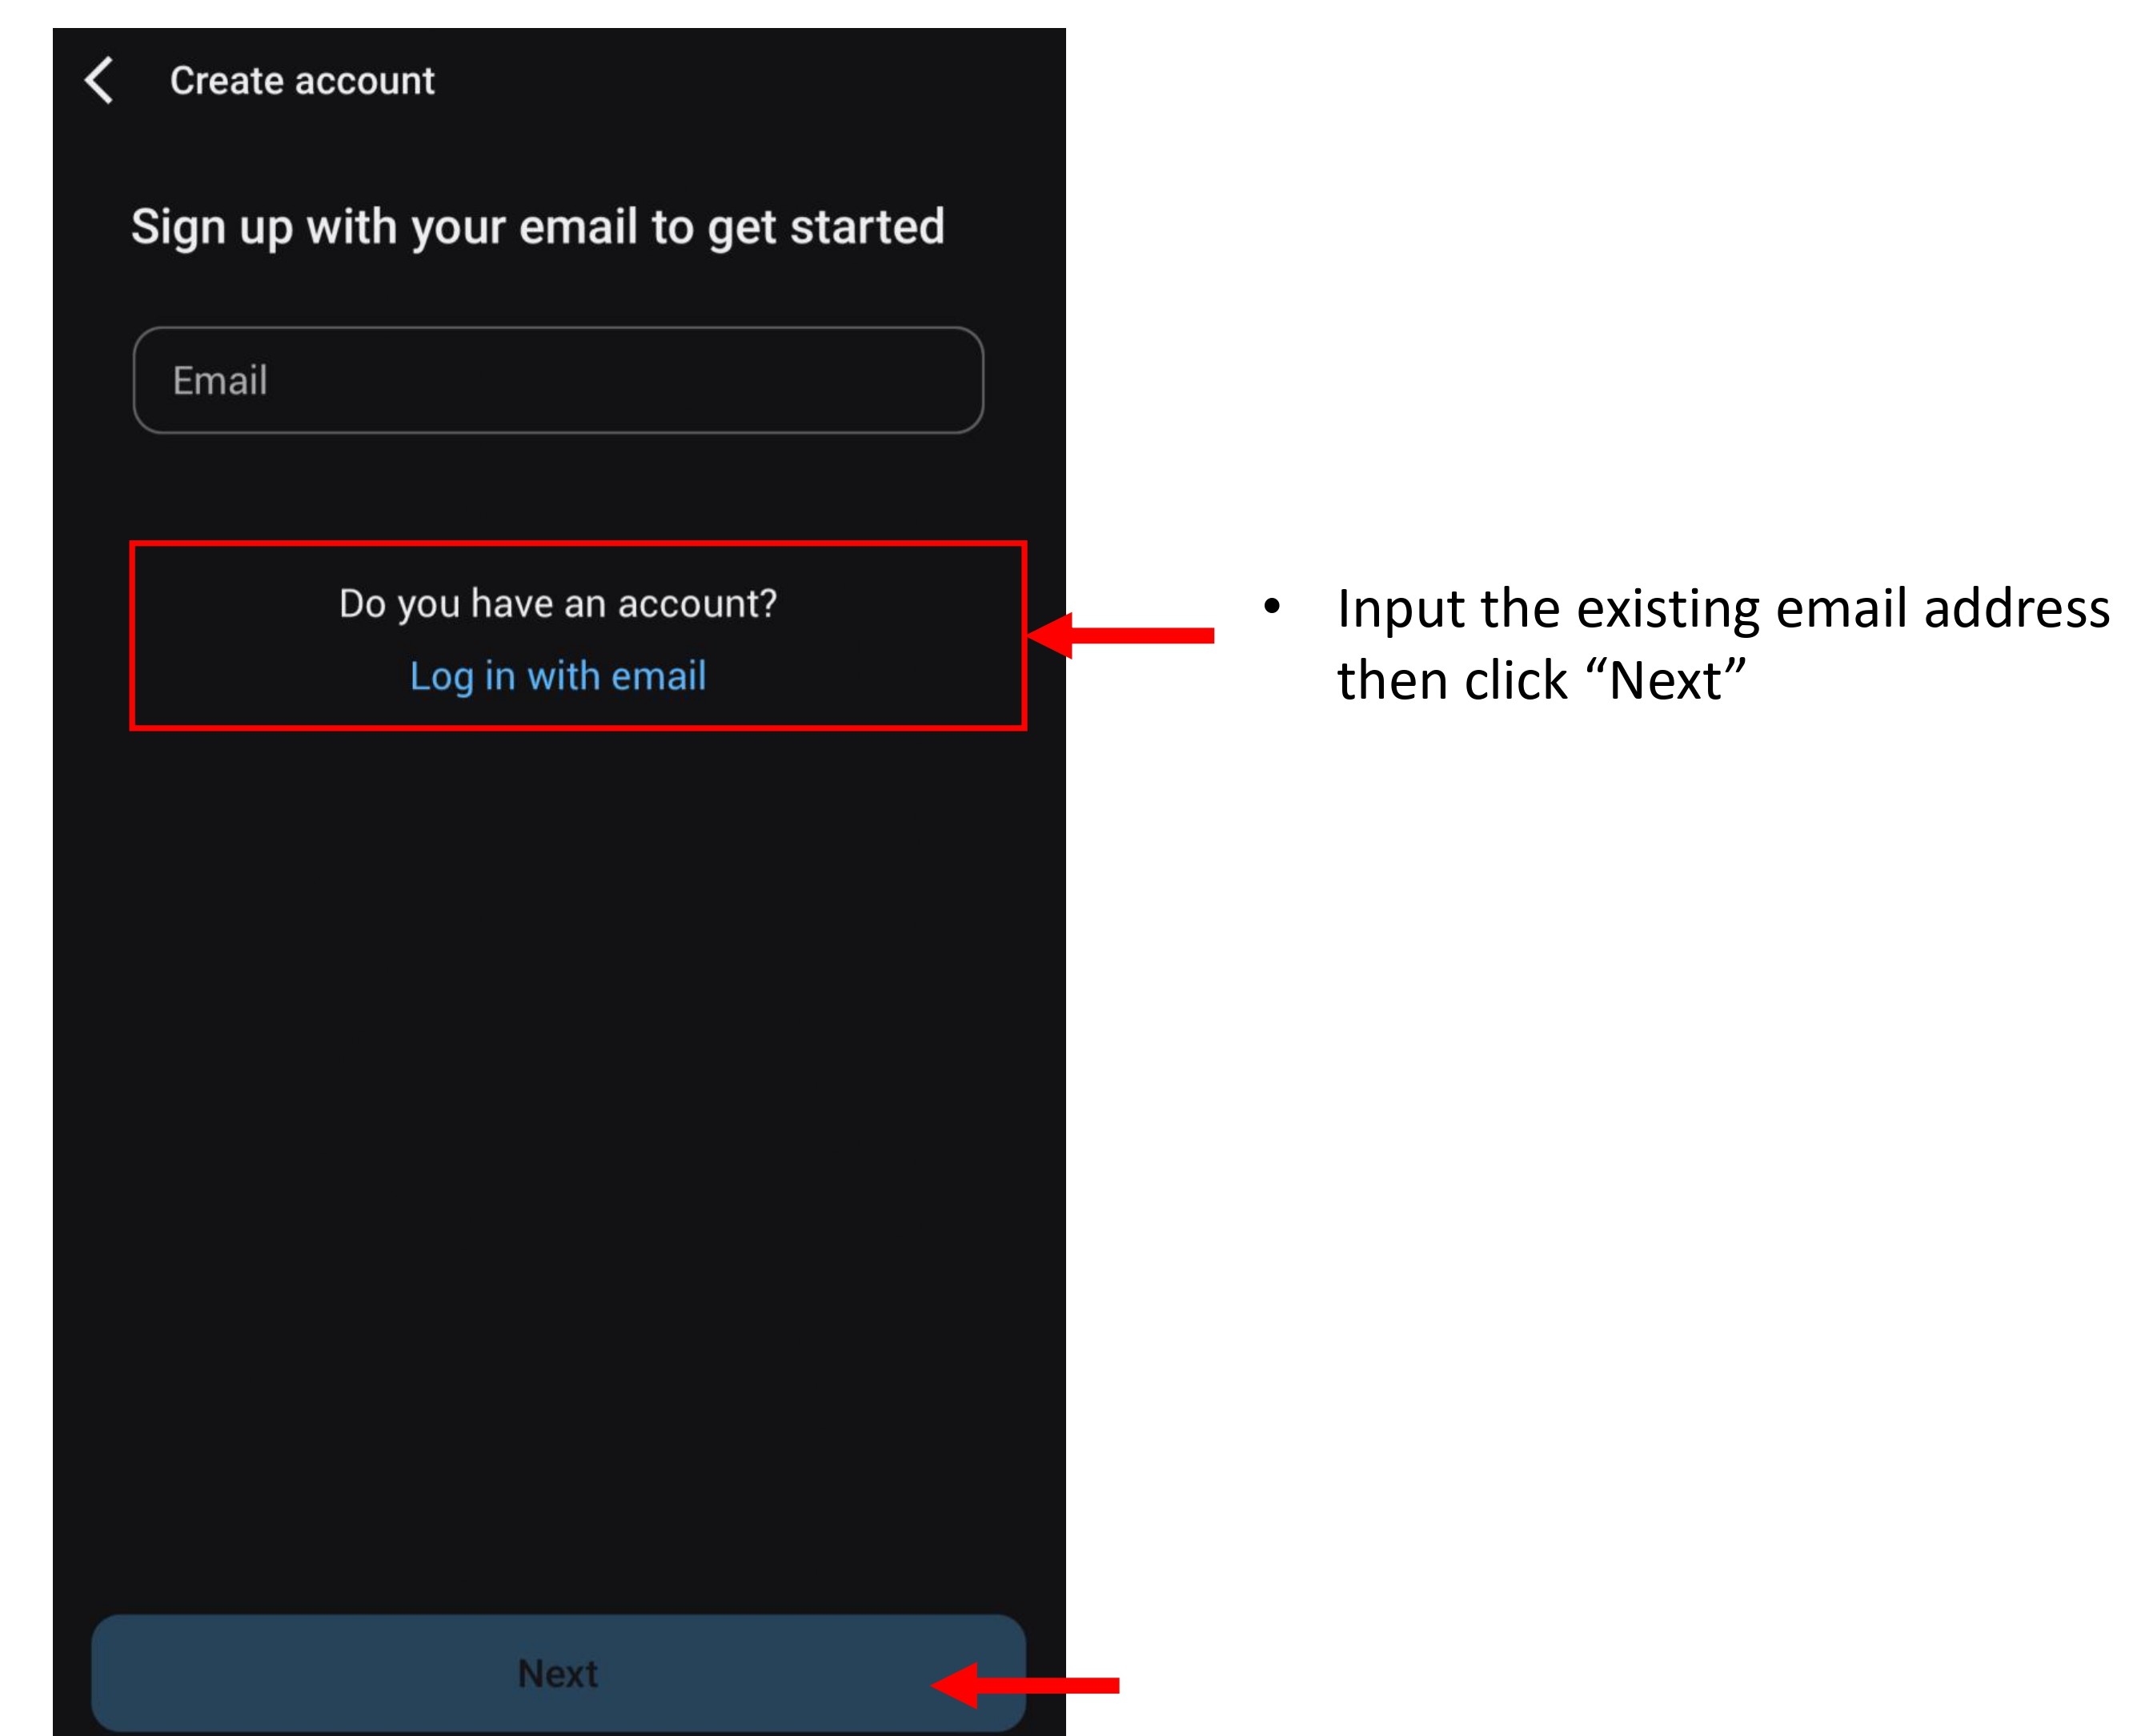
- For existing user that has BlackVue account, click on "Log In With Email".
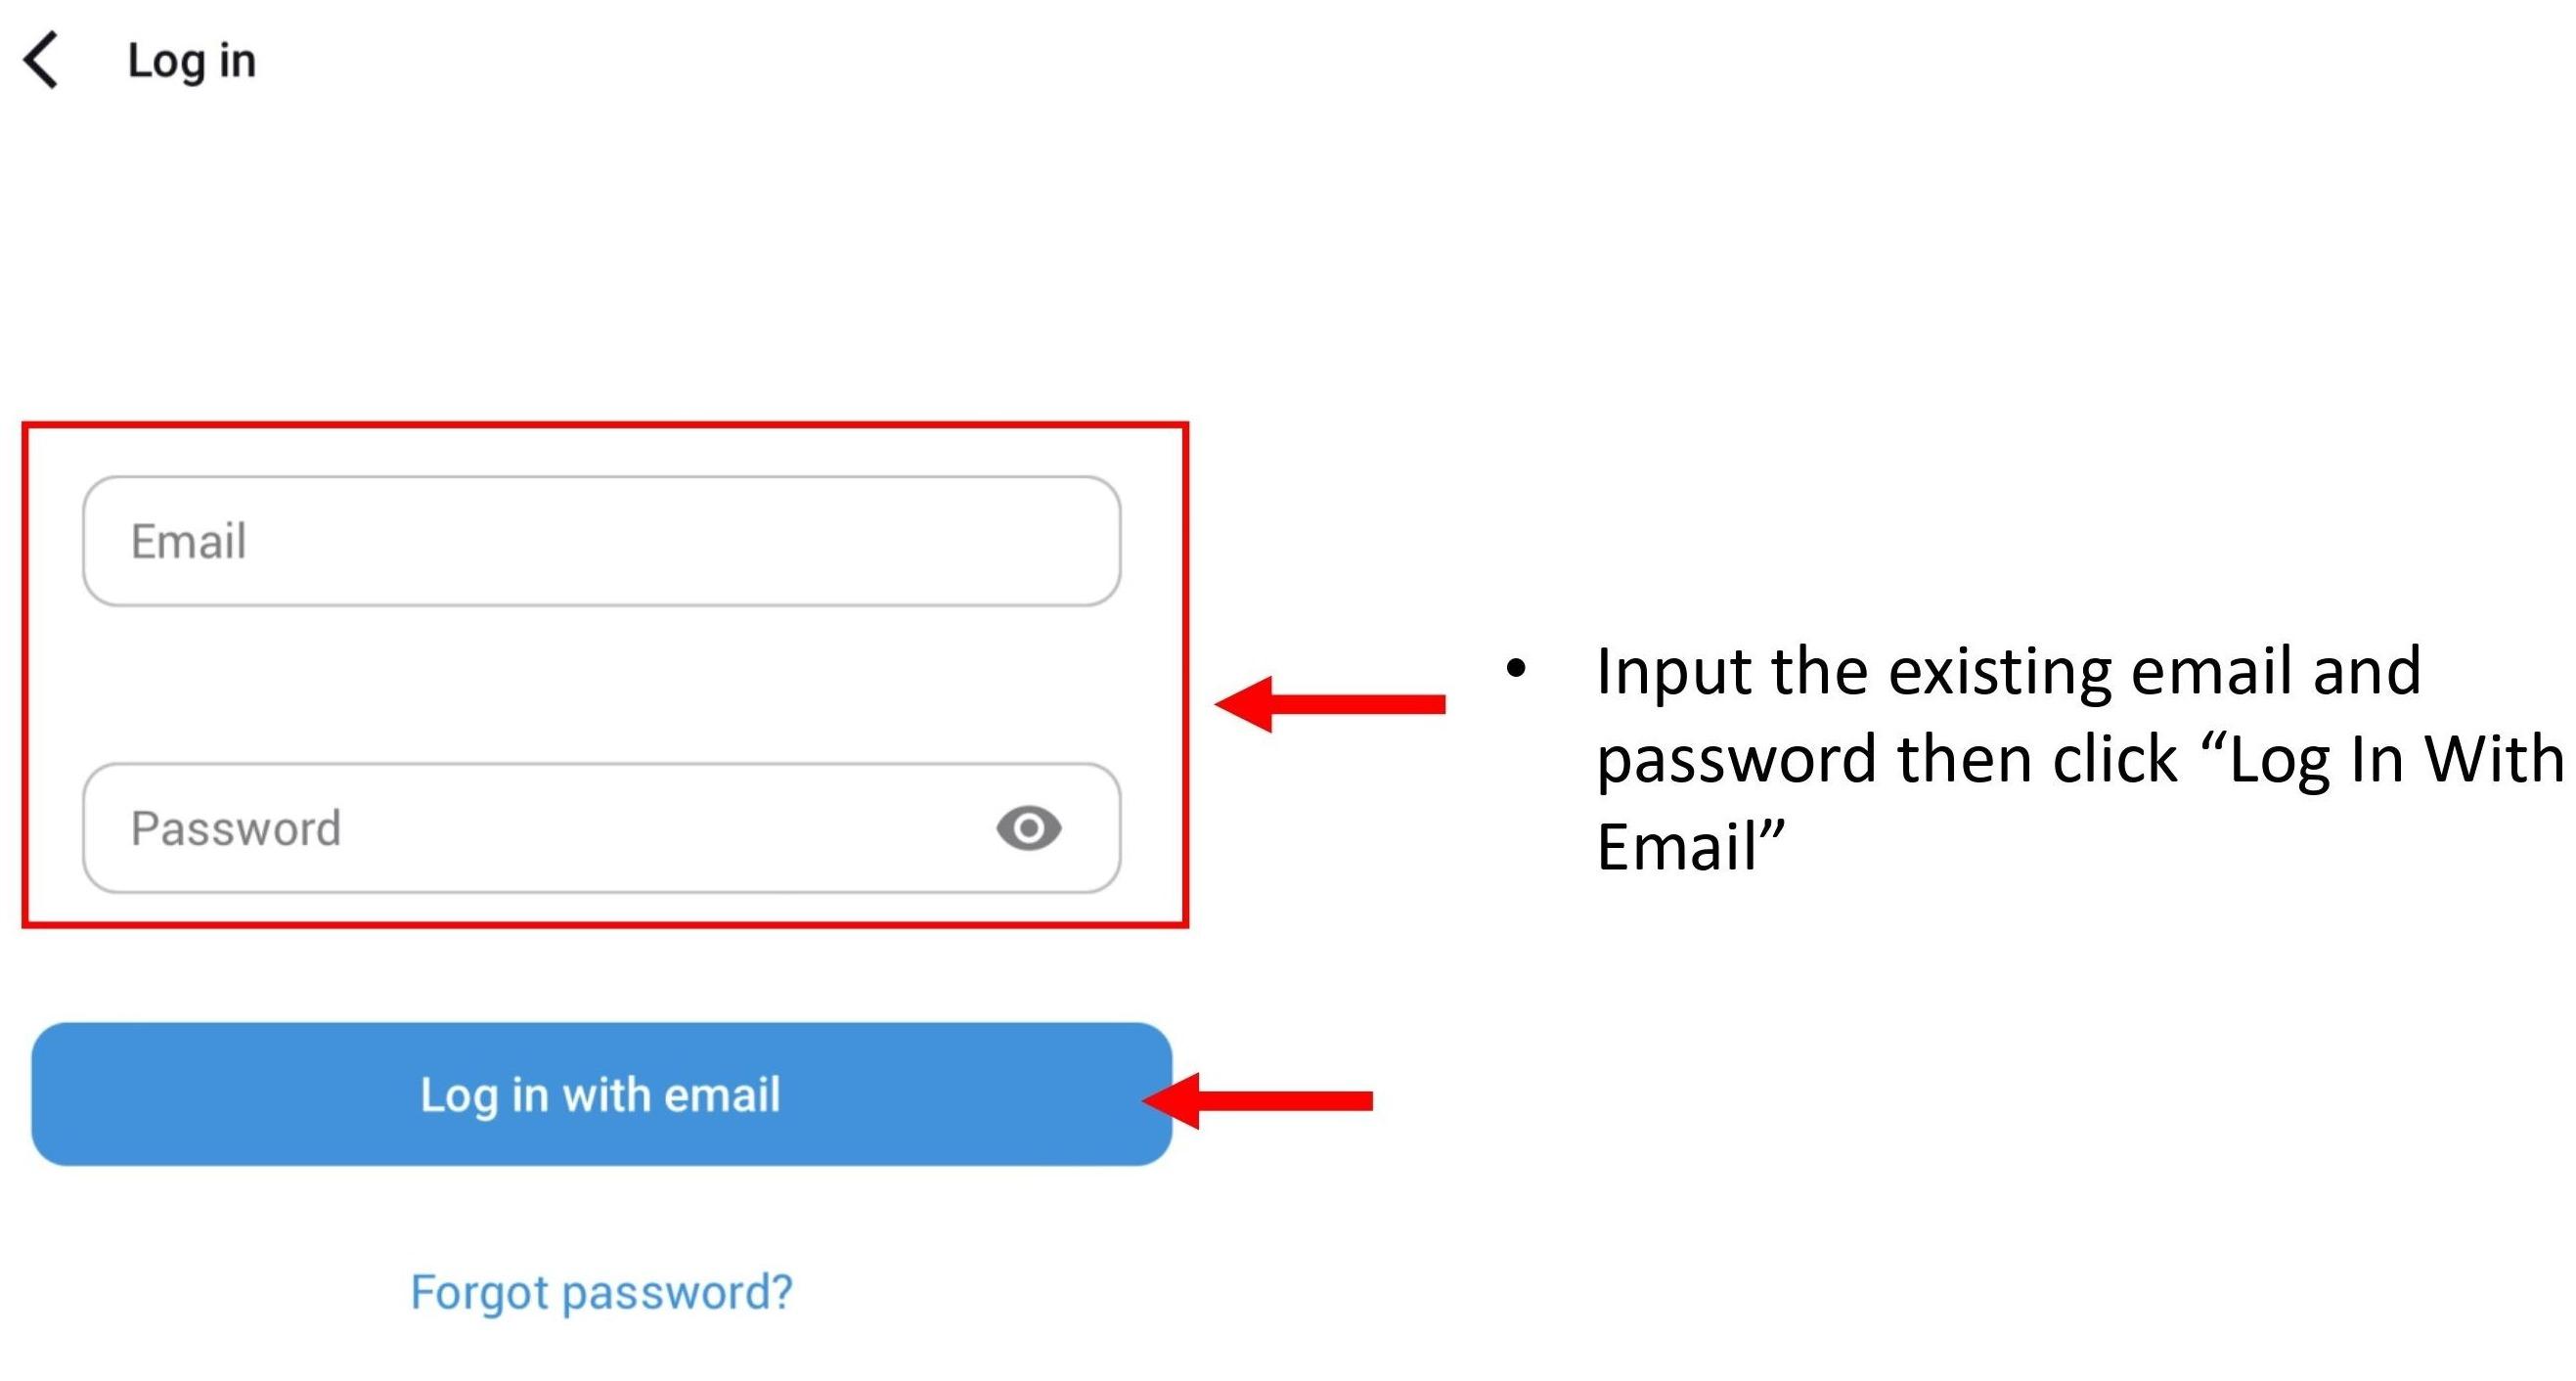
- Input the email address and password.
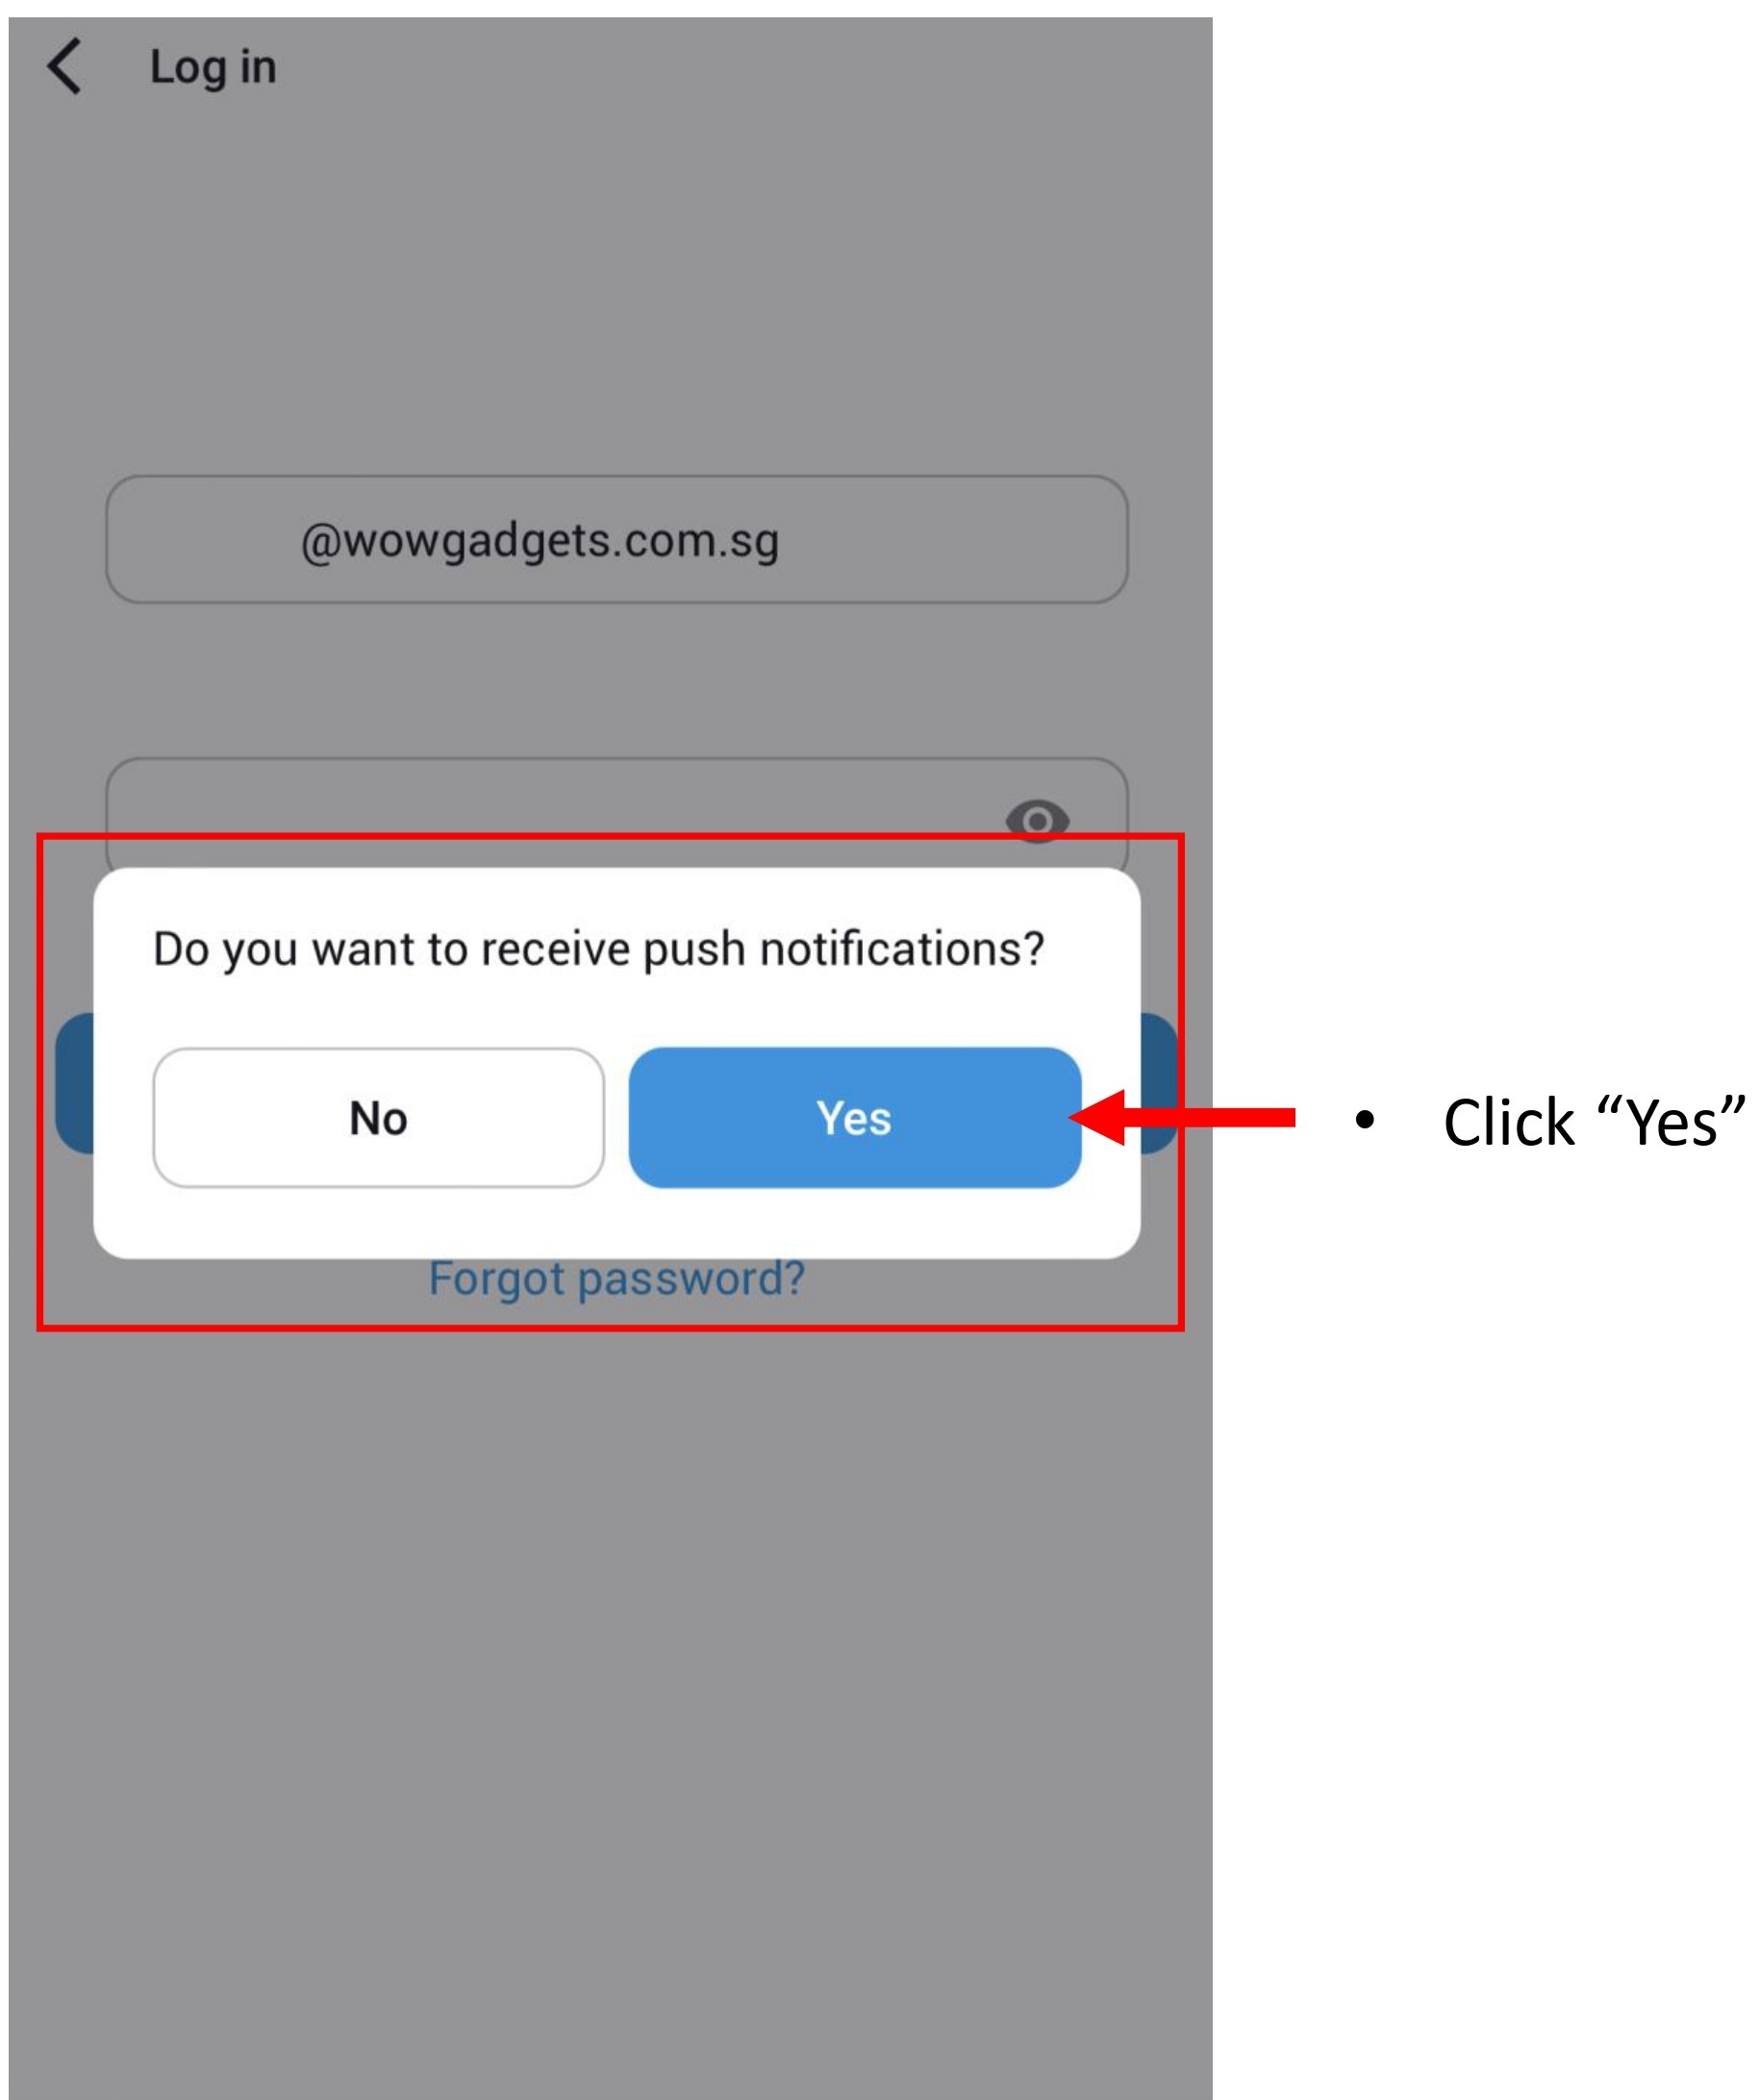
- Click "Yes".

- You have successfully log in to the existing BlackVue account
2. ADD CAMERA - SEAMLESS PAIRING DASHCAM MODEL
2.1 STEPS ON ADDING SEAMLESS PAIRING DASHCAM MODEL
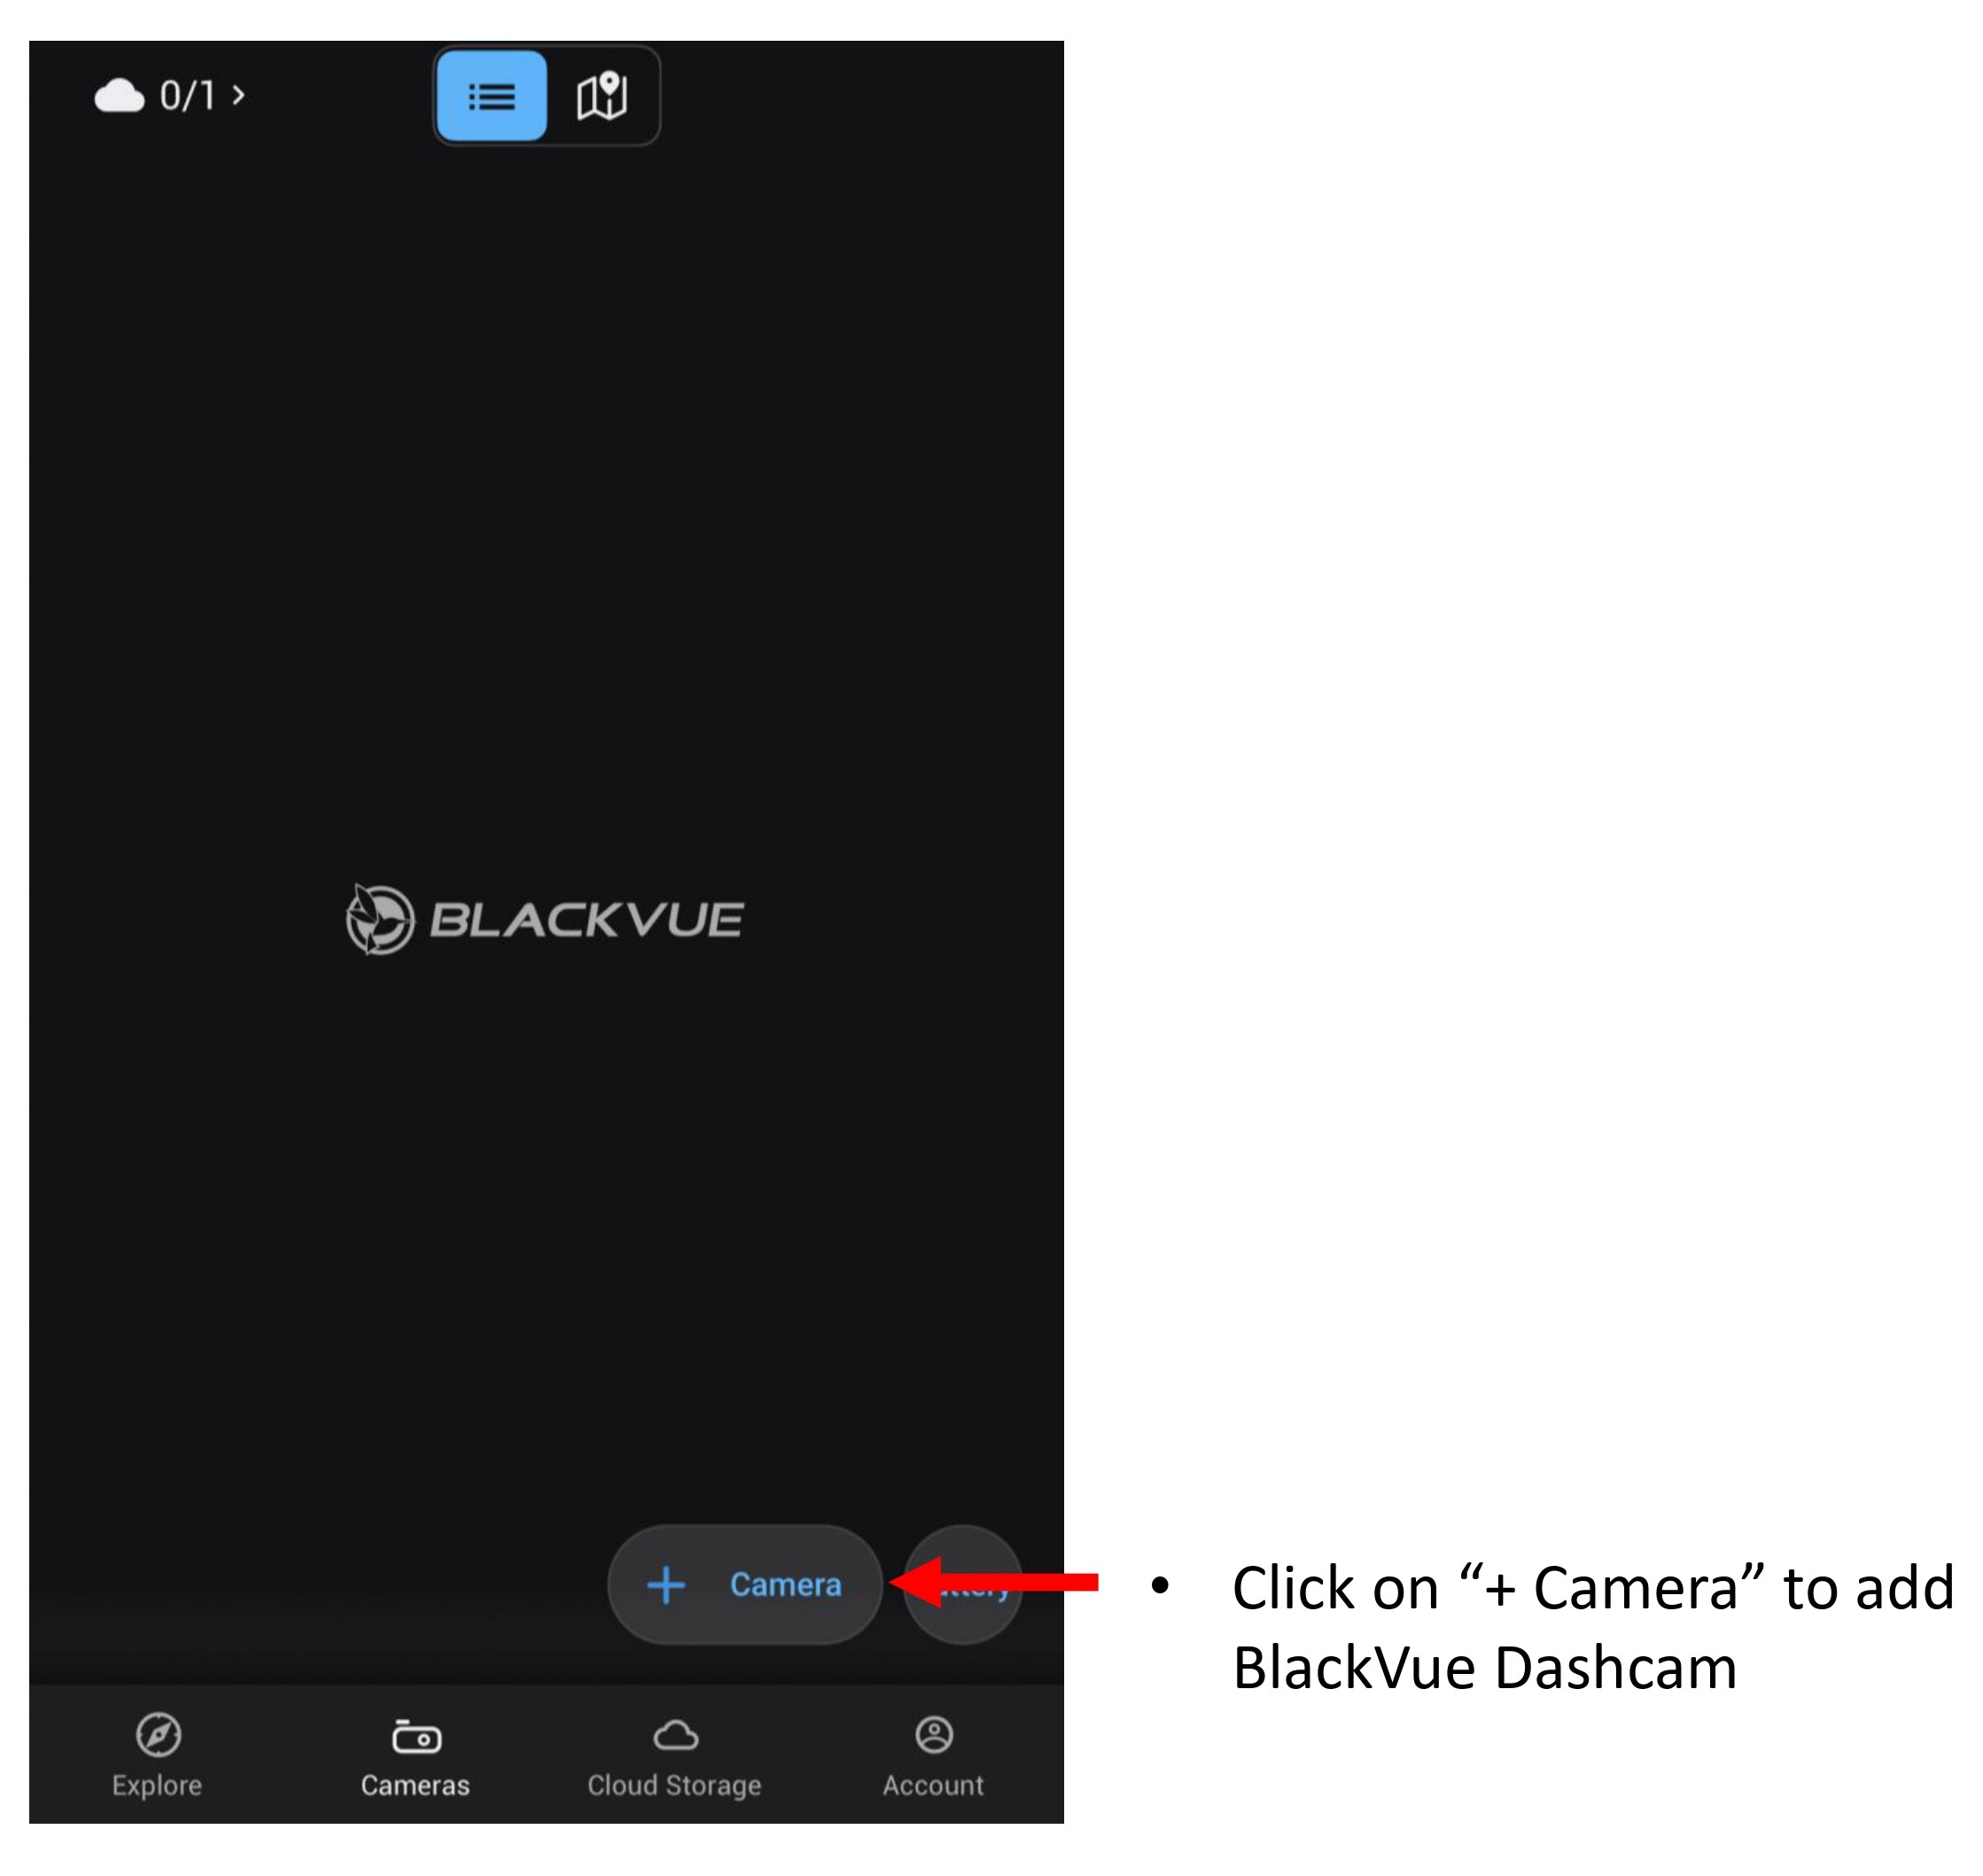
- Click "+ Camera" to add camera.
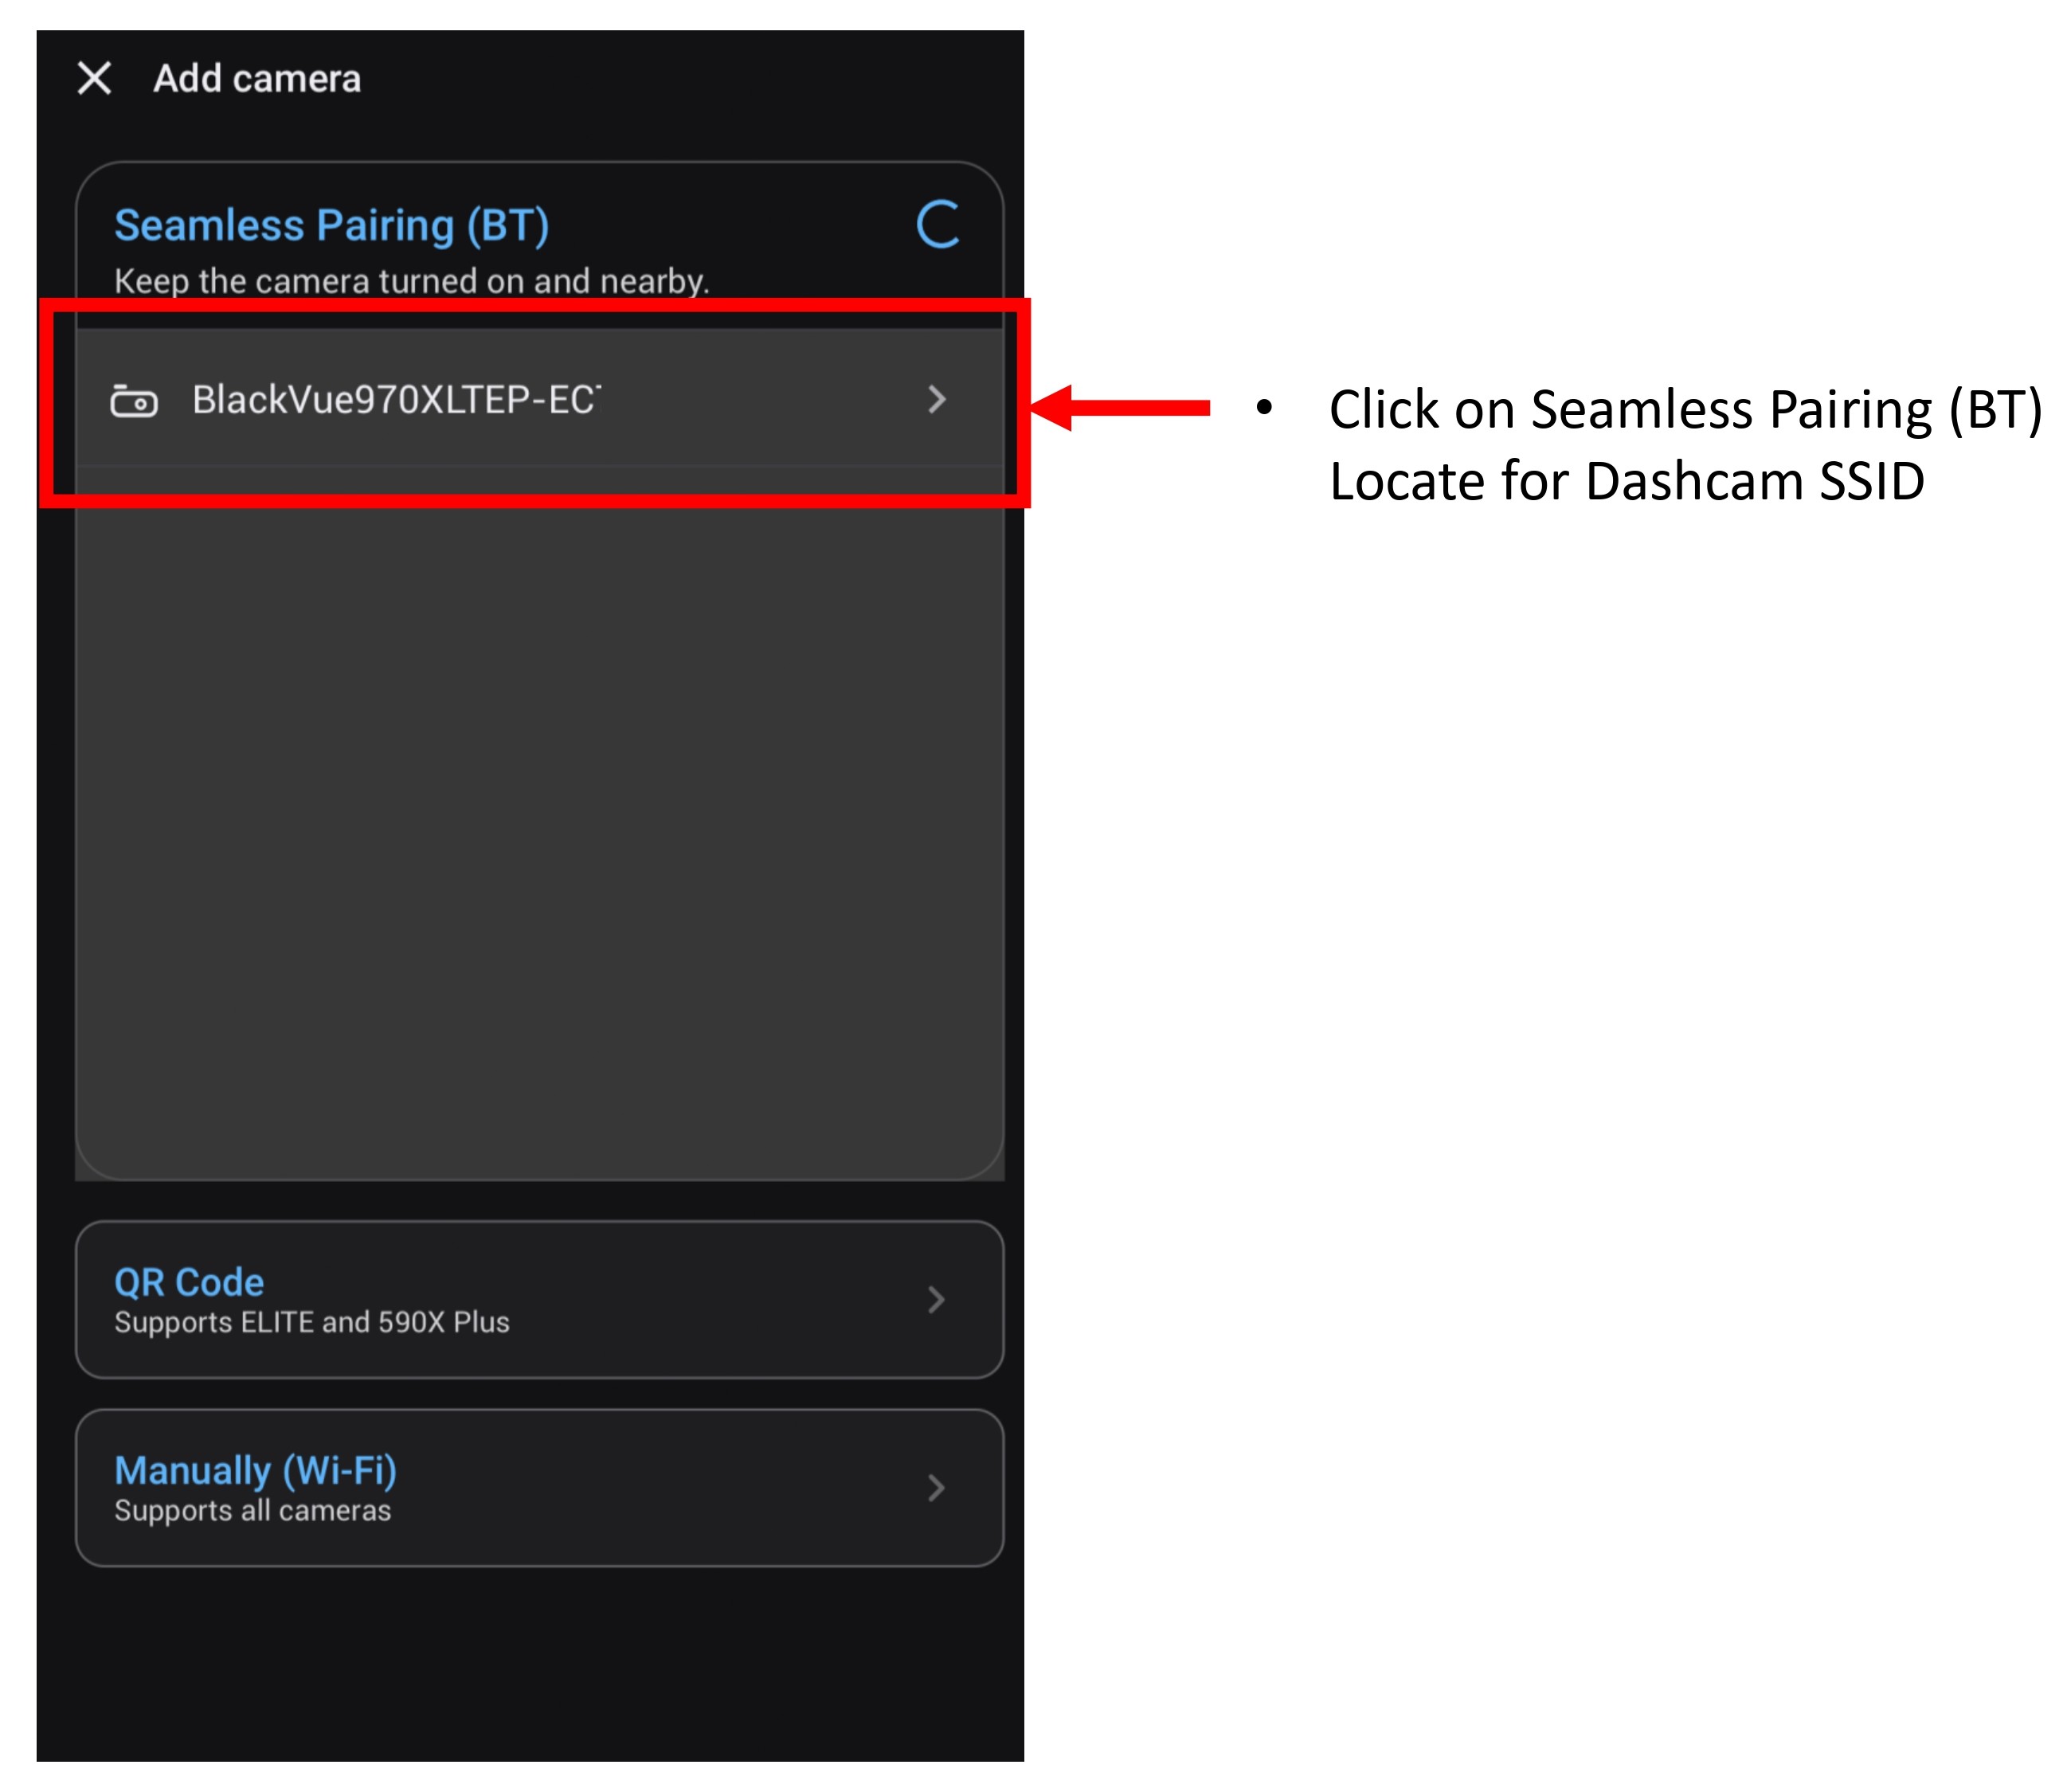
- Select "Seamless Pairing" for dashcam that do have seamless pairing feature.
Dashcams that have seamless pairing features: DR970X, DR770X, DR900X, DR750X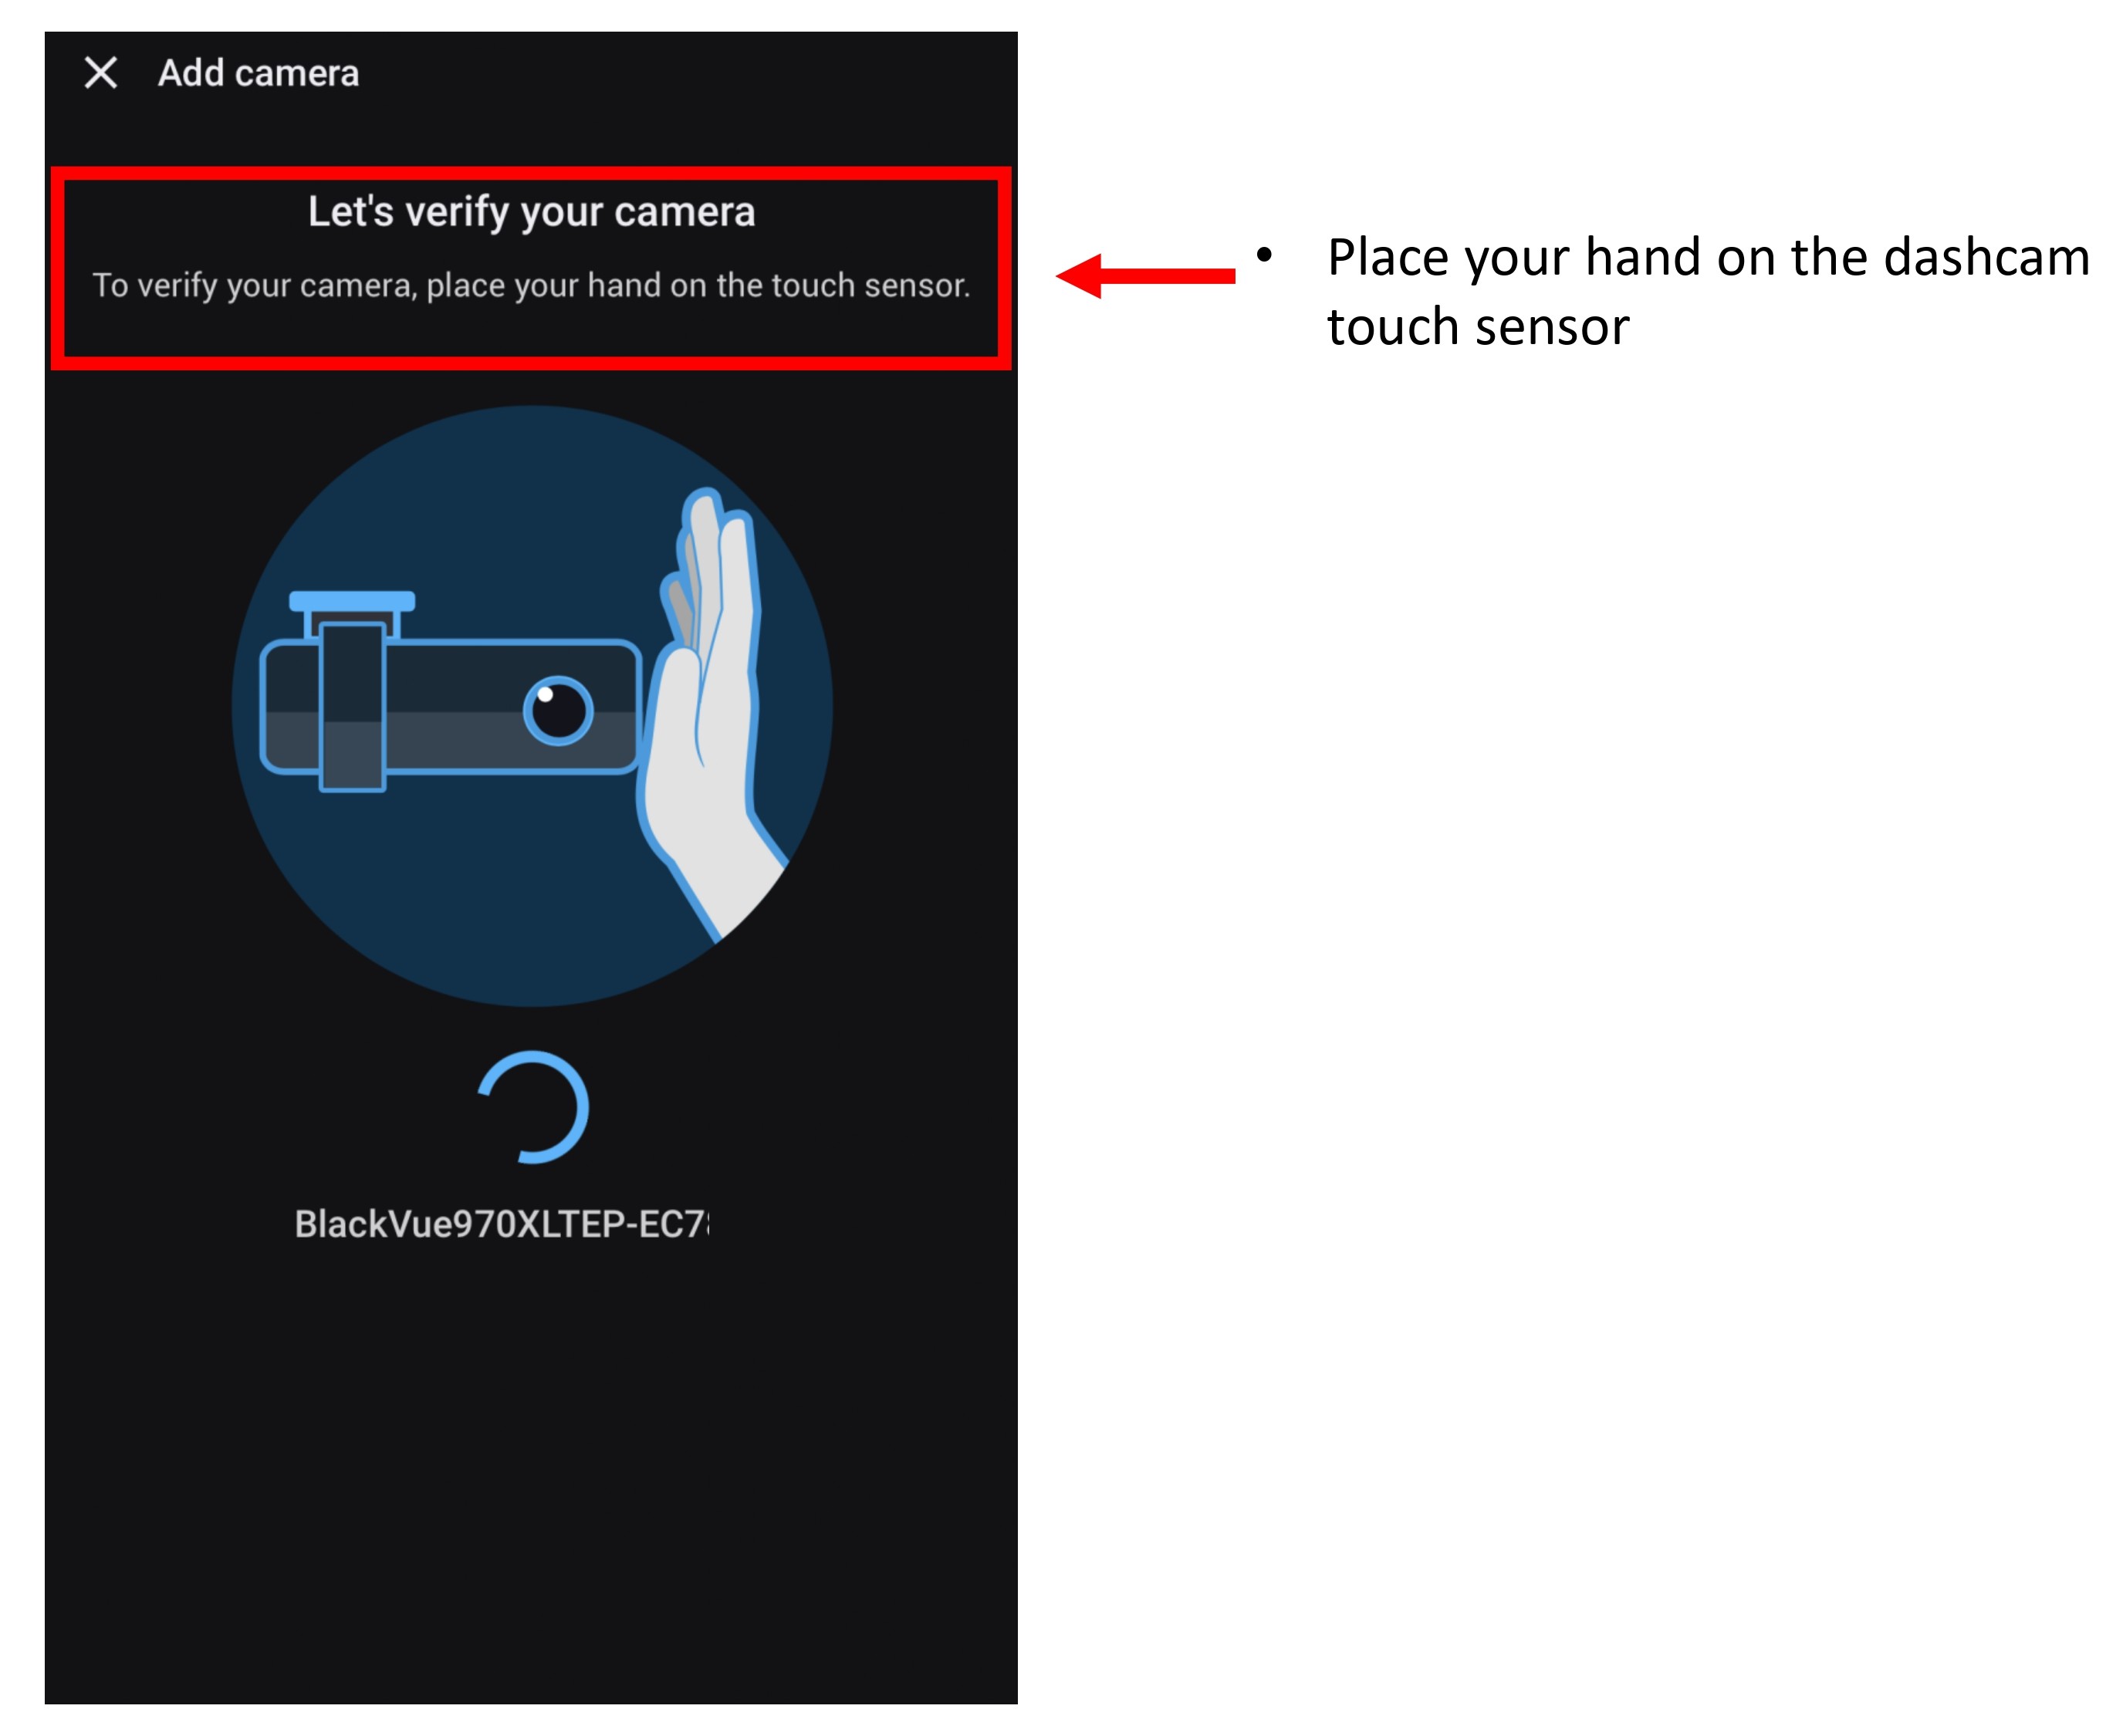
- Place your hand on the dashcam touch sensor to pair it.
- Once paired, it will shown on screen.
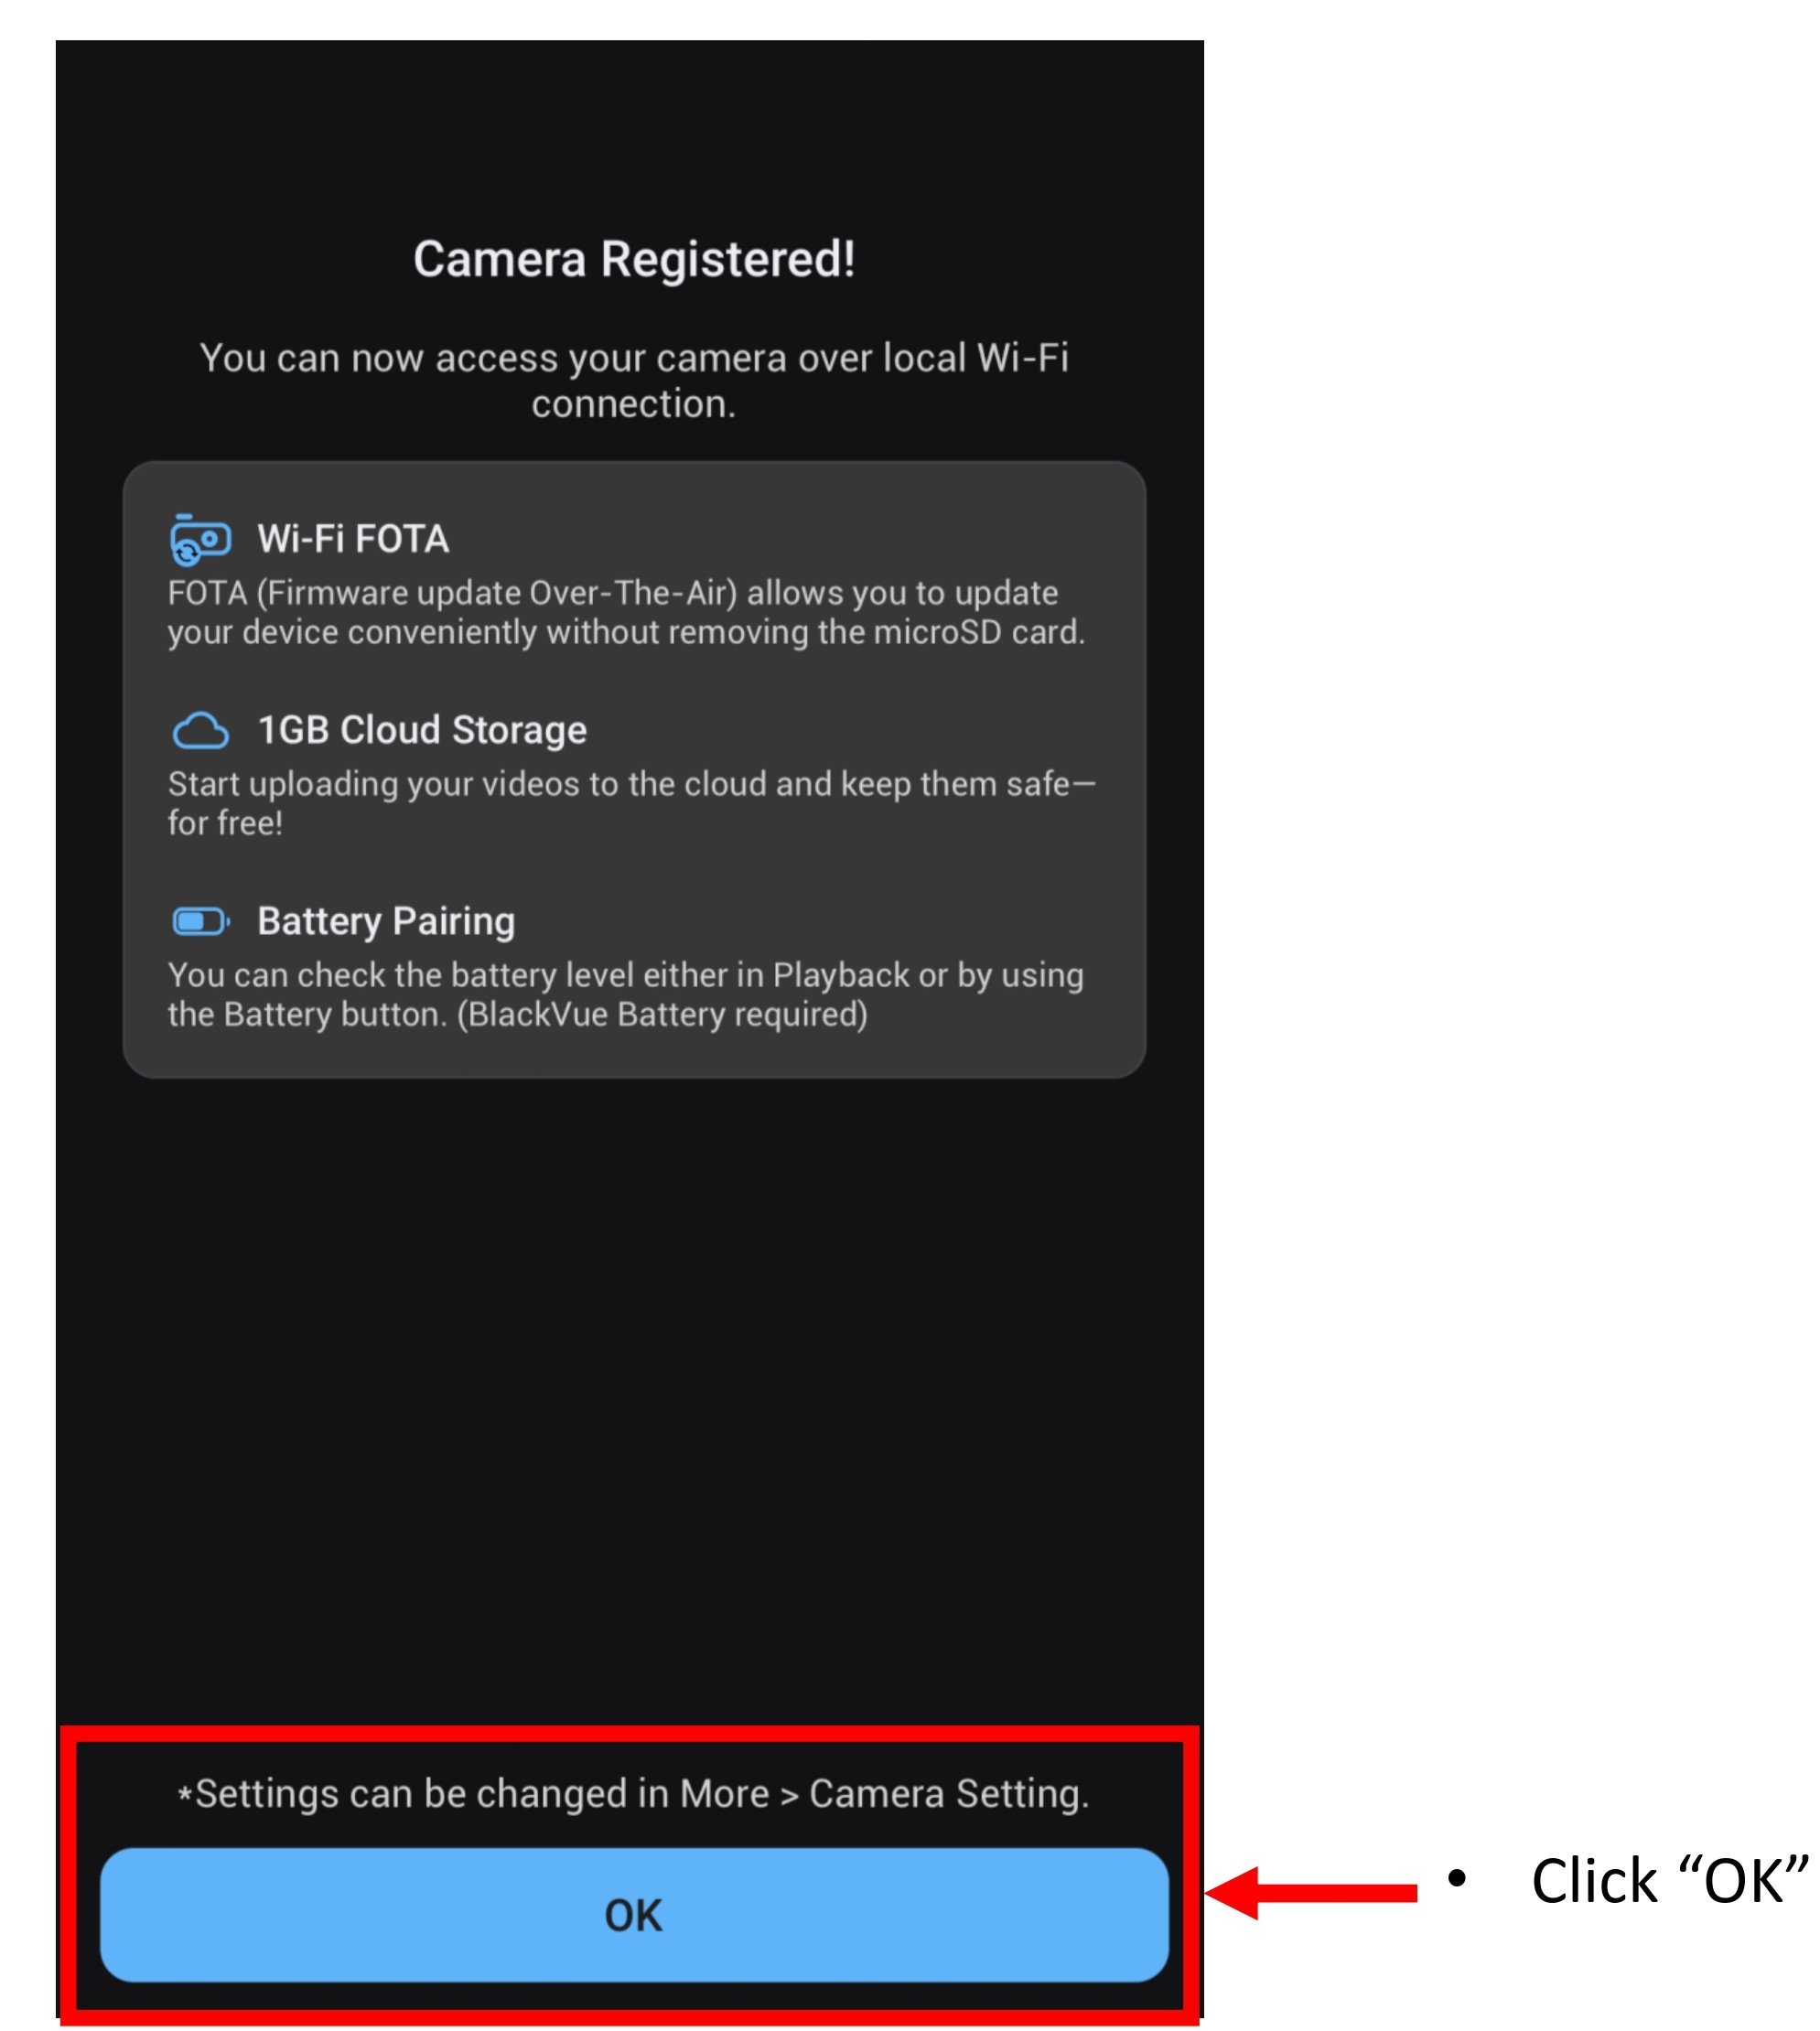
- Click "OK".
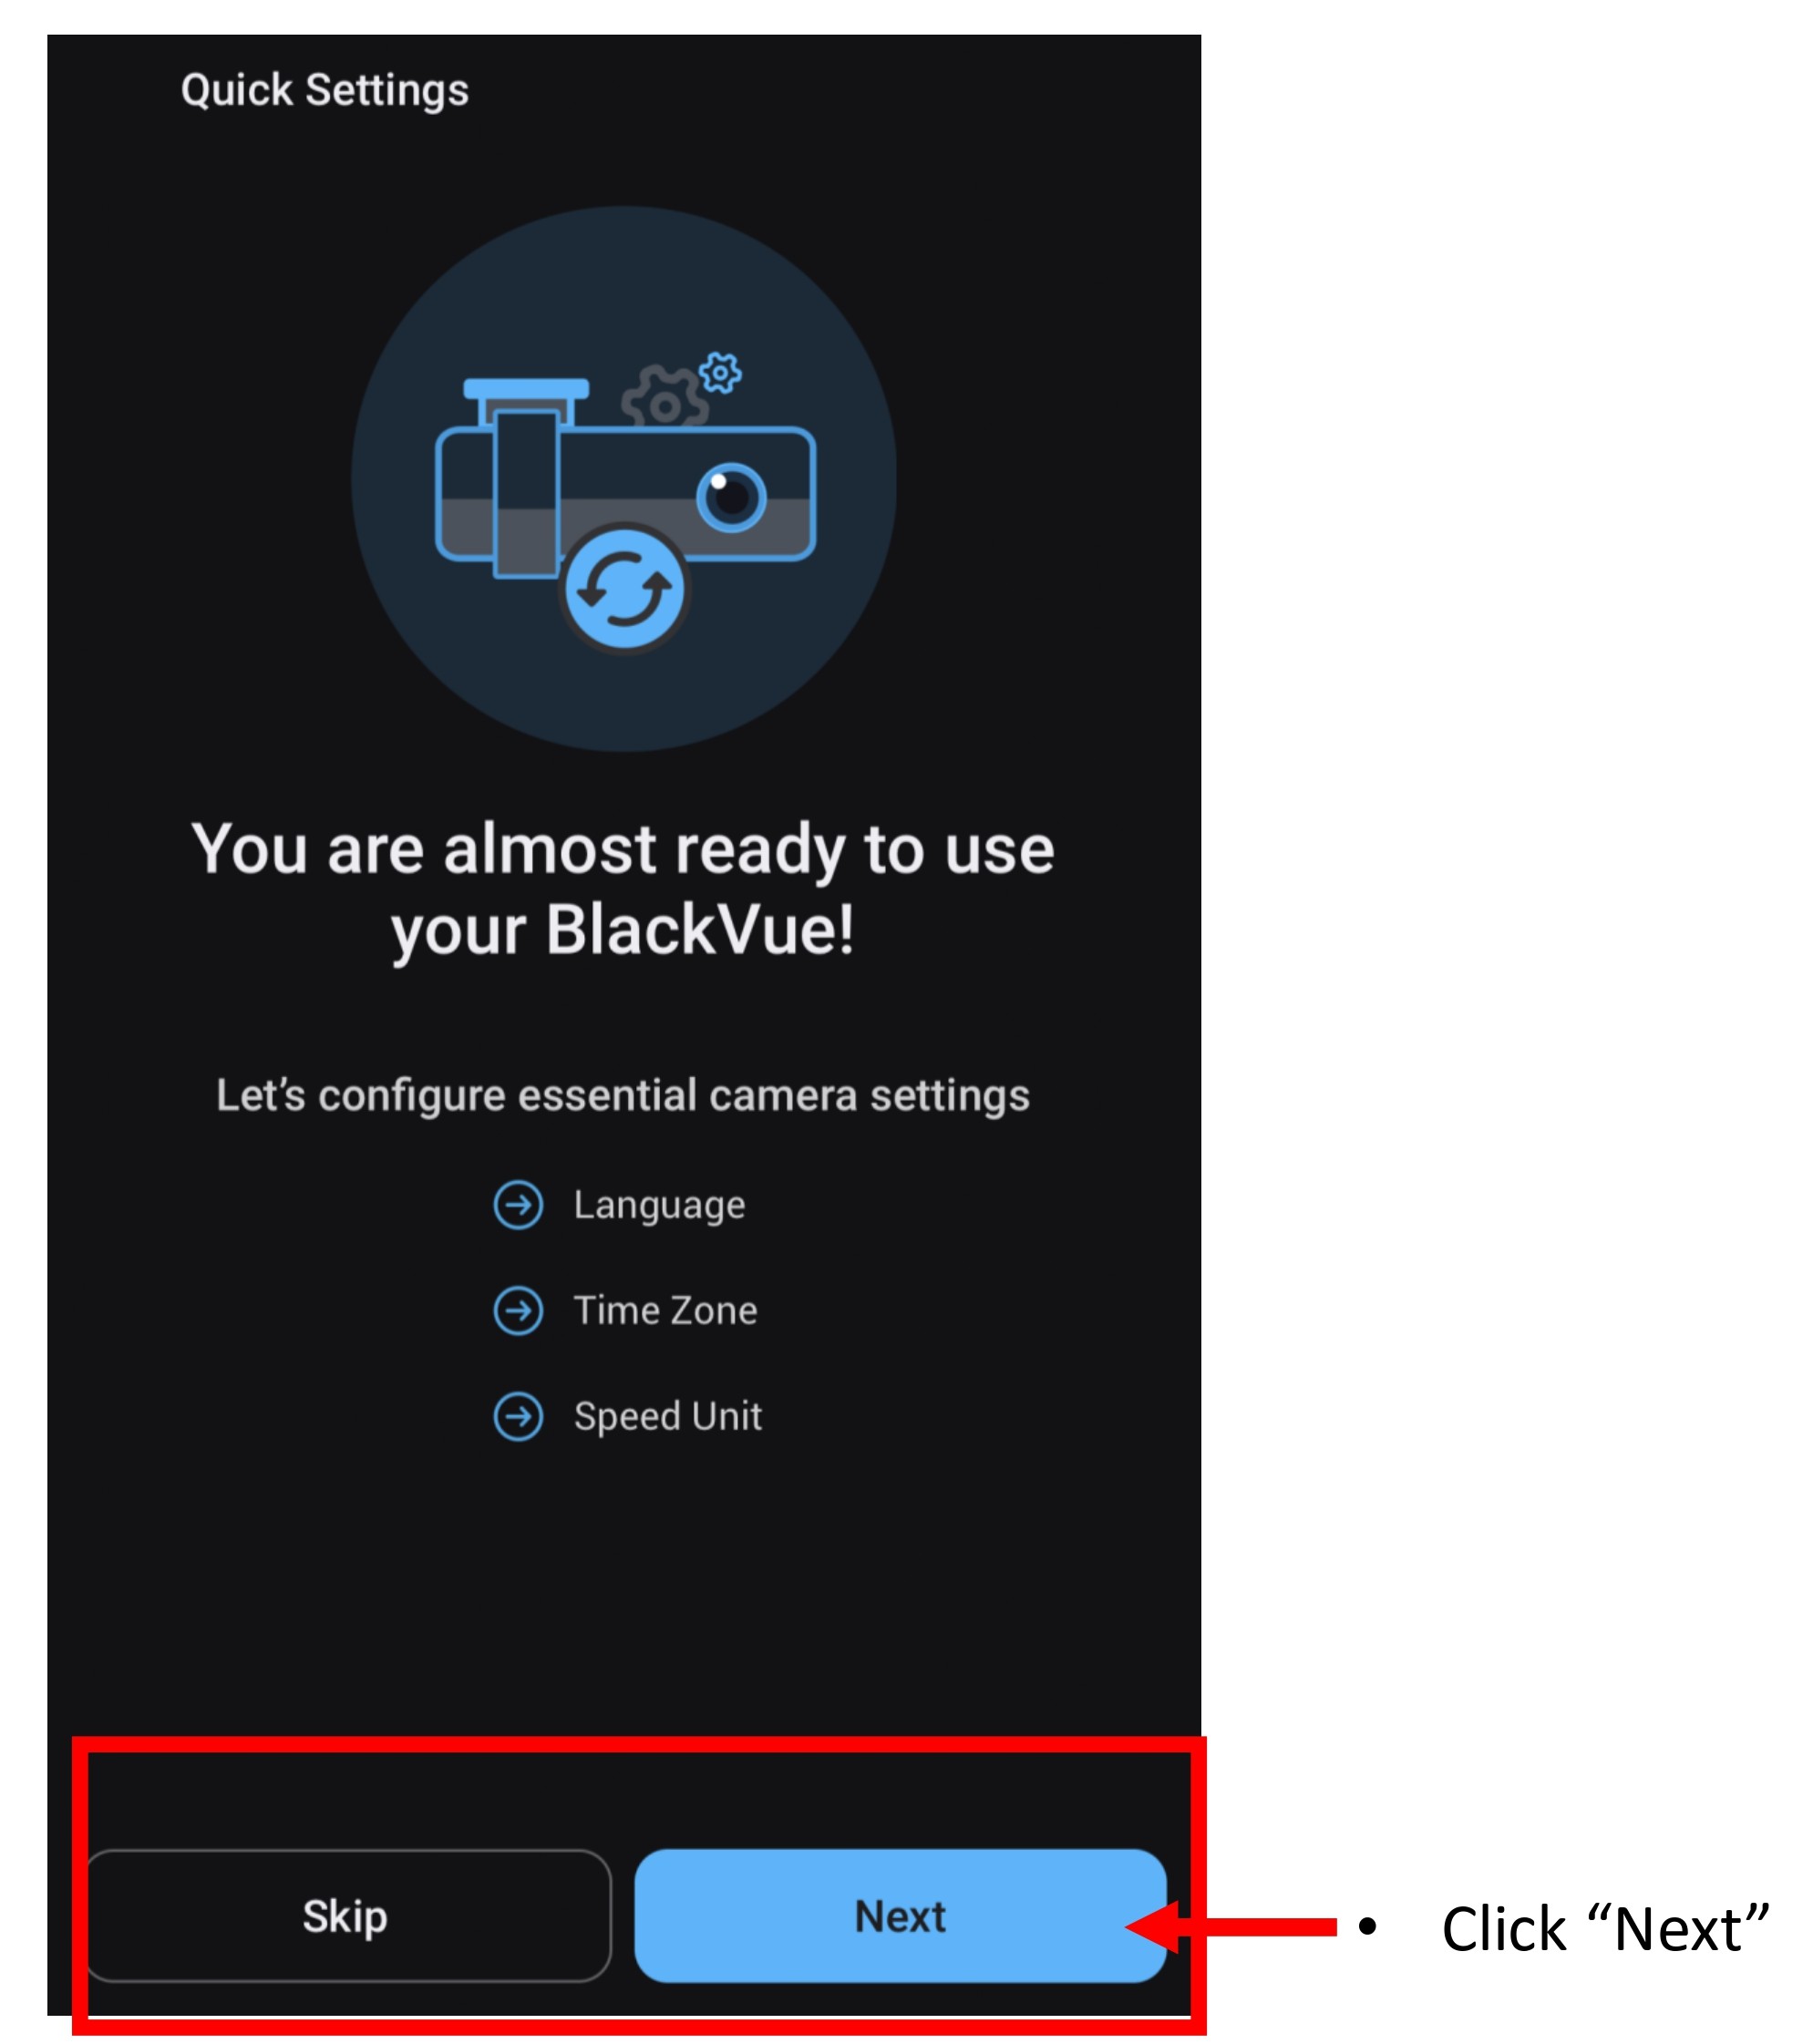
- Click "Next" to do a quick setting or else "Skip".
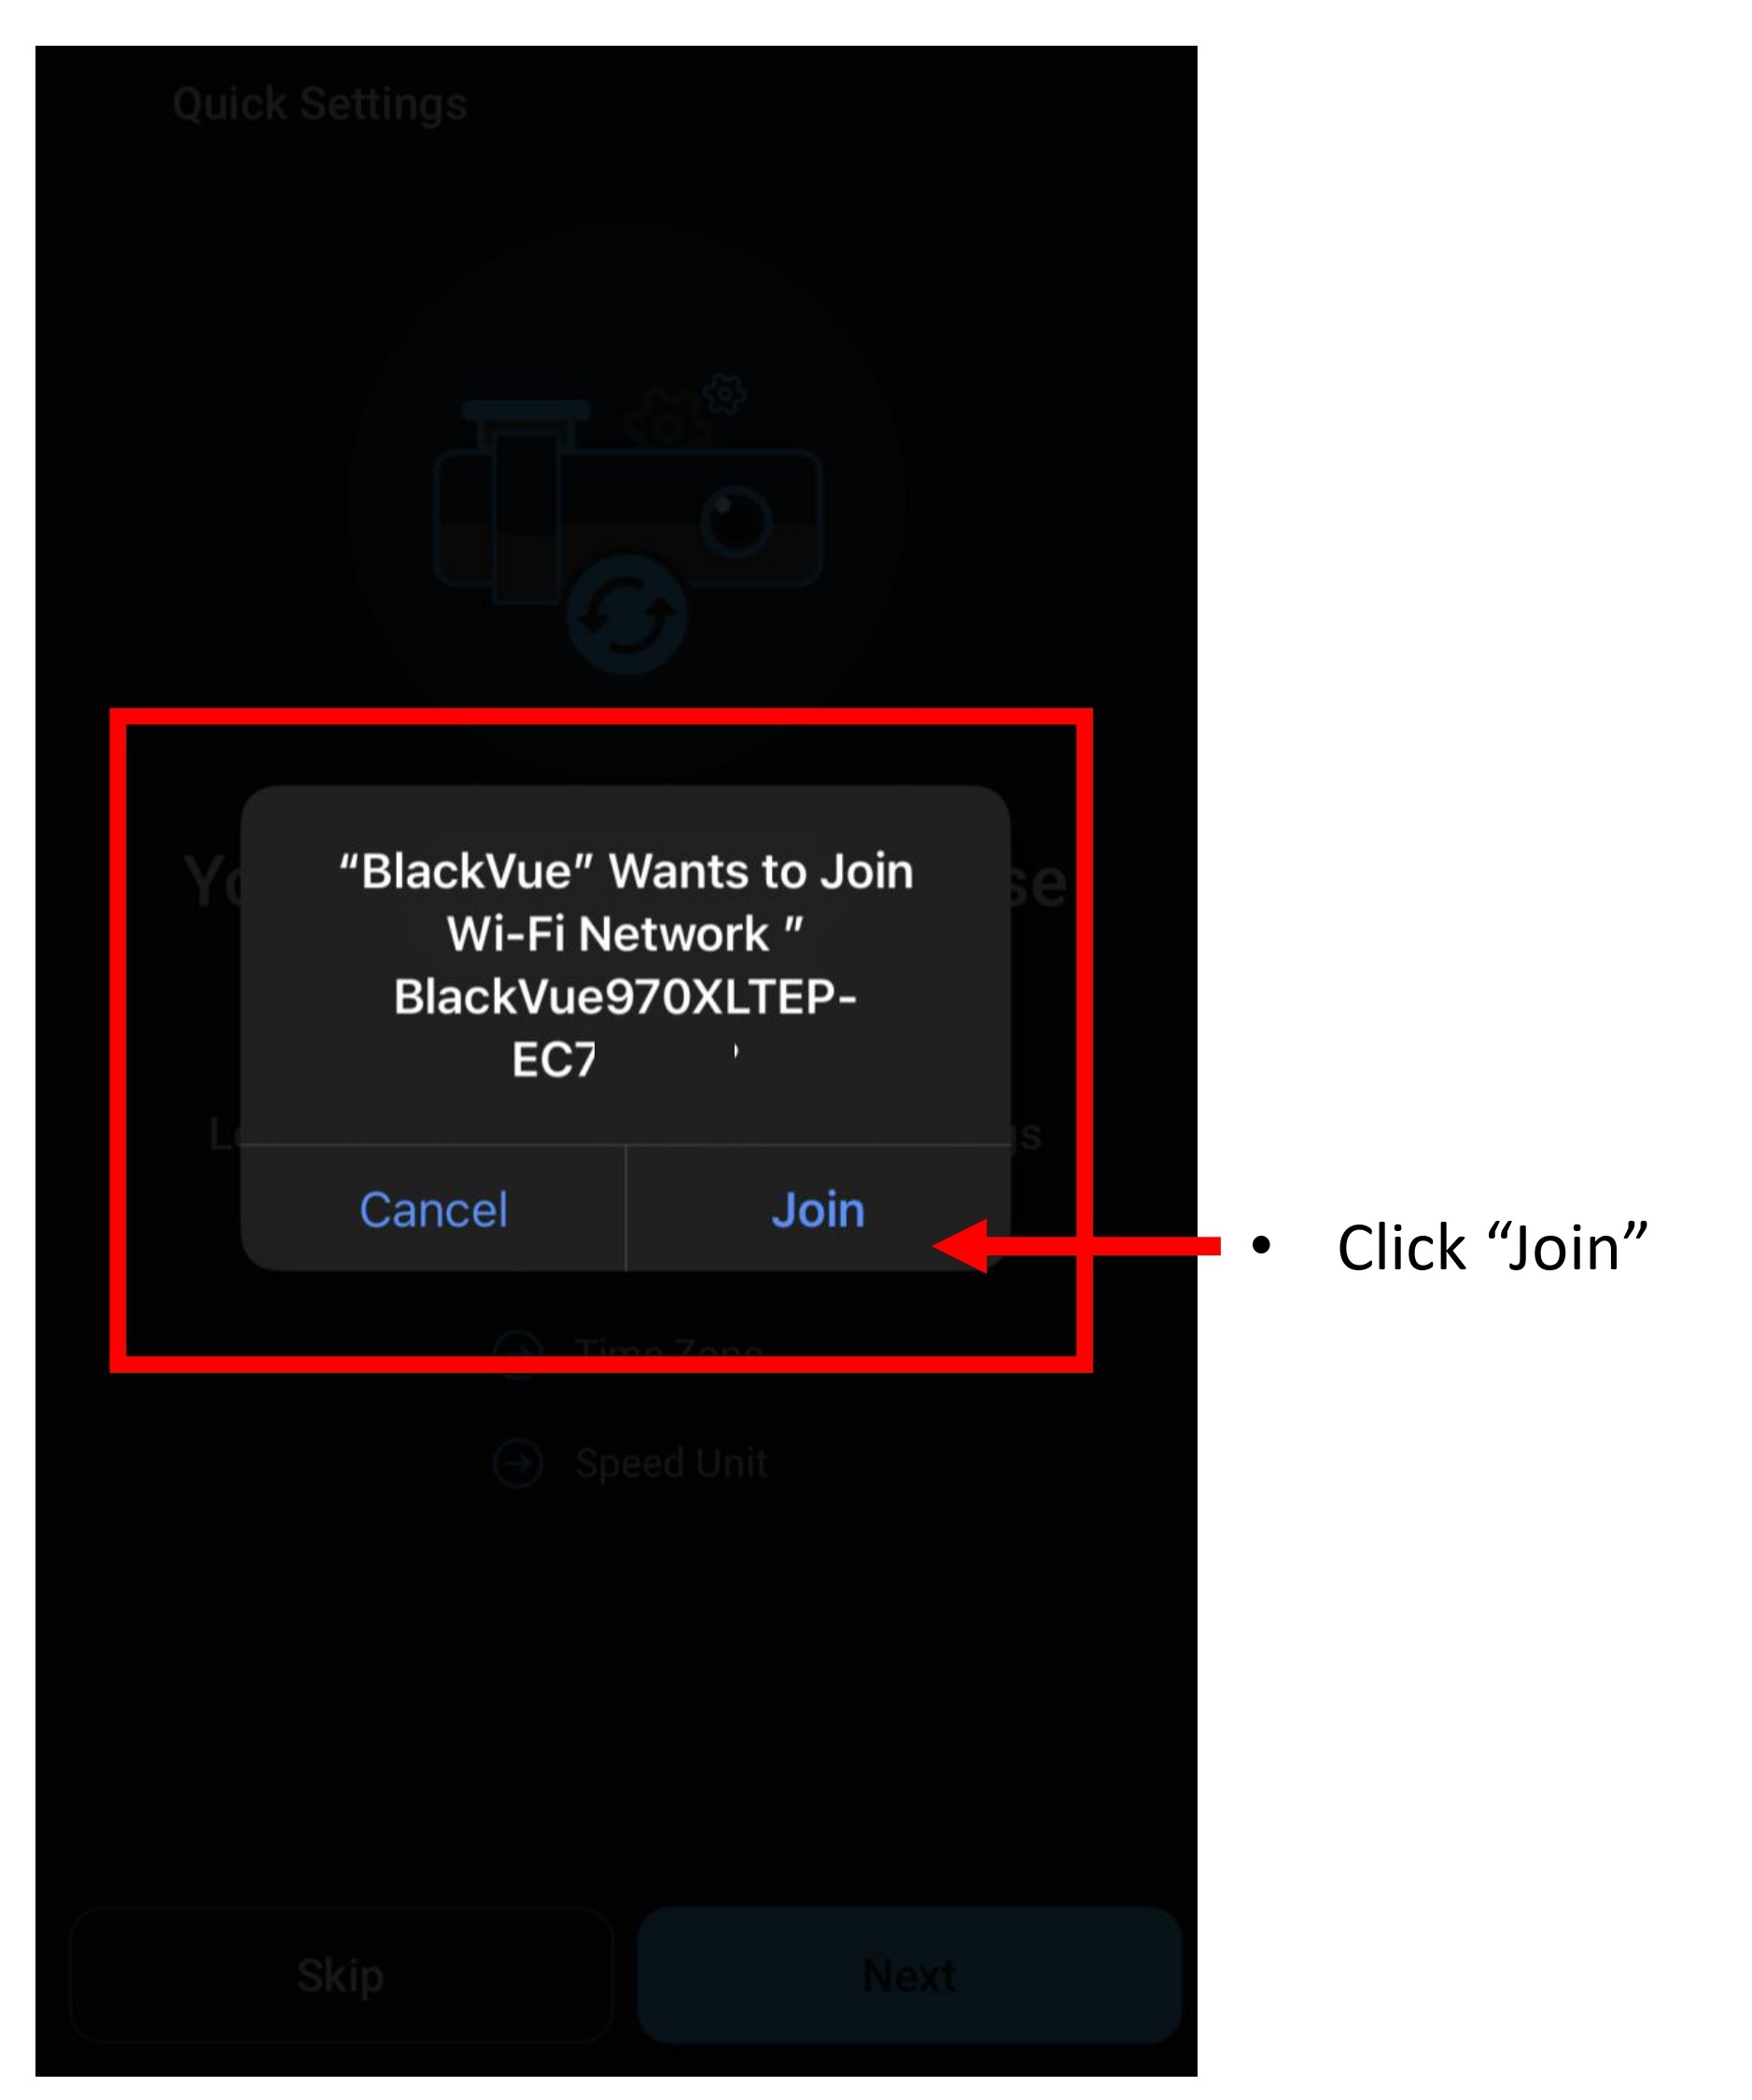
- Click "Join".
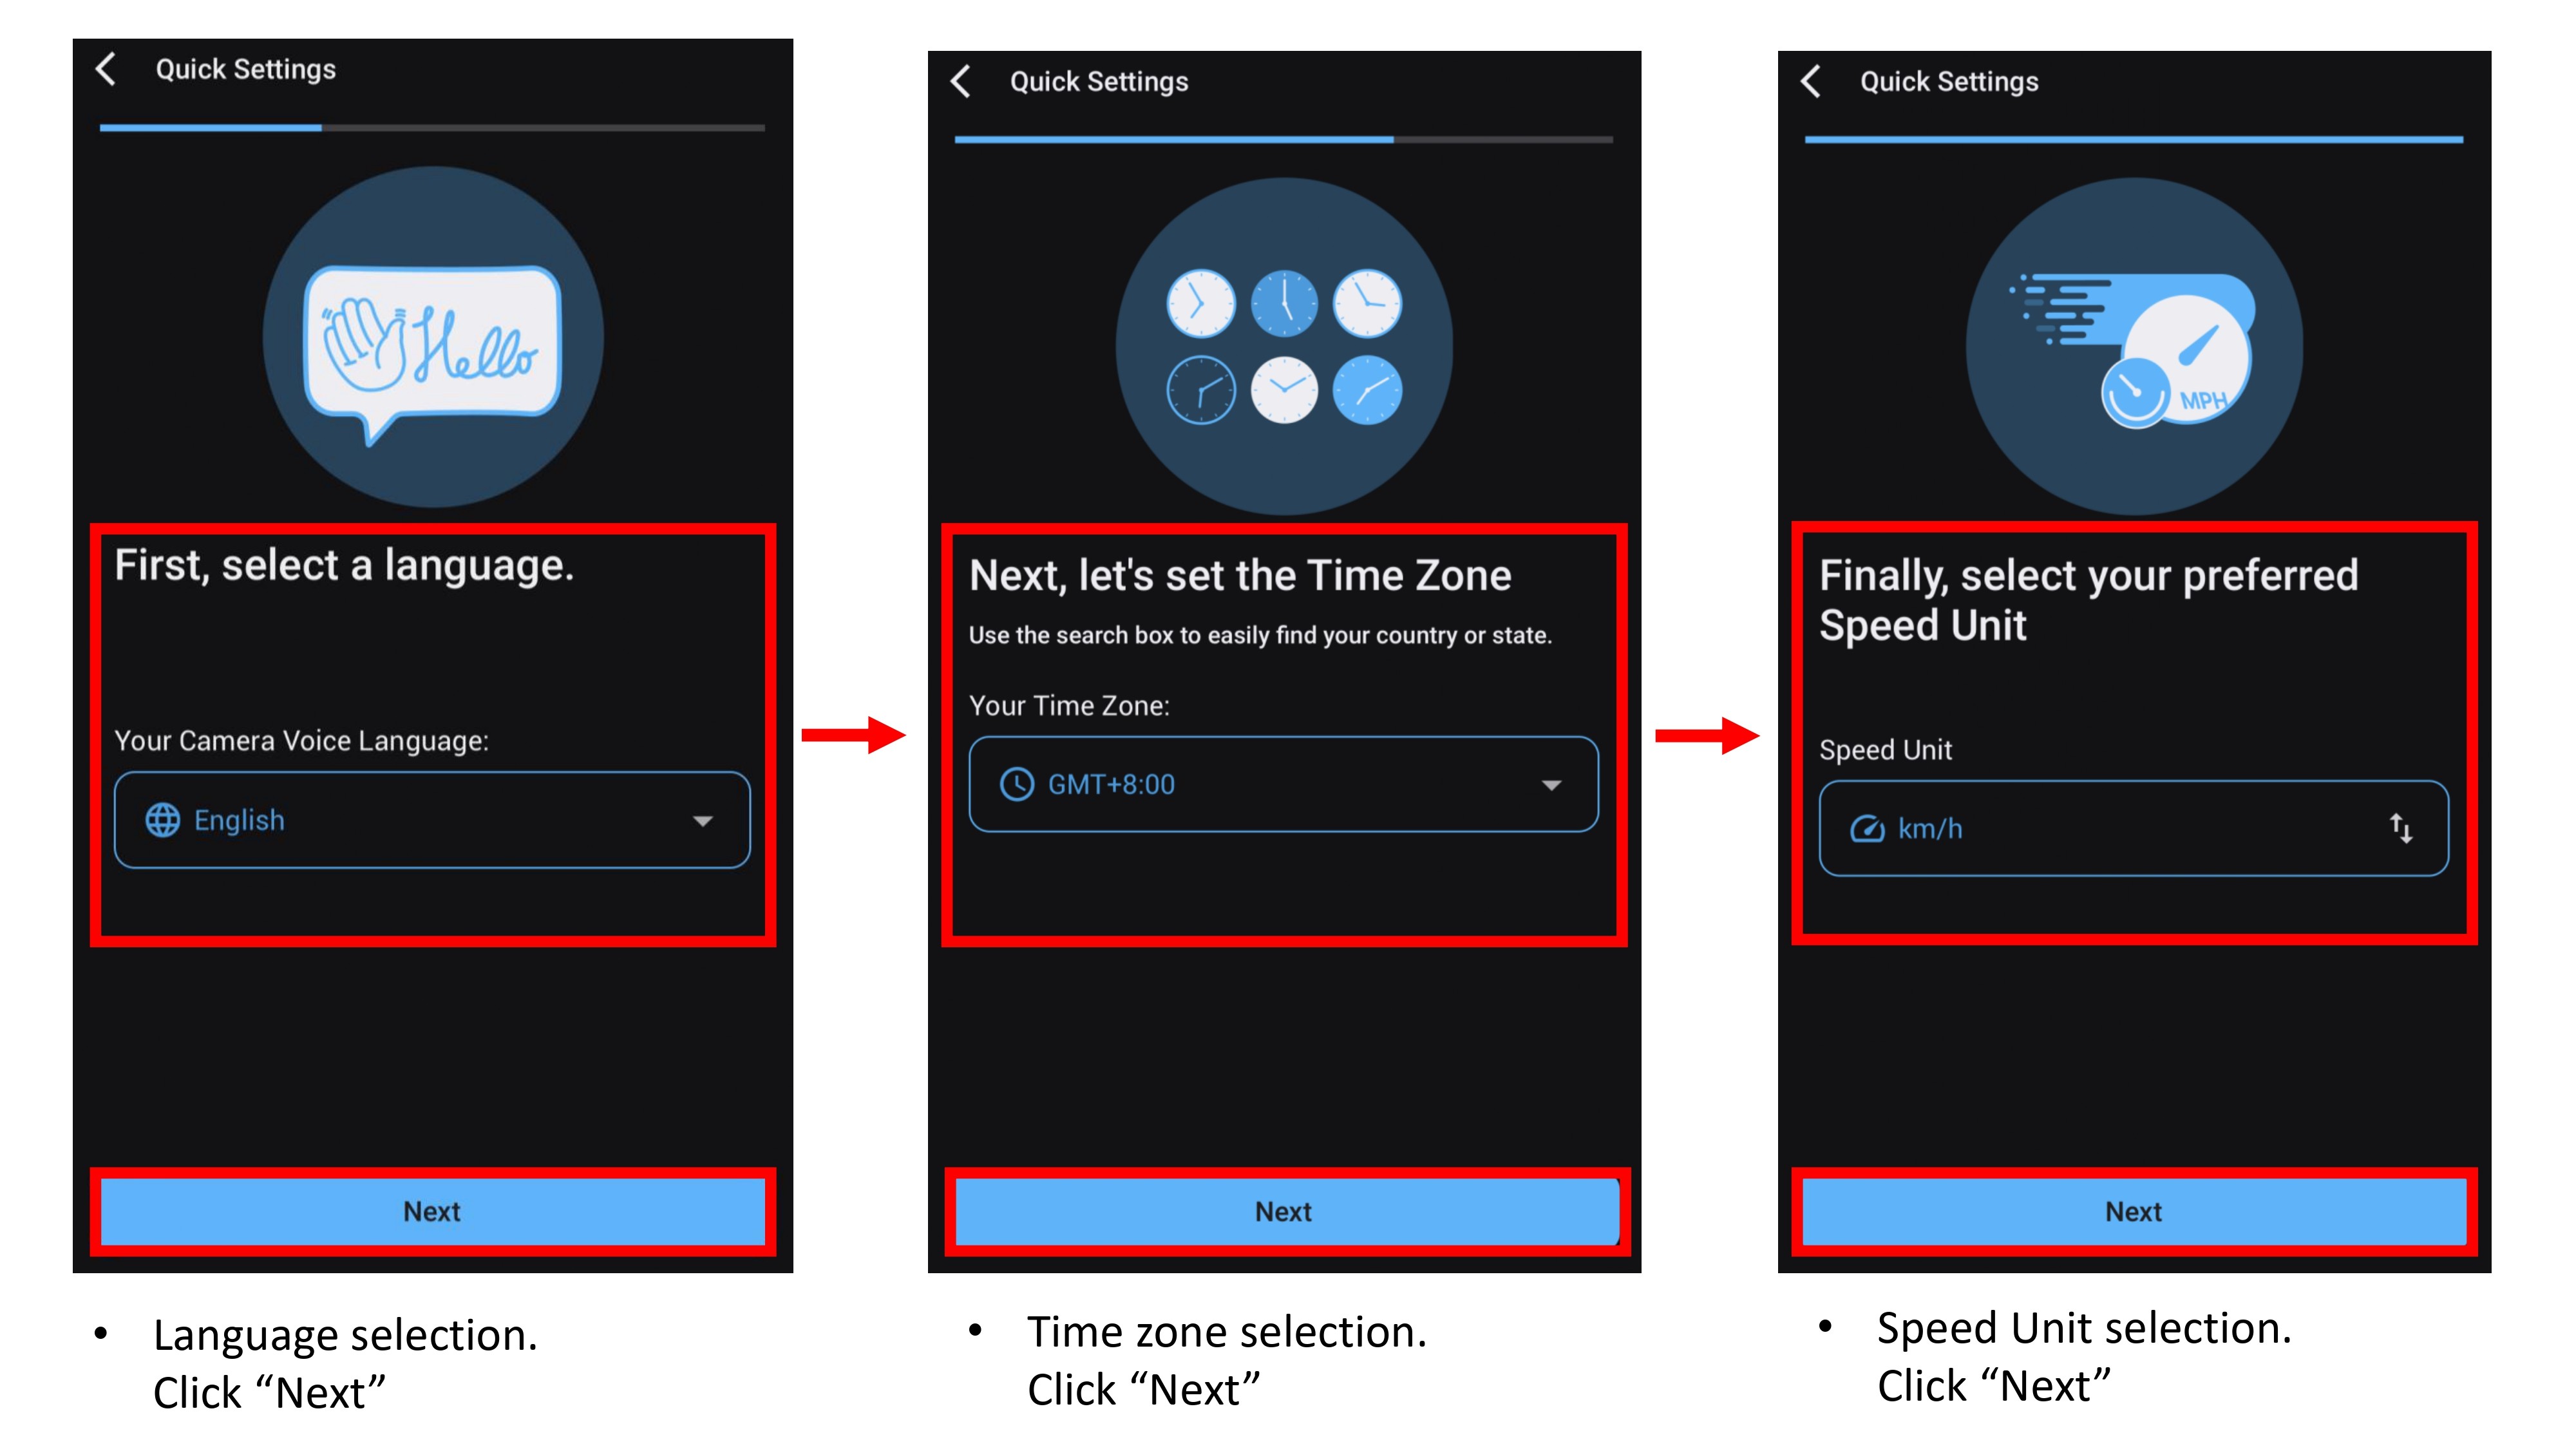
- Quick Setting - Language, Time Zone and Speed Unit.
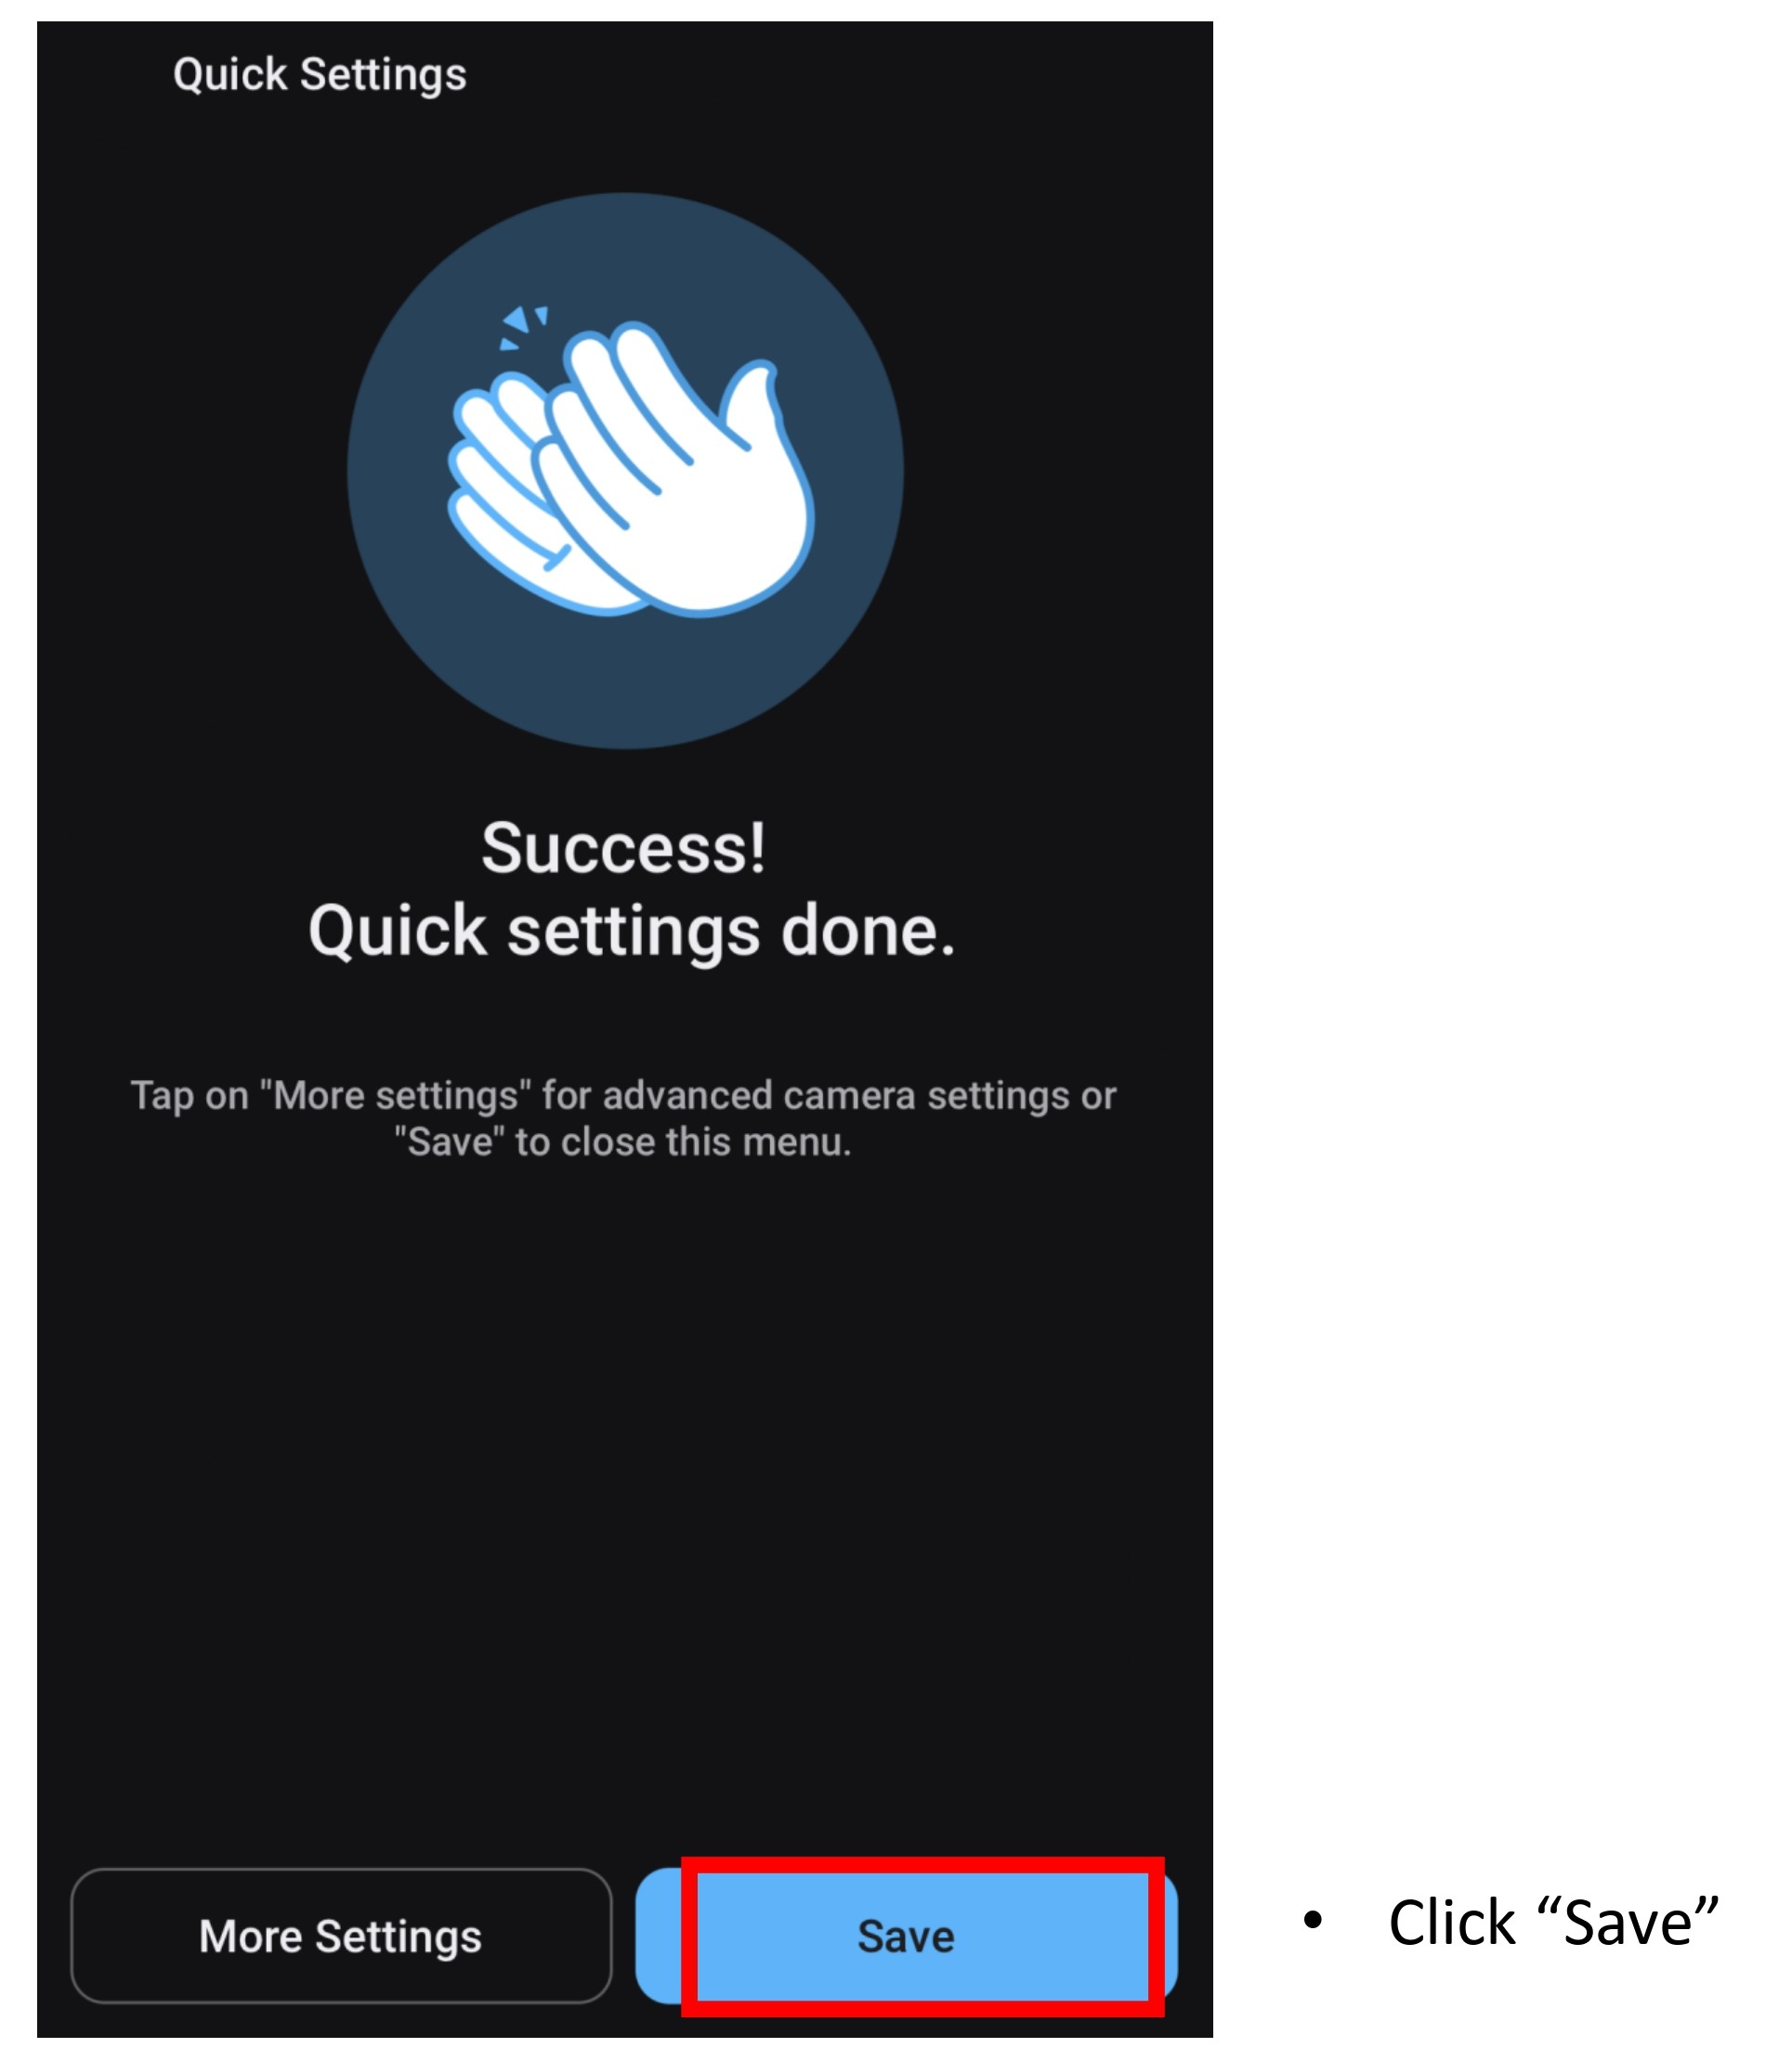
- Settings has succesfully saved. Click "Save".
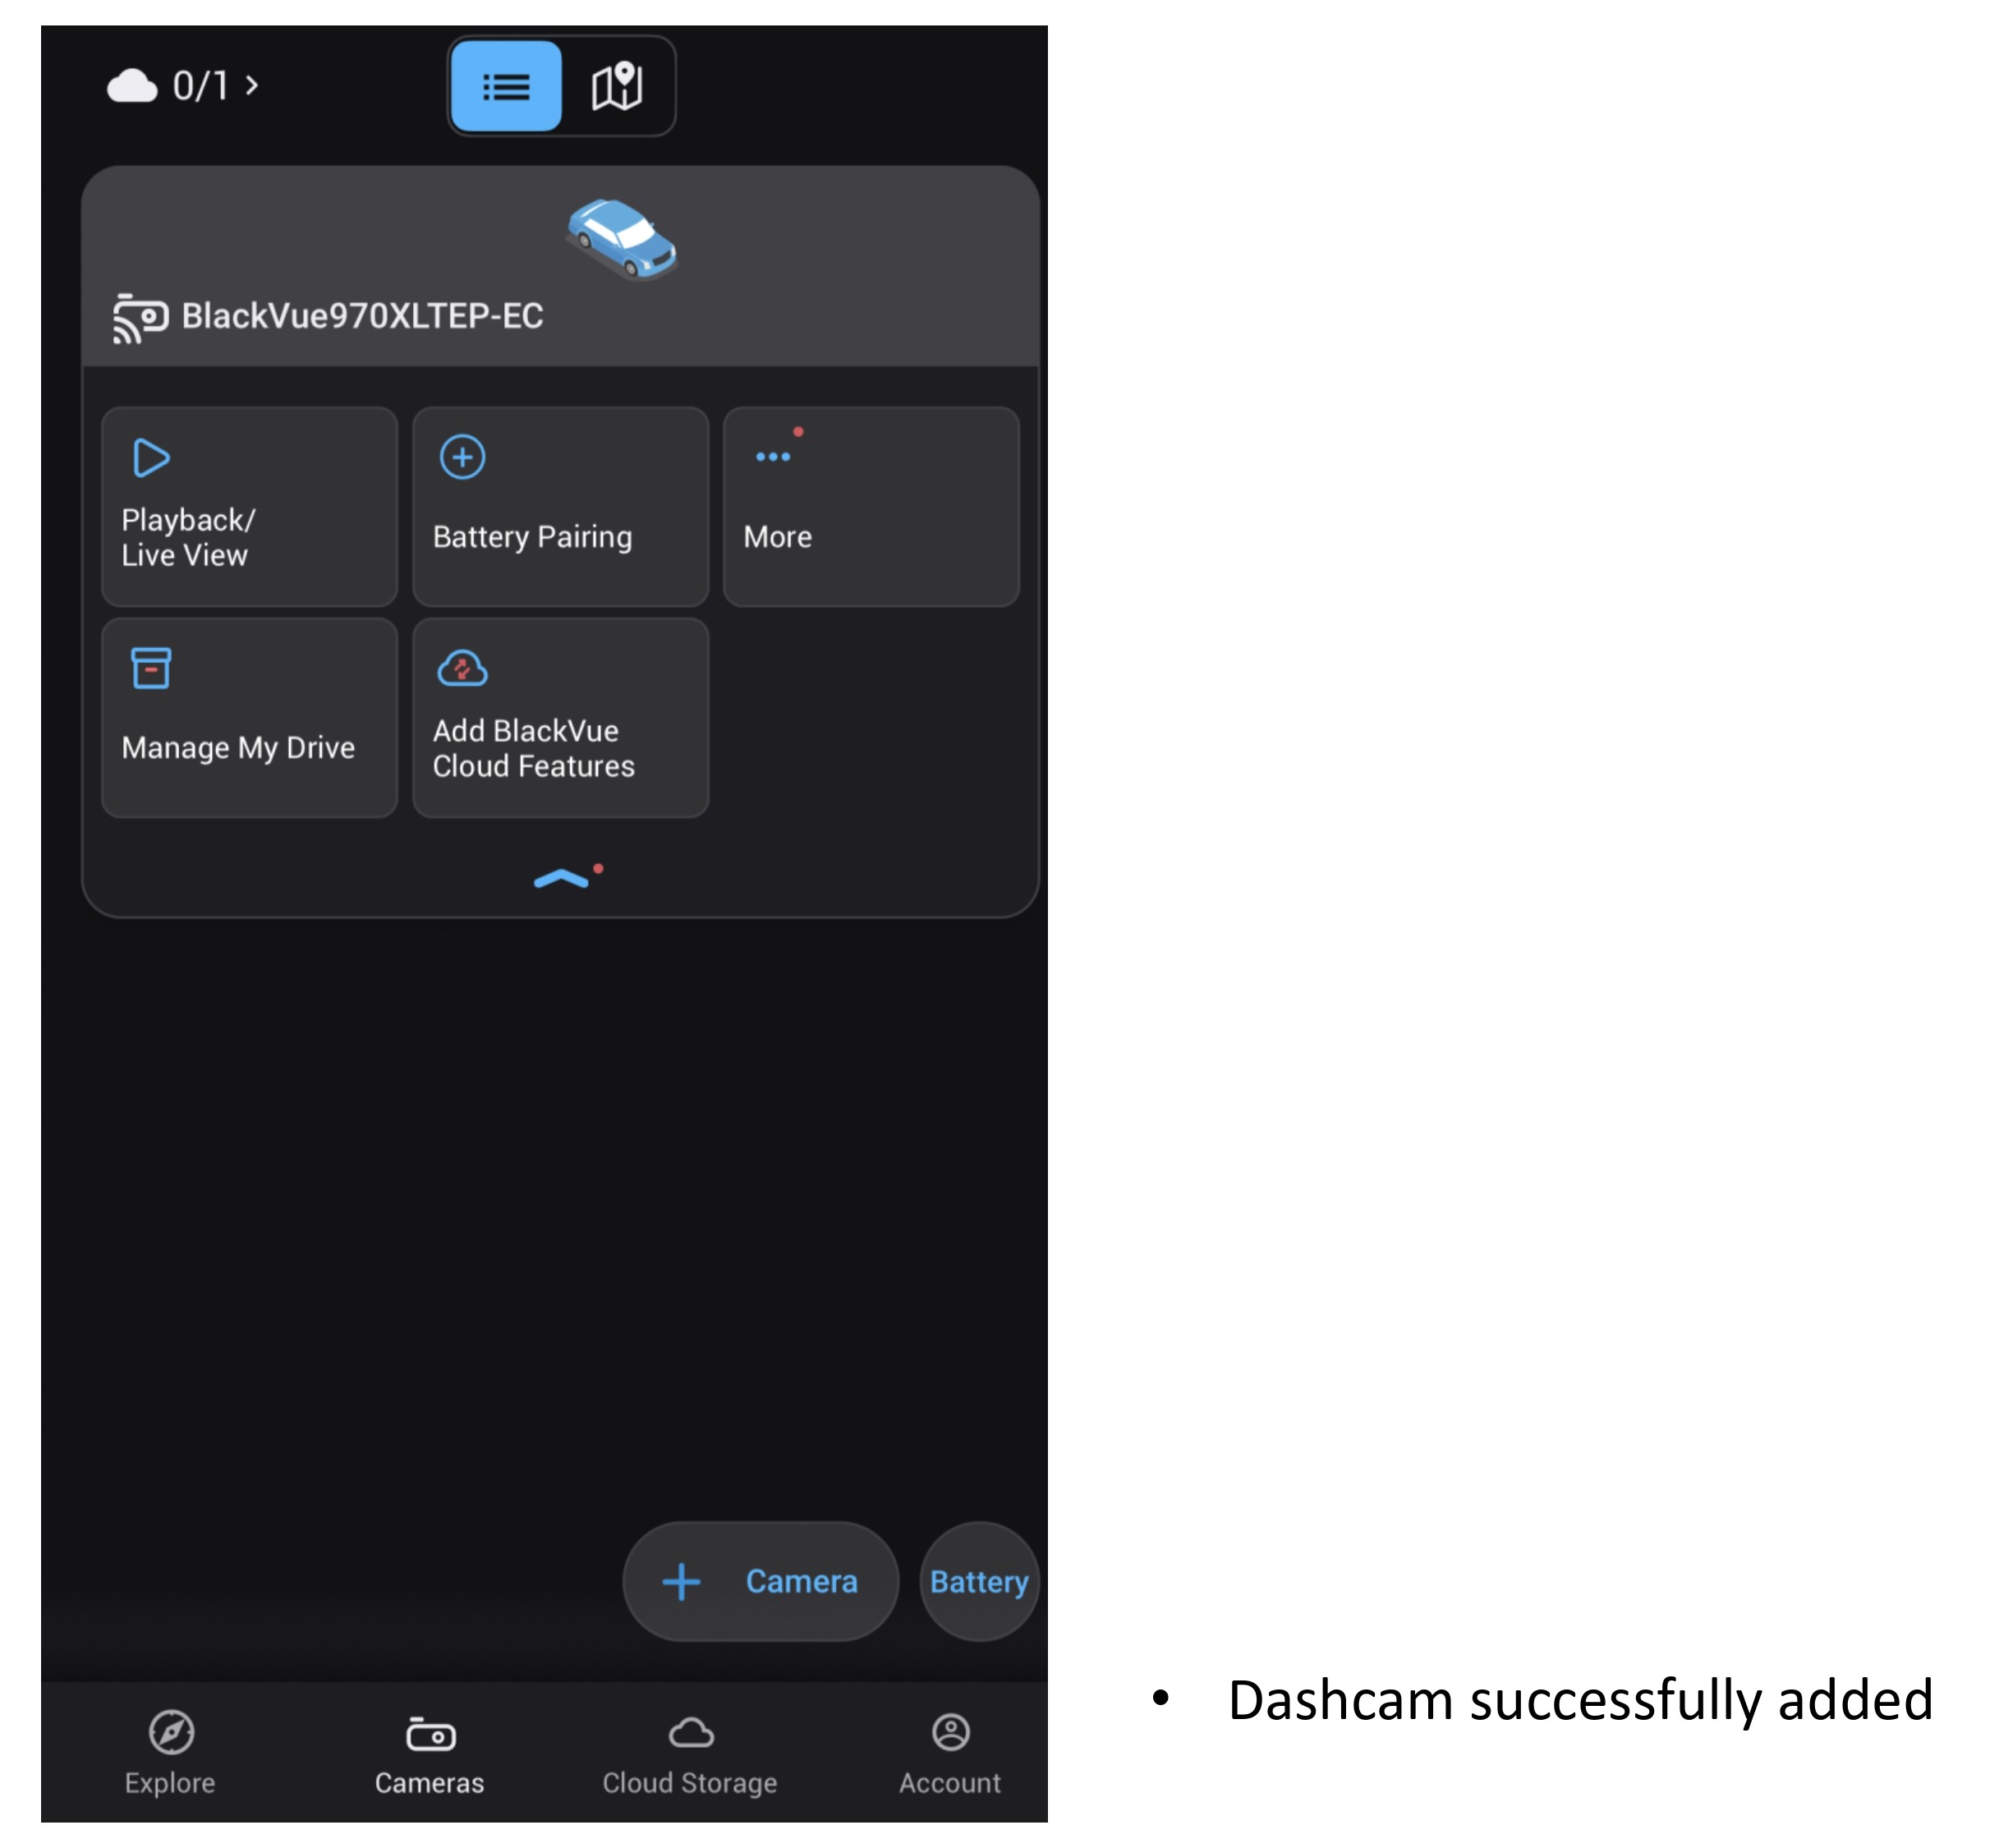
- Dashcam has successfully added.
2.2 CLOUDS CONNECTION - SIM CARD CONFIGURATION
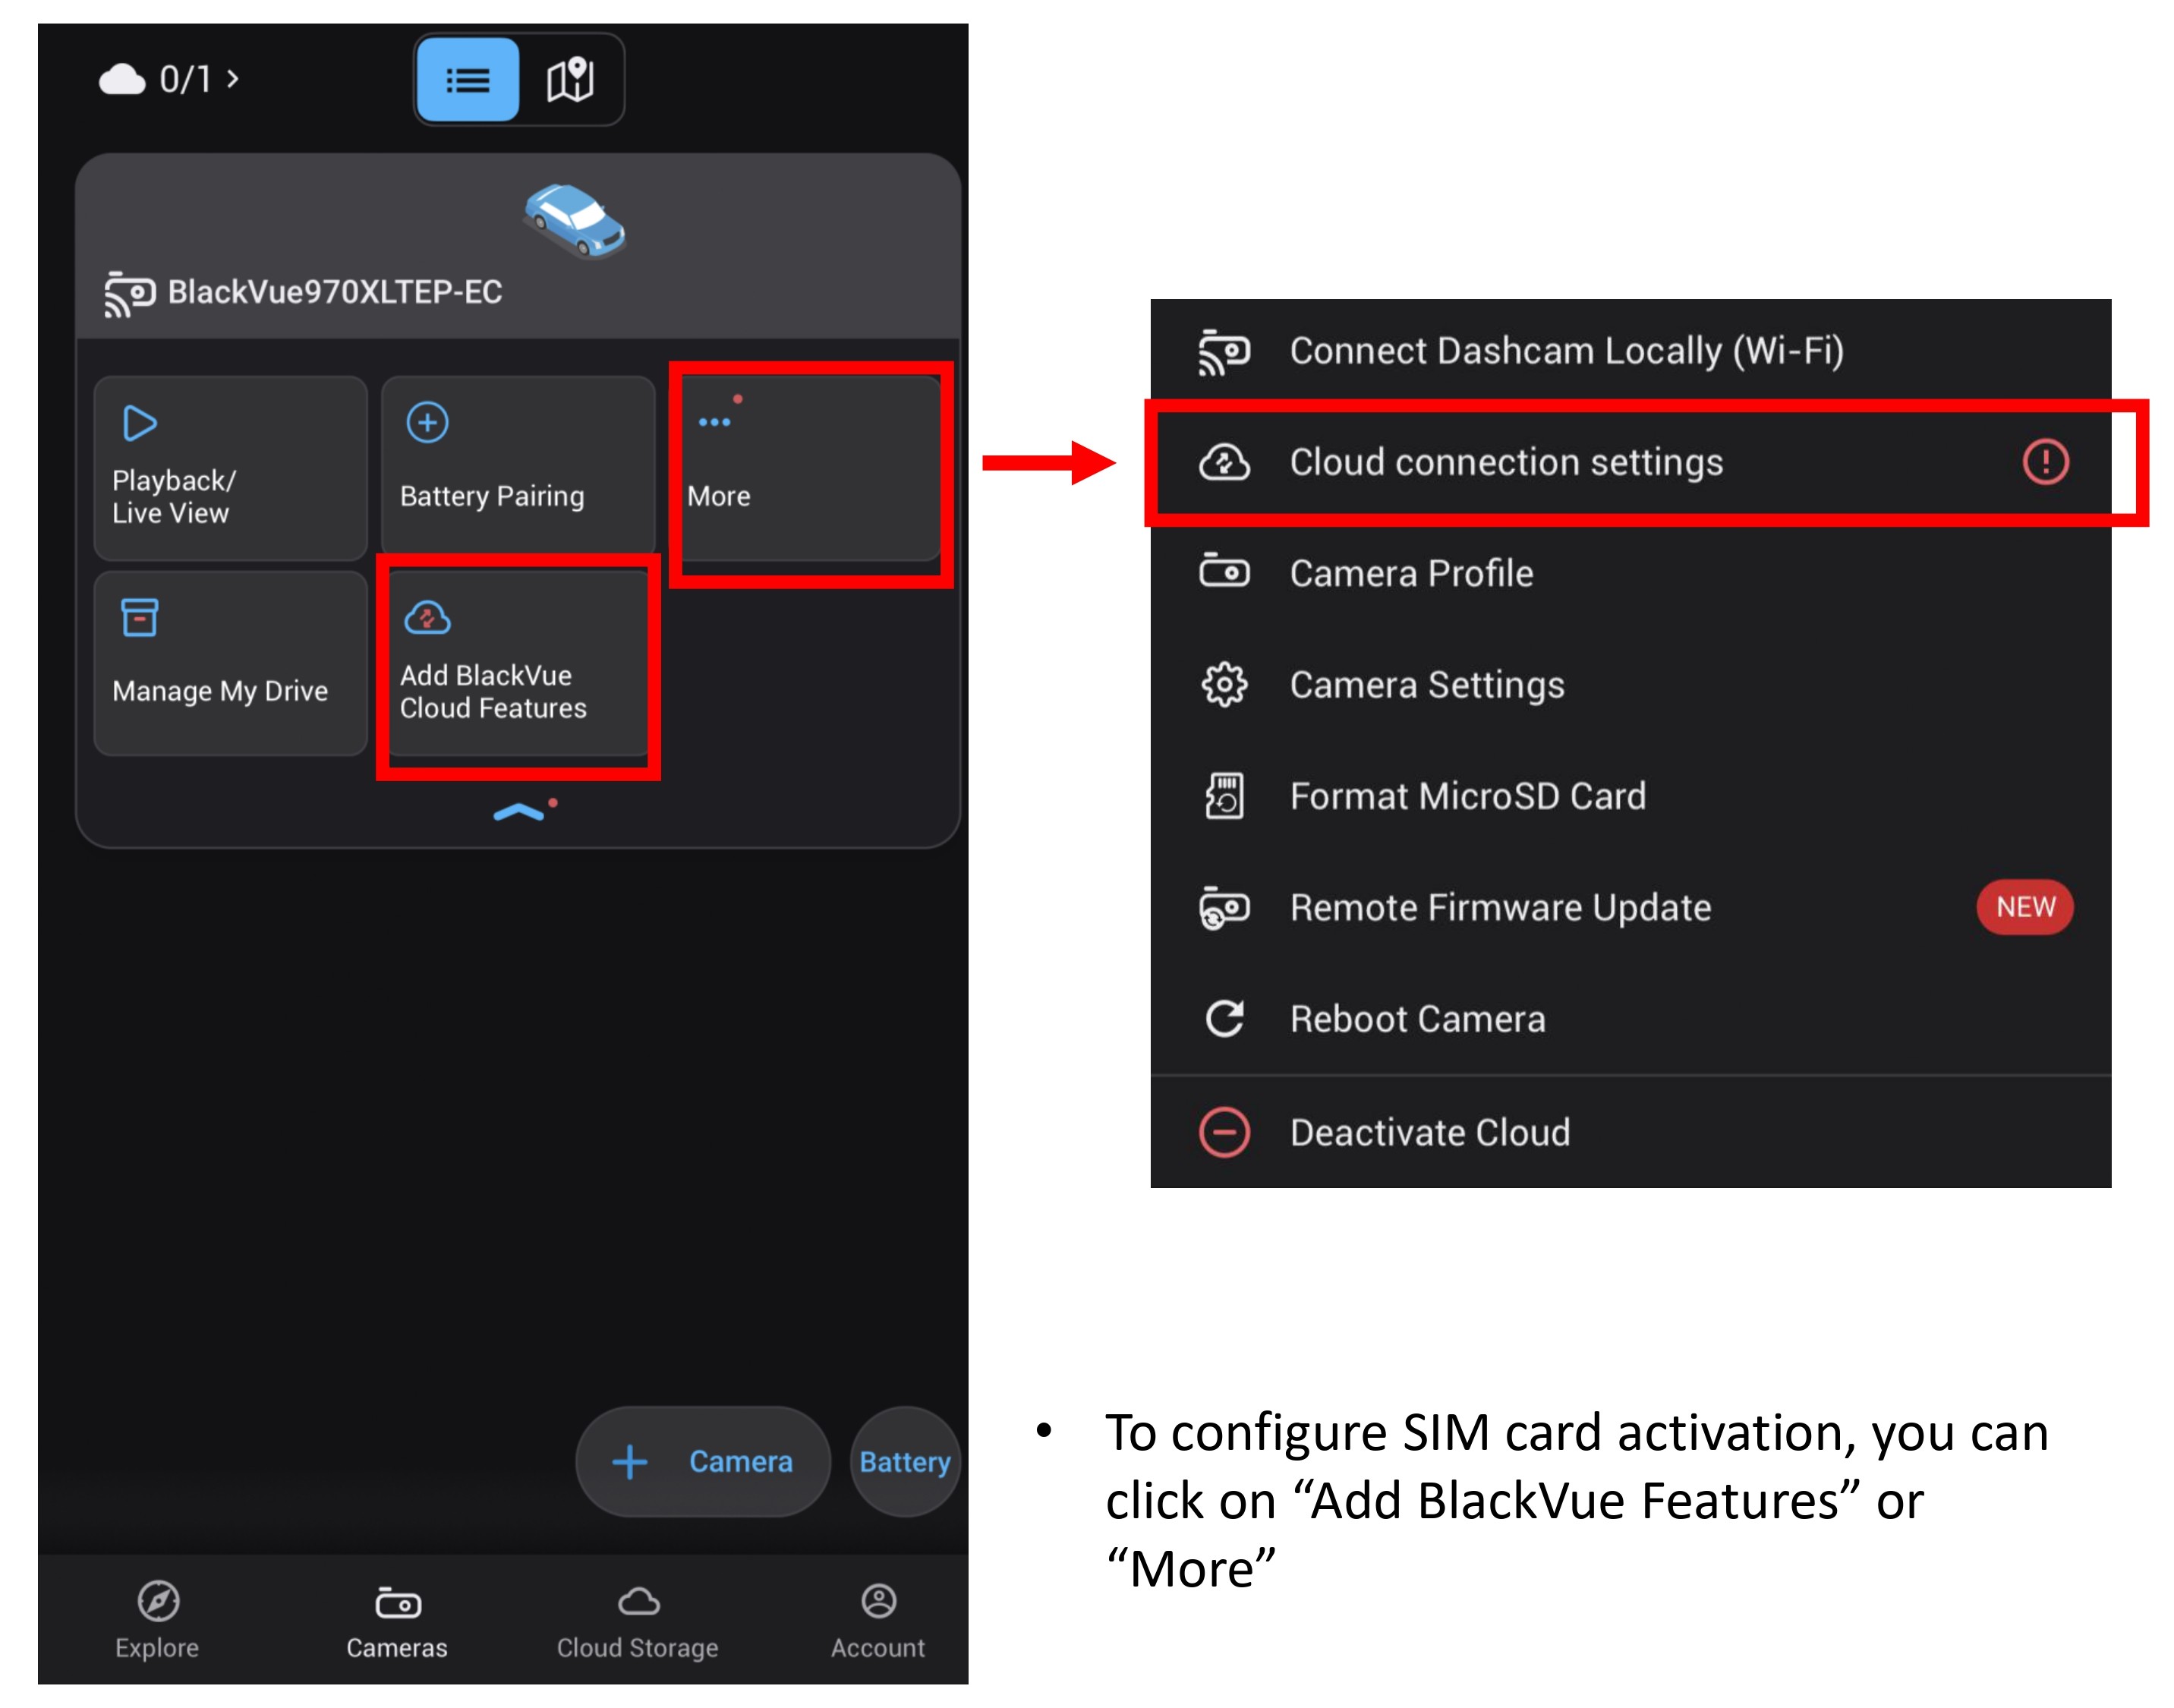
- To setup SIM card, click on the "Add BlackVue Features" or "More - Cloud Connection Settings".
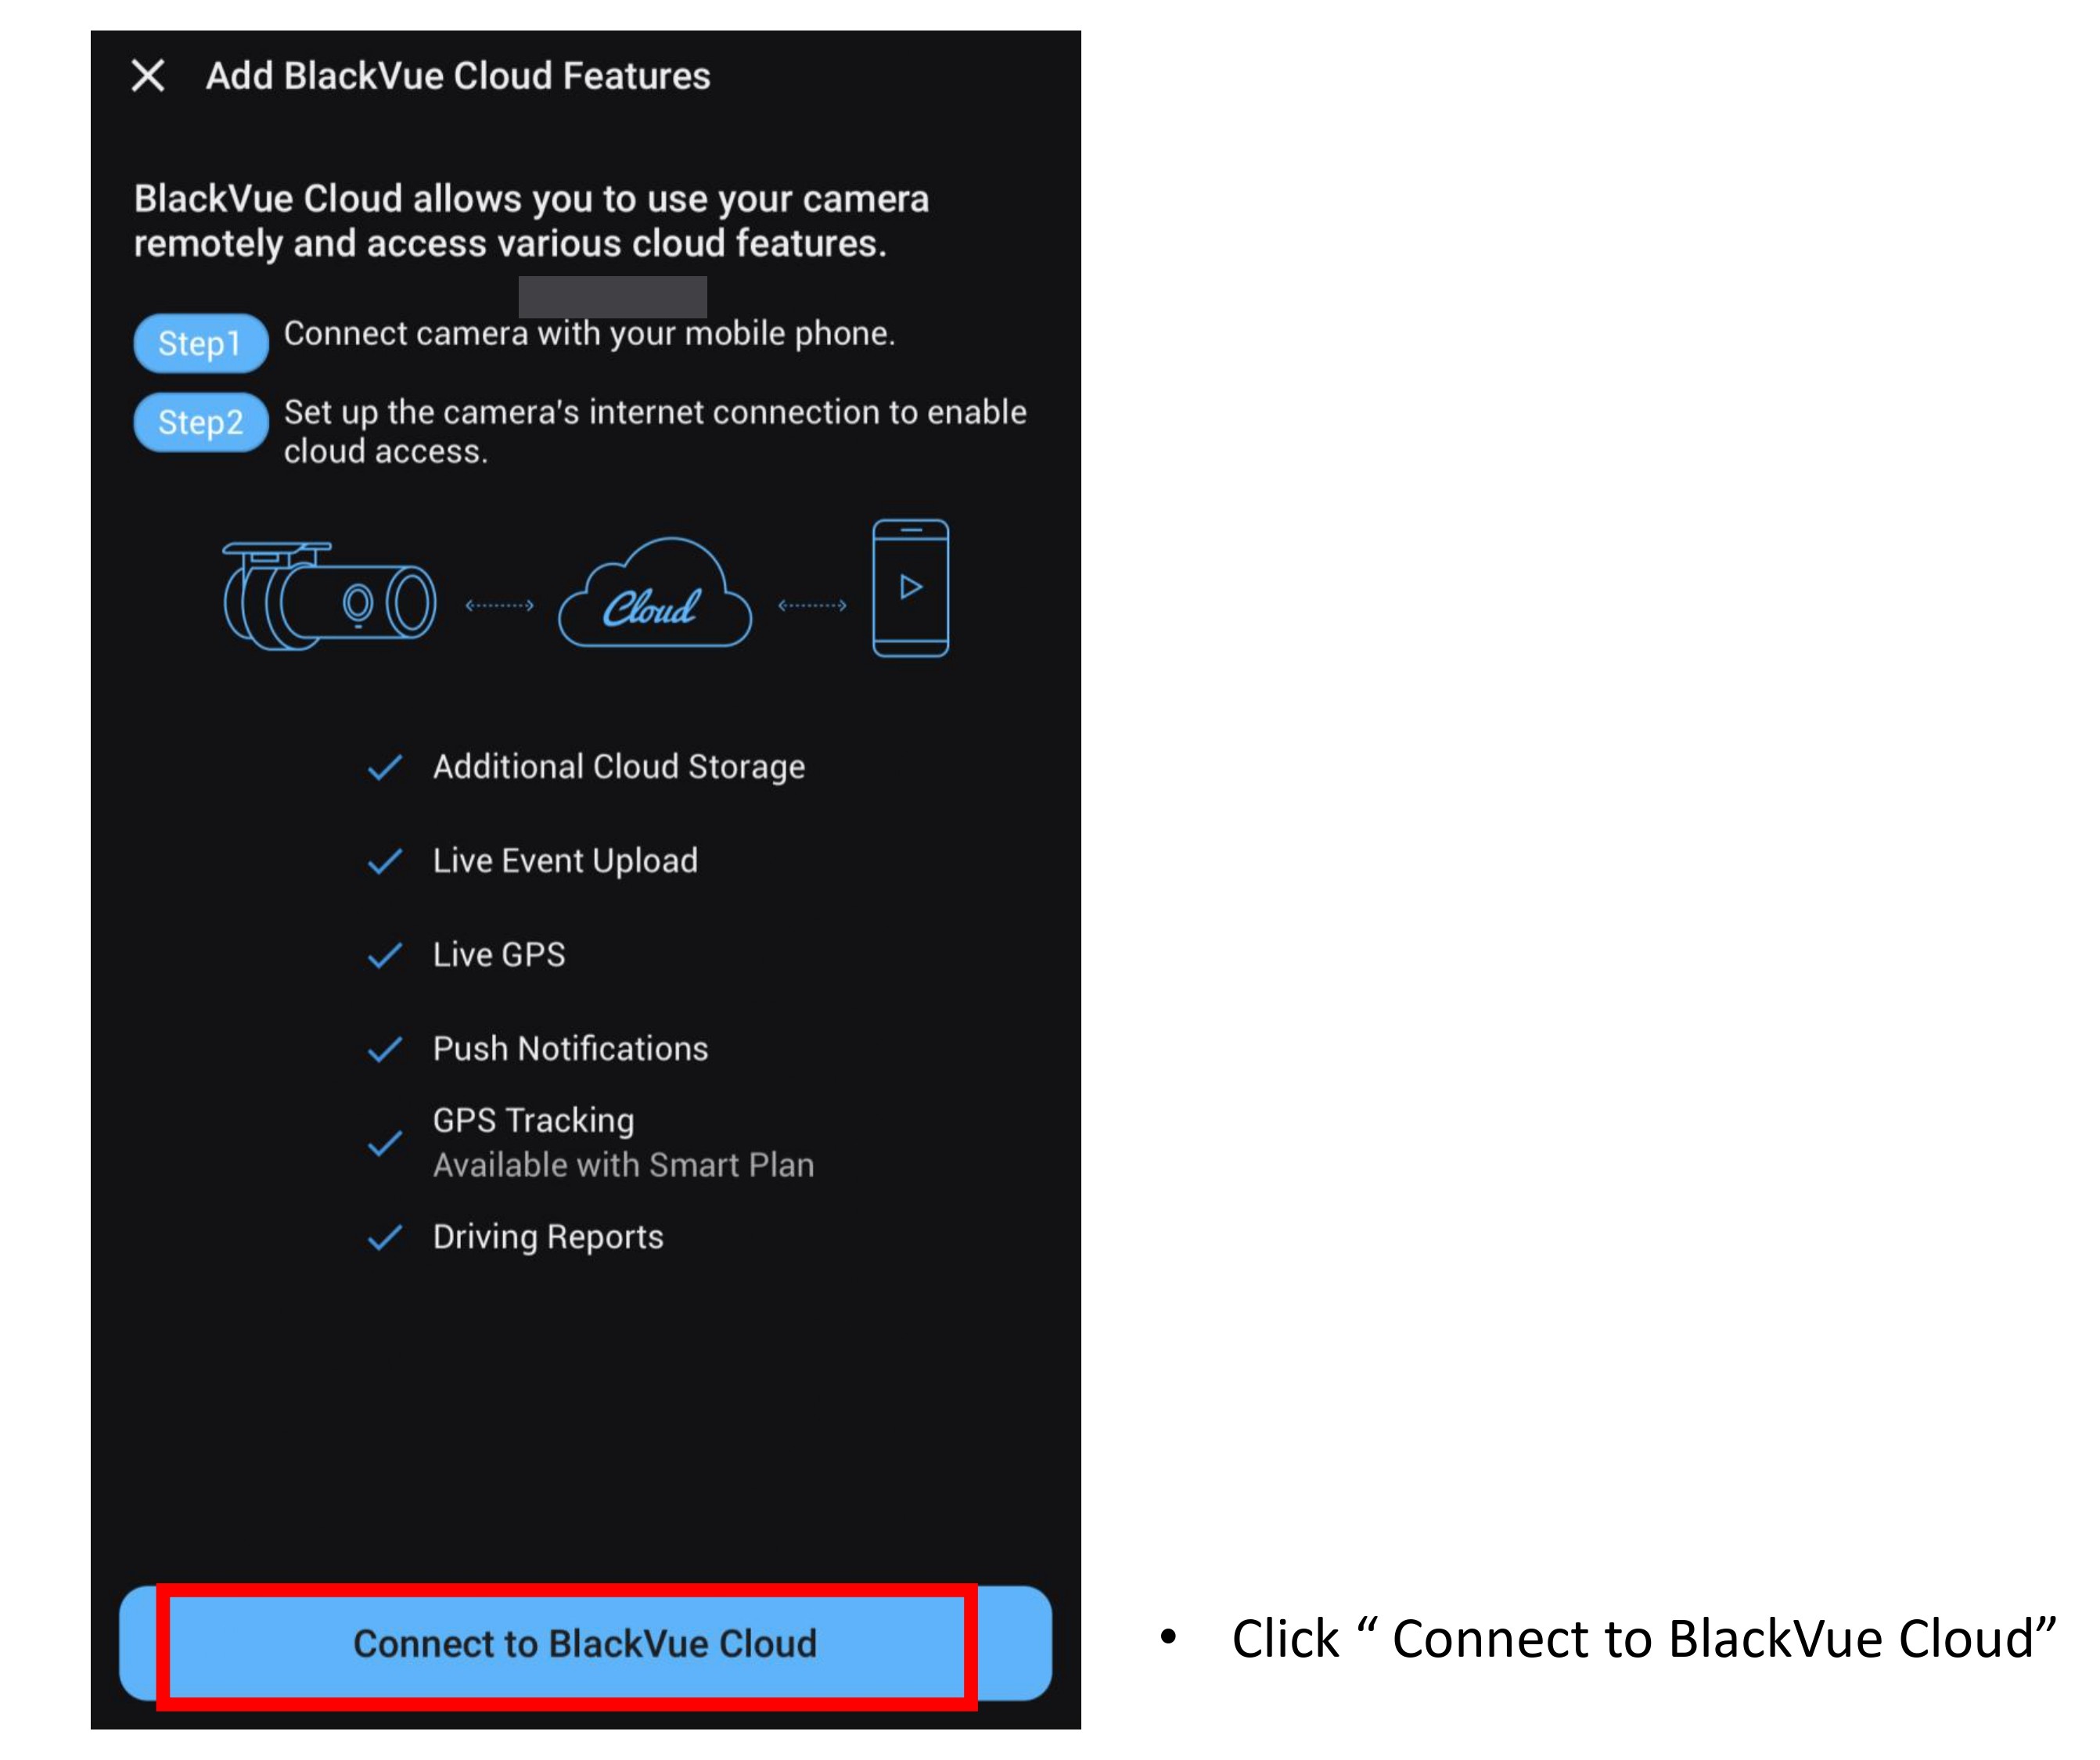
- Click "Connect to BlackVue Cloud".
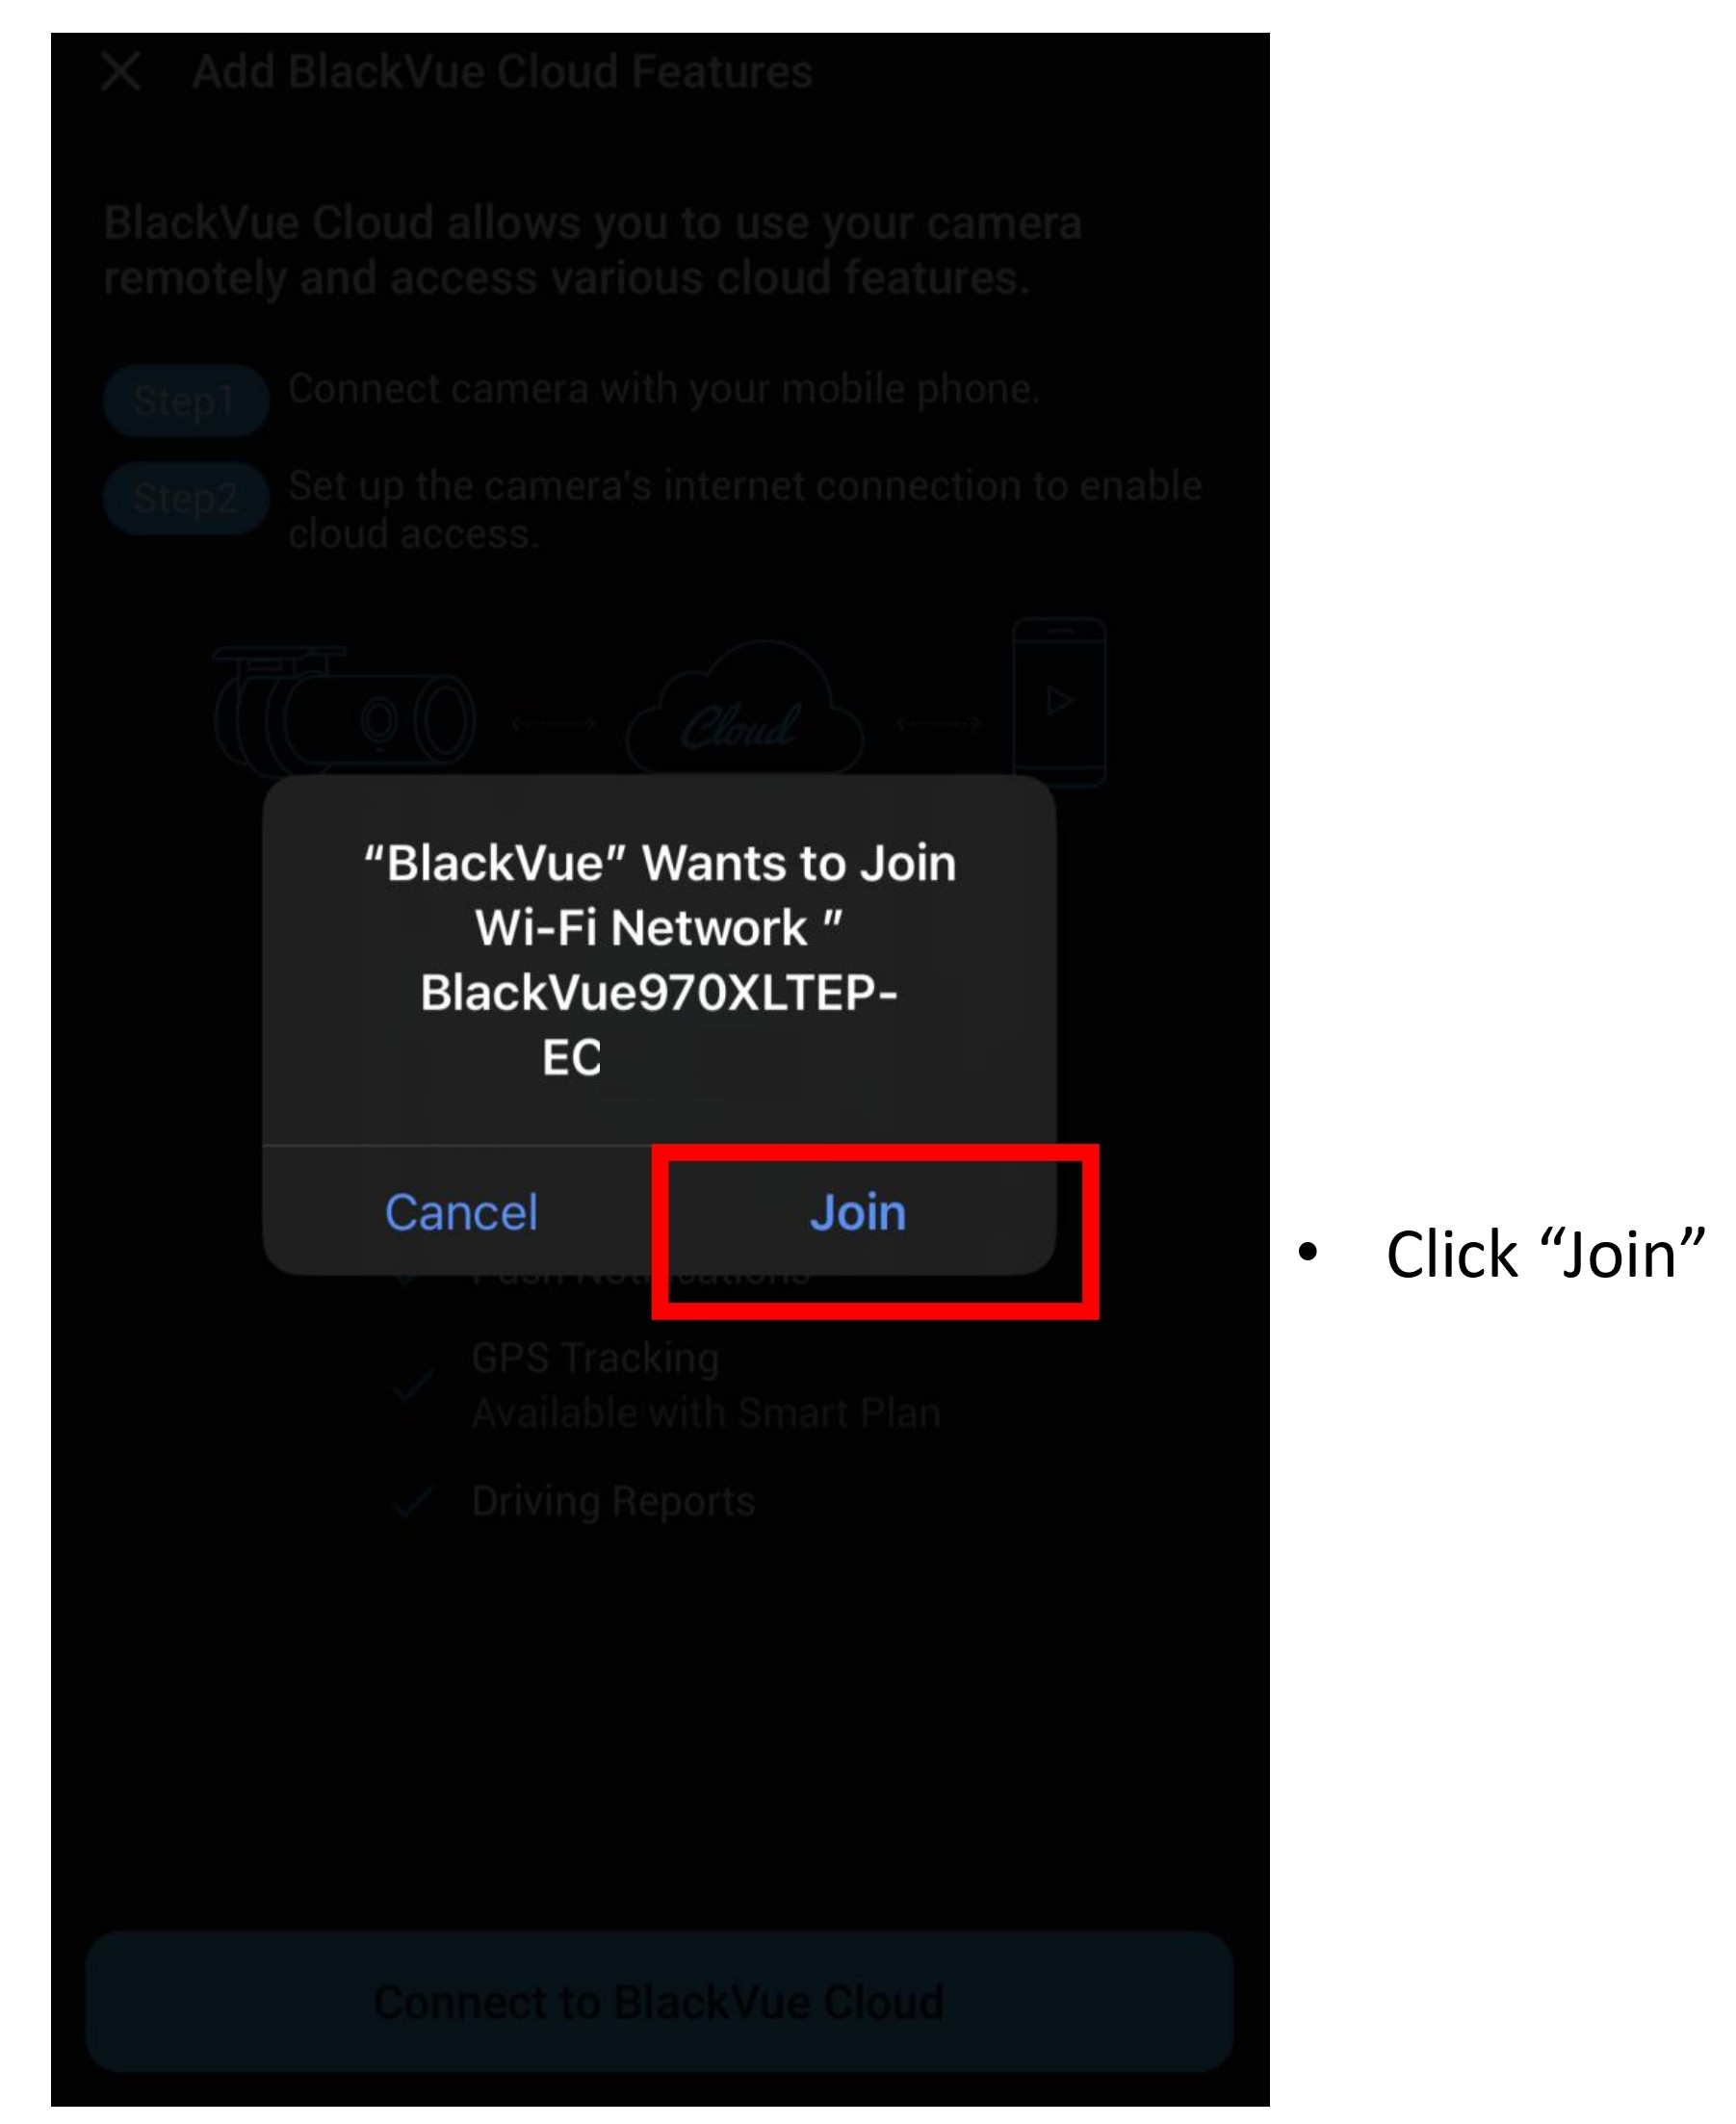
- Click "Join".
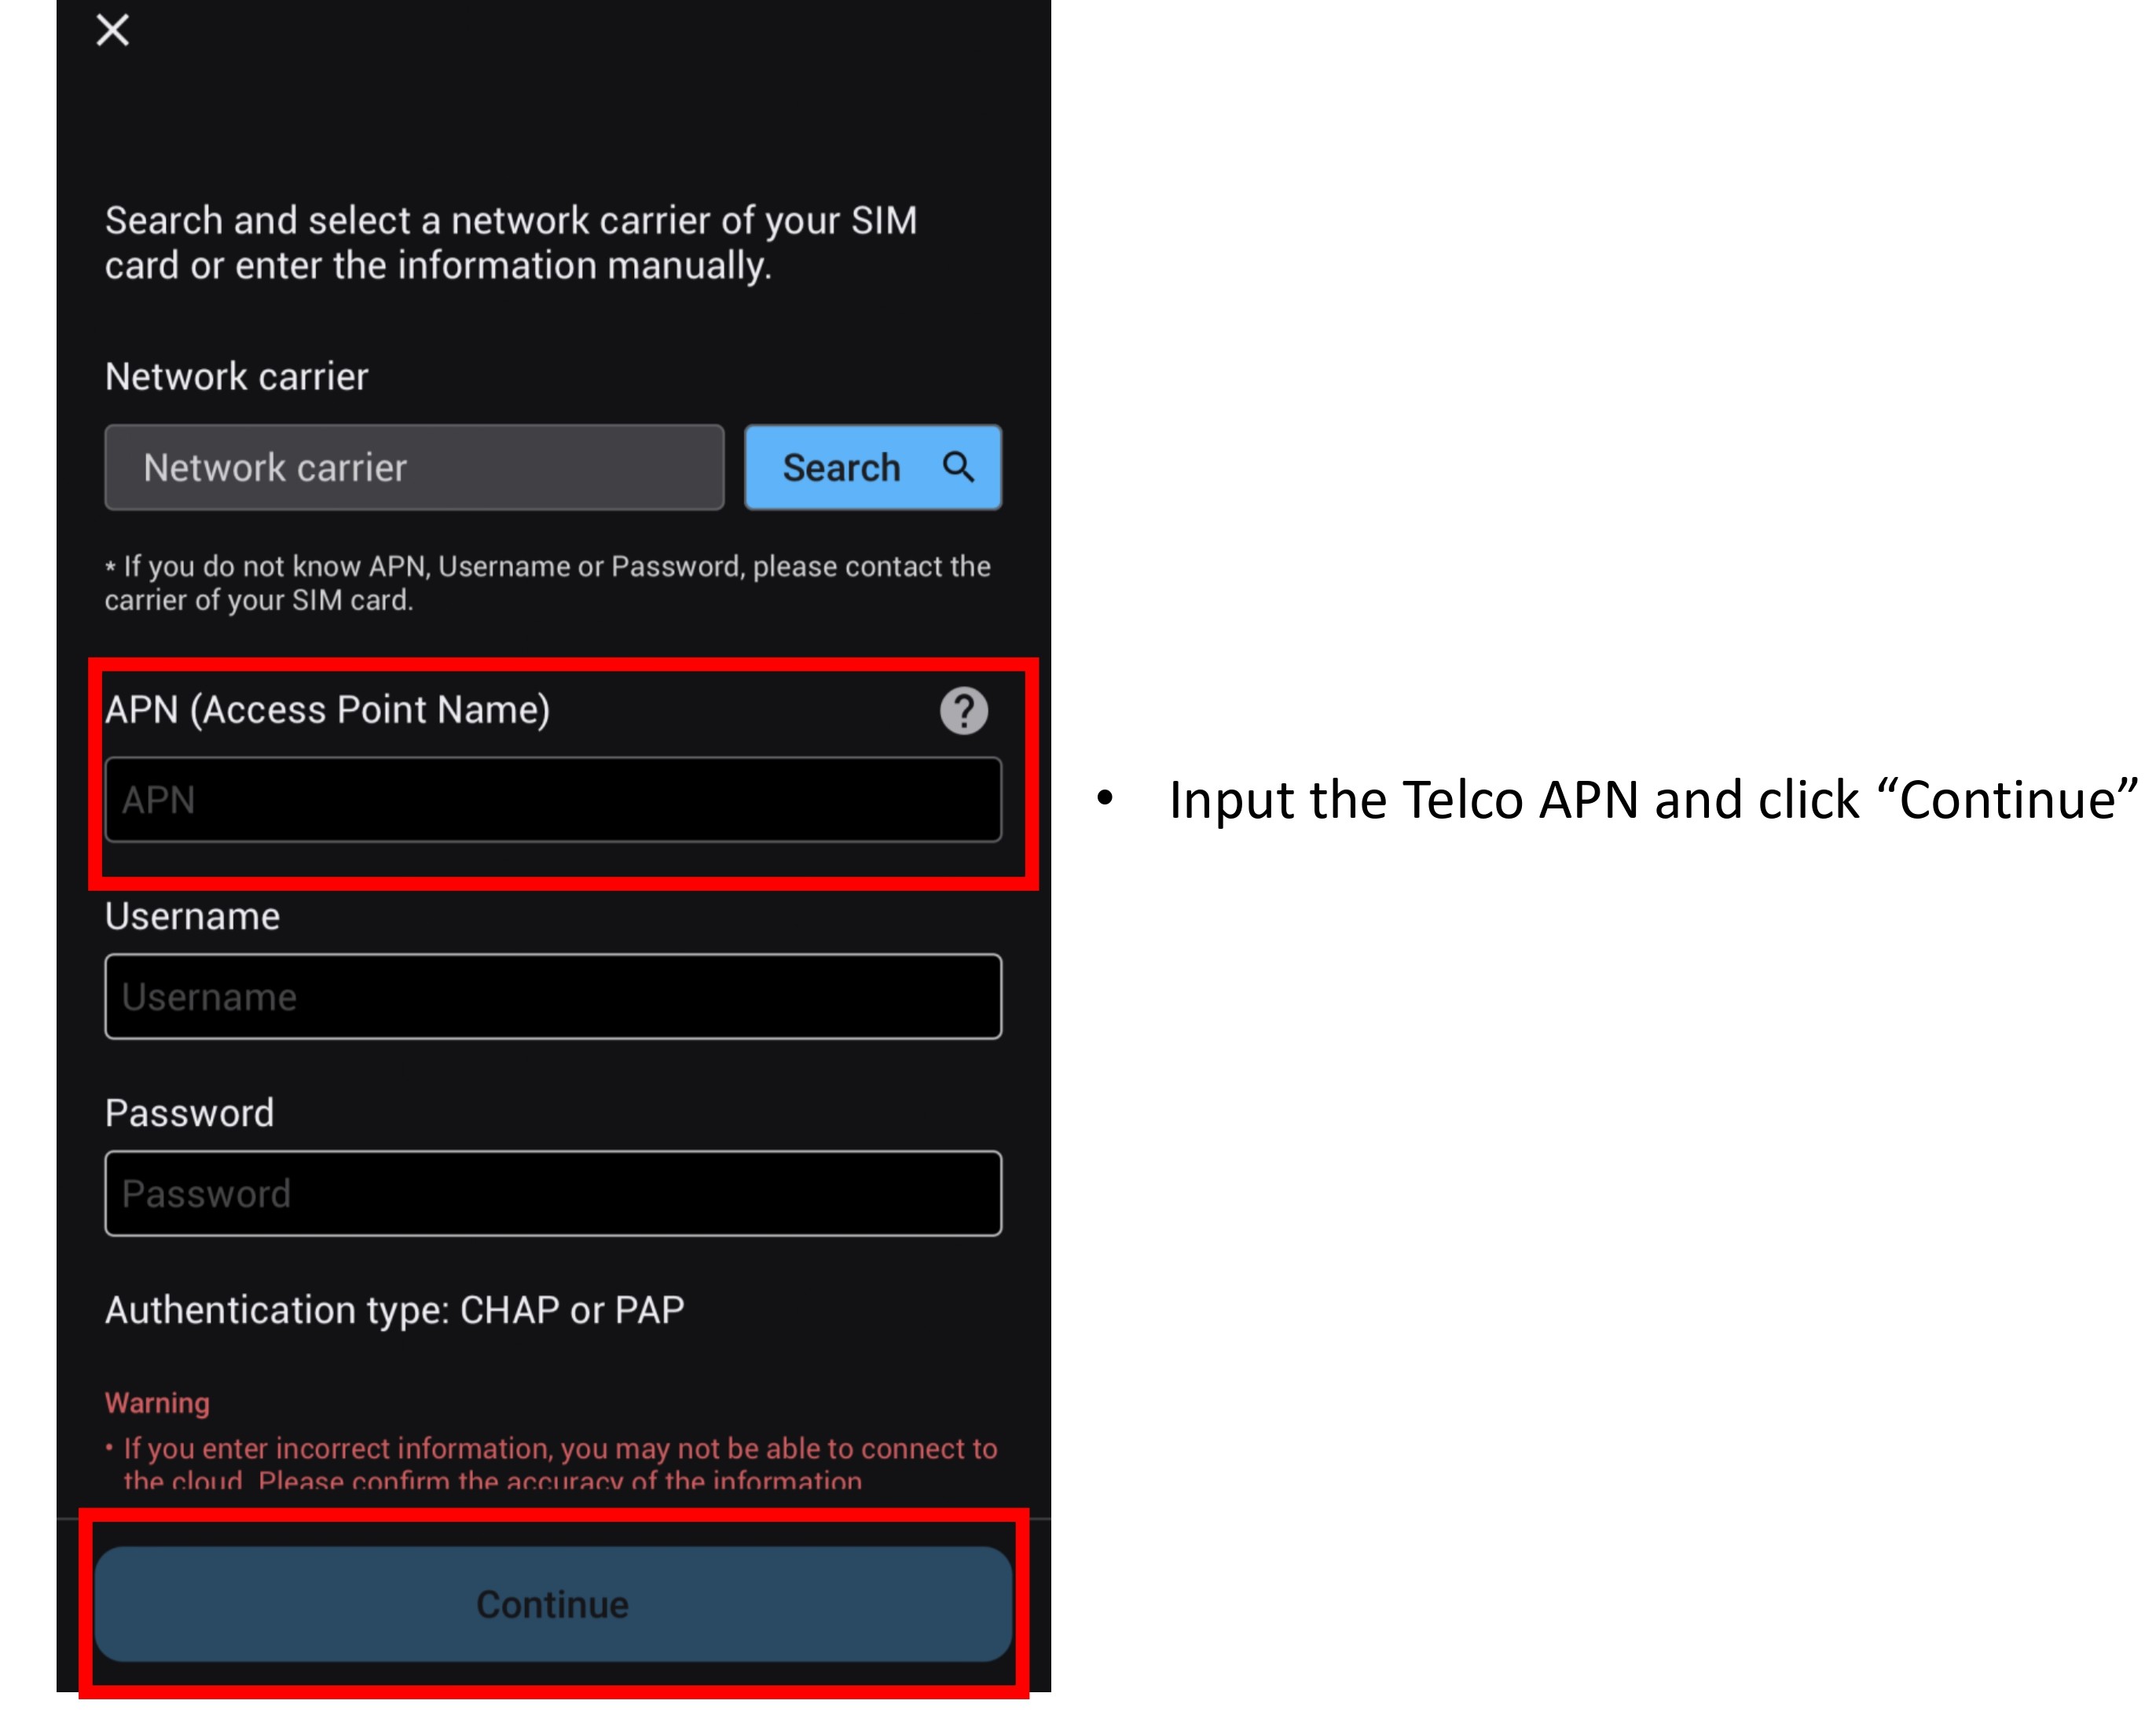
- Input the SIM card Telco APN and click "Continue".
Example: Telco: M1 APN: sunsurf
Telco: Singtel APN: e-ideas
Please refer to the below link for more Telco's APN
Telco's APN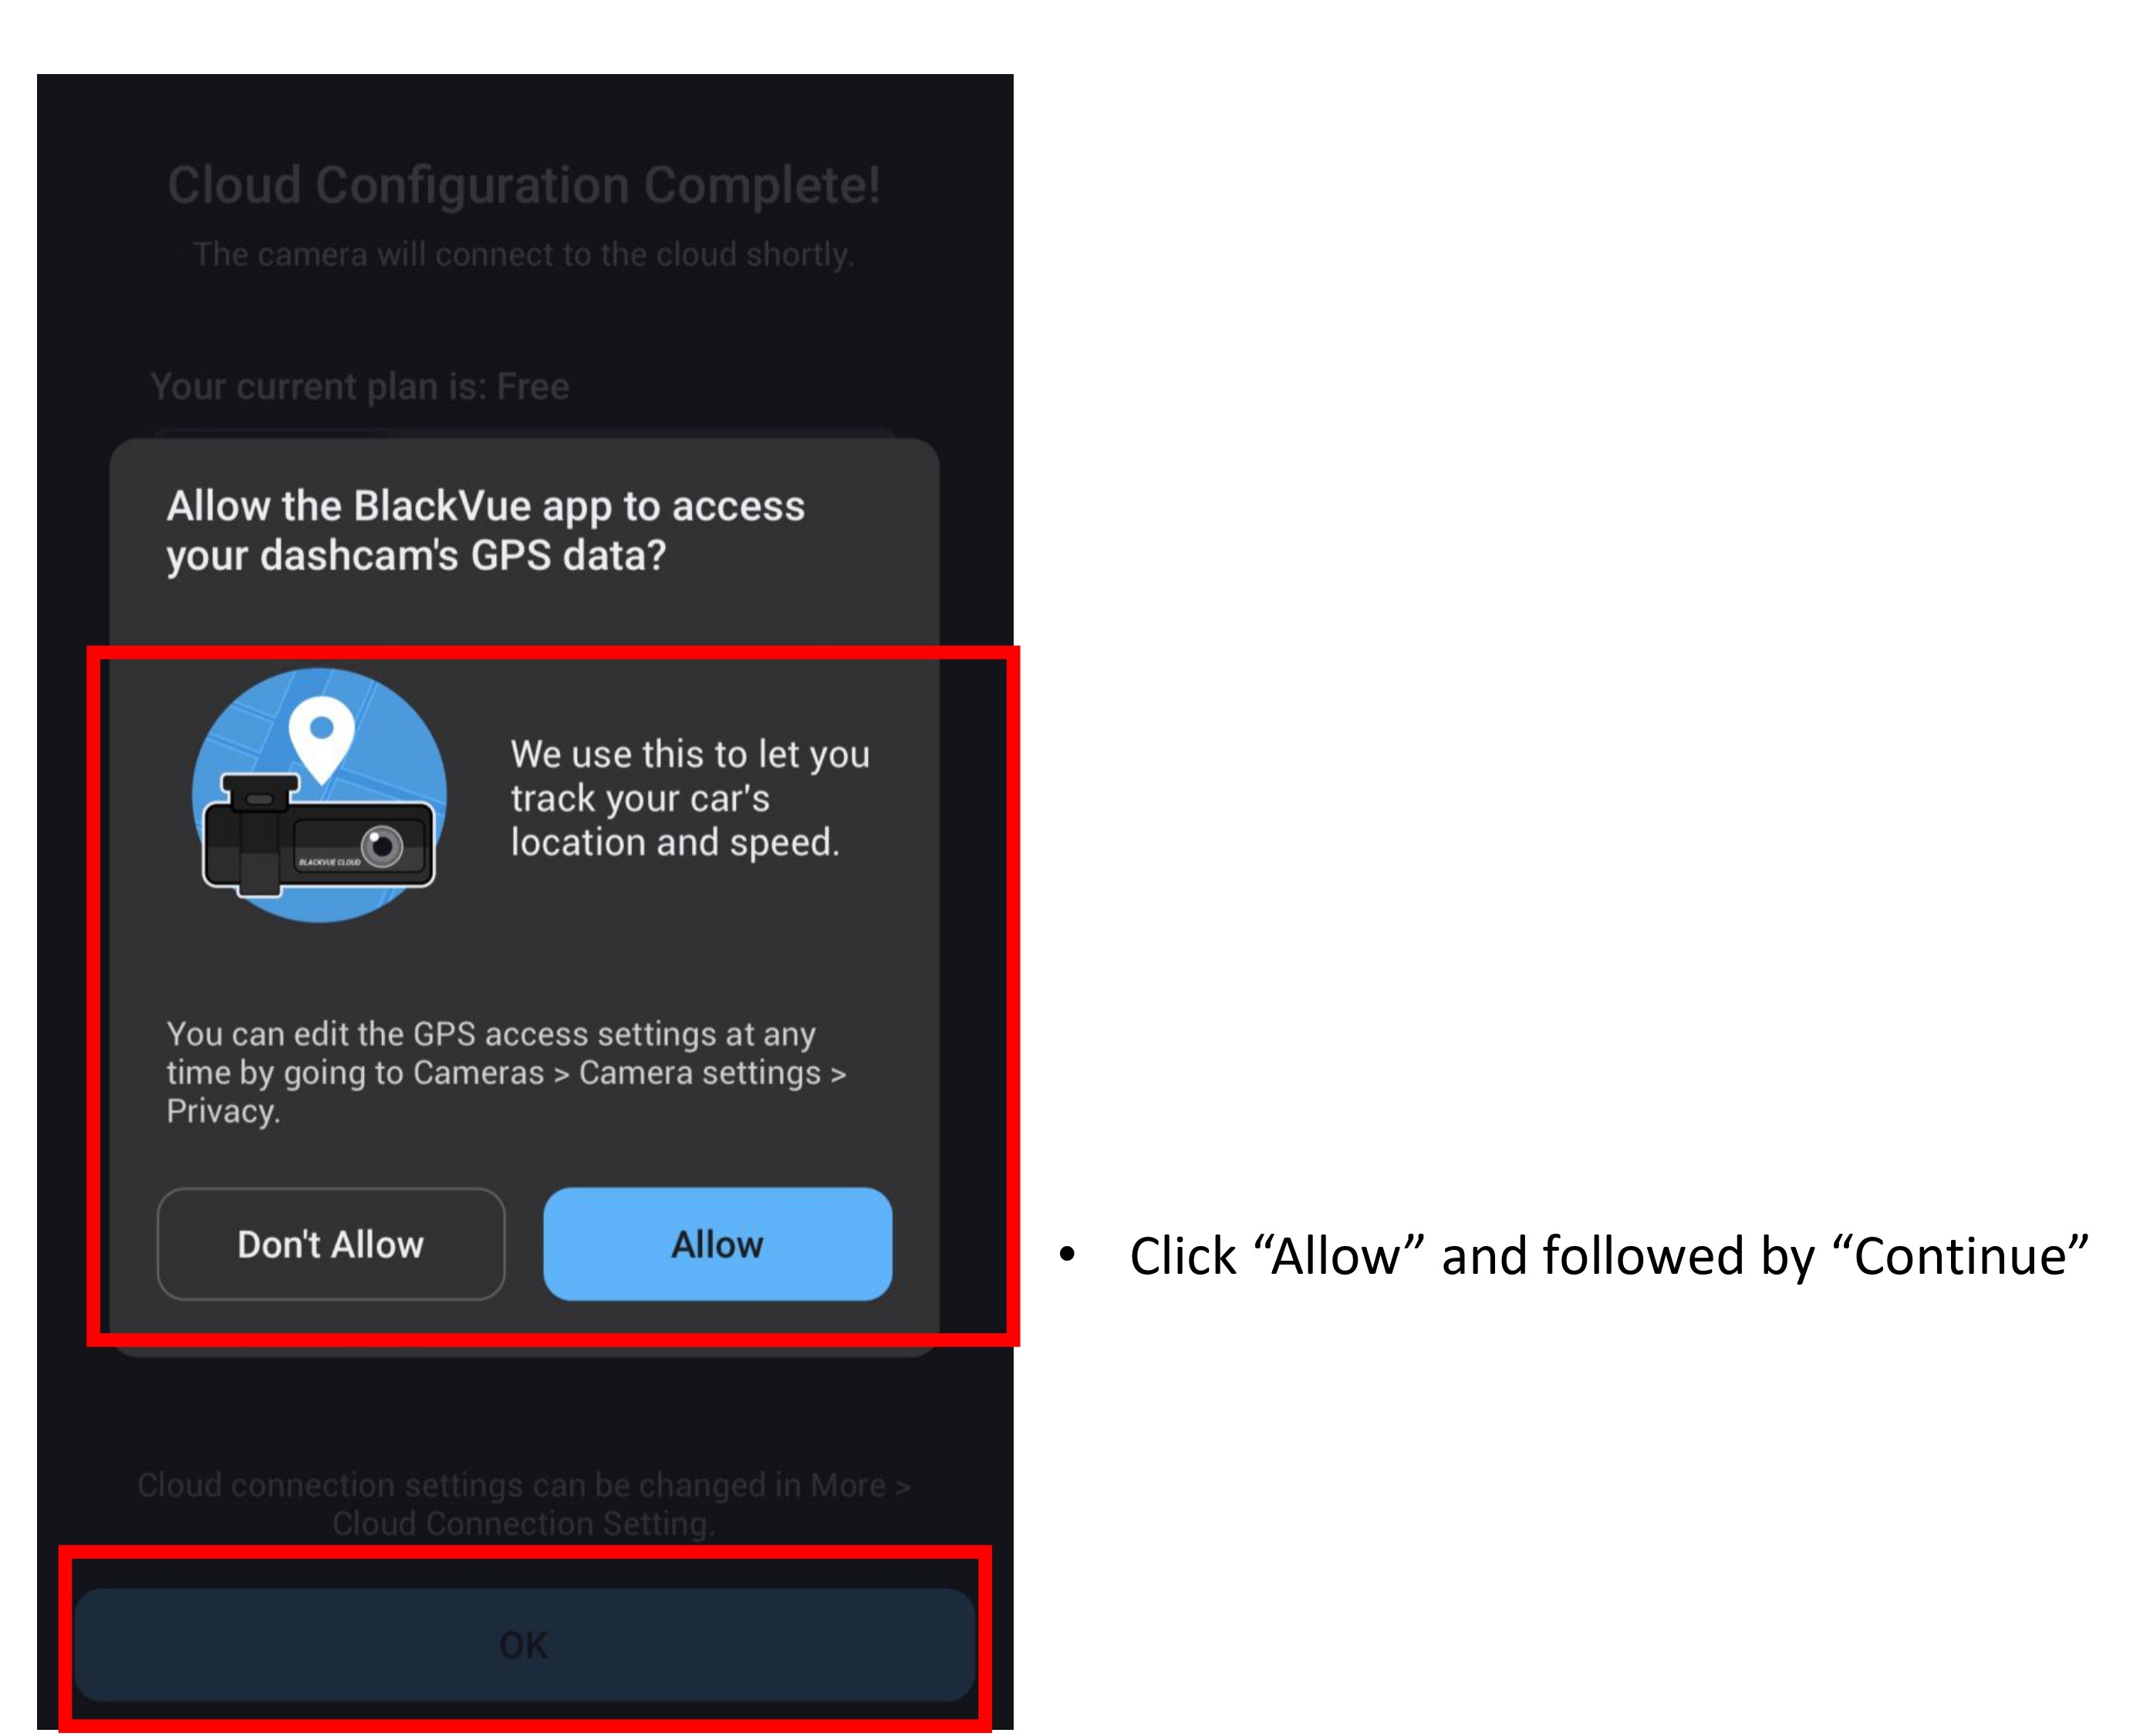
- Click "Allow" , then "OK"
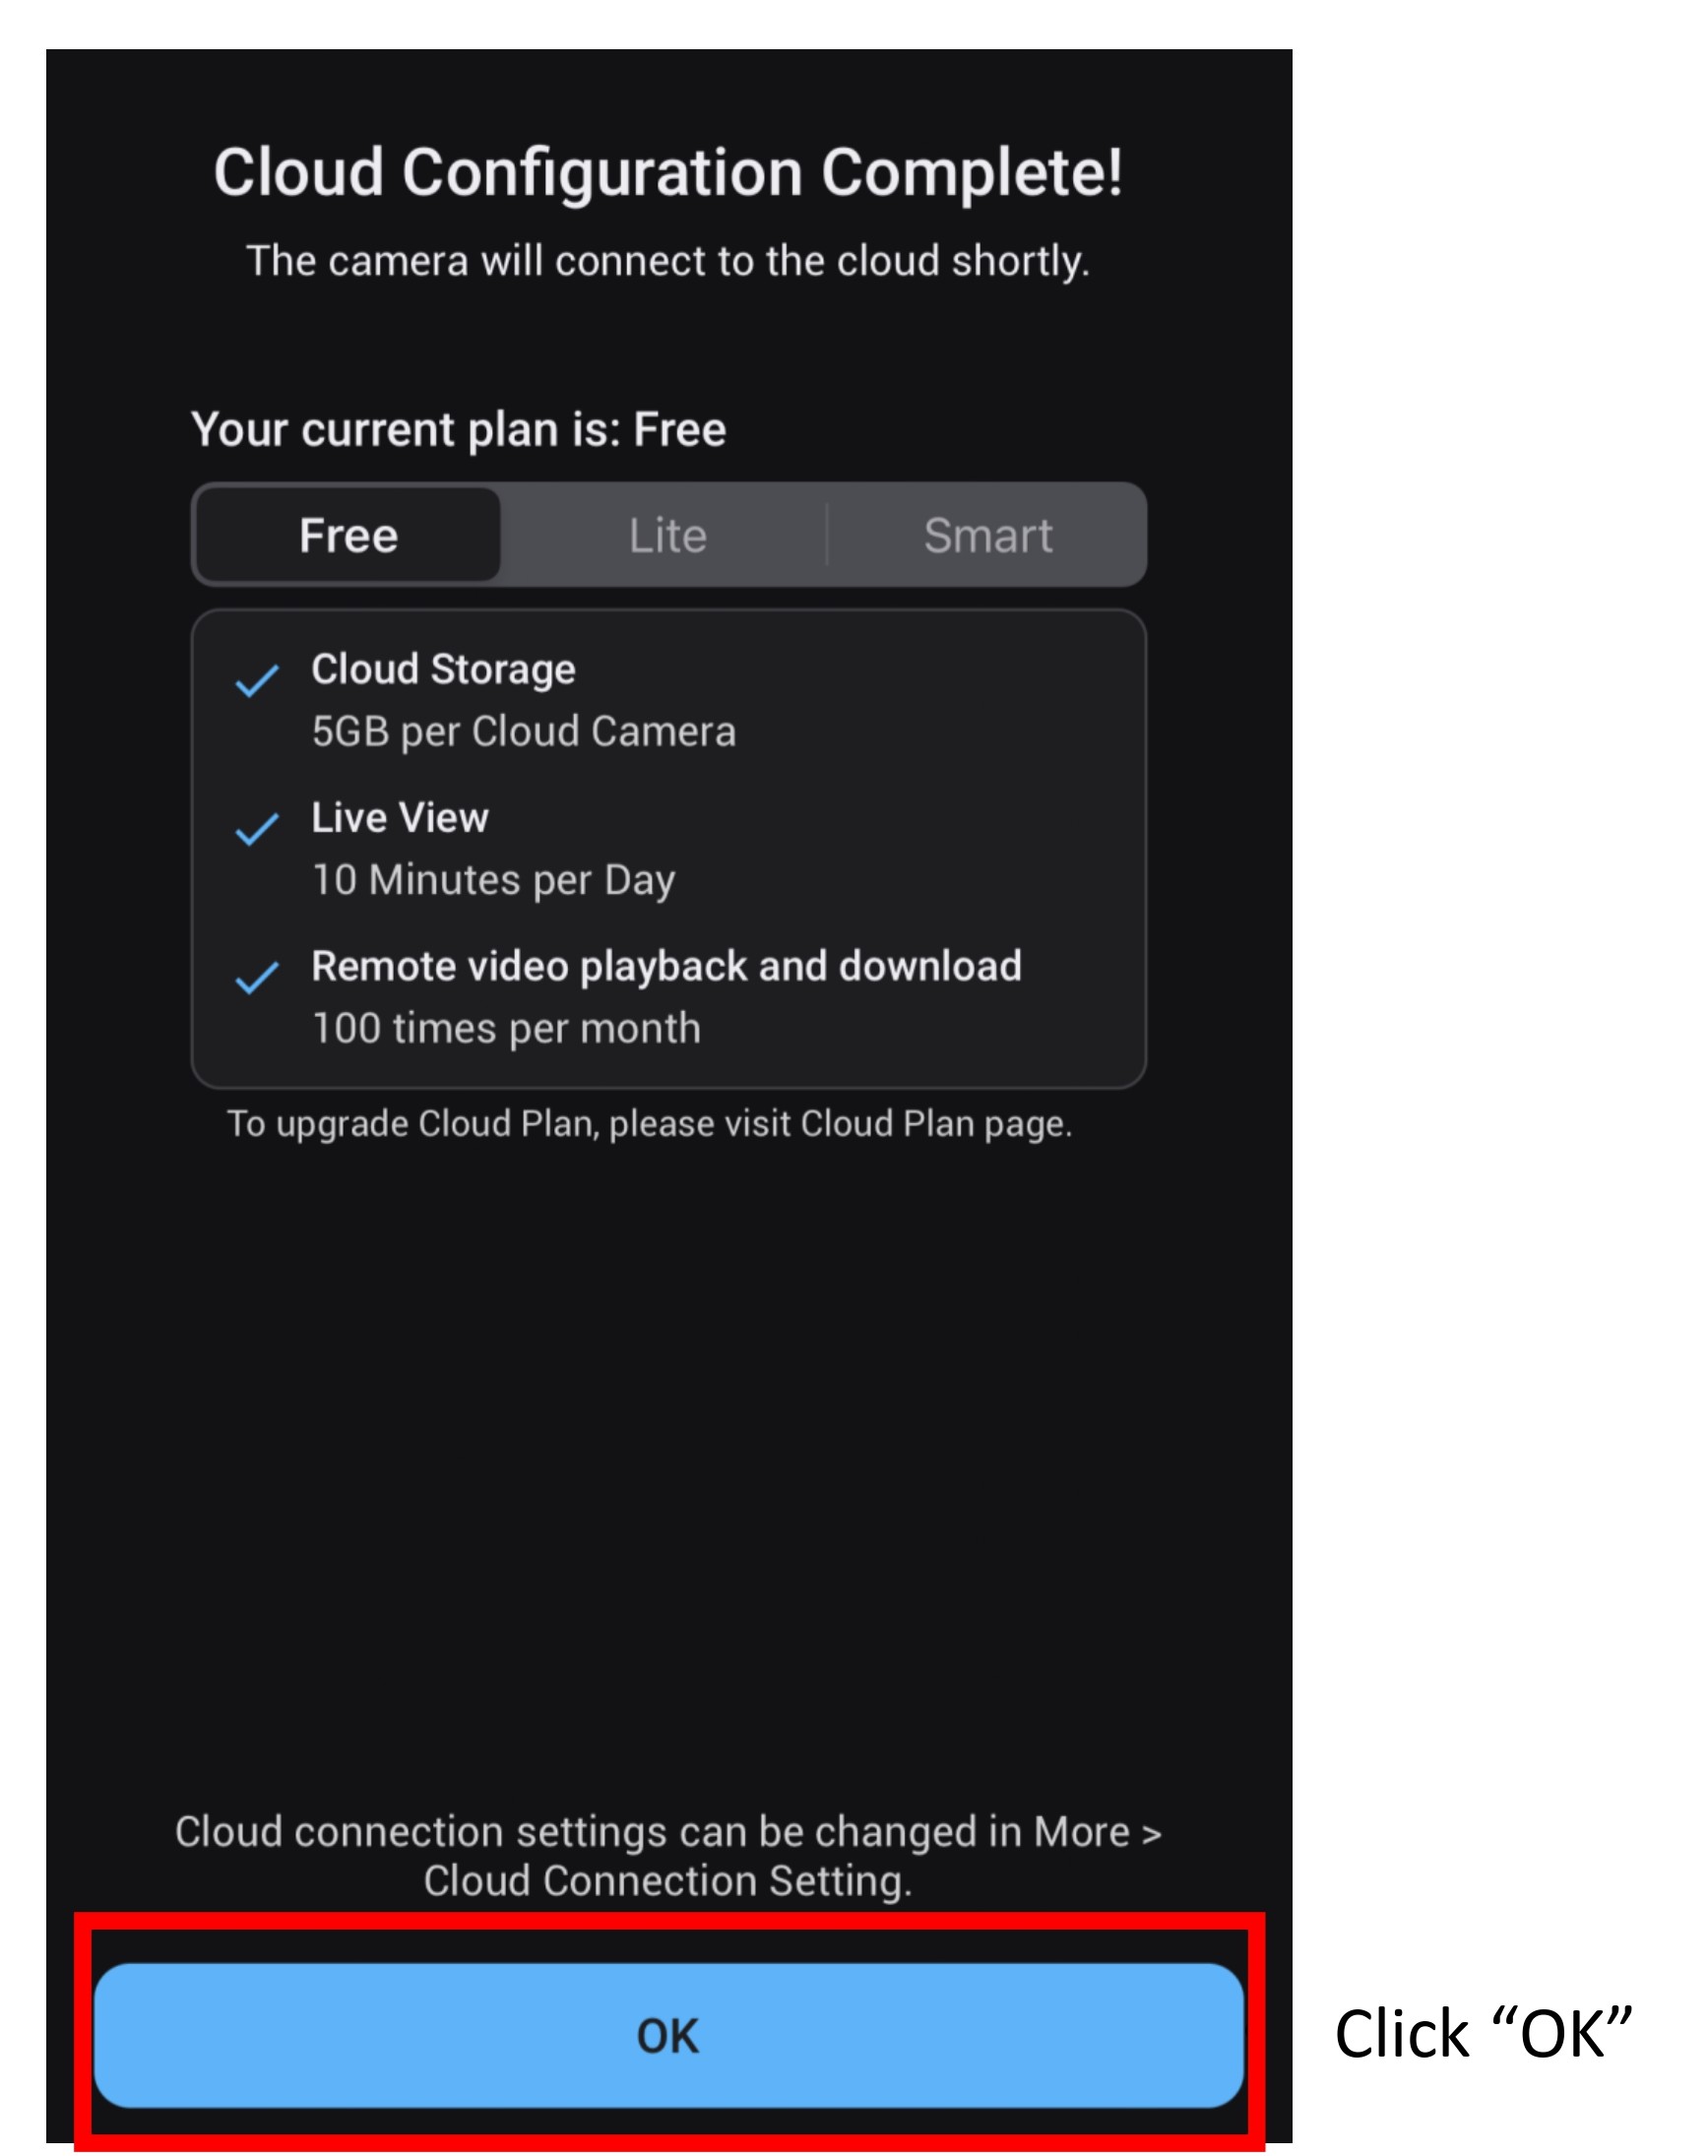
- SIM card has successfully setup.
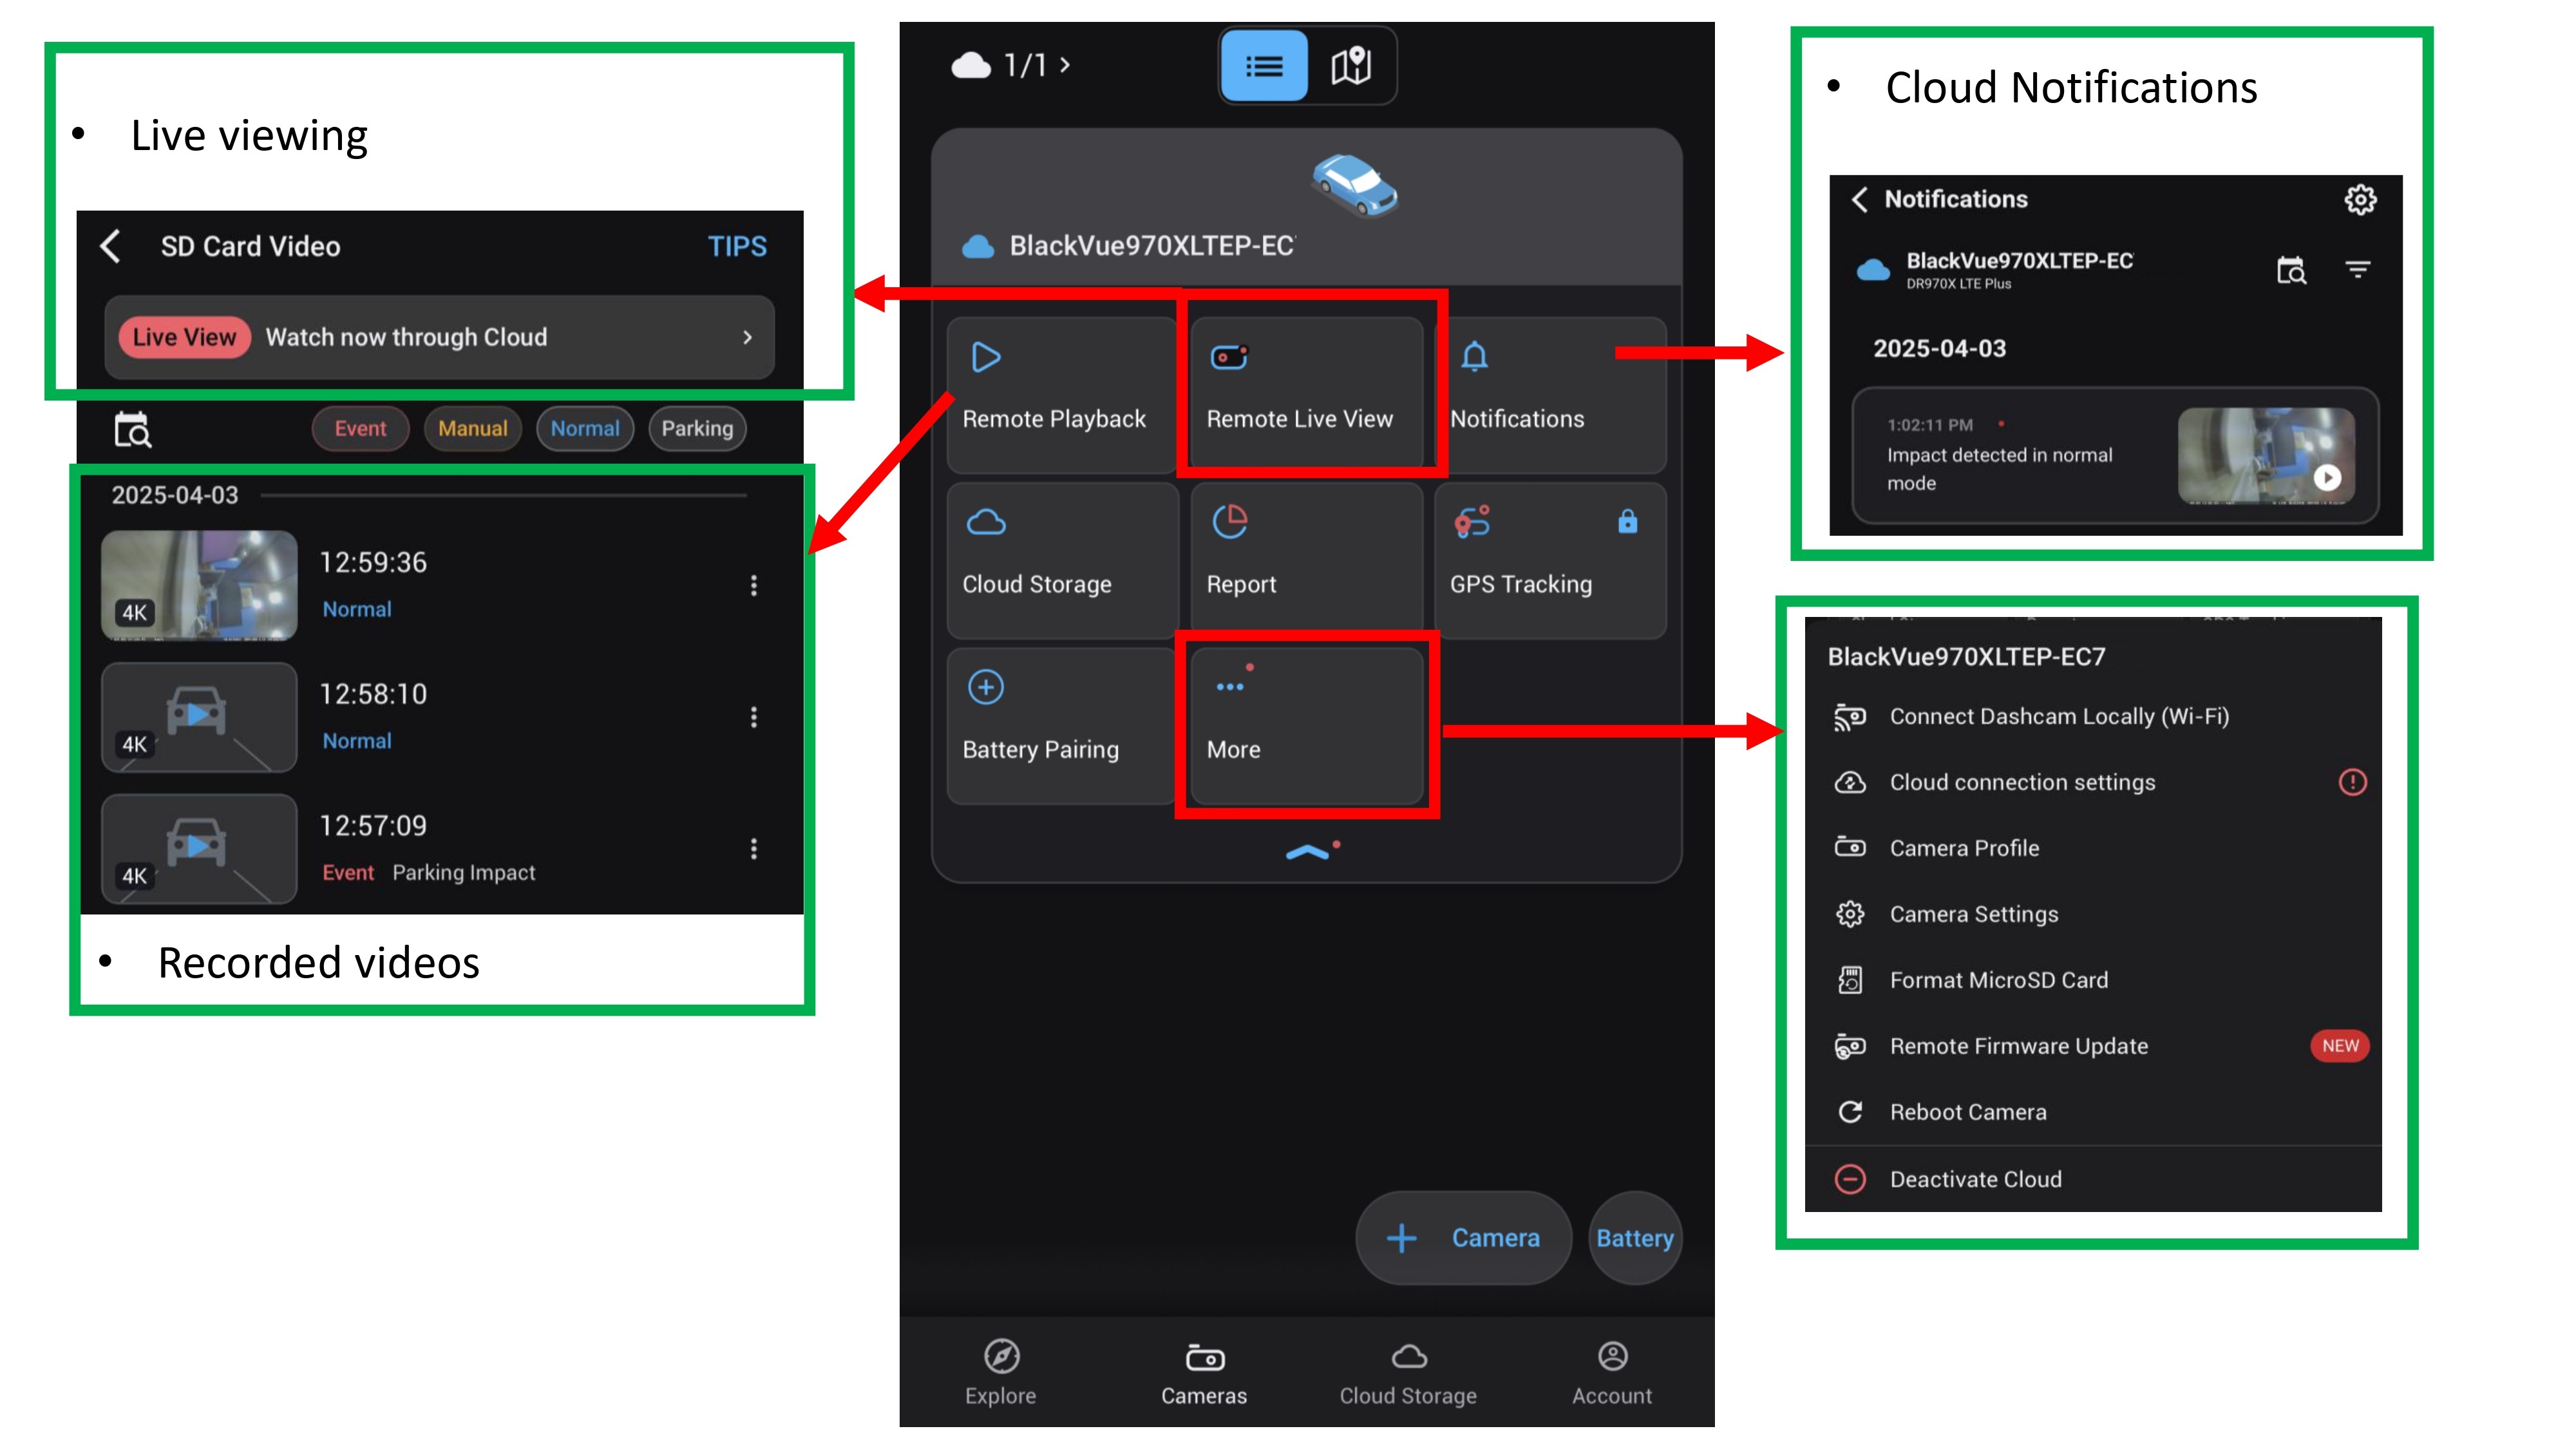
- Dashcam recorded videos, cloud live viewing and settings as shown above
2.2.2 Wi-Fi Hotspot Configuration
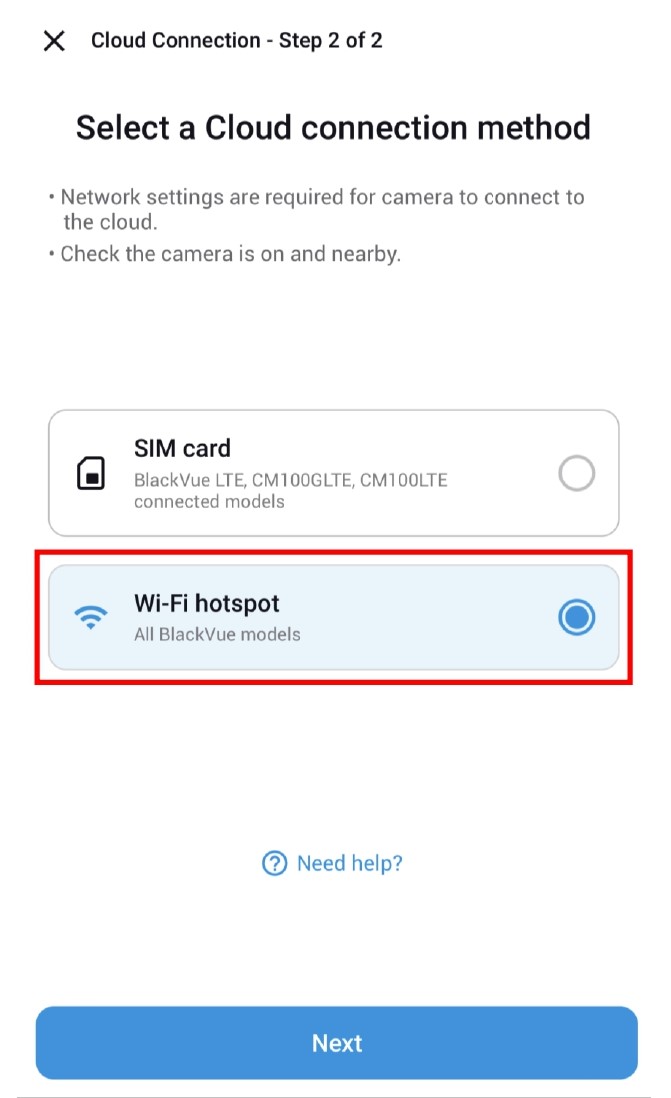
- Select "Wi-Fi Hotspot" to configure then click "Next".
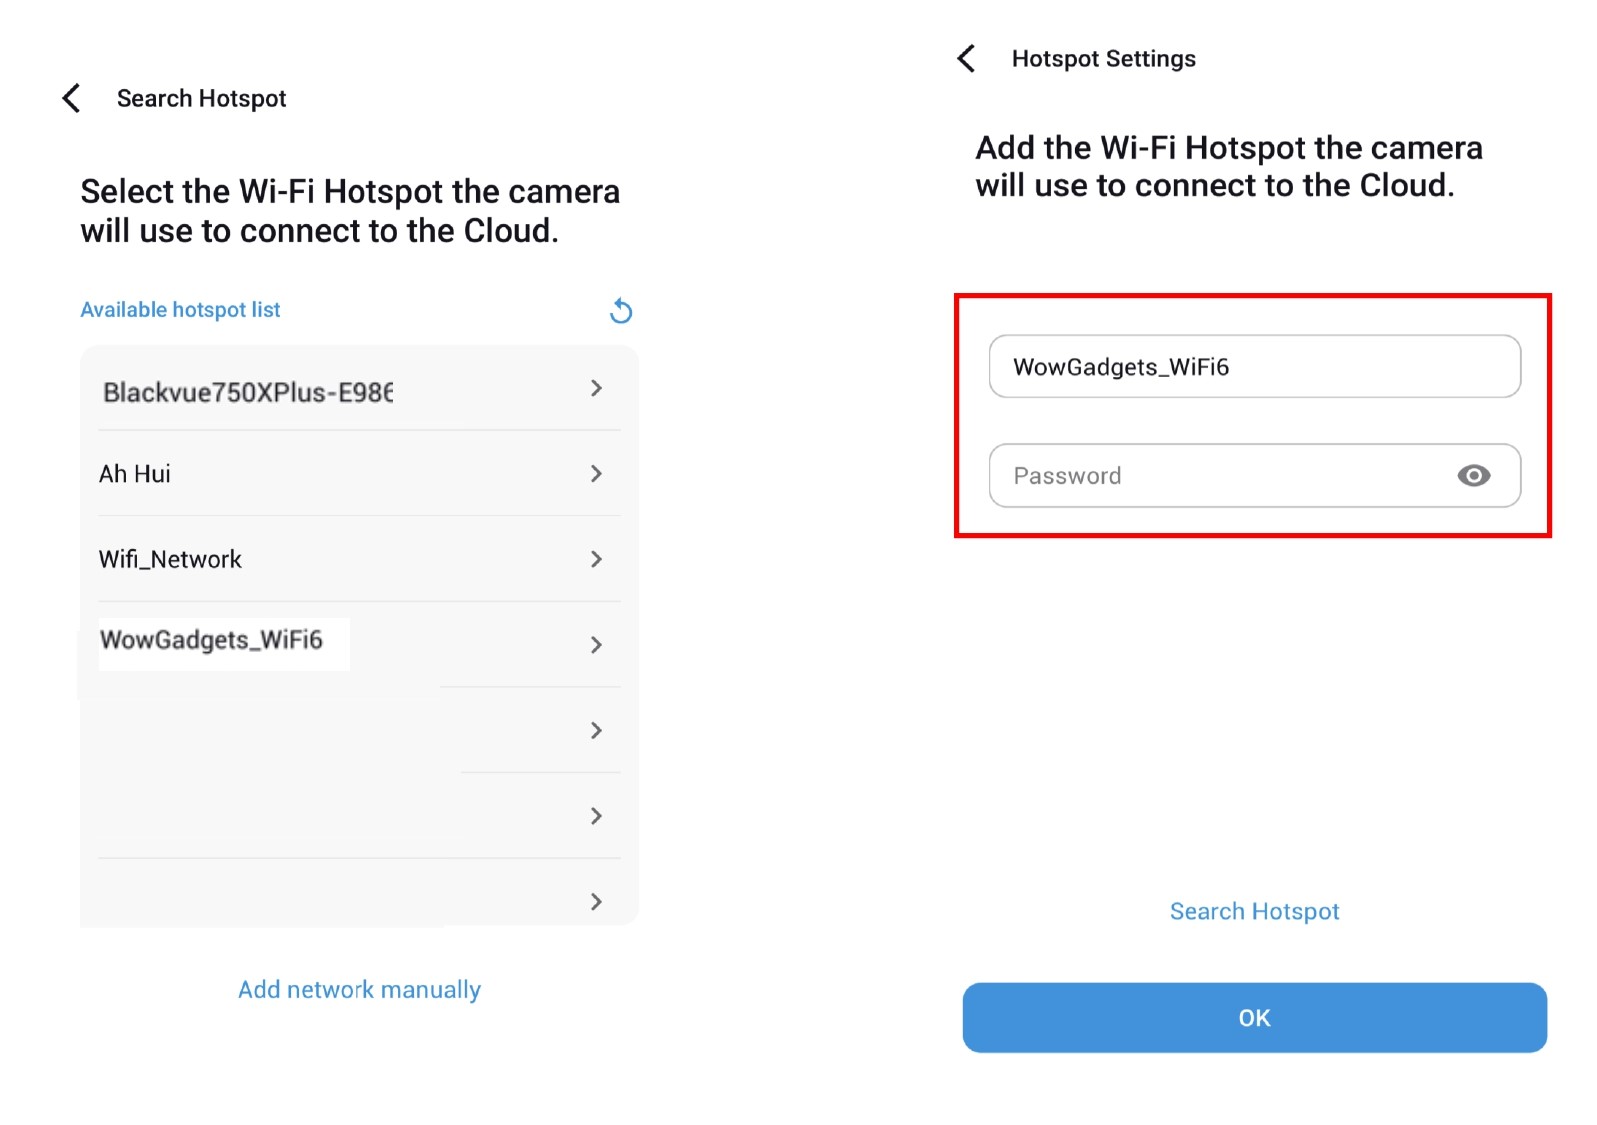
- Choose the Wi-Fi hotspot and input the password.
- Once connected, camera can accessed via cloud.
3. ADD CAMERA - WI-FI MODELS BLACKVUE DASHCAM
3.1 STEPS ON ADDING BLACKVUE DASHCAM - WI-FI METHODS

- Click "+ Camera" to add camera.
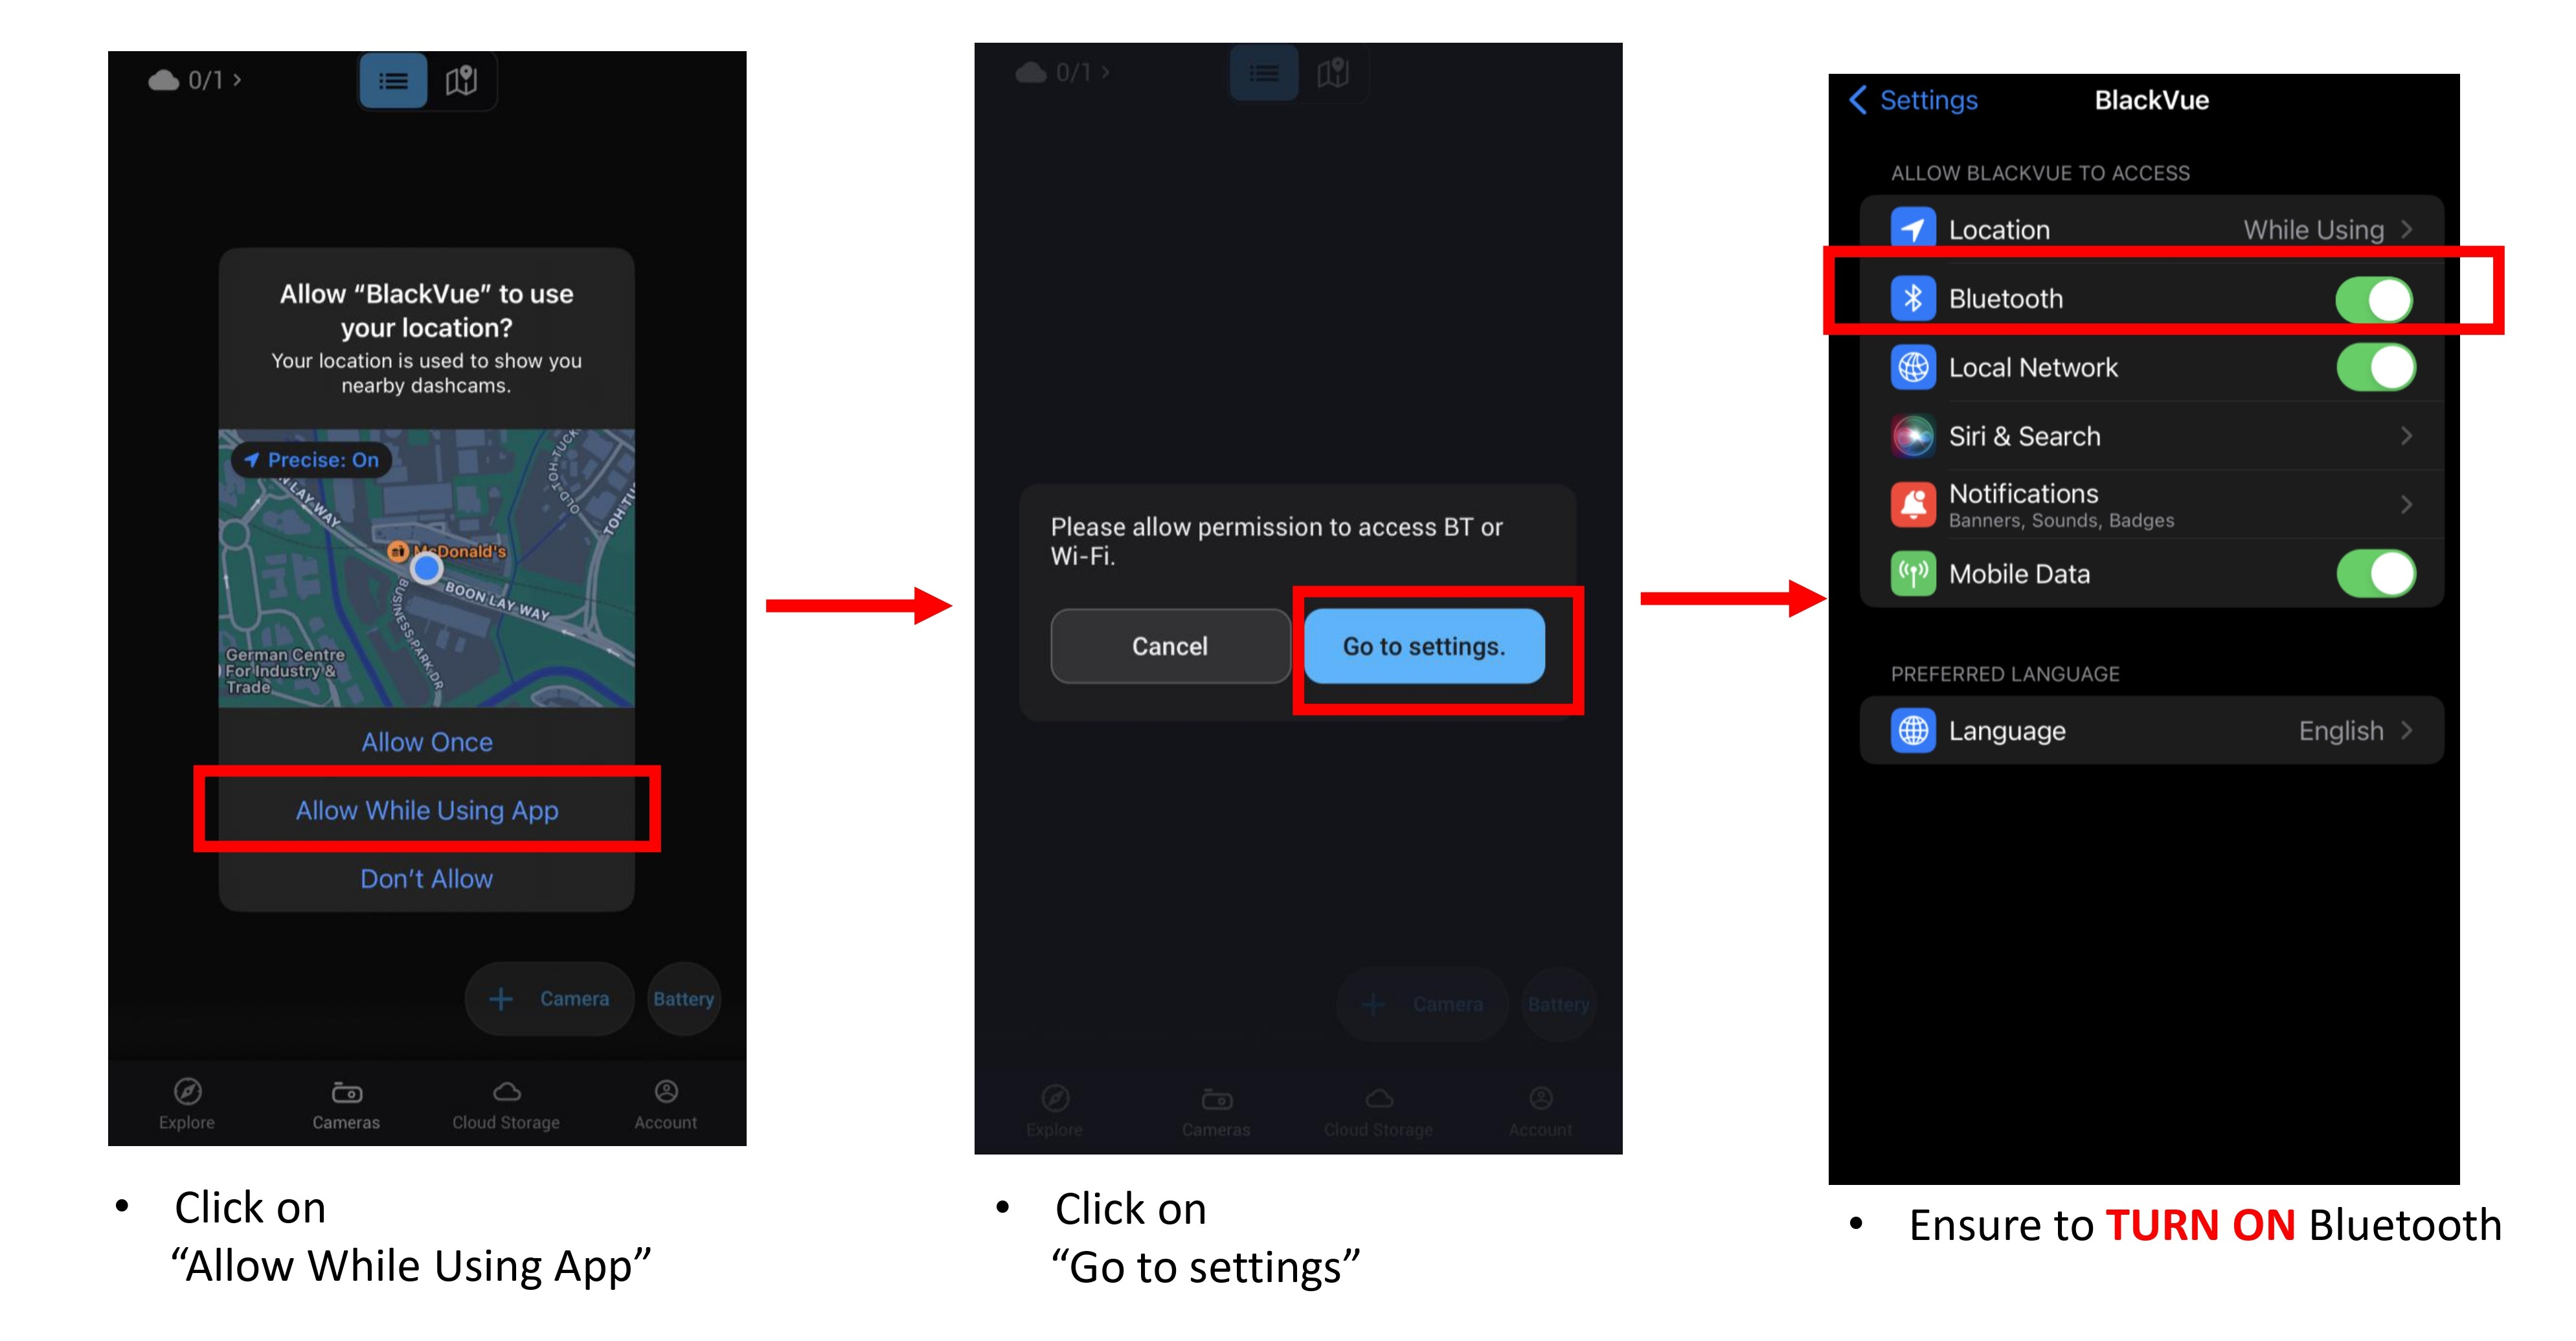
- Ensure all the permission is allowed and bluetooth is always turn on for the BlackVue Apps.
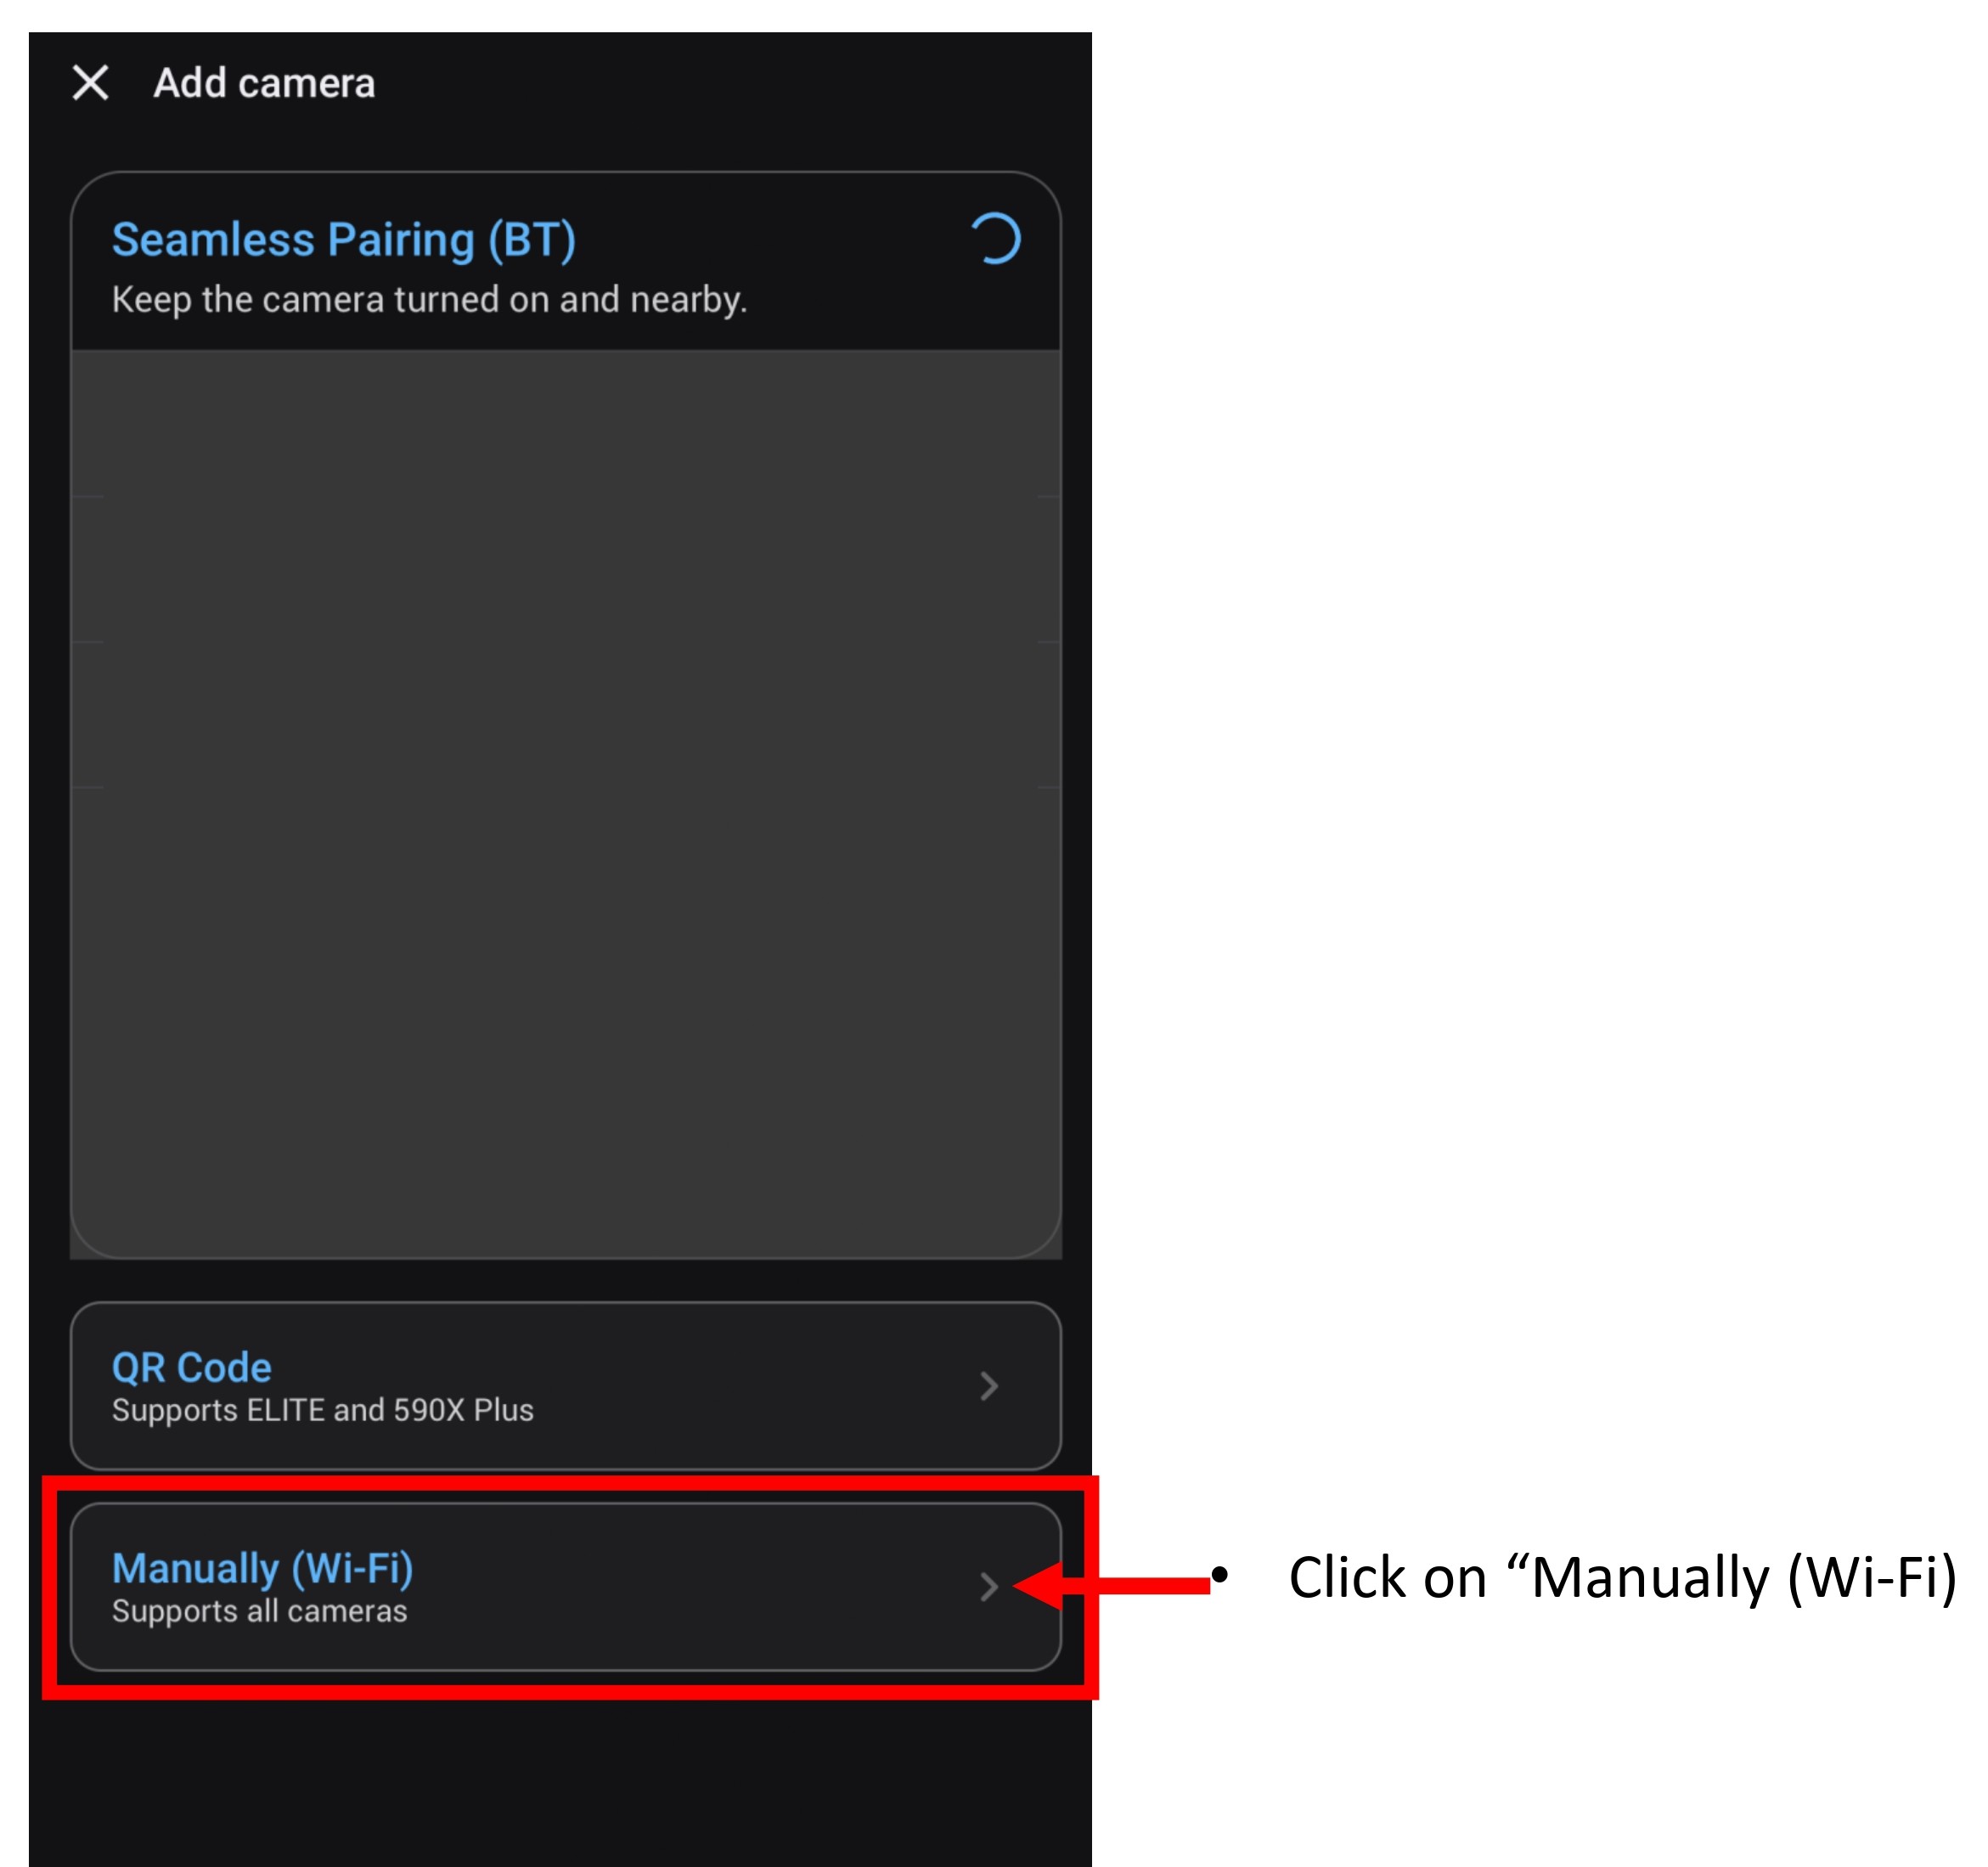
- Select "Manually (Wi-Fi)" only for dashcam that do not have seamless pairing feature.
Dashcams that do not have seamless pairing feature : DR590X, DR590W, DR650, DR750S ..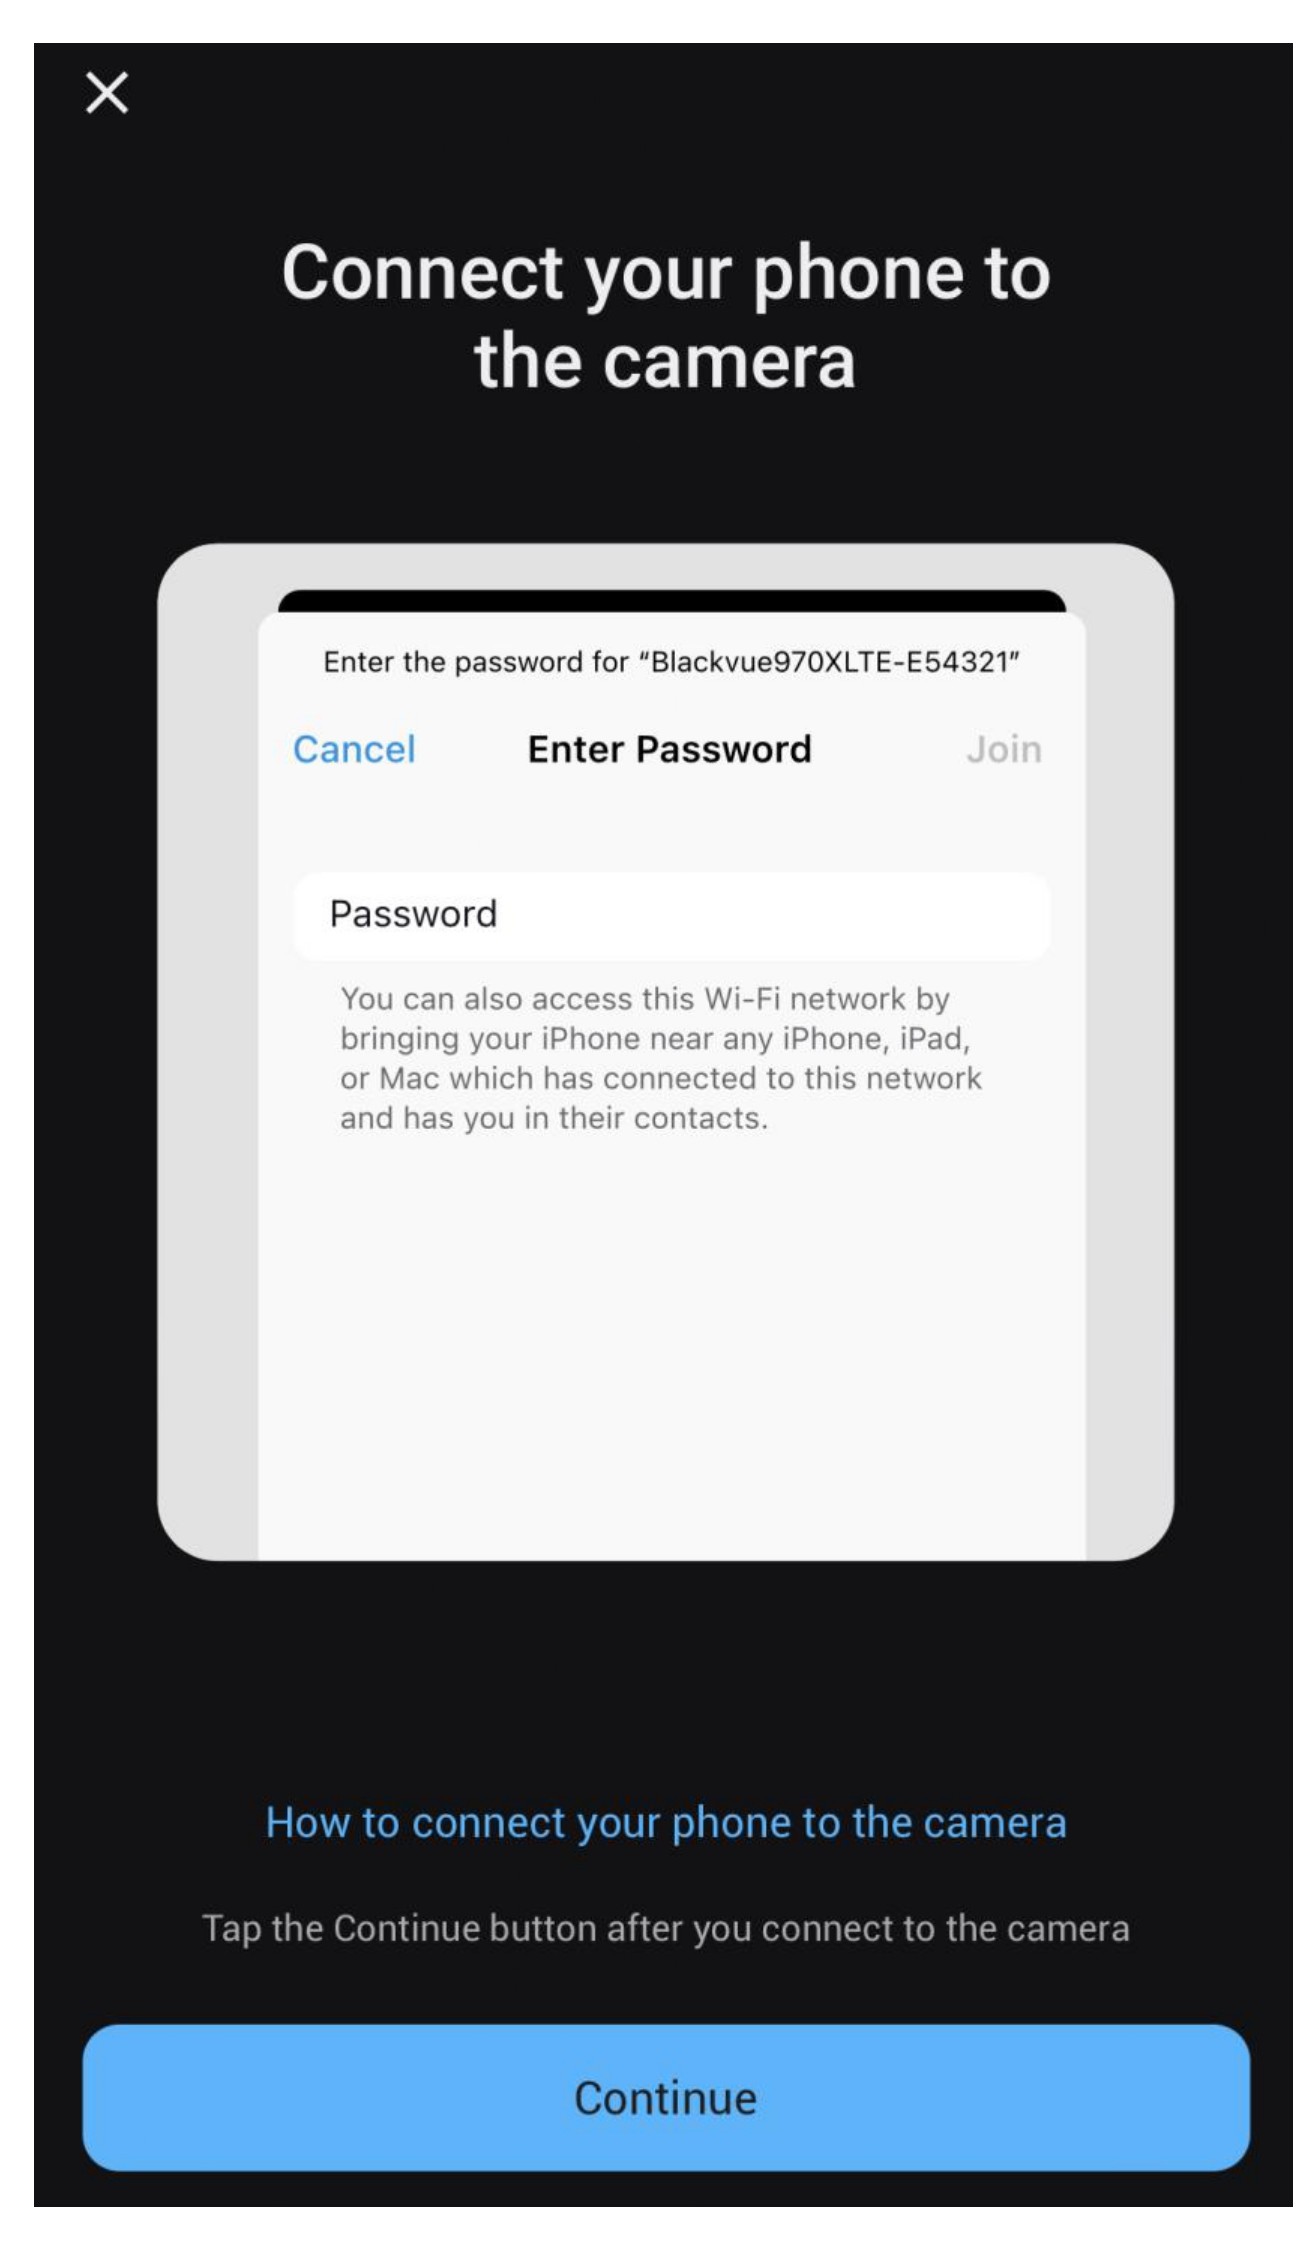
- Before clicking "Continue", Go to -Phone Setting - Wi-Fi connection
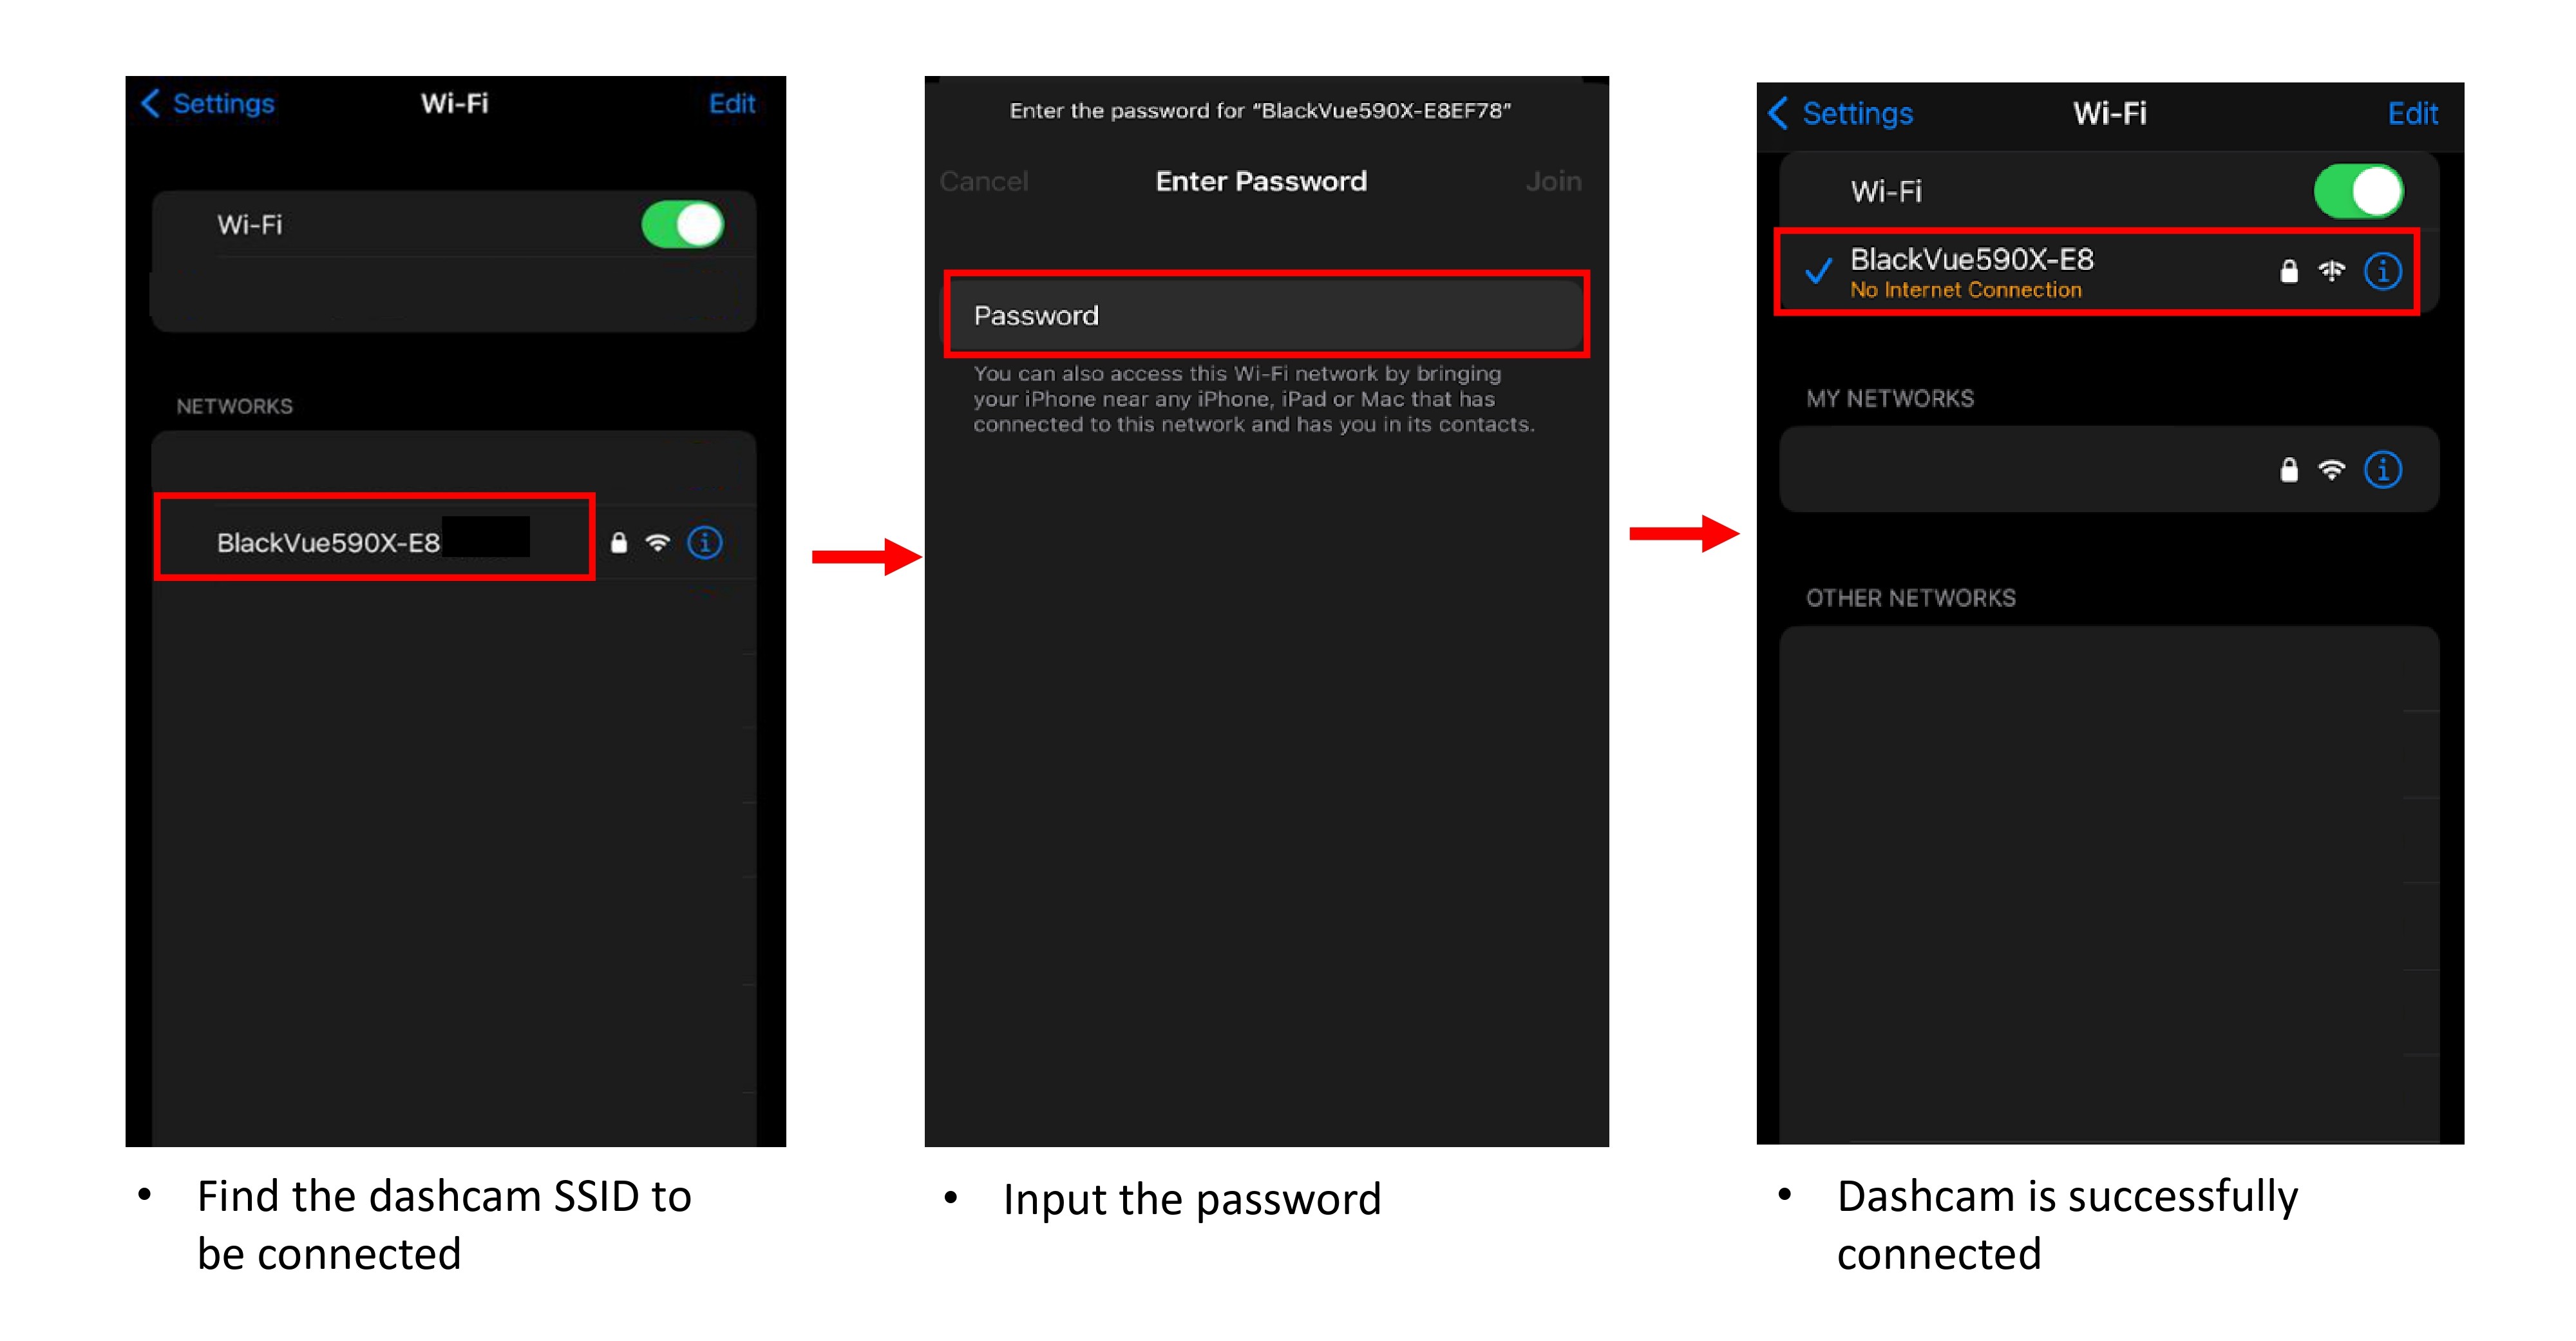
- Find the dashcam SSID that need to be connected.
- Input the password for the selected dashcam.
Password can be found at the box of the dashcam or at the dashcam body itself. - Dashcam is connected once password is verified.
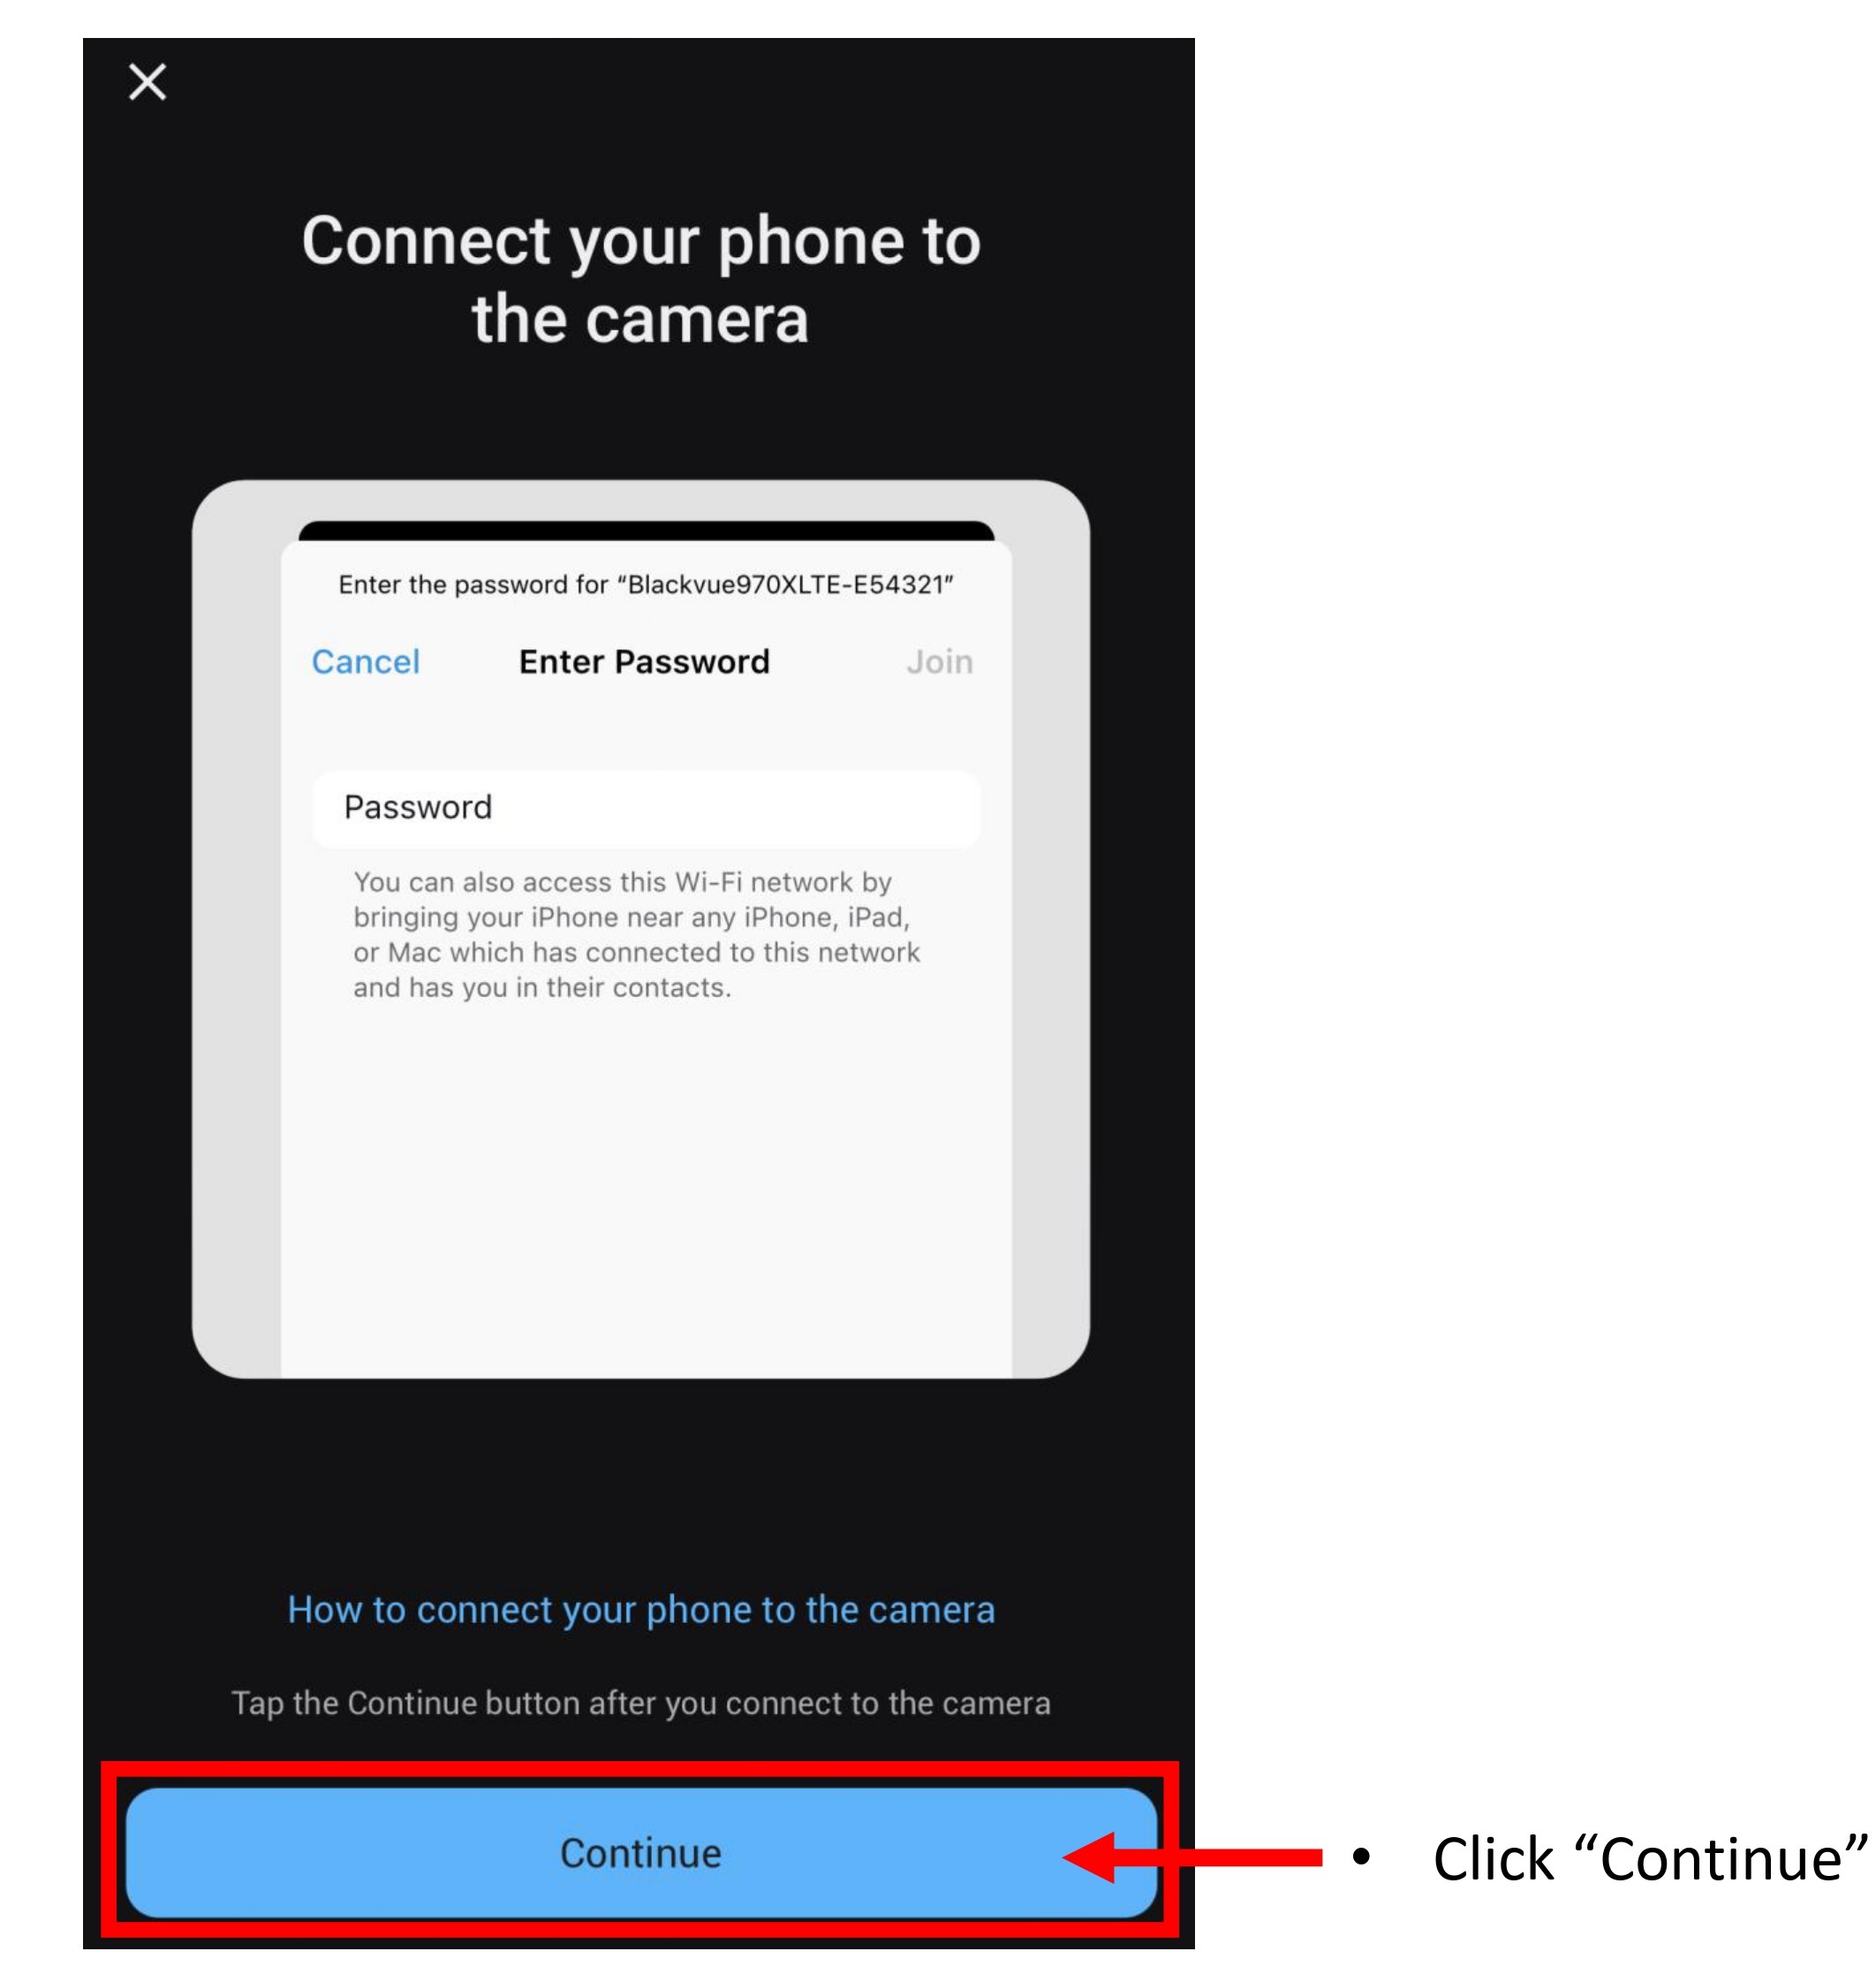
- Go back BlackVue App and click "Continue".
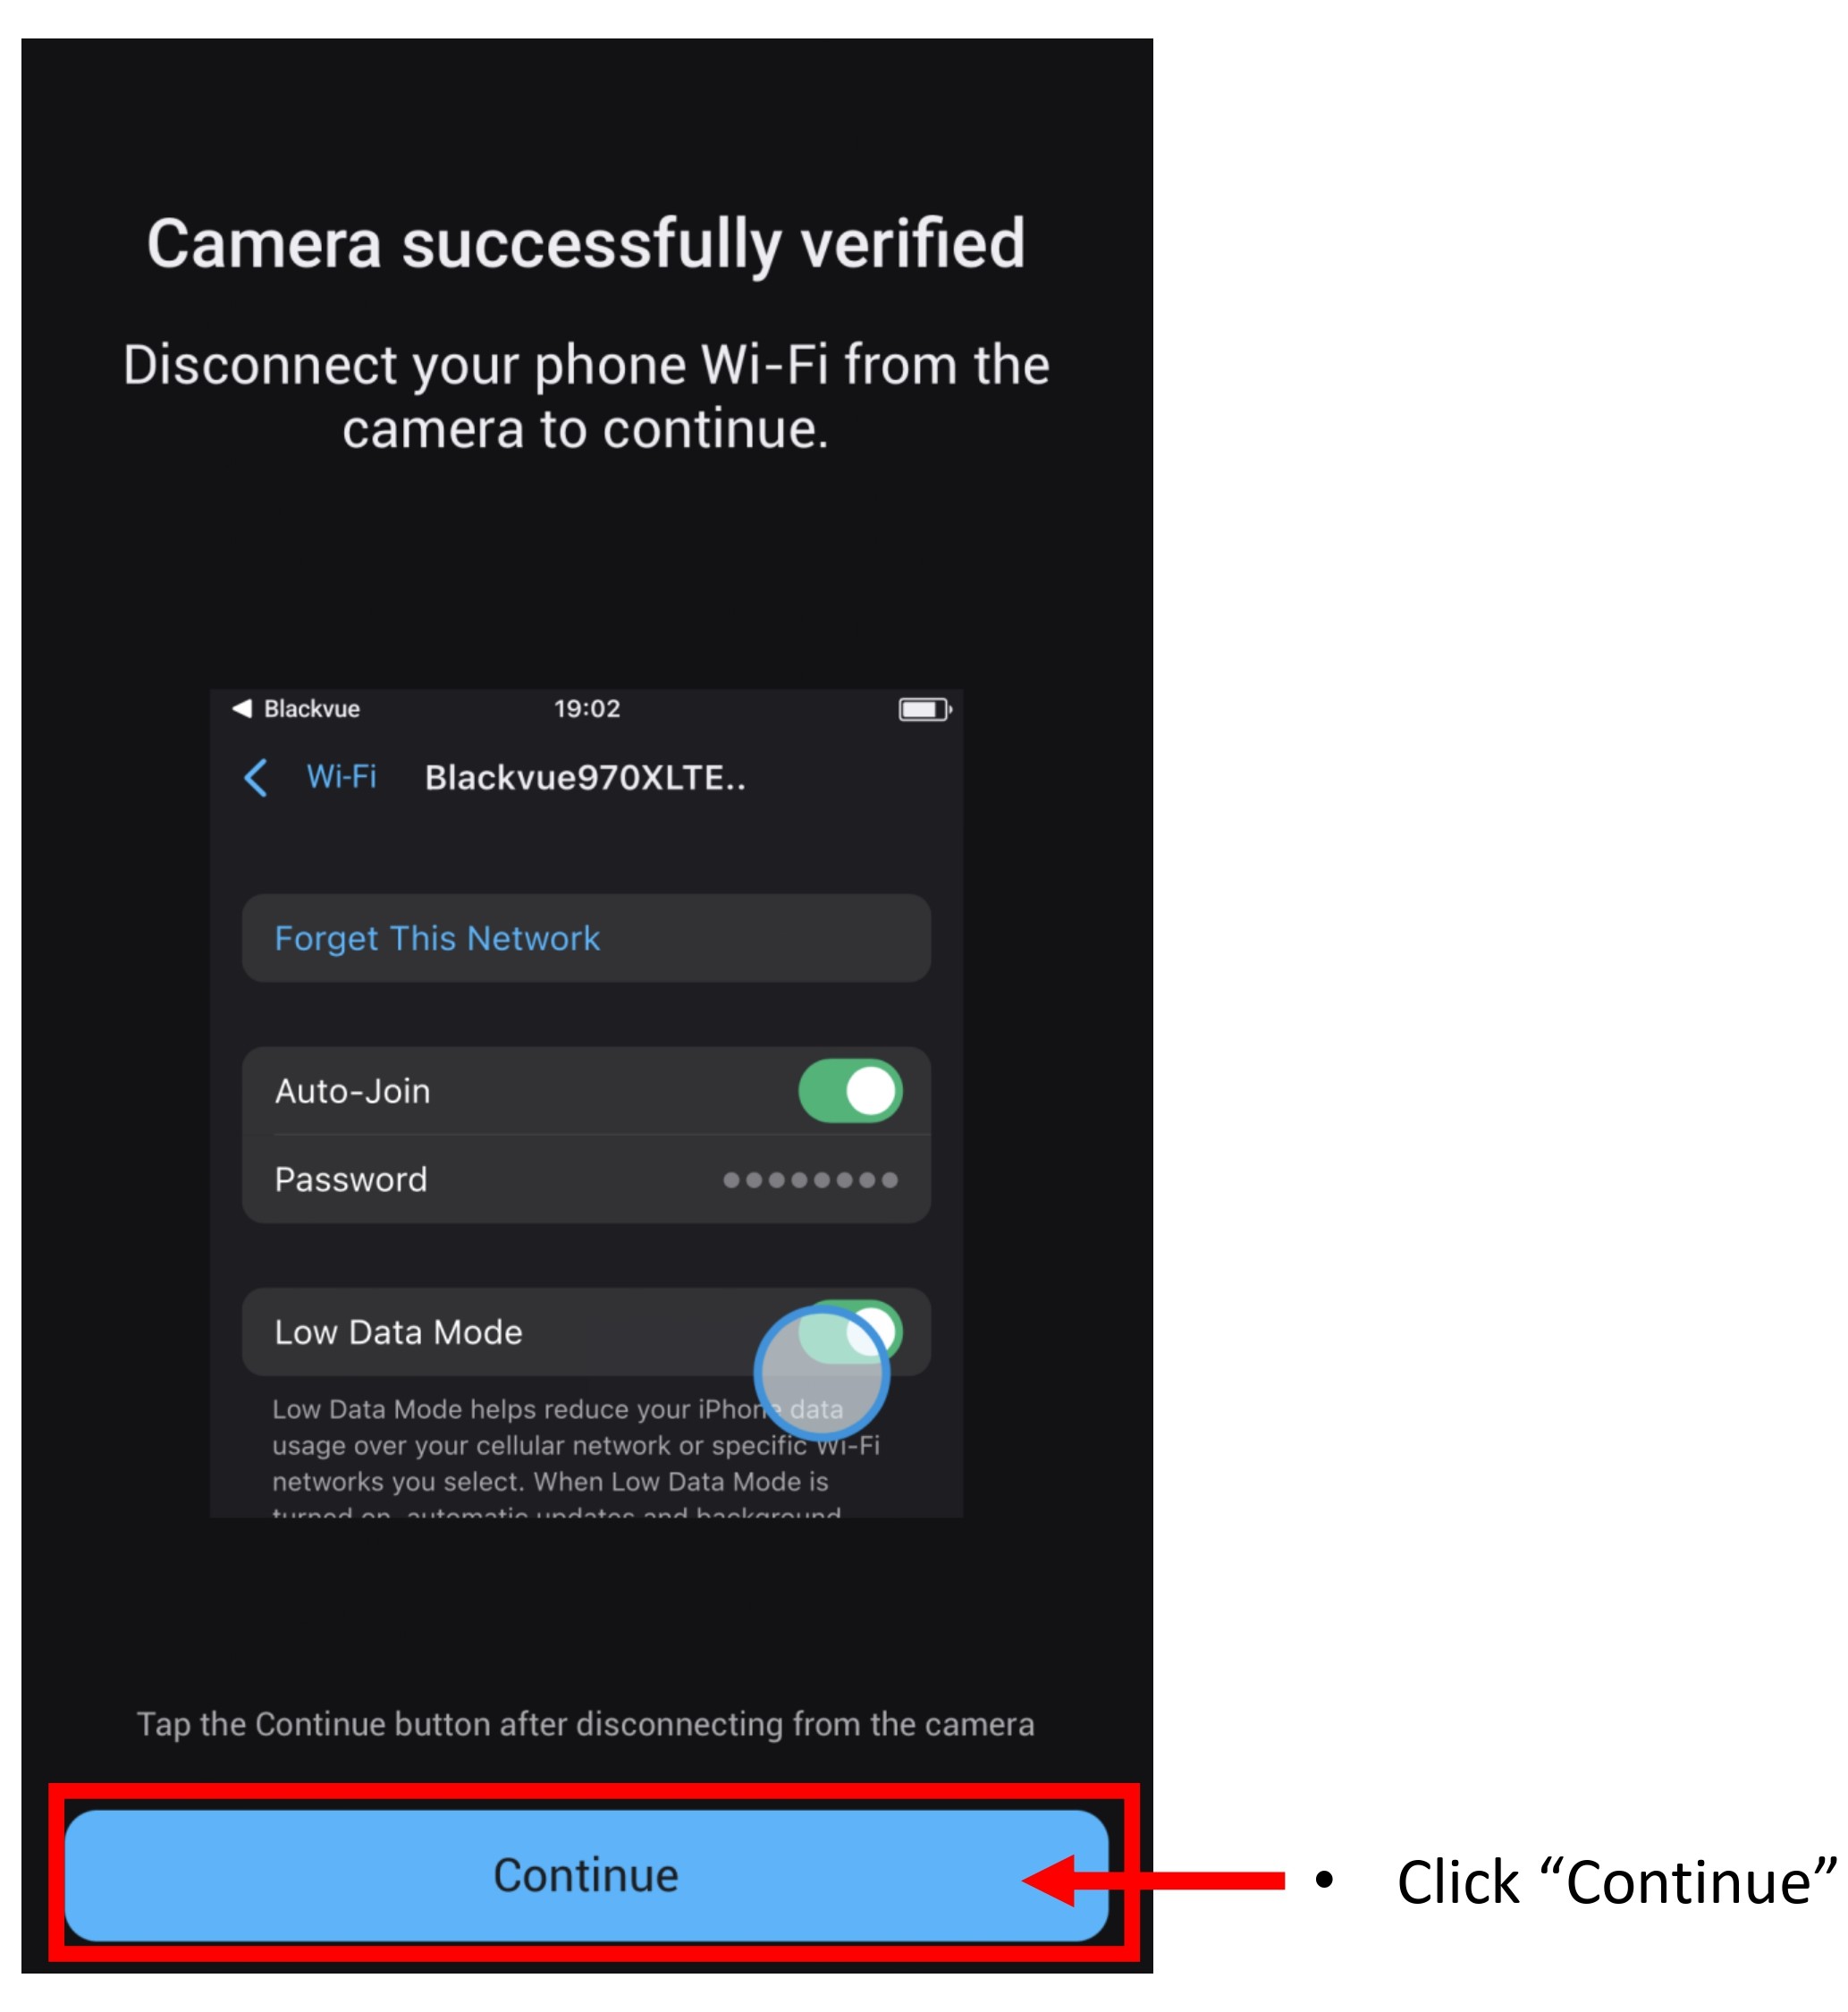
- The camera is successfully added in the BlackVue App camera list. Click "Continue".
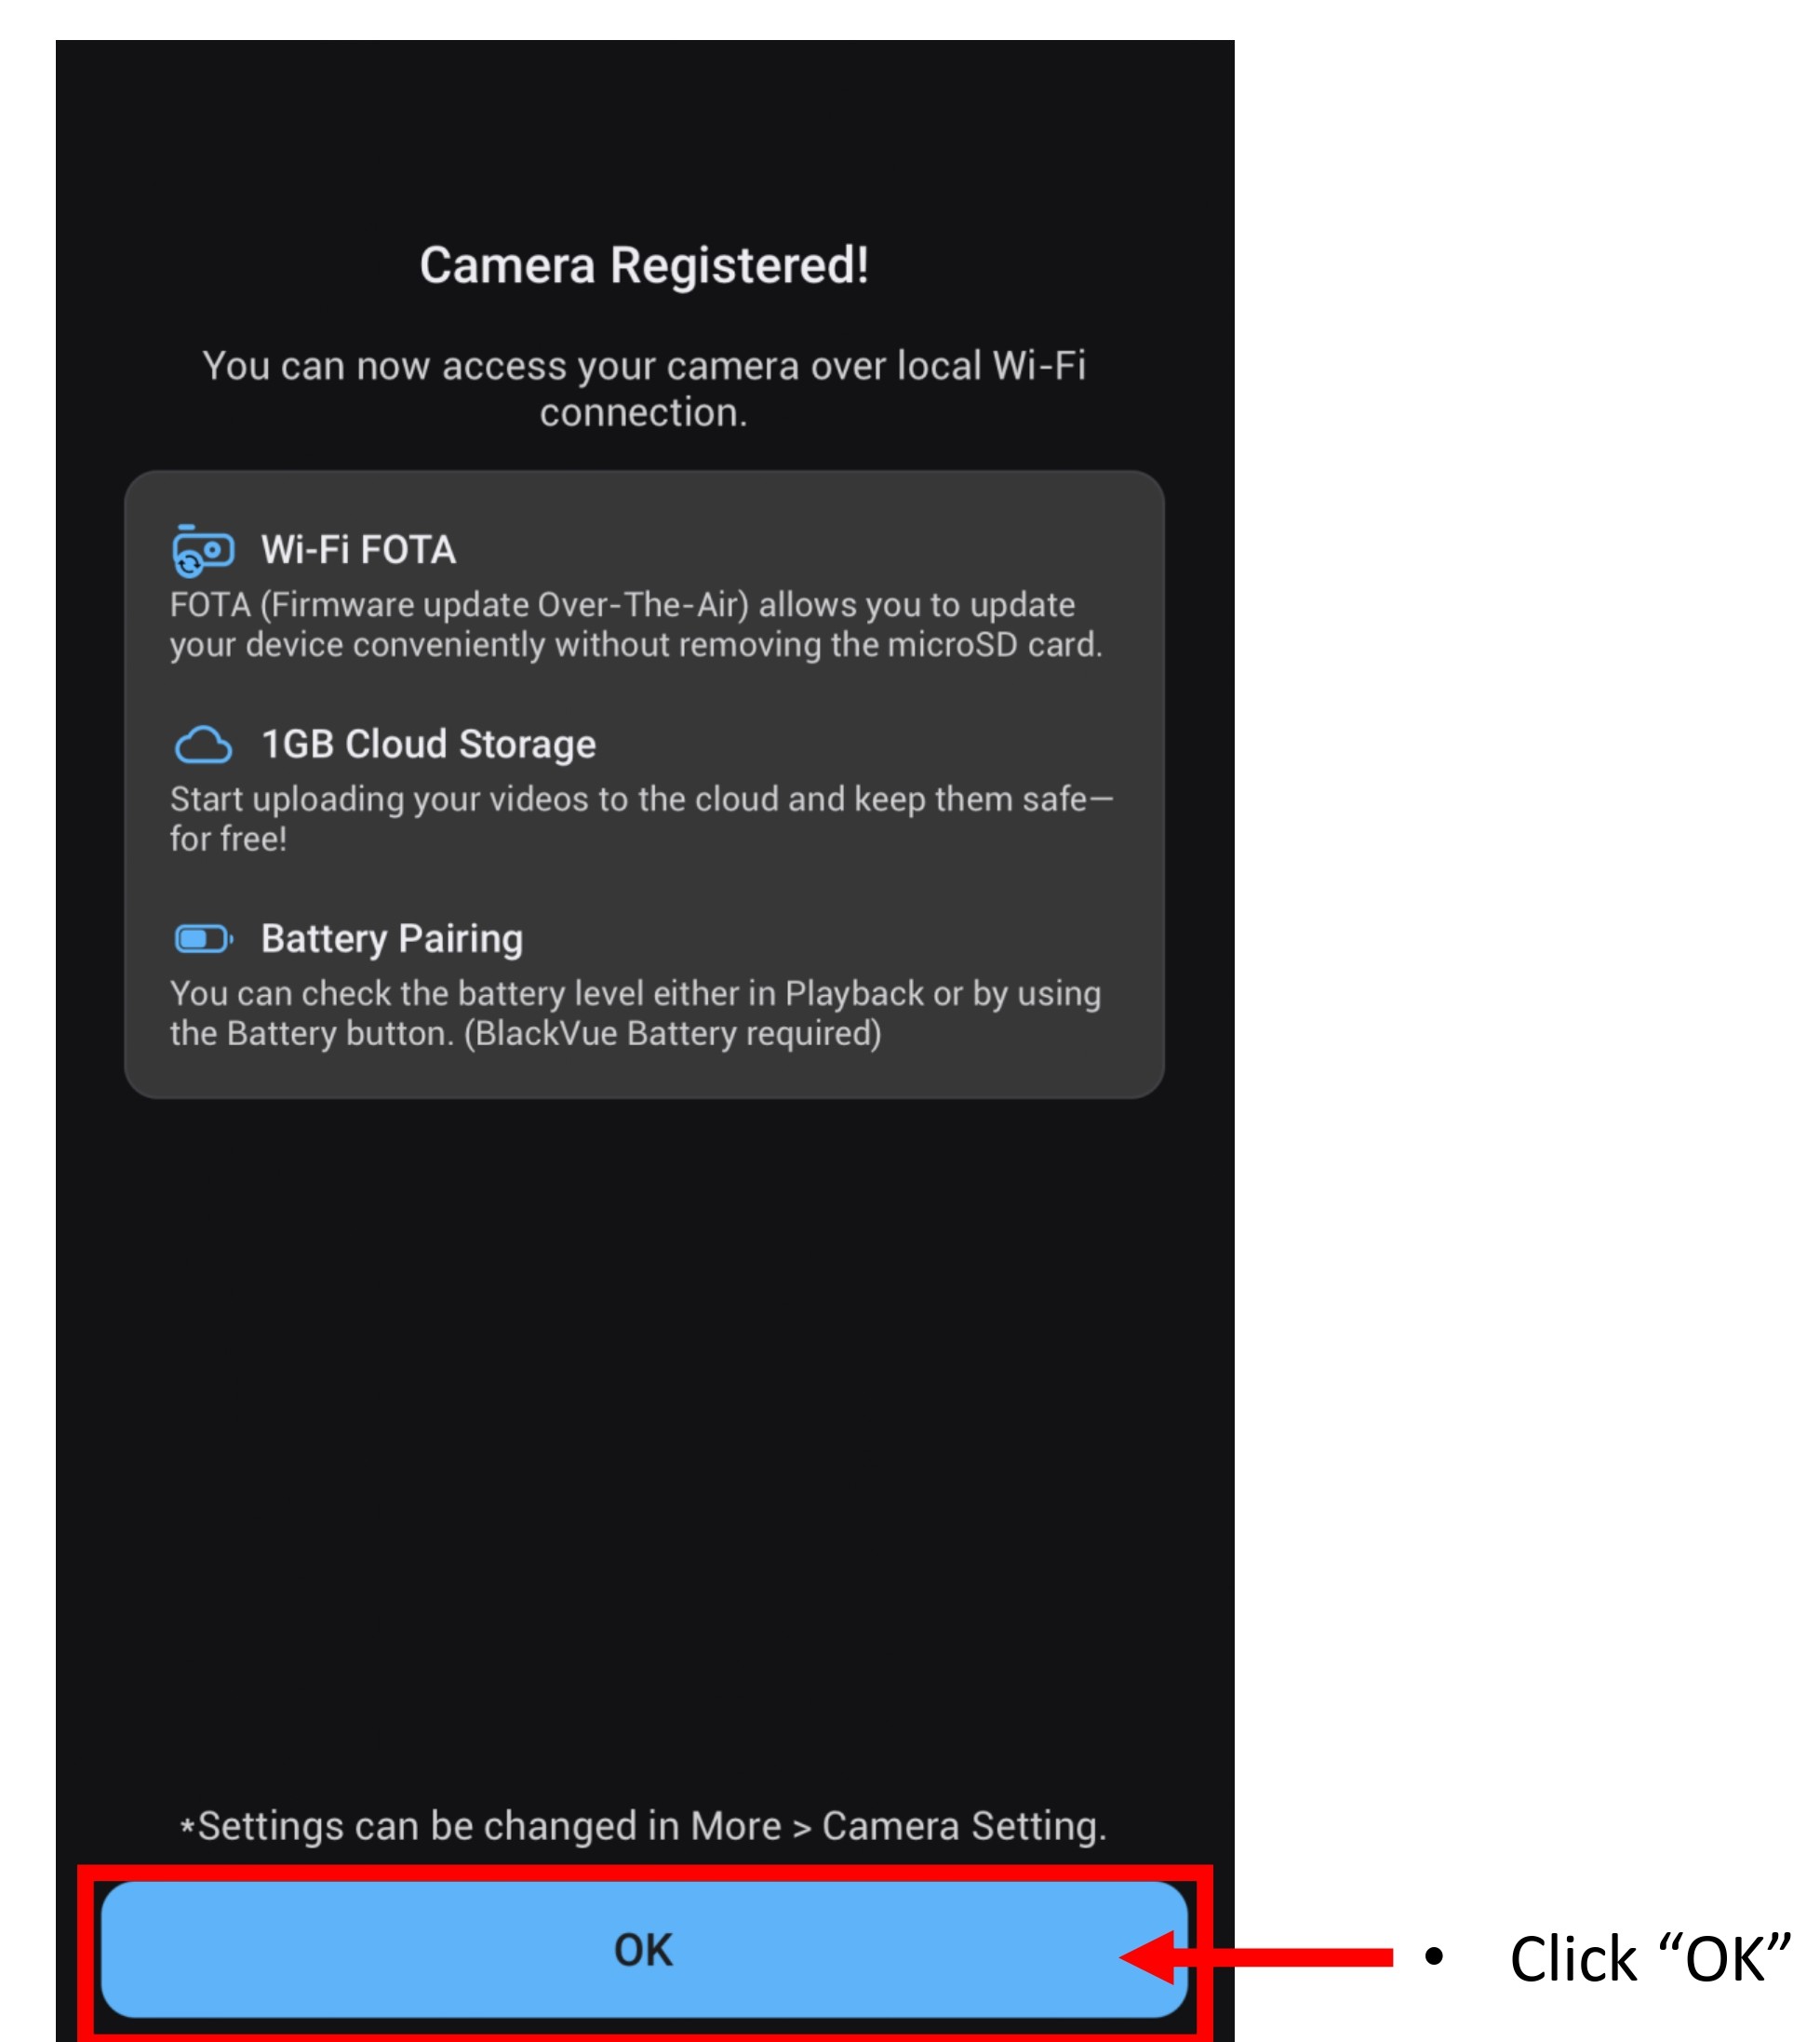
- Click "OK".
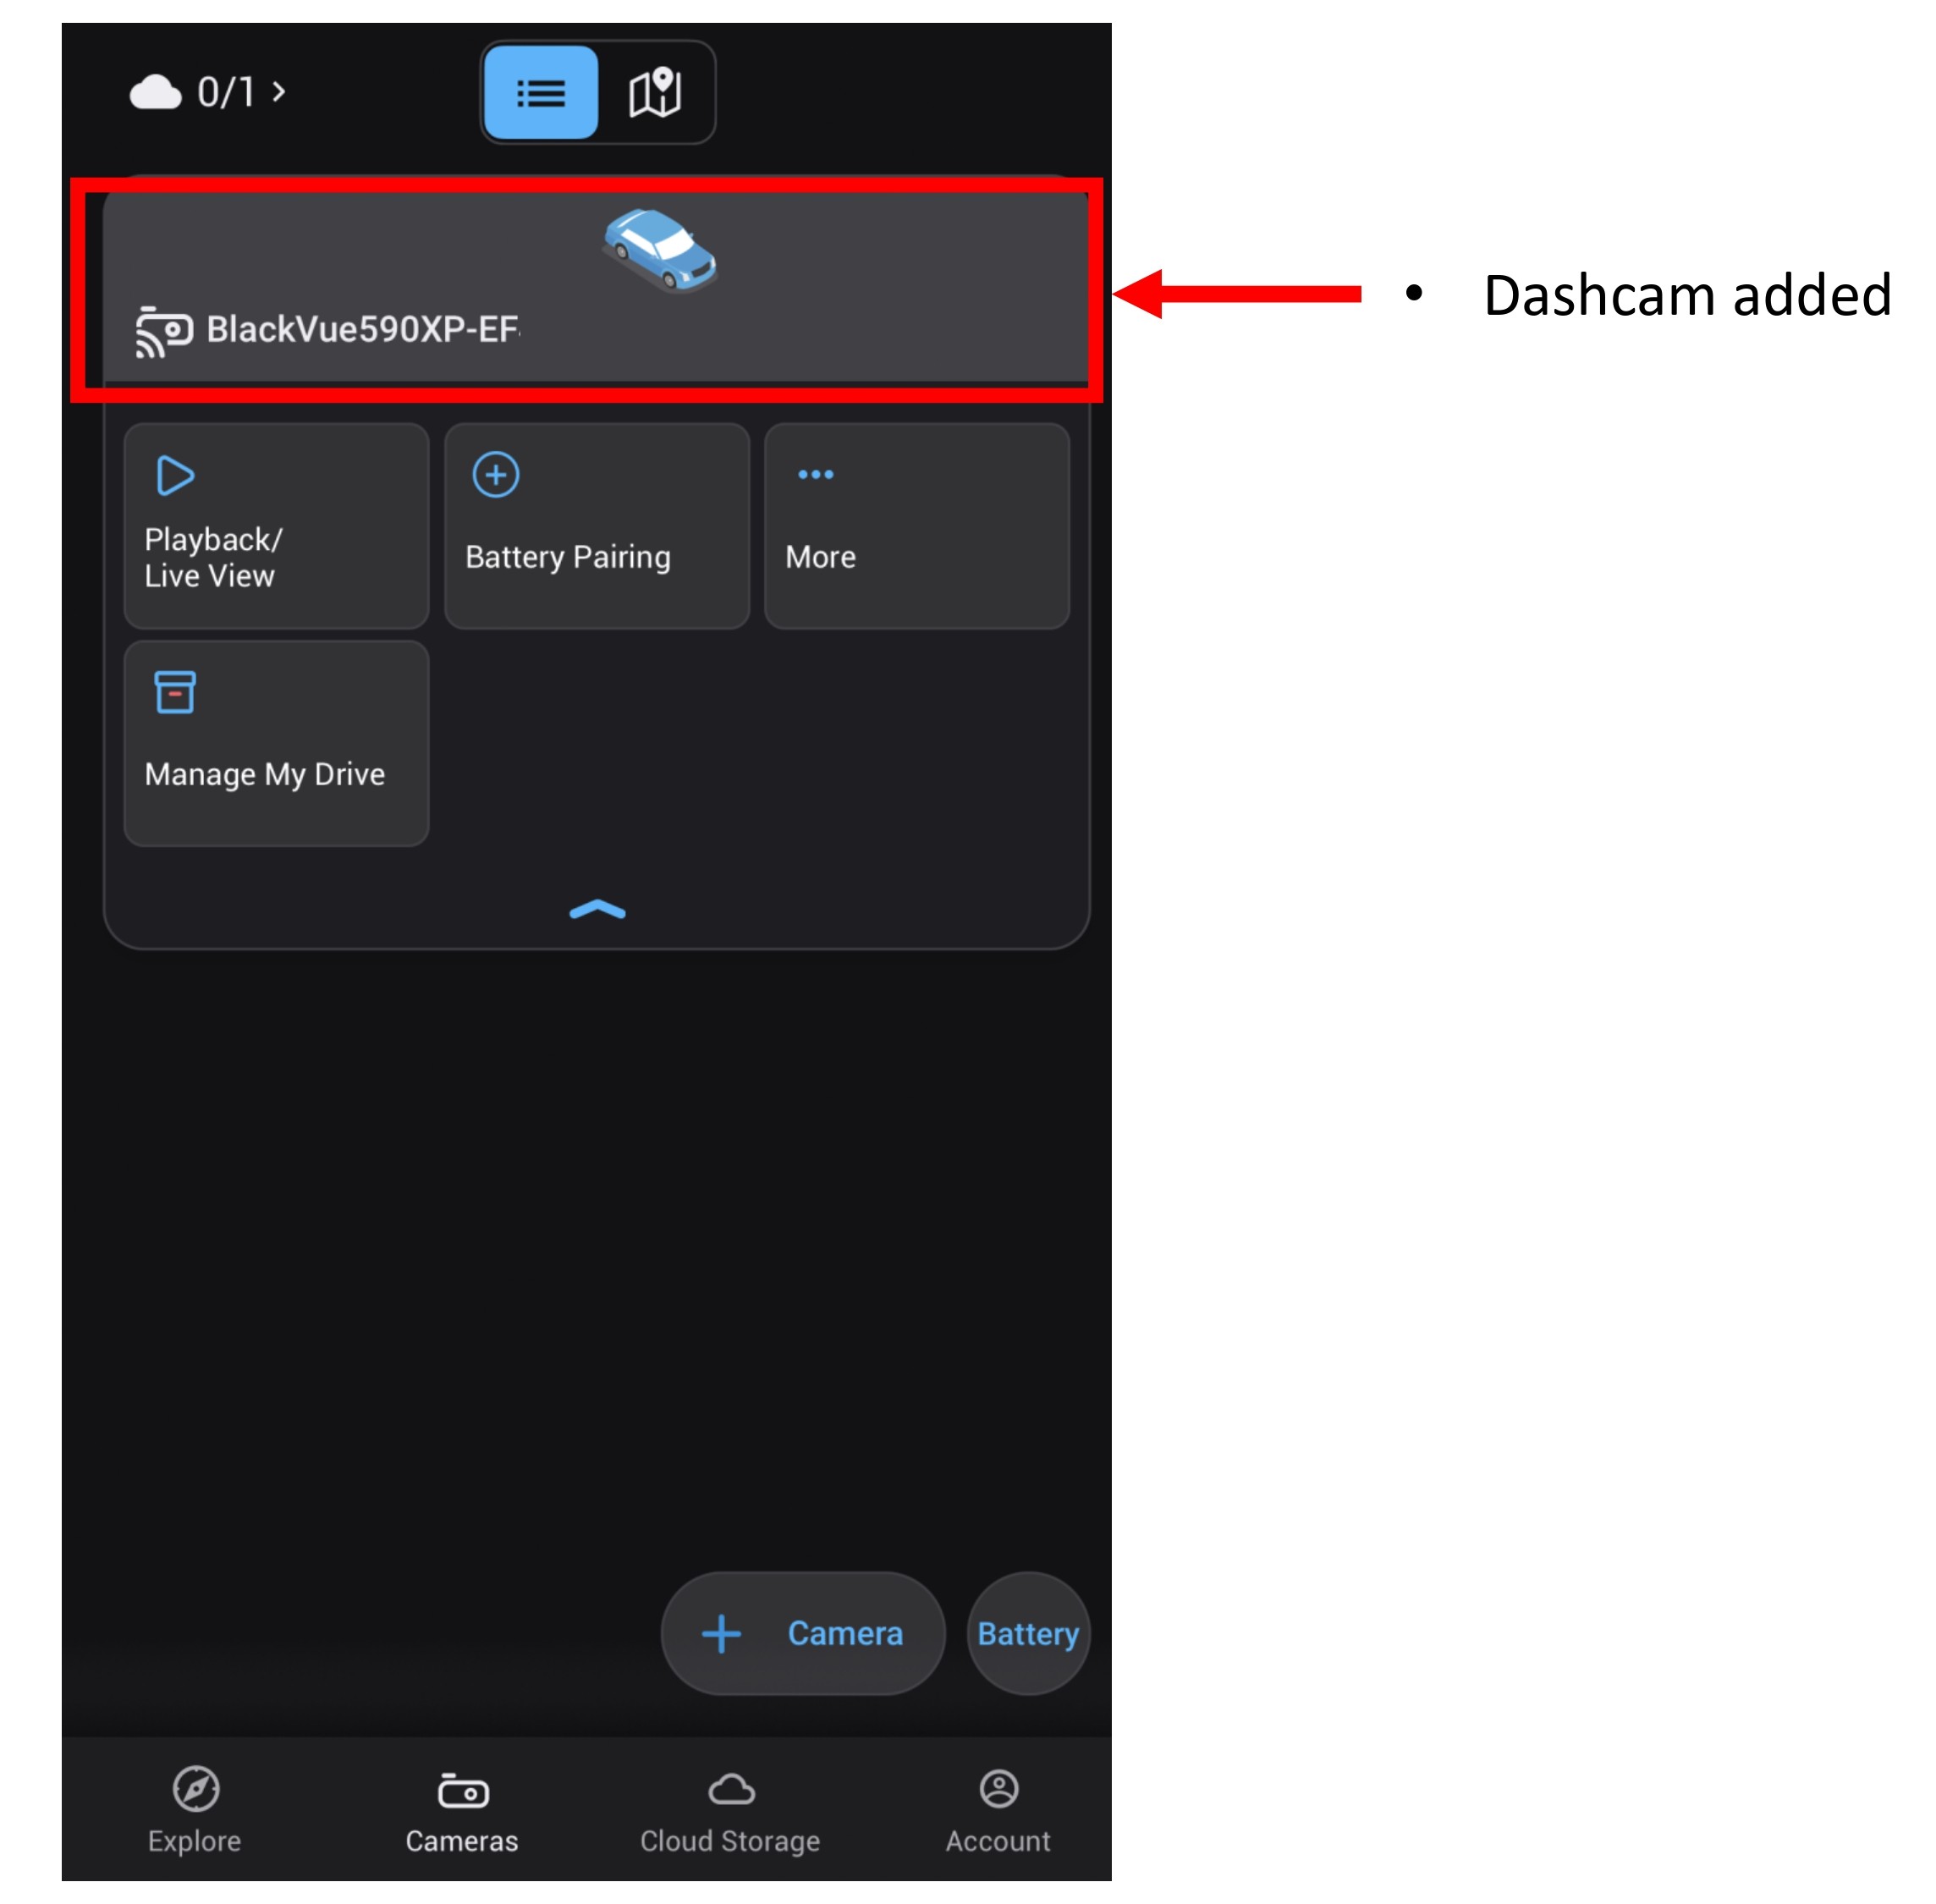
- Dashcam is reflected at the BlackVue Account.
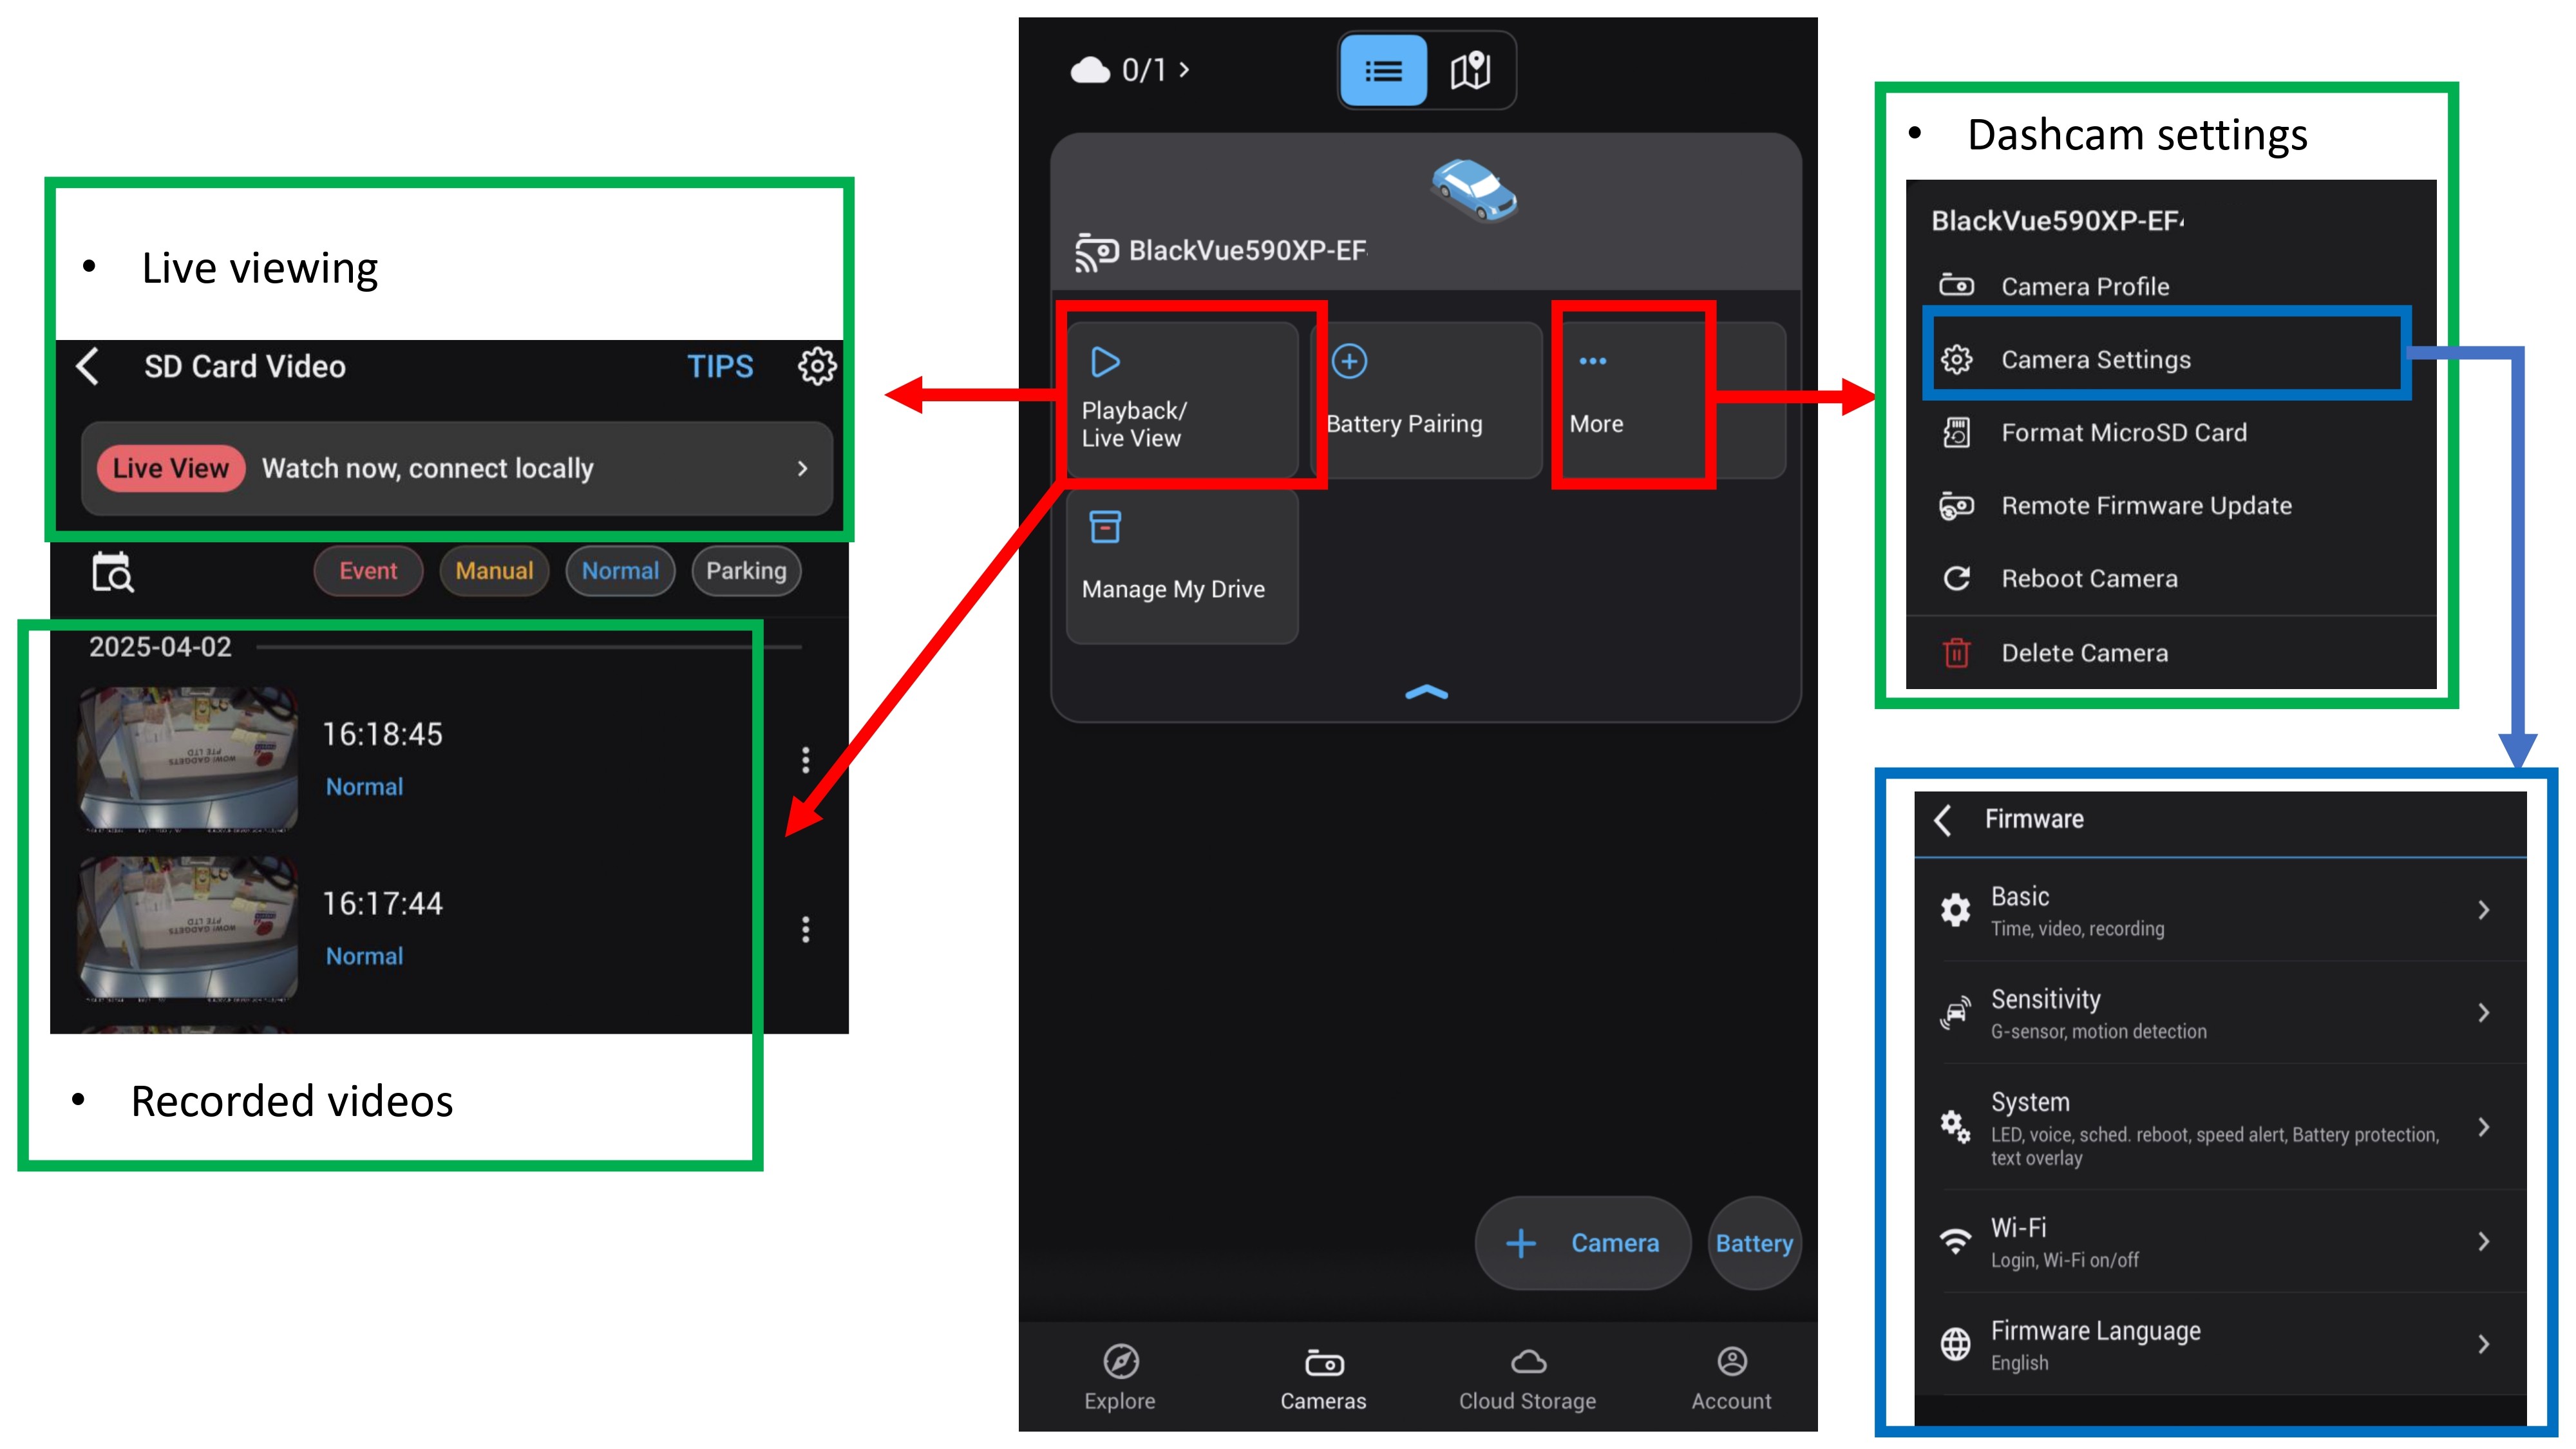
- Dashcam recorded videos, live viewing and settings as shown above.