SIM Card and Hotspot Configuration for LTE Dashcams_Updated 27Feb26
Table of Contents
1. HOW TO REPLACE A SIM CARD
Note: To avoid damage, always power off the dashcam before handling the SIM card.
Whether you’re setting up your dashcam for the first time or performing maintenance, this guide will walk you through the process.
1. Remove the mount holder by pressing the lock button and sliding it out.
2. Turn the dashcam upside down to access the SIM card tray.
3. Use the ejector needle to poke the SIM card tray hole and eject the tray.
4. Place the SIM card with the logo facing upwards on the tray.
5. Insert the tray back into the slot.
6. Reattach the mount holder by pressing the lock button and sliding it back in.
2. SIM CARD CONFIGURATION
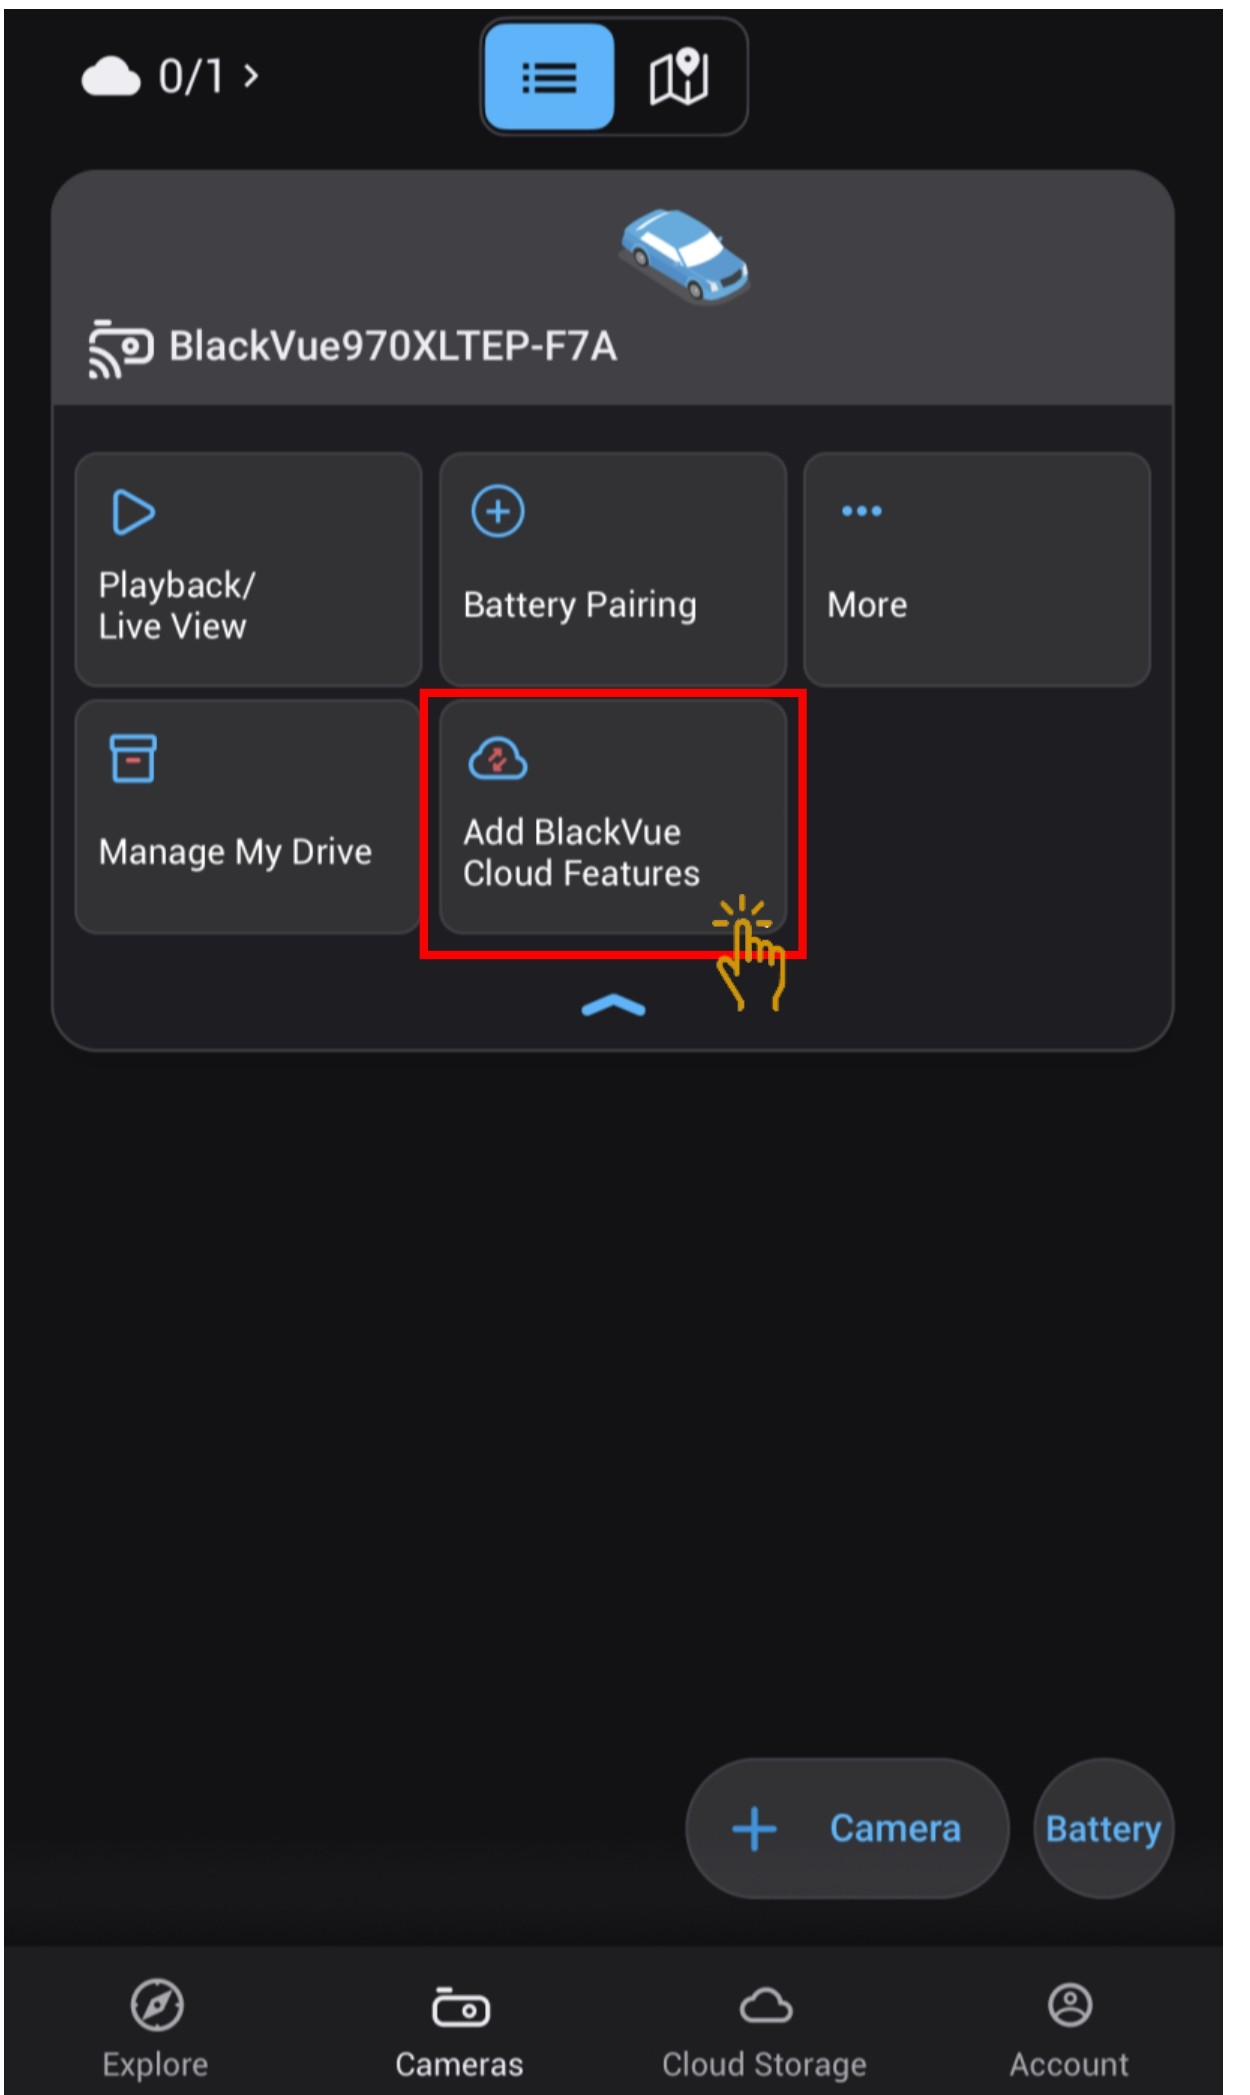
- Click on the "Add BlackVue Cloud Features" where you want to activate the SIM Card.
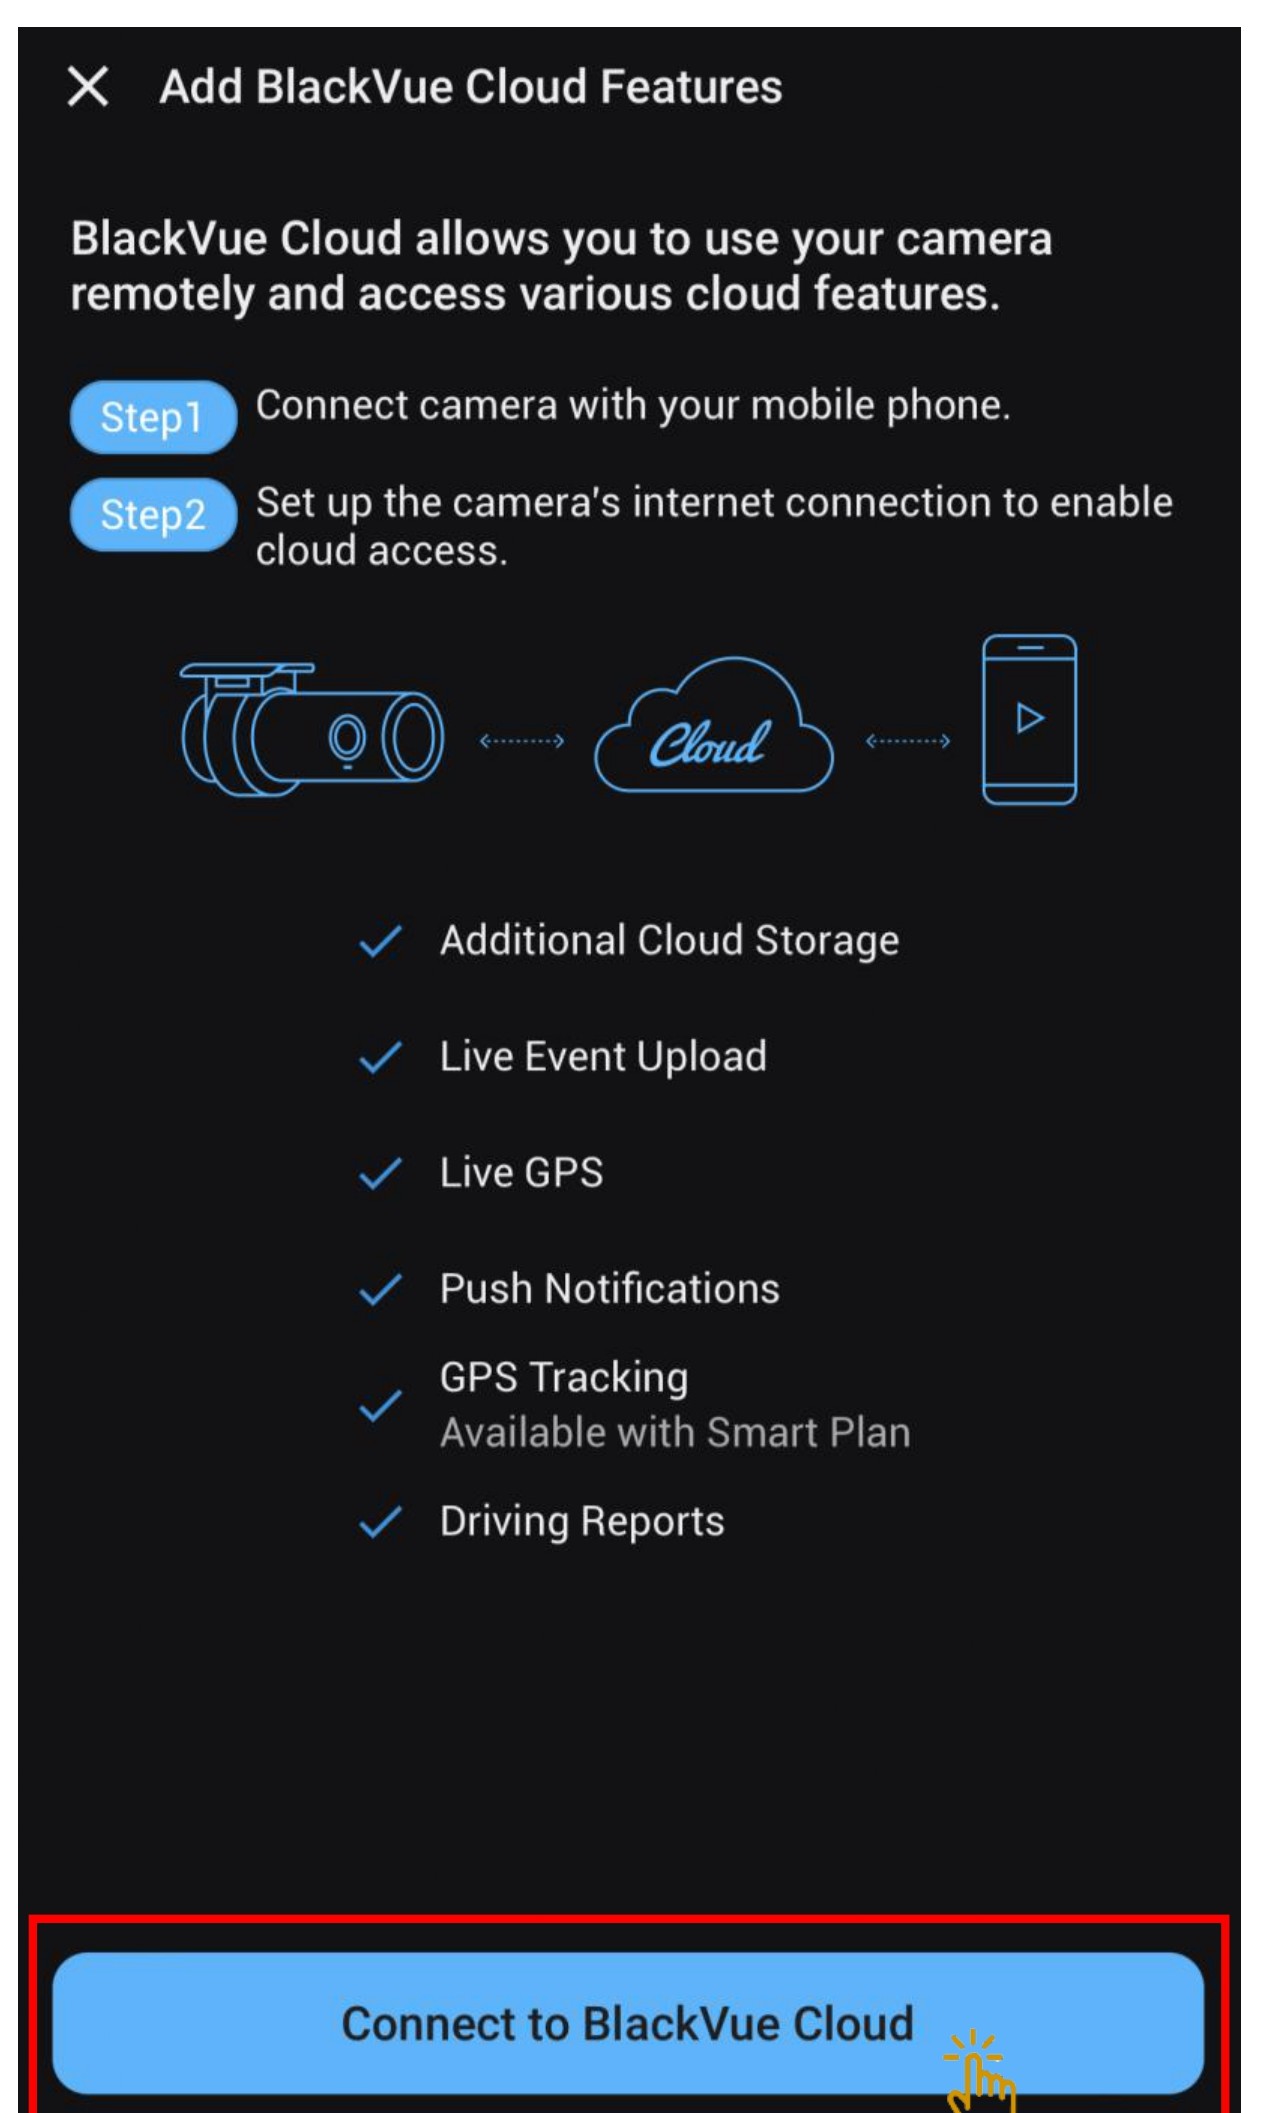
- Click on "Connect to BlackVue Cloud".
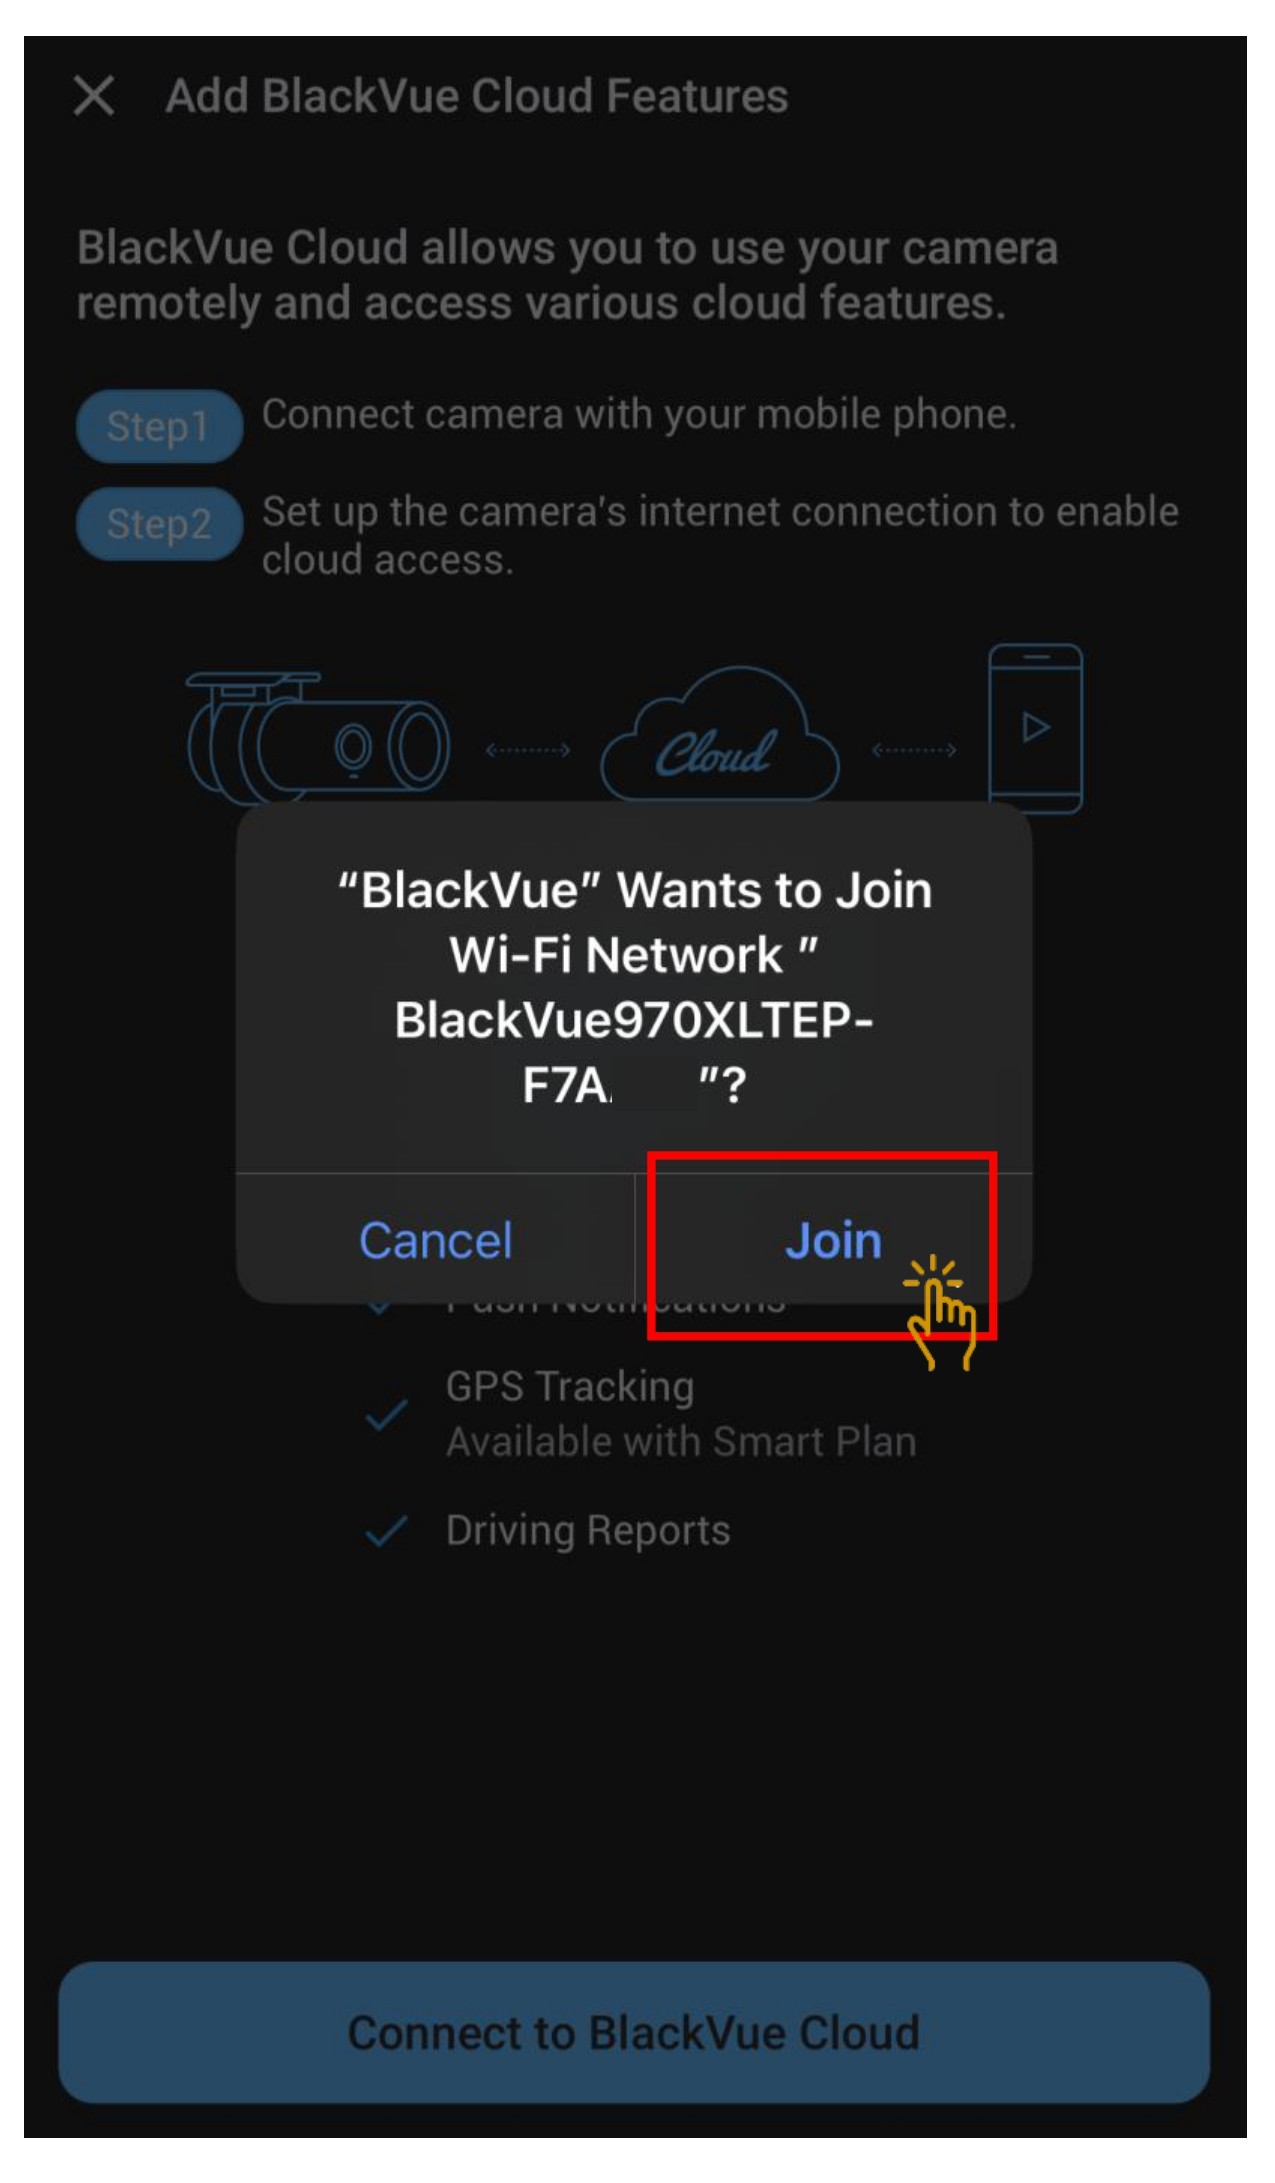
- Click "Join" for the app to connect to the camera

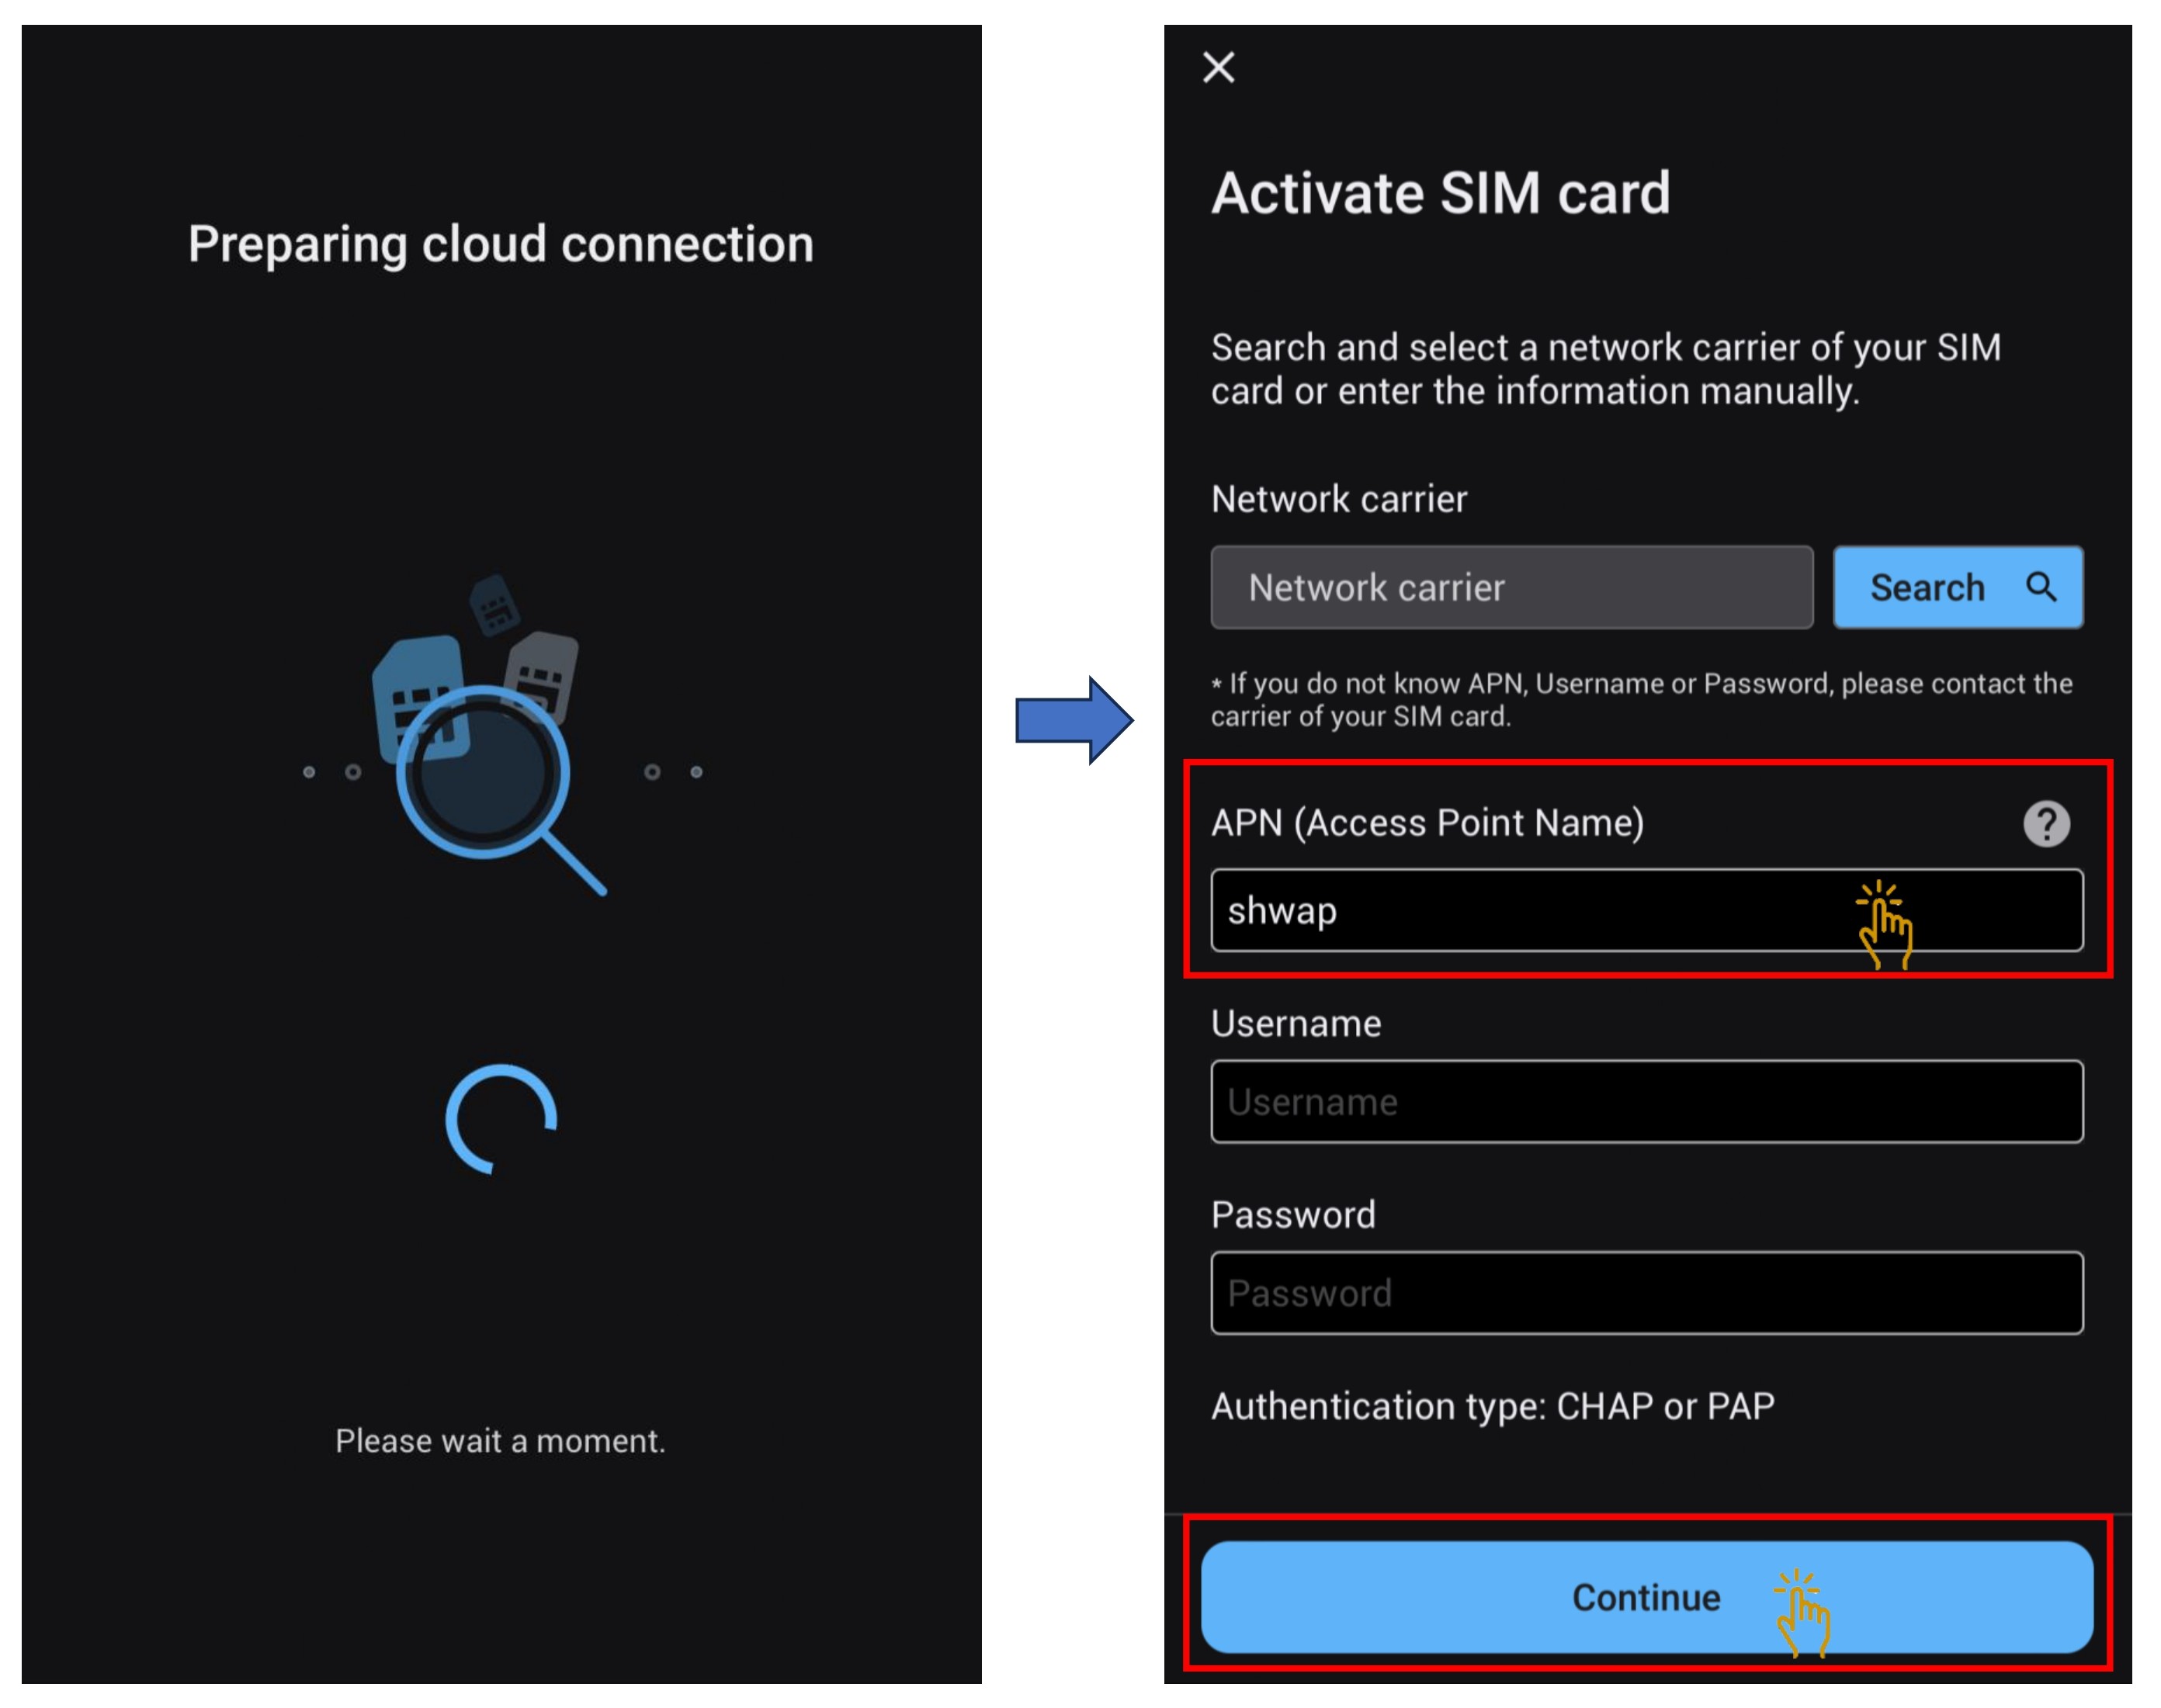
- Input the SIM card Telco APN and click "Done"
Example: Telco M1 - APN: sunsurf
Telco Singtel - APN: e-ideas
Please click on the below link for more Telco's APN
Telco's APN - Dashcam will restart.
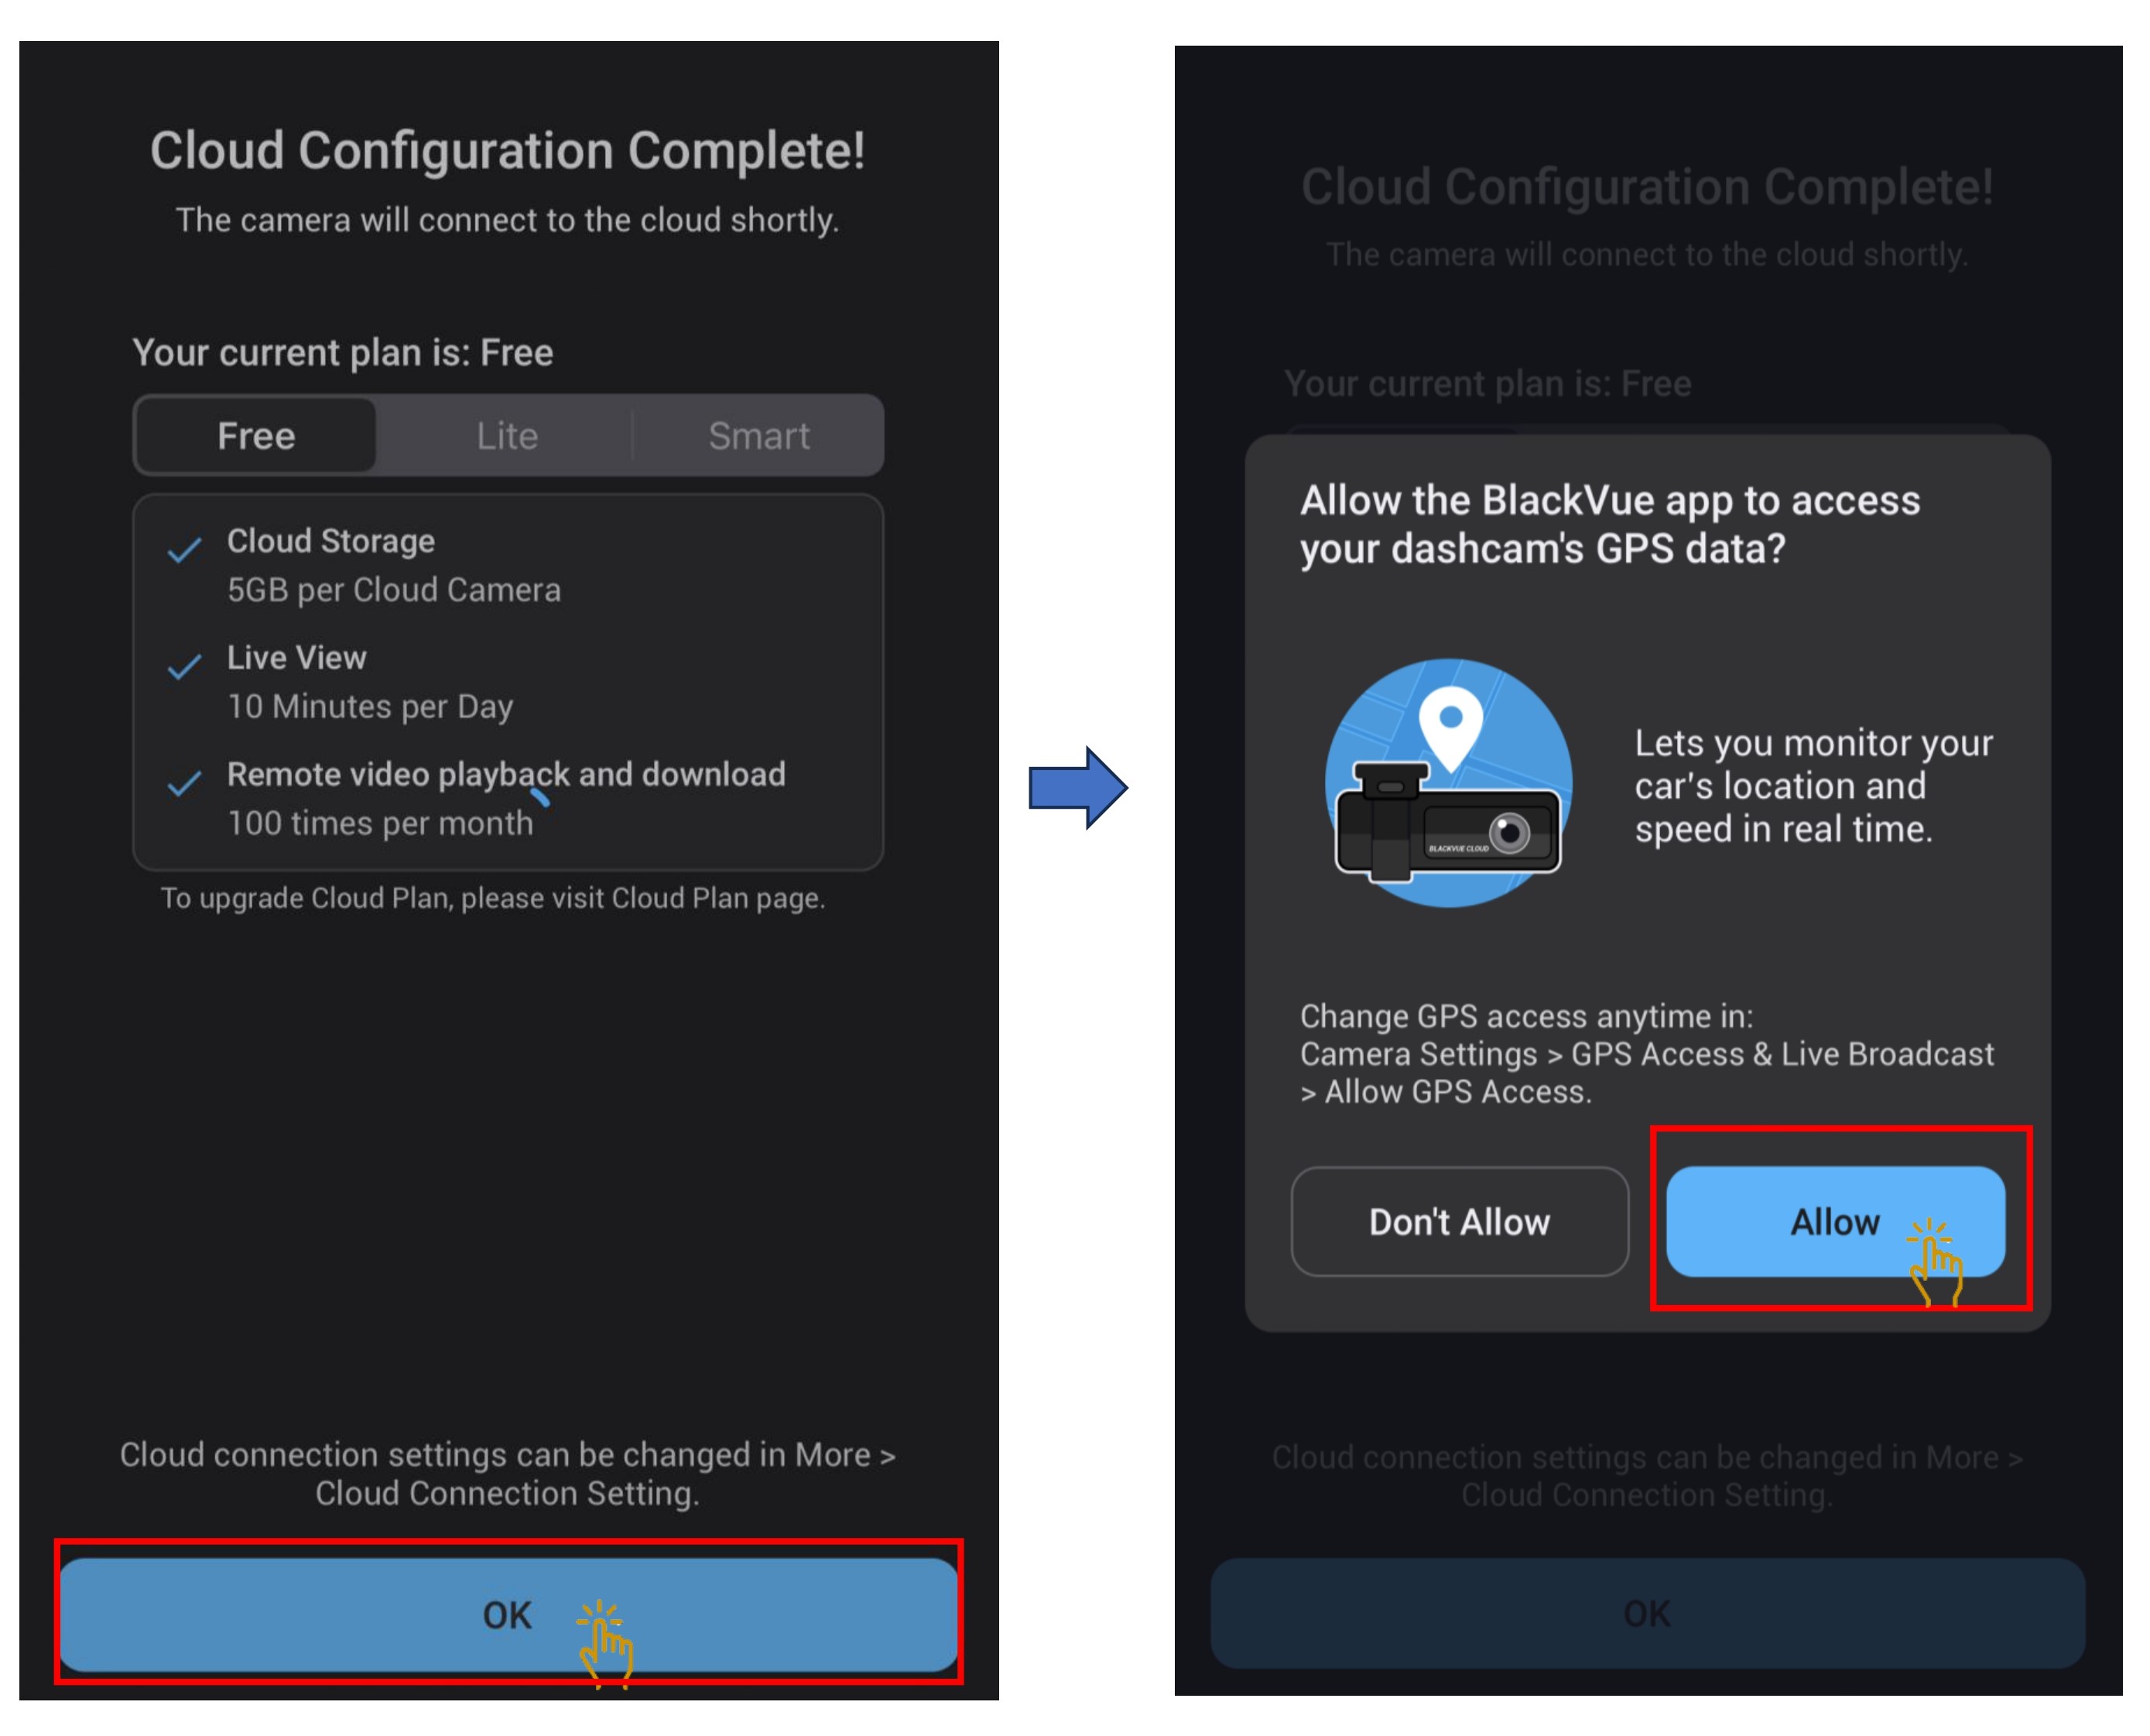
- Click "Ok" and " Allow" to permit GPS access.
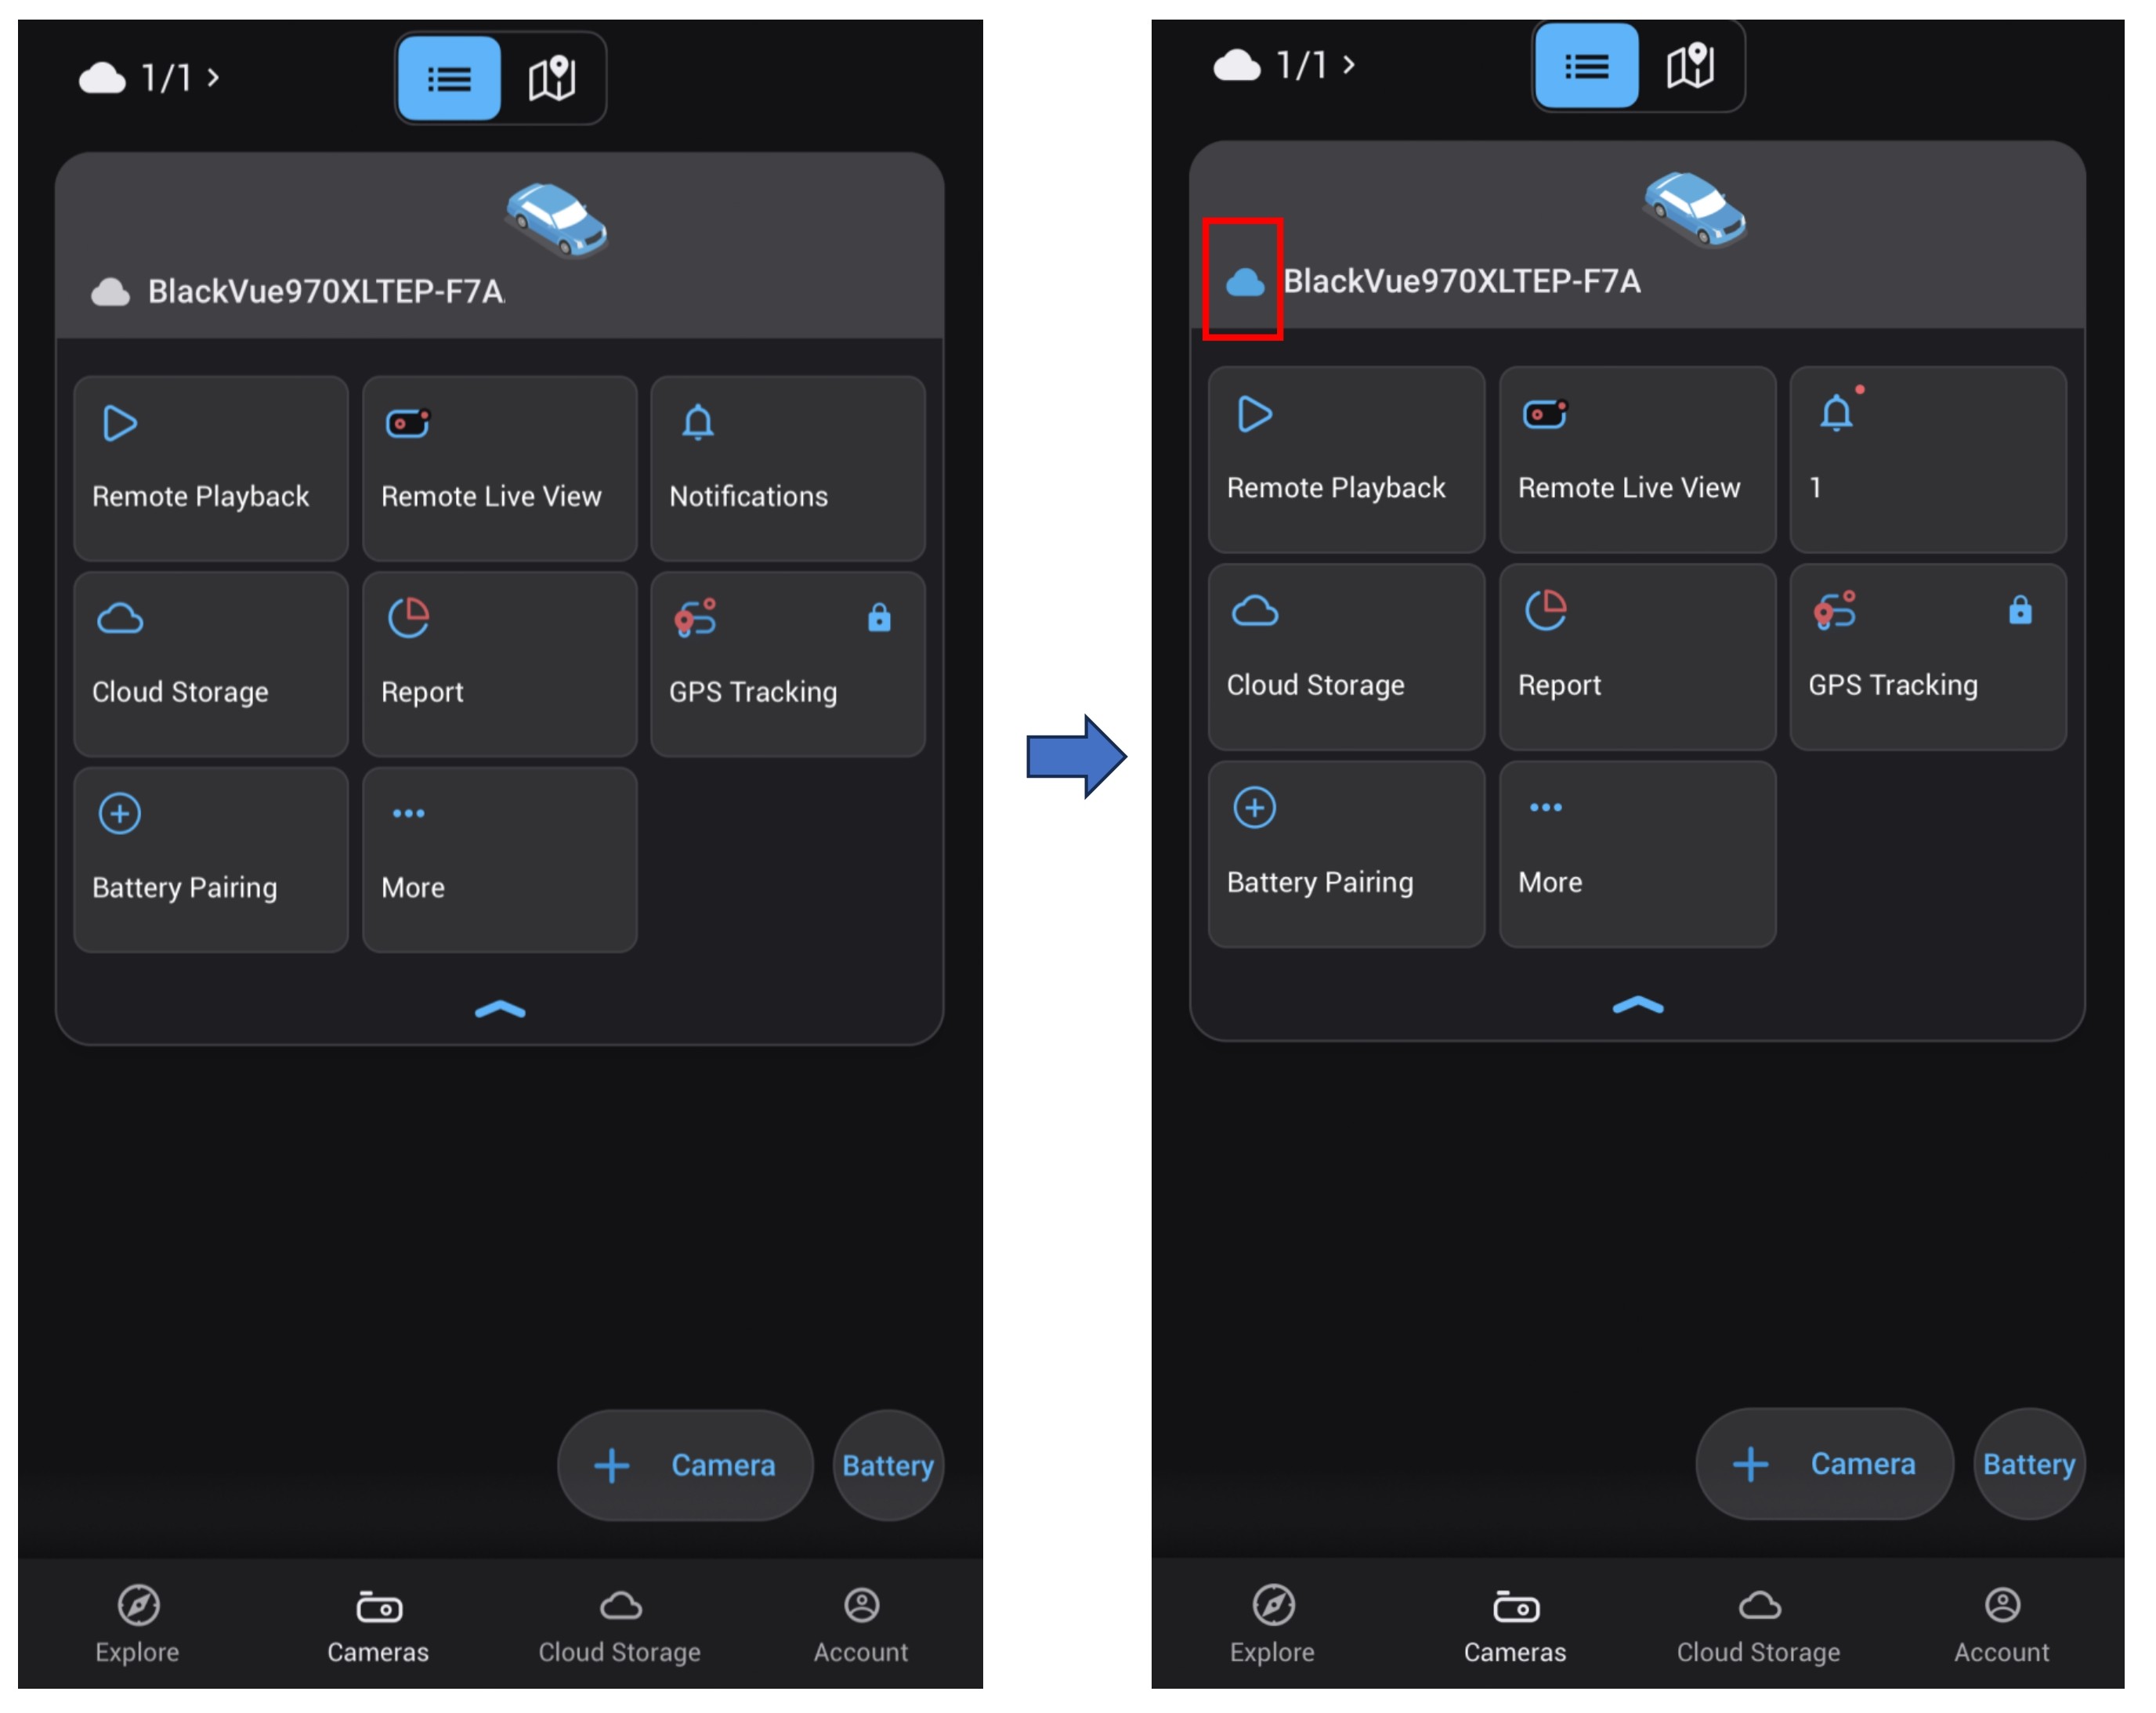
- Once connected. the cloud icon will turned blue in color.
- You can start access cloud features.
3. CHANGING SIM CARD TELCO APN
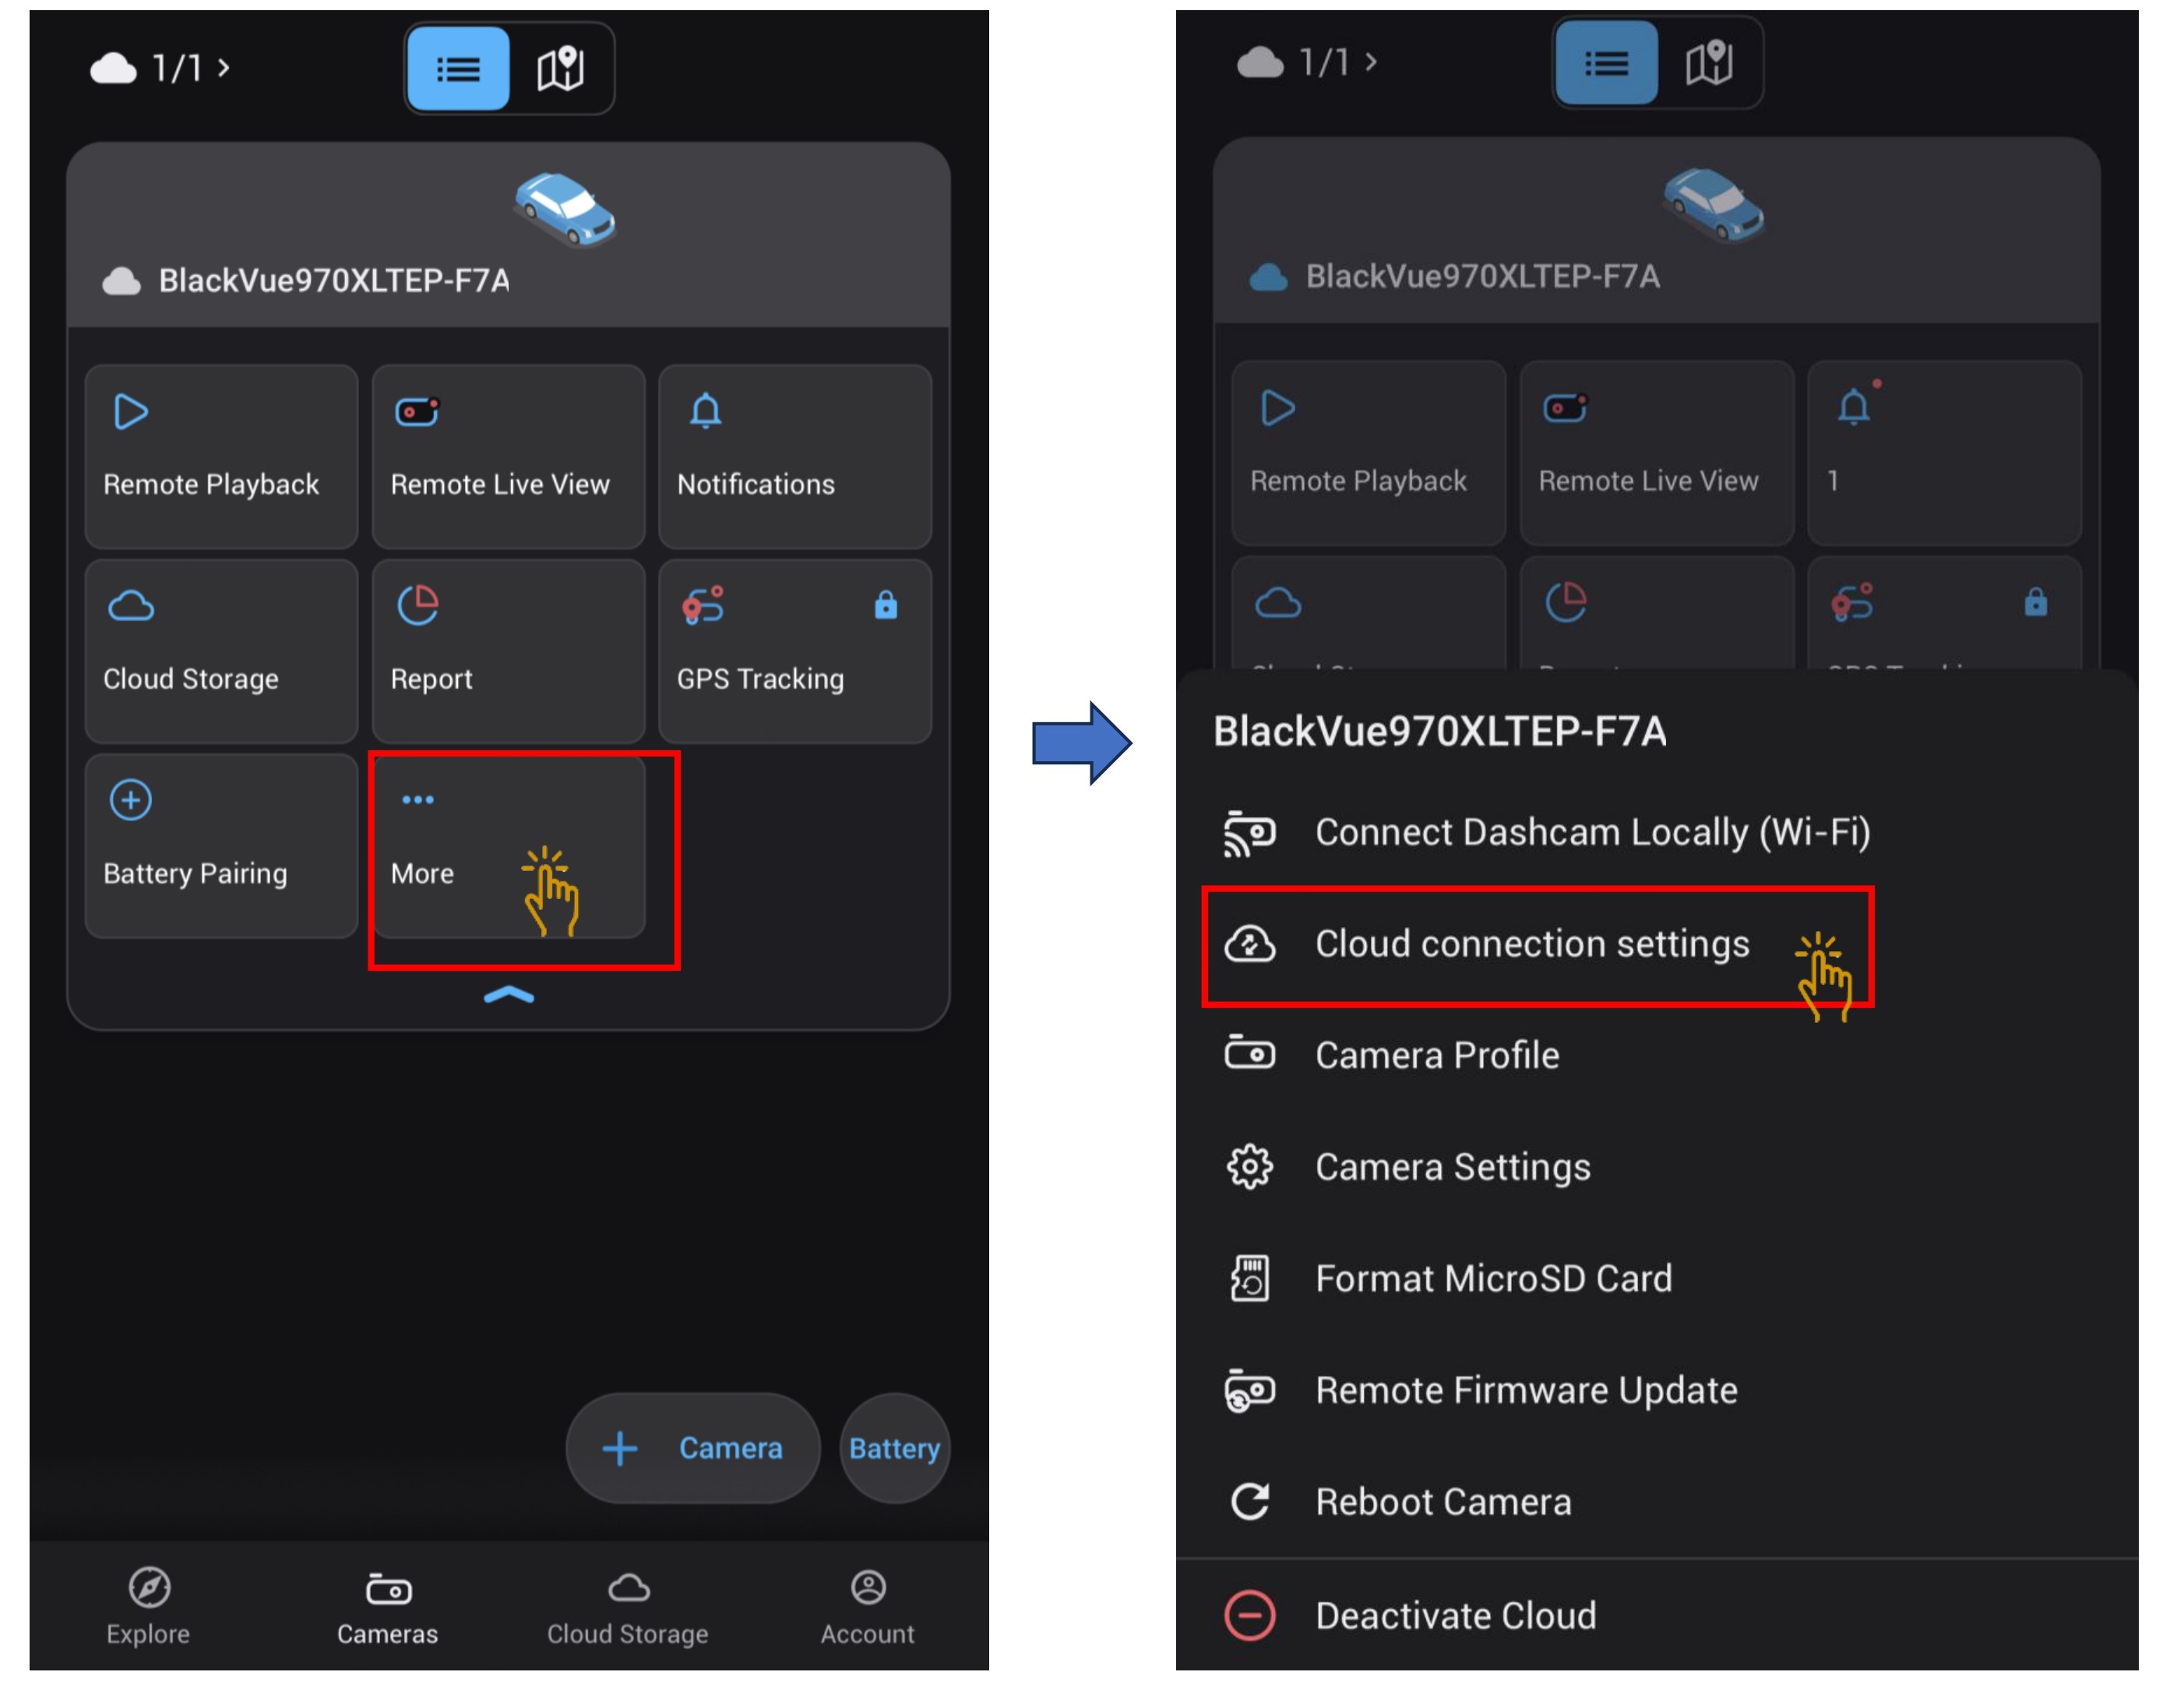
- Click on the "More" and the submenu will be shown and choose "Cloud connection settings".
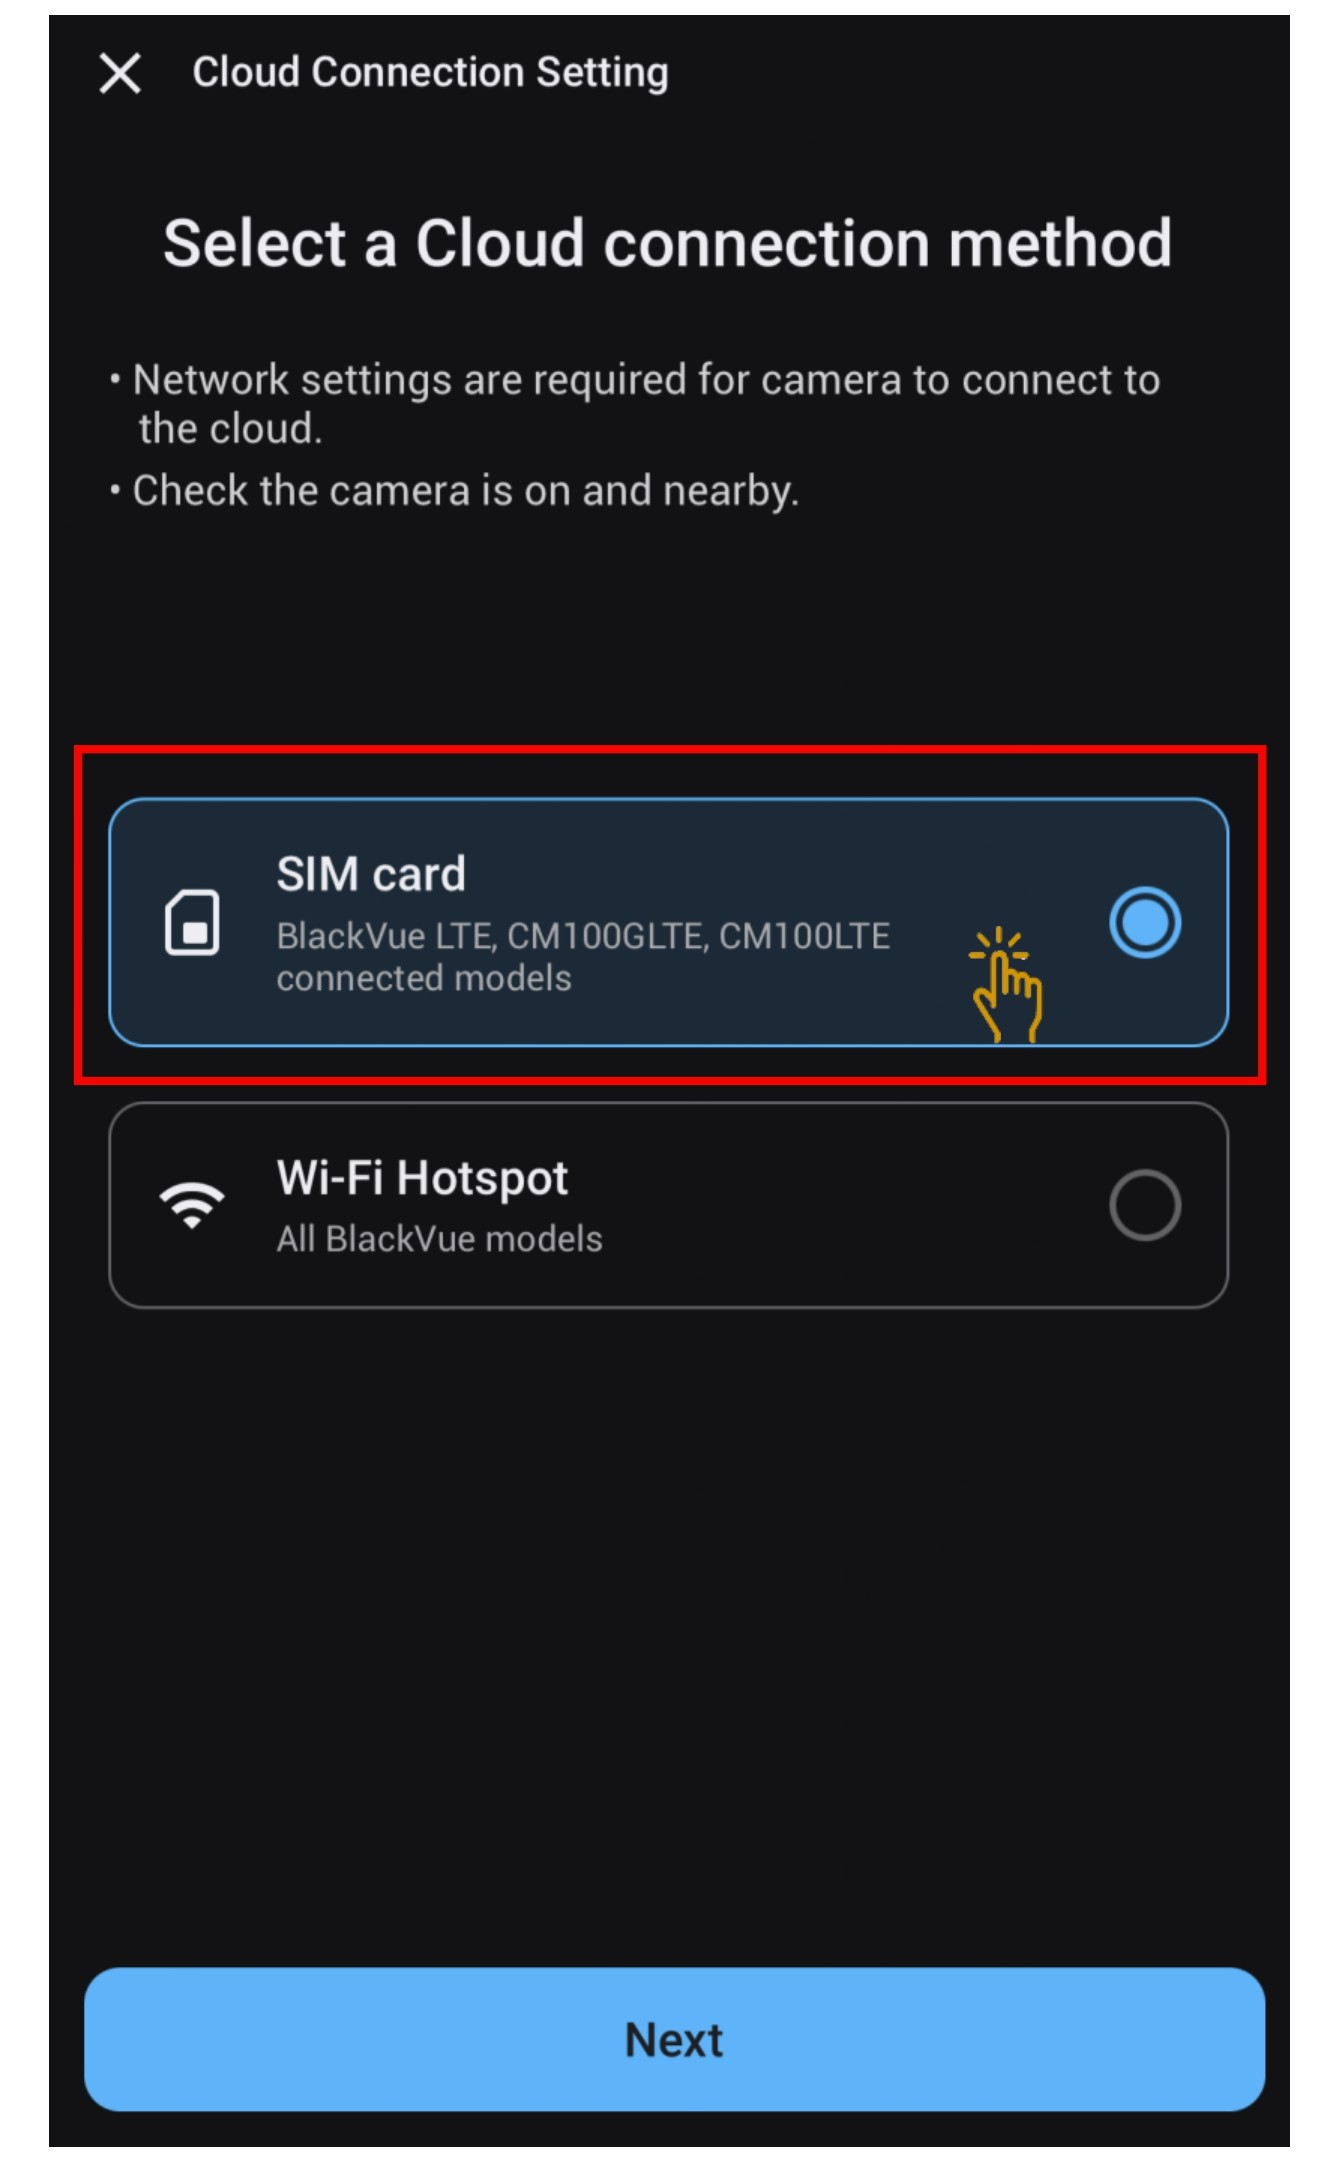
- Choose " Sim Card" and click "Next".
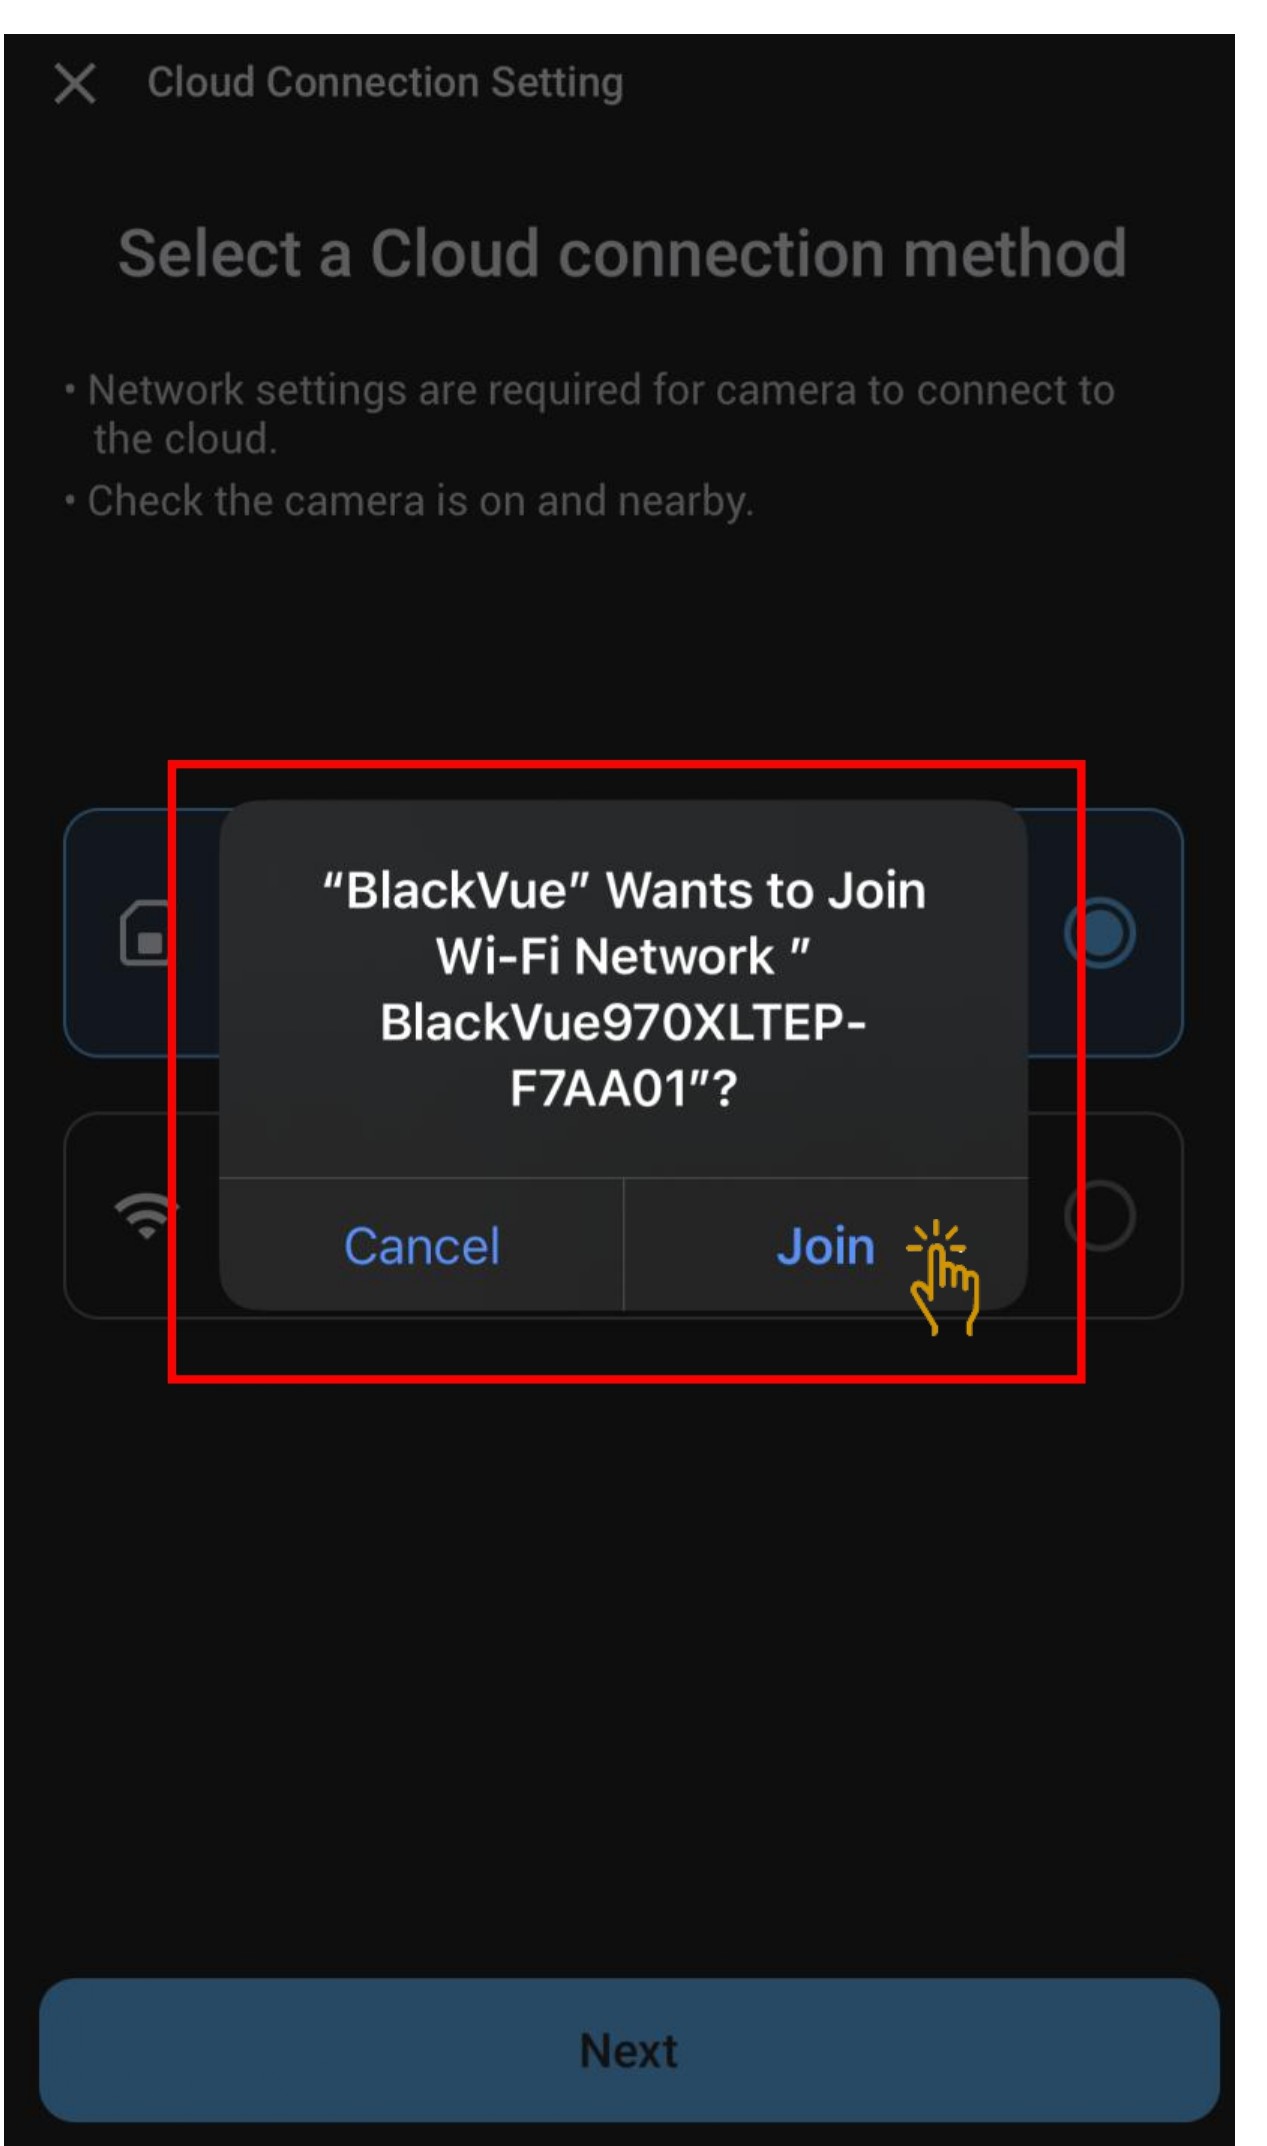
- Click "Join" for the app to connect to the camera.
- Input the new Telco APN and click "Continue".
Example: Telco M1 - APN: sunsurf
Telco Singtel - APN: e-ideas
Please click on the below link for more Telco's APN
Telco's APN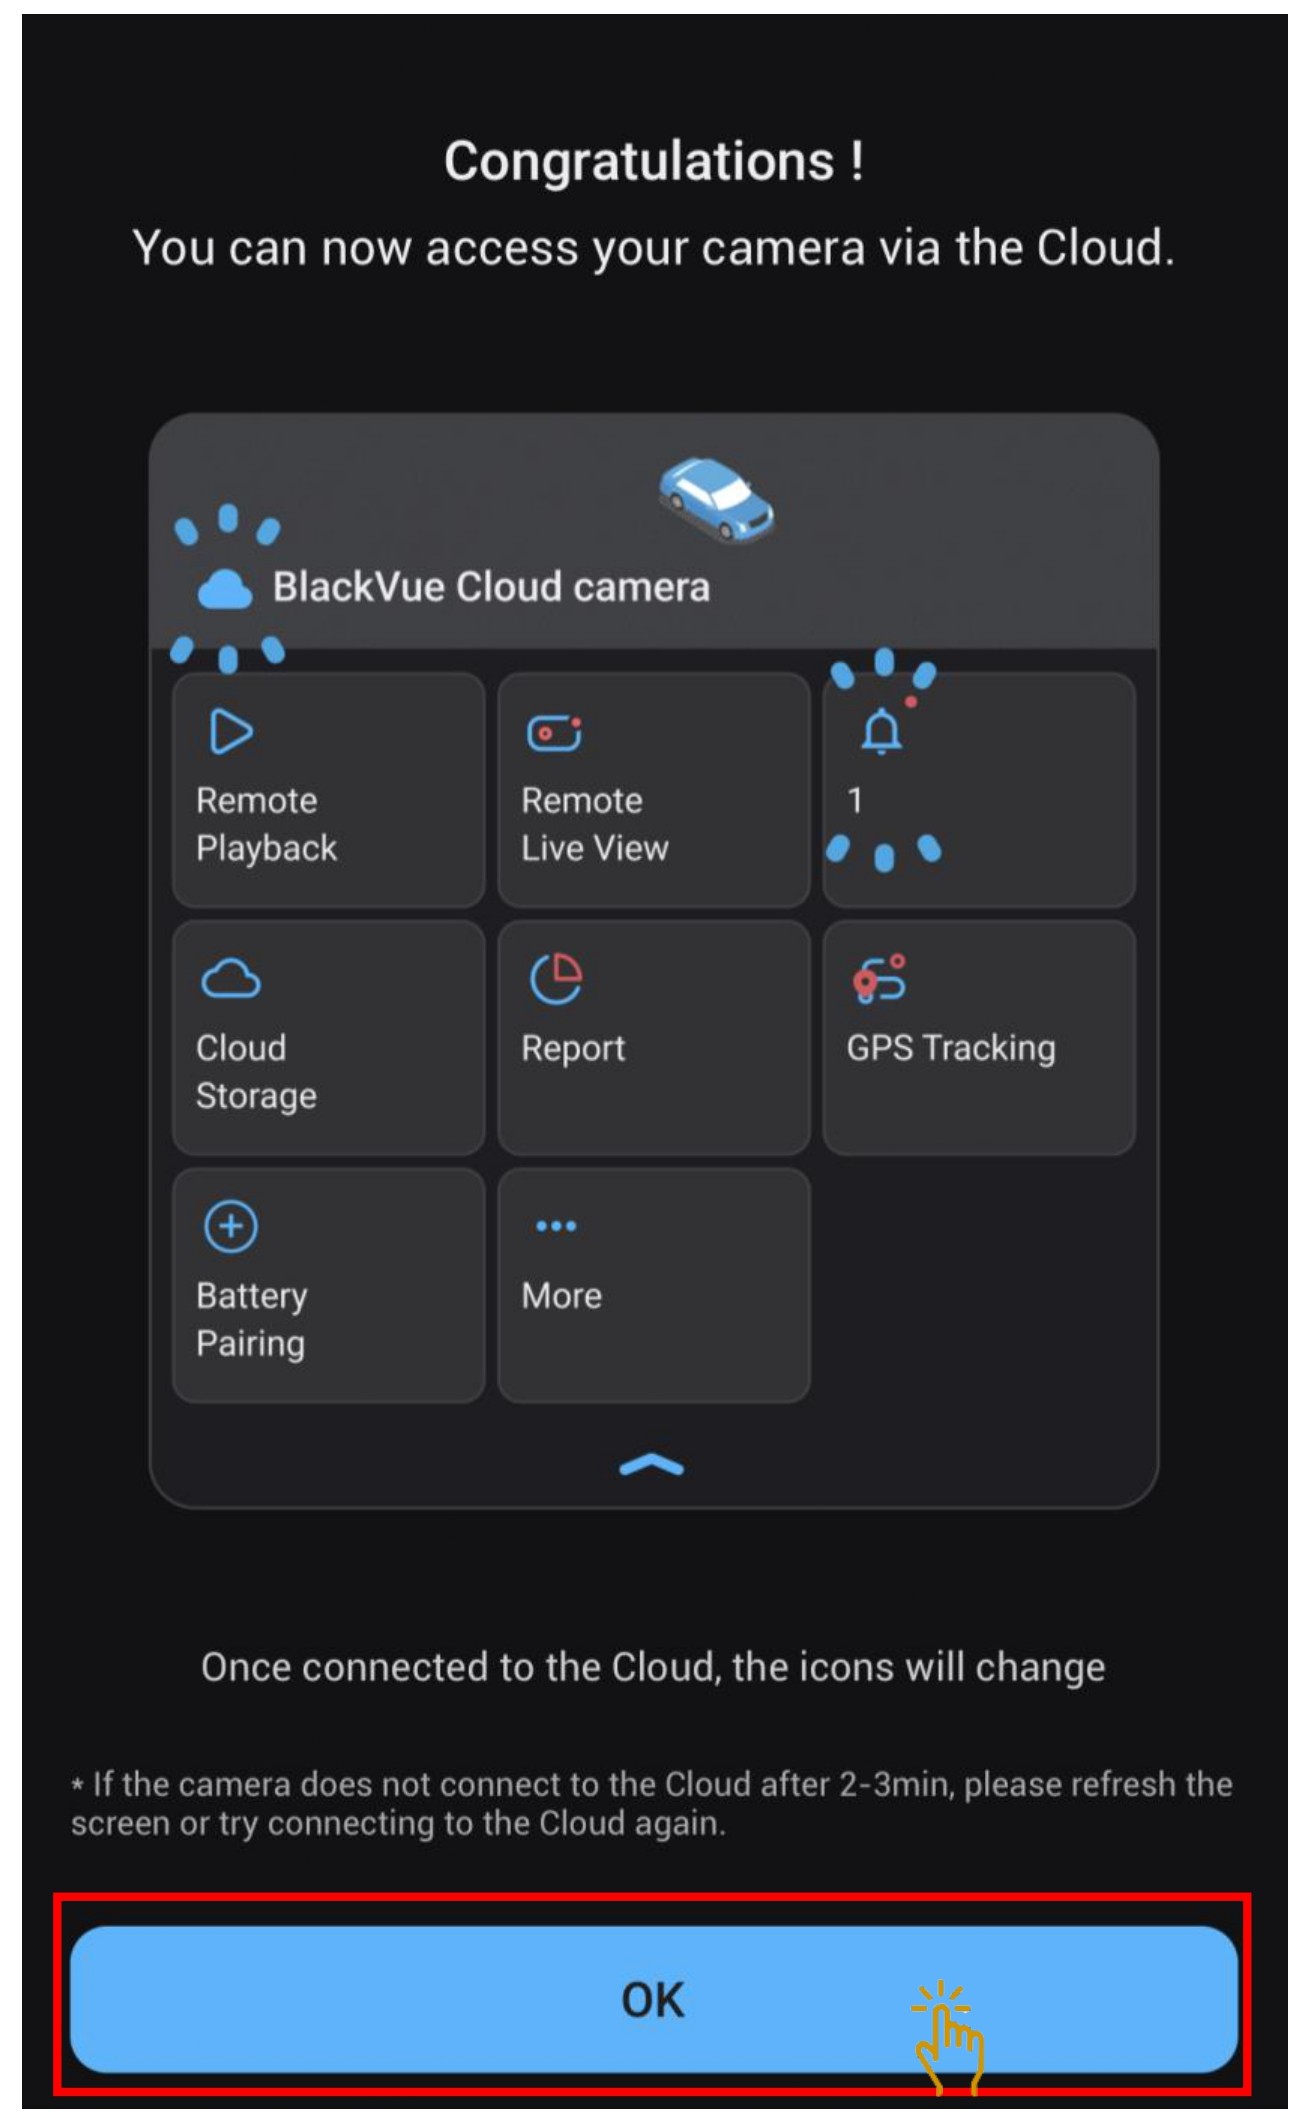
- Click "OK" where the SIM card has successfully set up.
- Once connected. the cloud icon will turned blue in color.
- You can start access cloud features.
4. HOTSPOT CONFIGURATION
- Click on the "Add BlackVue Cloud Features" where you want to setup Hotspot connection.
- Click on "Connect to BlackVue Cloud".
- Click "Join" for the app to connect to the camera.
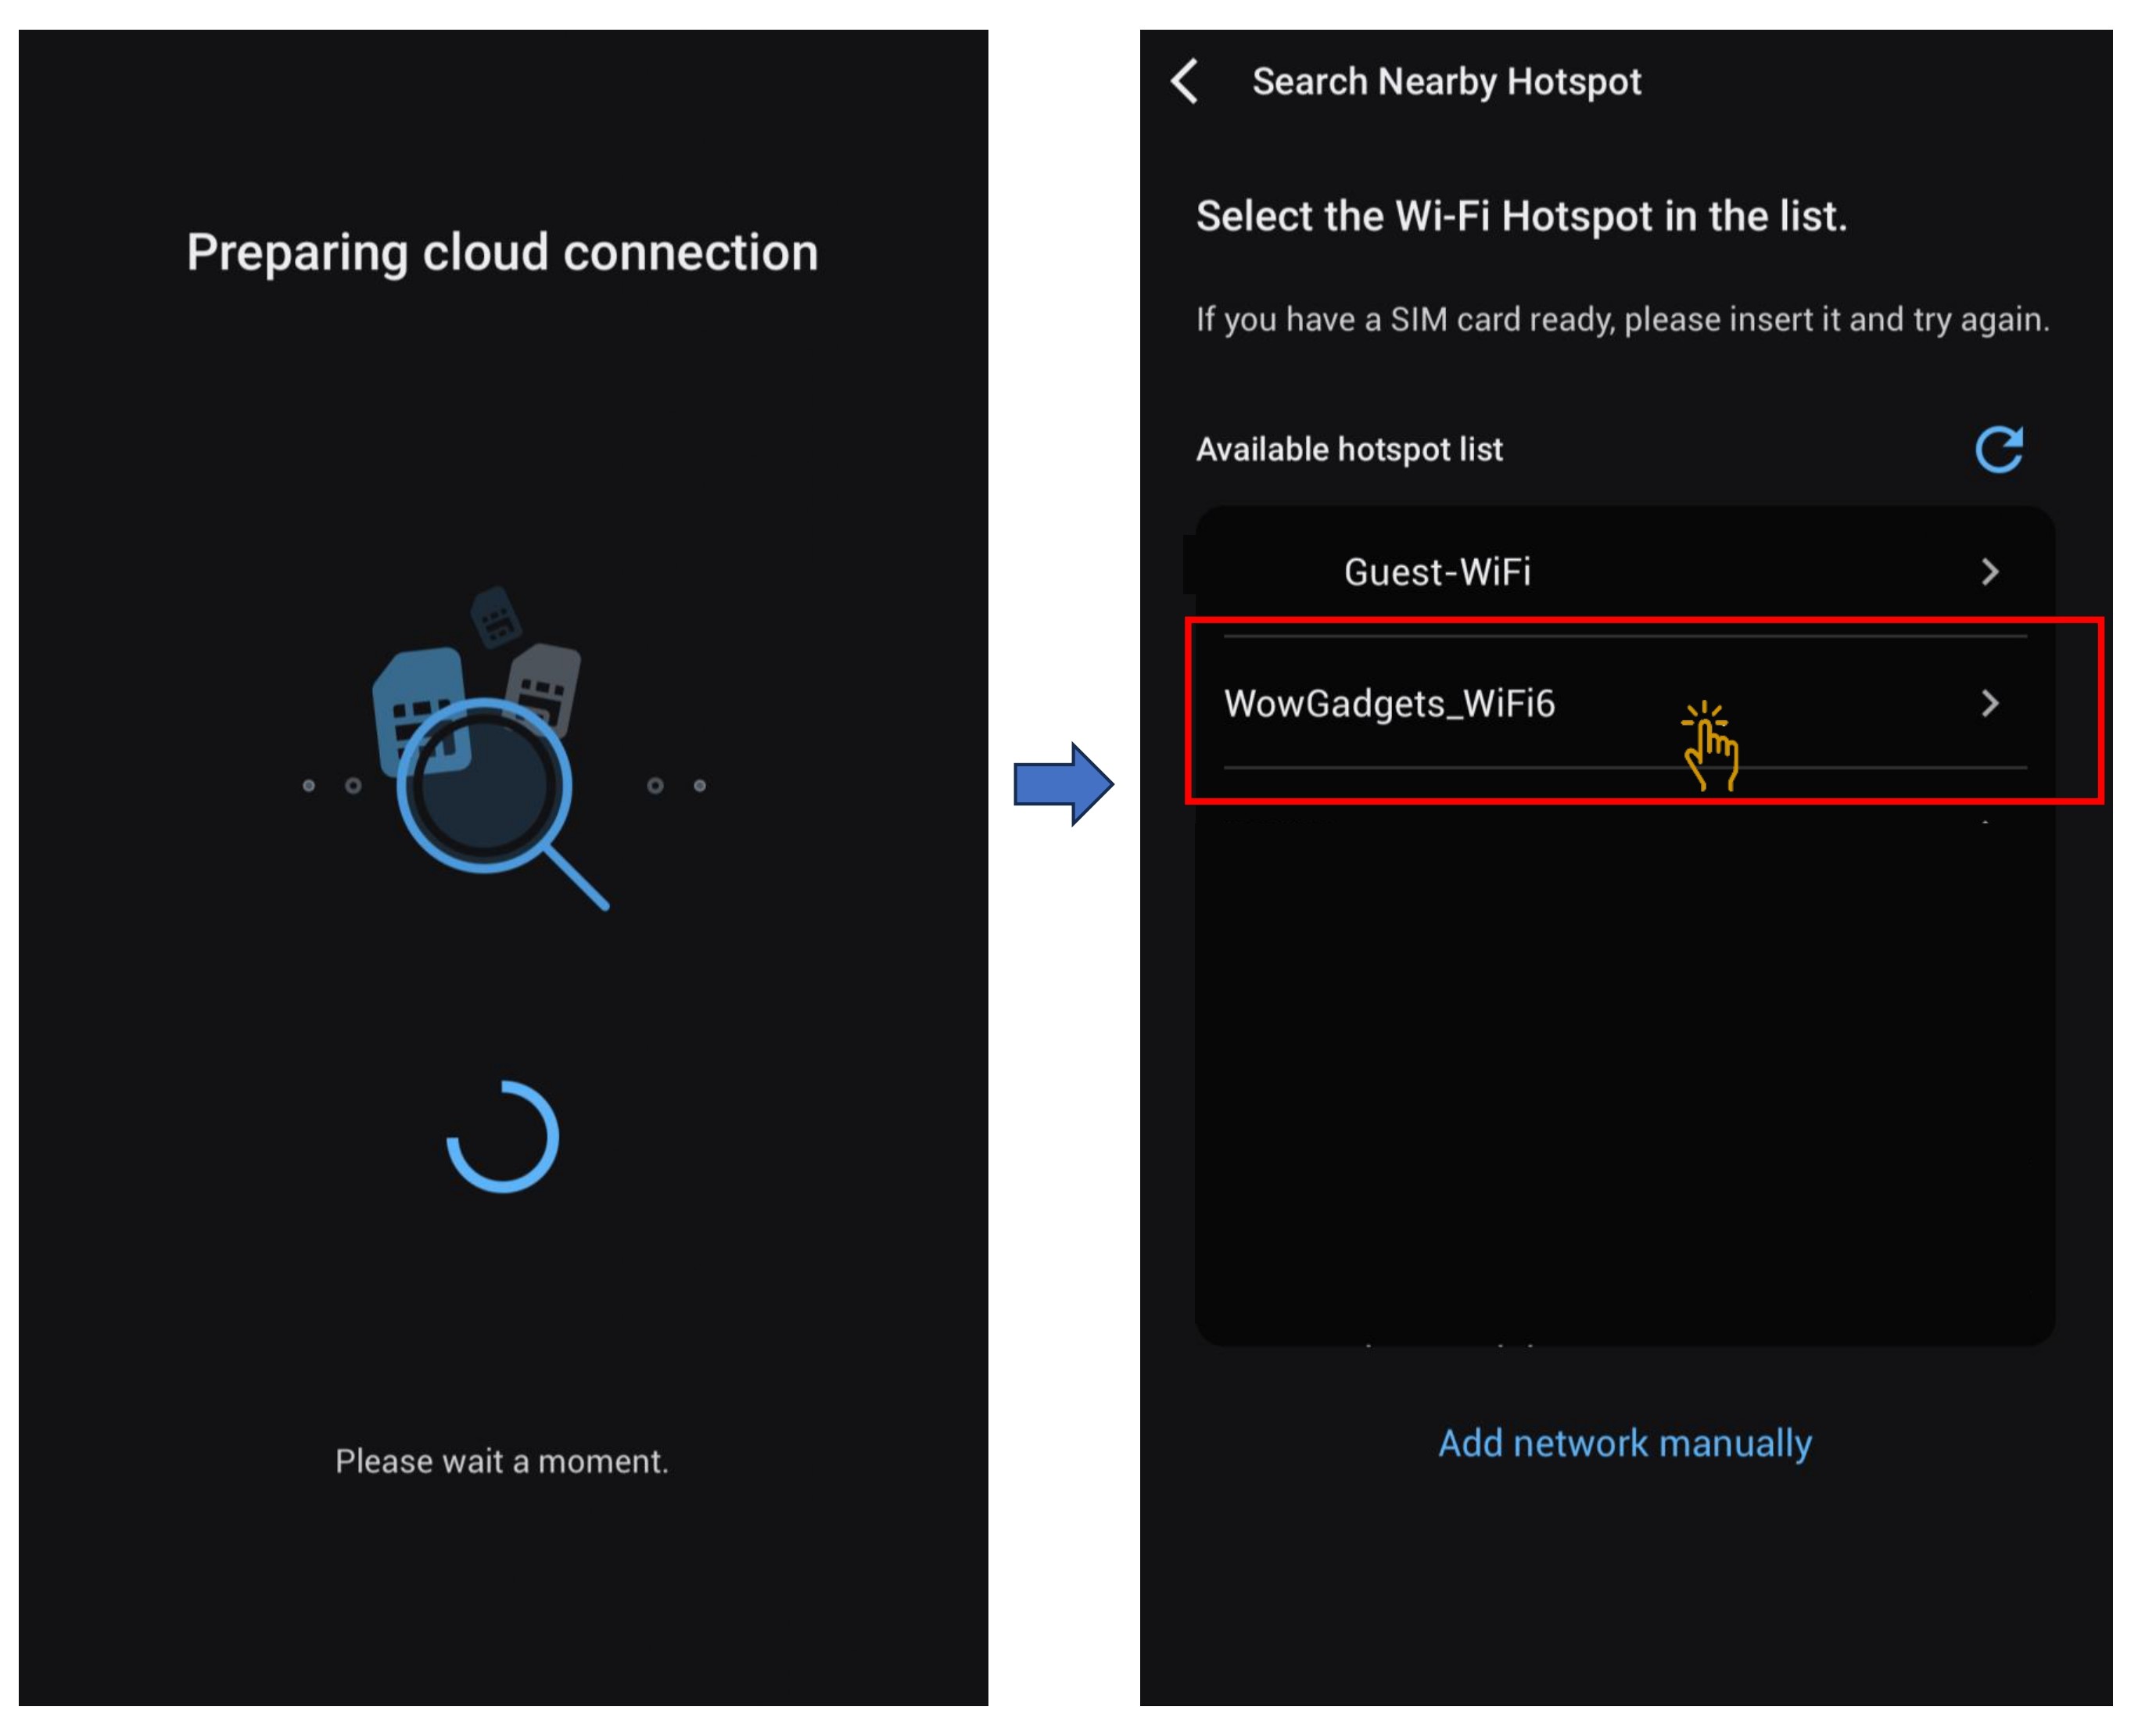
- Choose the Wi-Fi hotspot network that you want to setup.
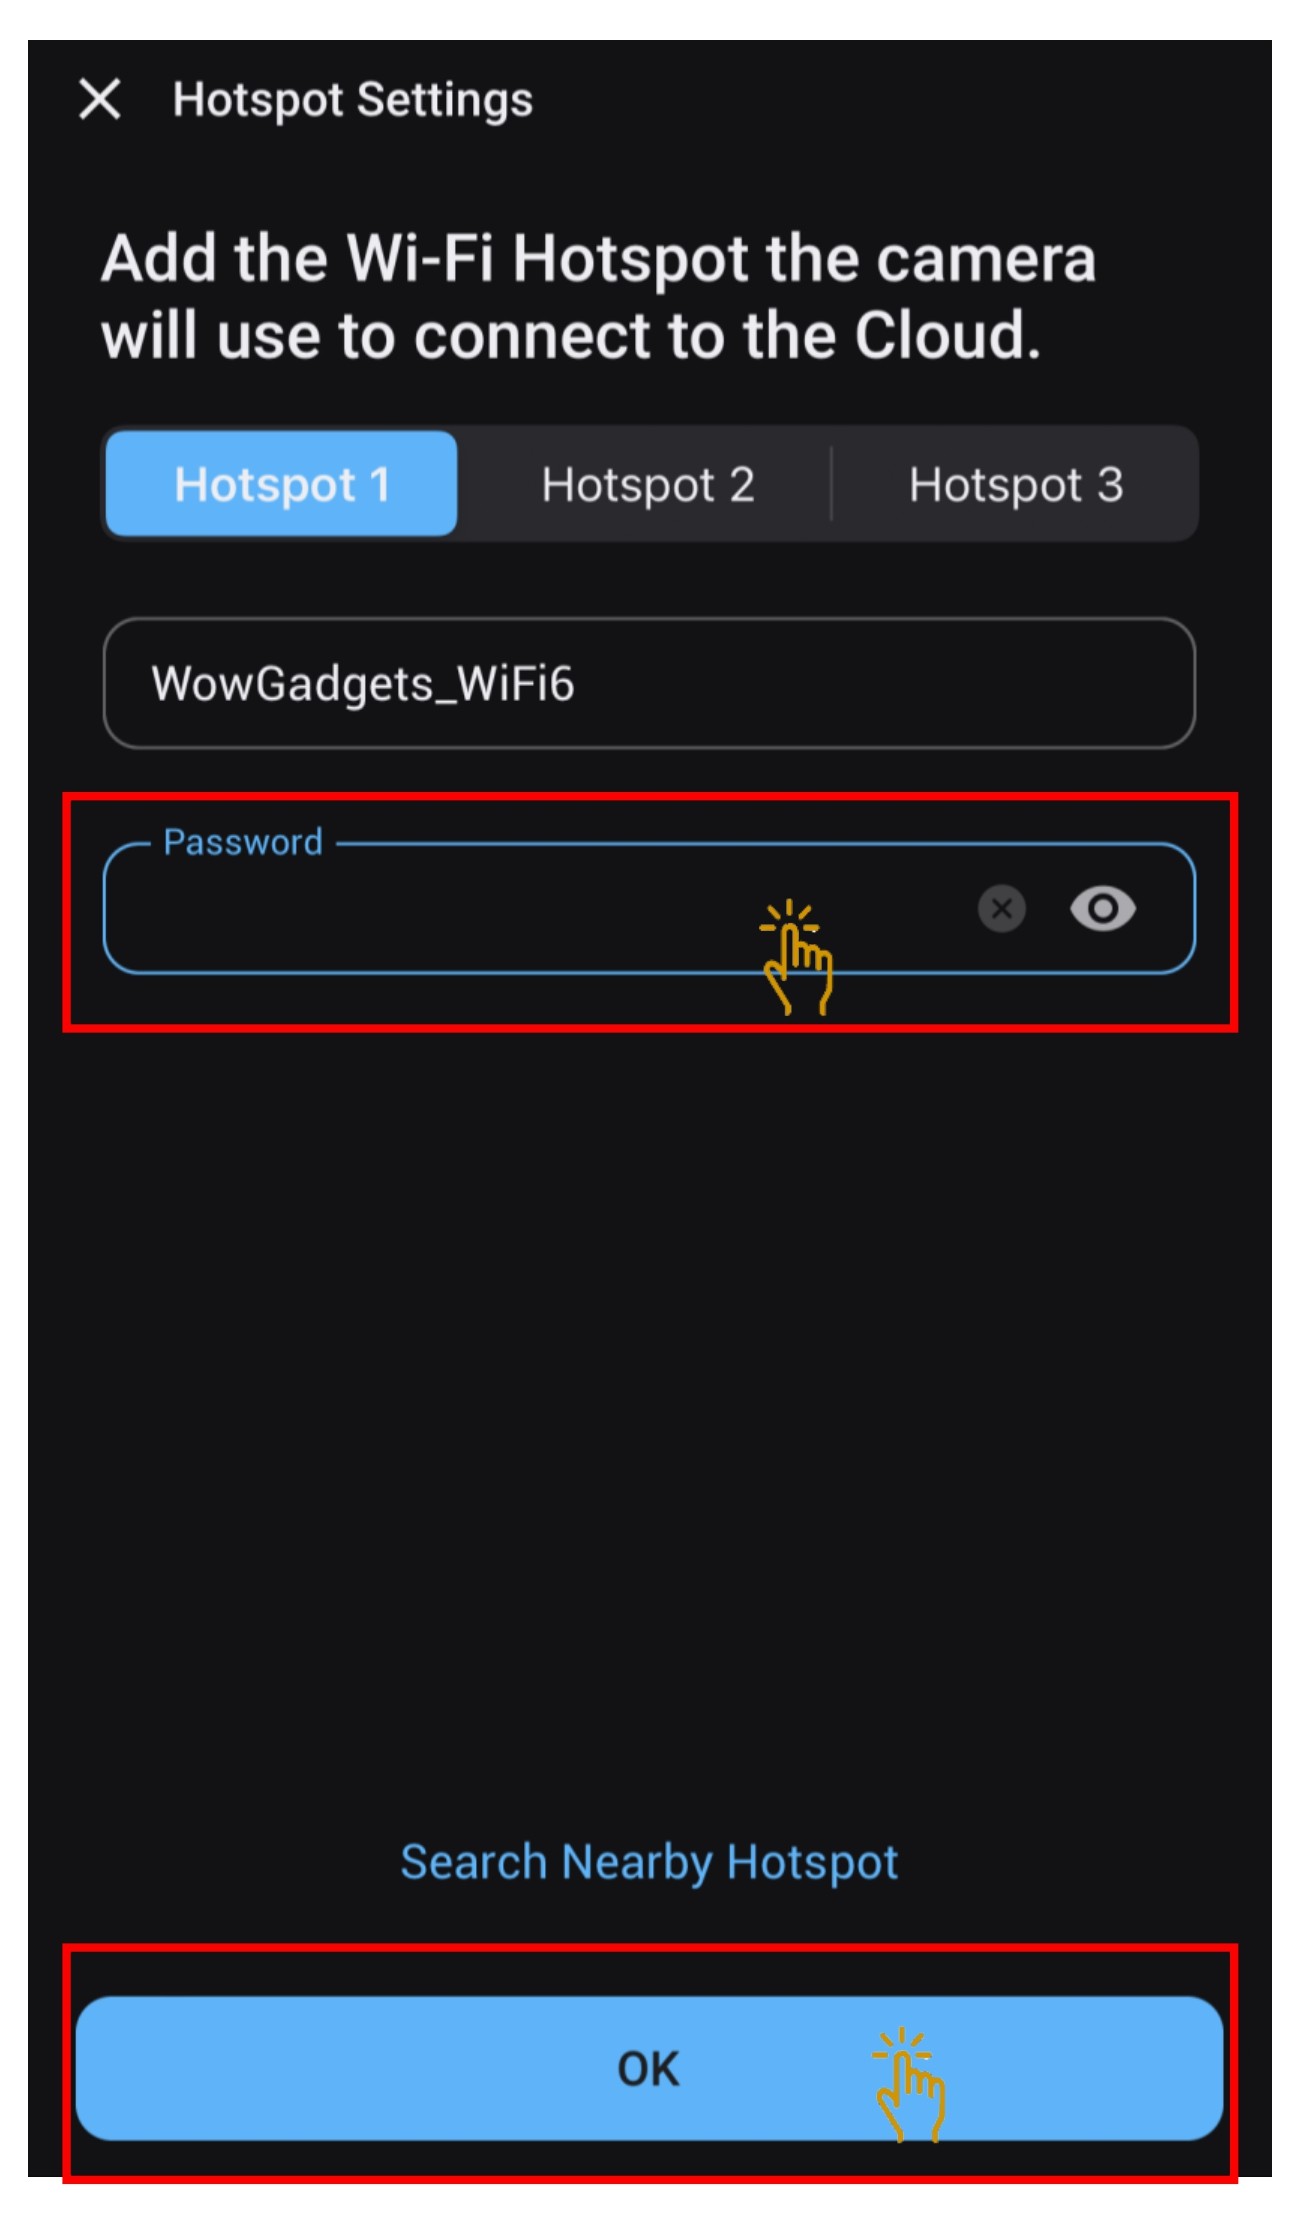
- Input the network password and click "Ok".
- You can add up to 3 Hotspot network.
- Dashcam will restart.
- Click "Ok" and " Allow" to permit GPS access.
- Once connected. the cloud icon will turned blue in color.
- You can start access cloud features.
5. ADD ON OR TO CHANGE HOTSPOT CONFIGURATION
- Click on the "More" and the submenu will be shown and choose "Cloud connection settings".
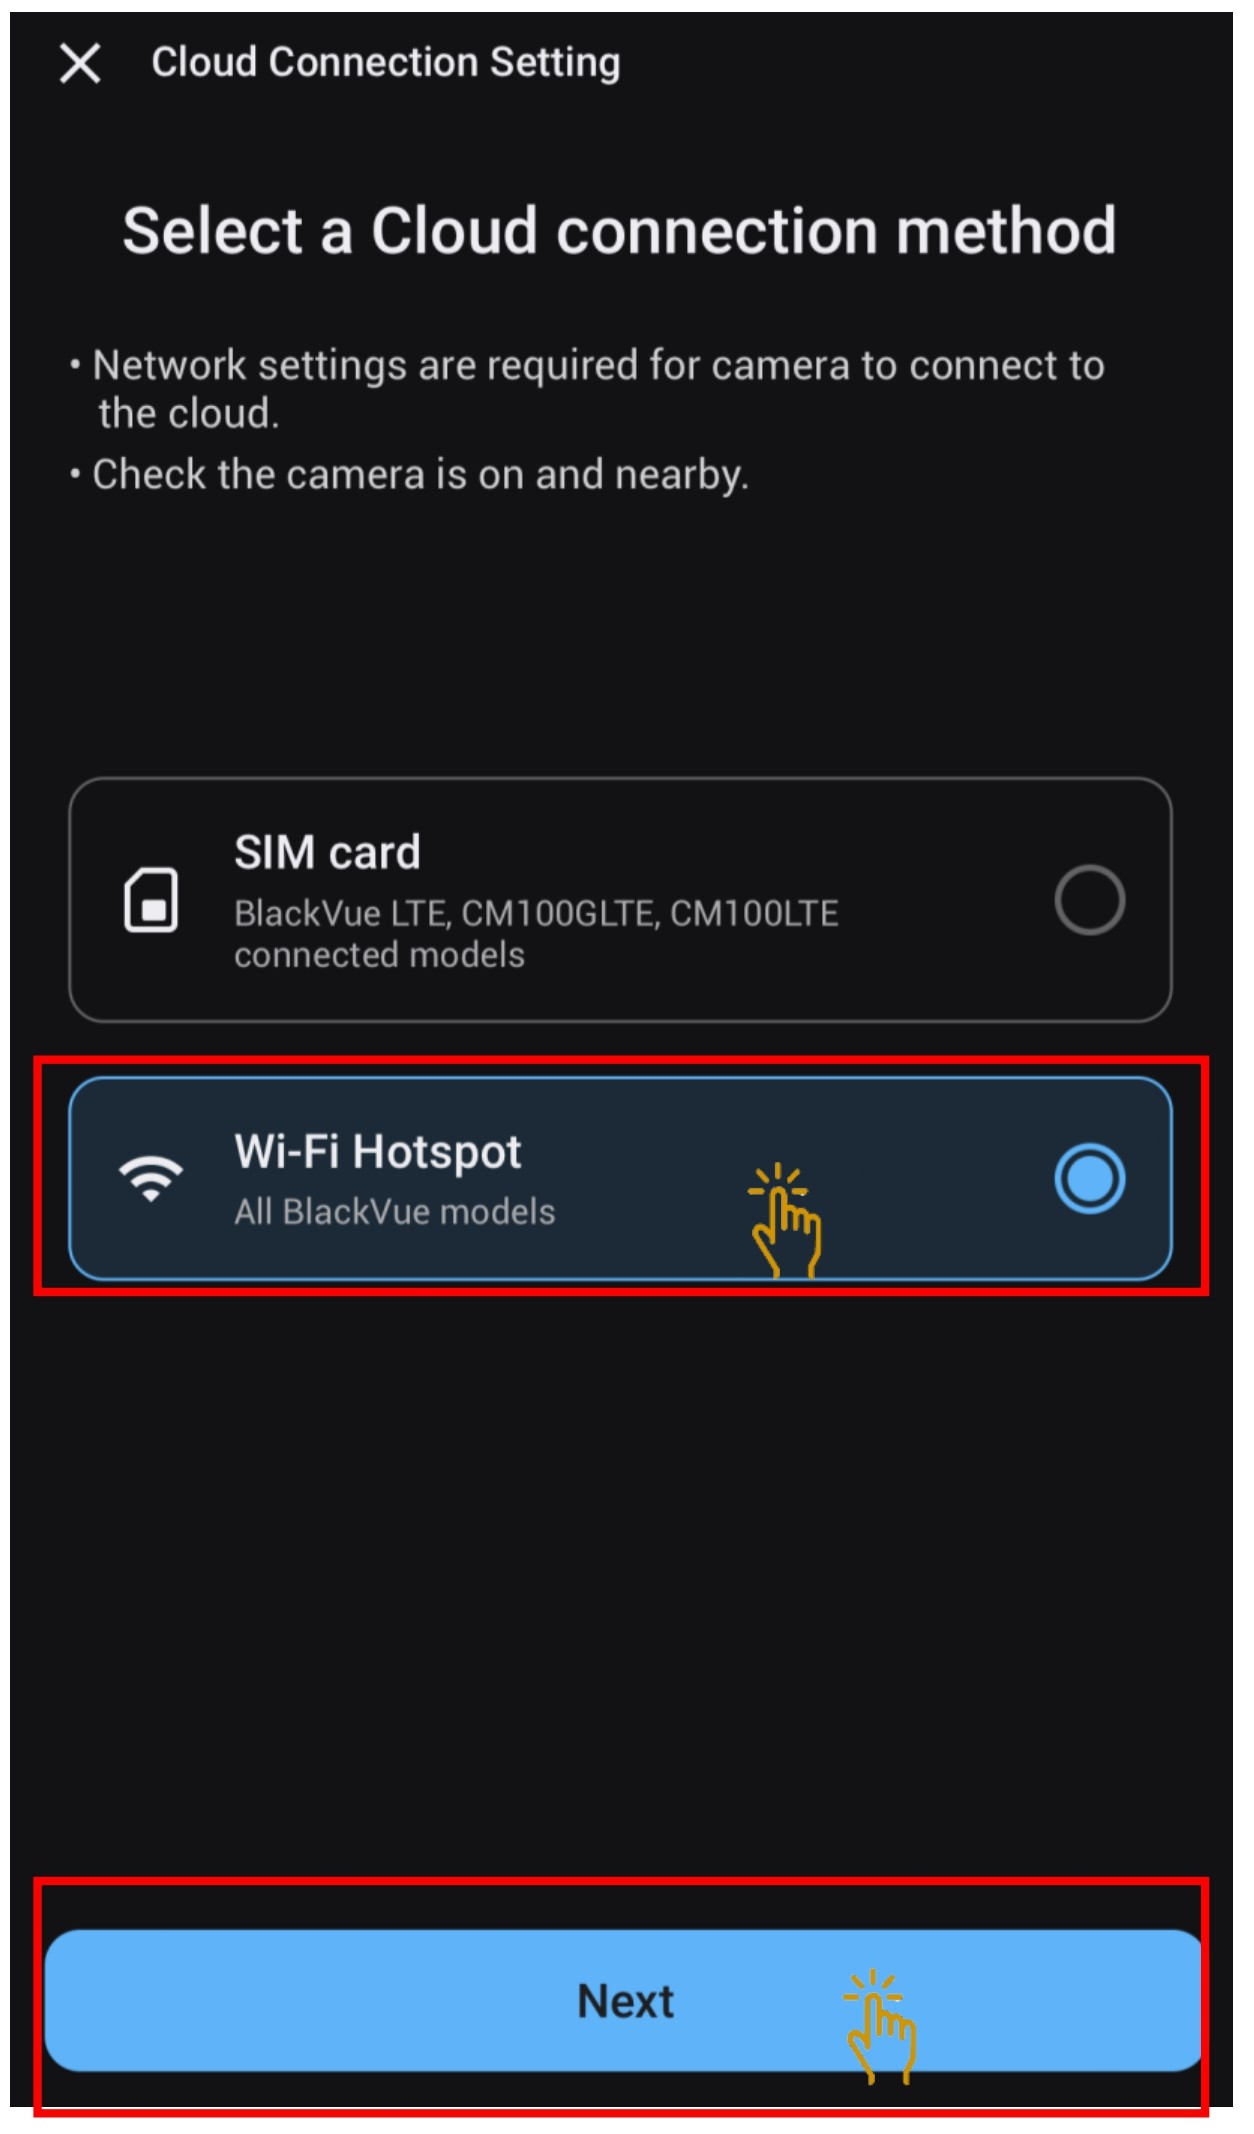
- Choose " Wi-Fi Hotspot" and click "Next".
- Click "Join" for the app to connect to the camera.
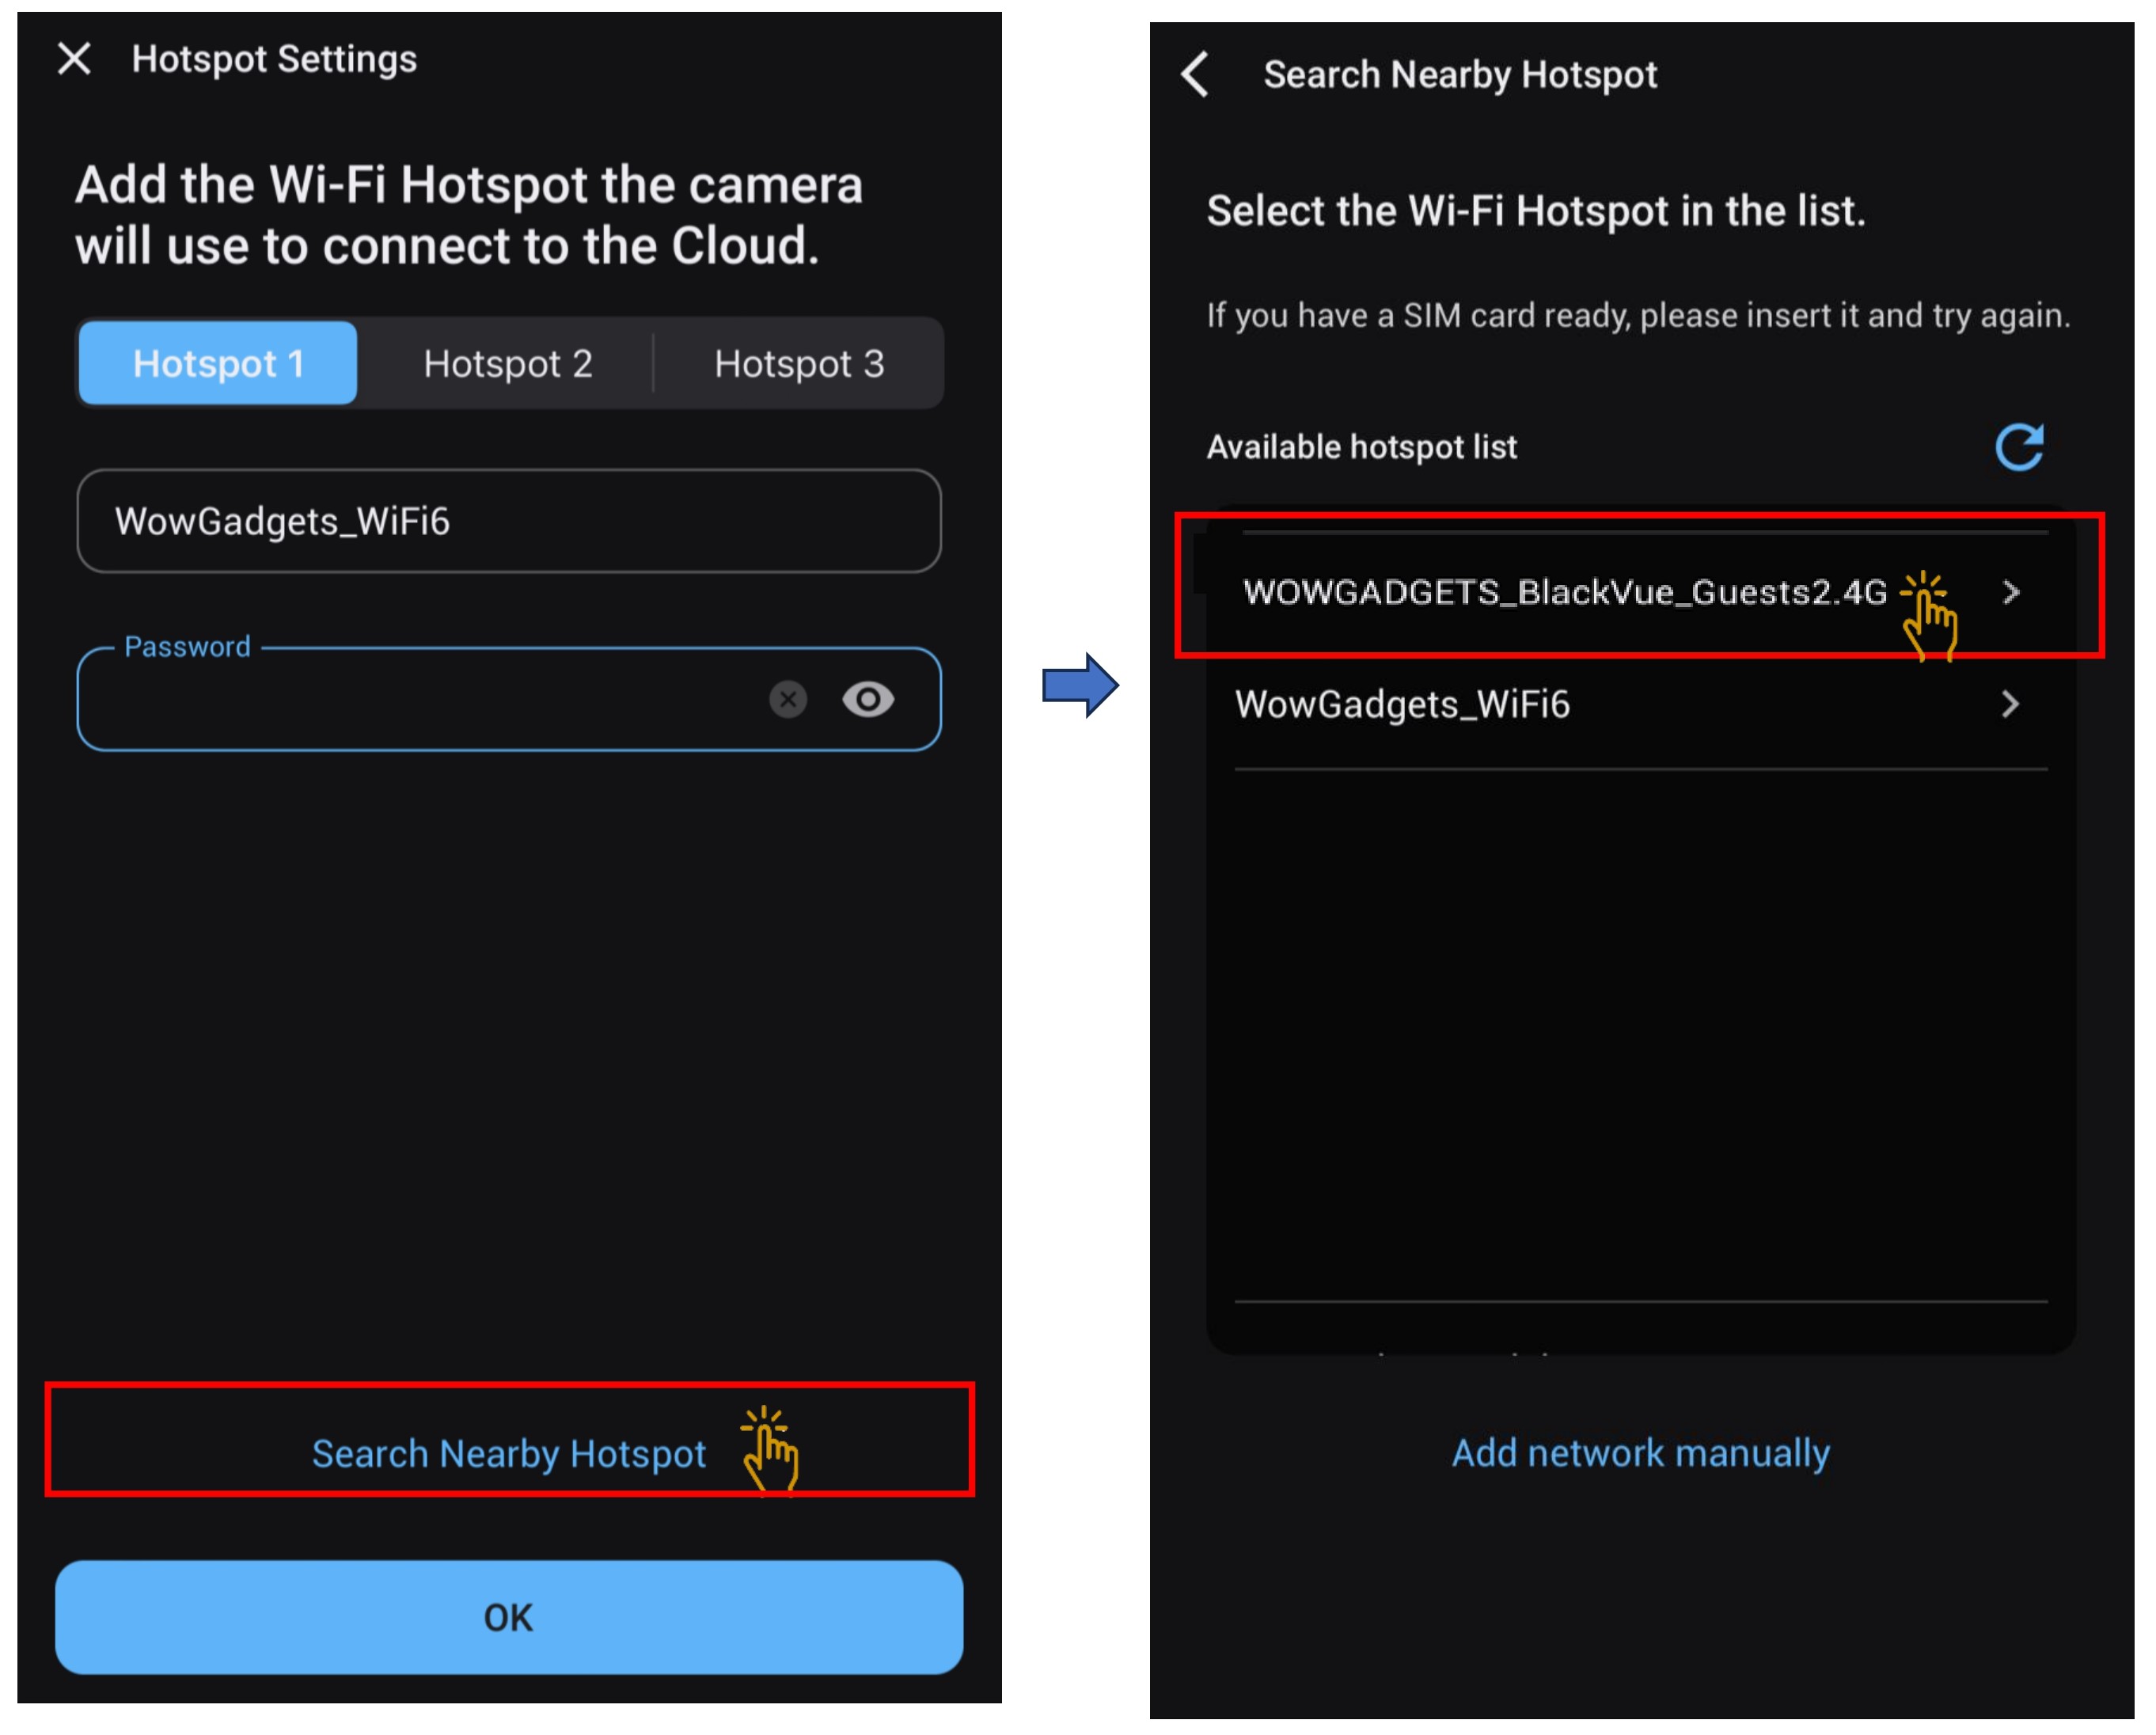
- Click on "Search Nearby Hotspot".
- Choose the new network that need to be setup.
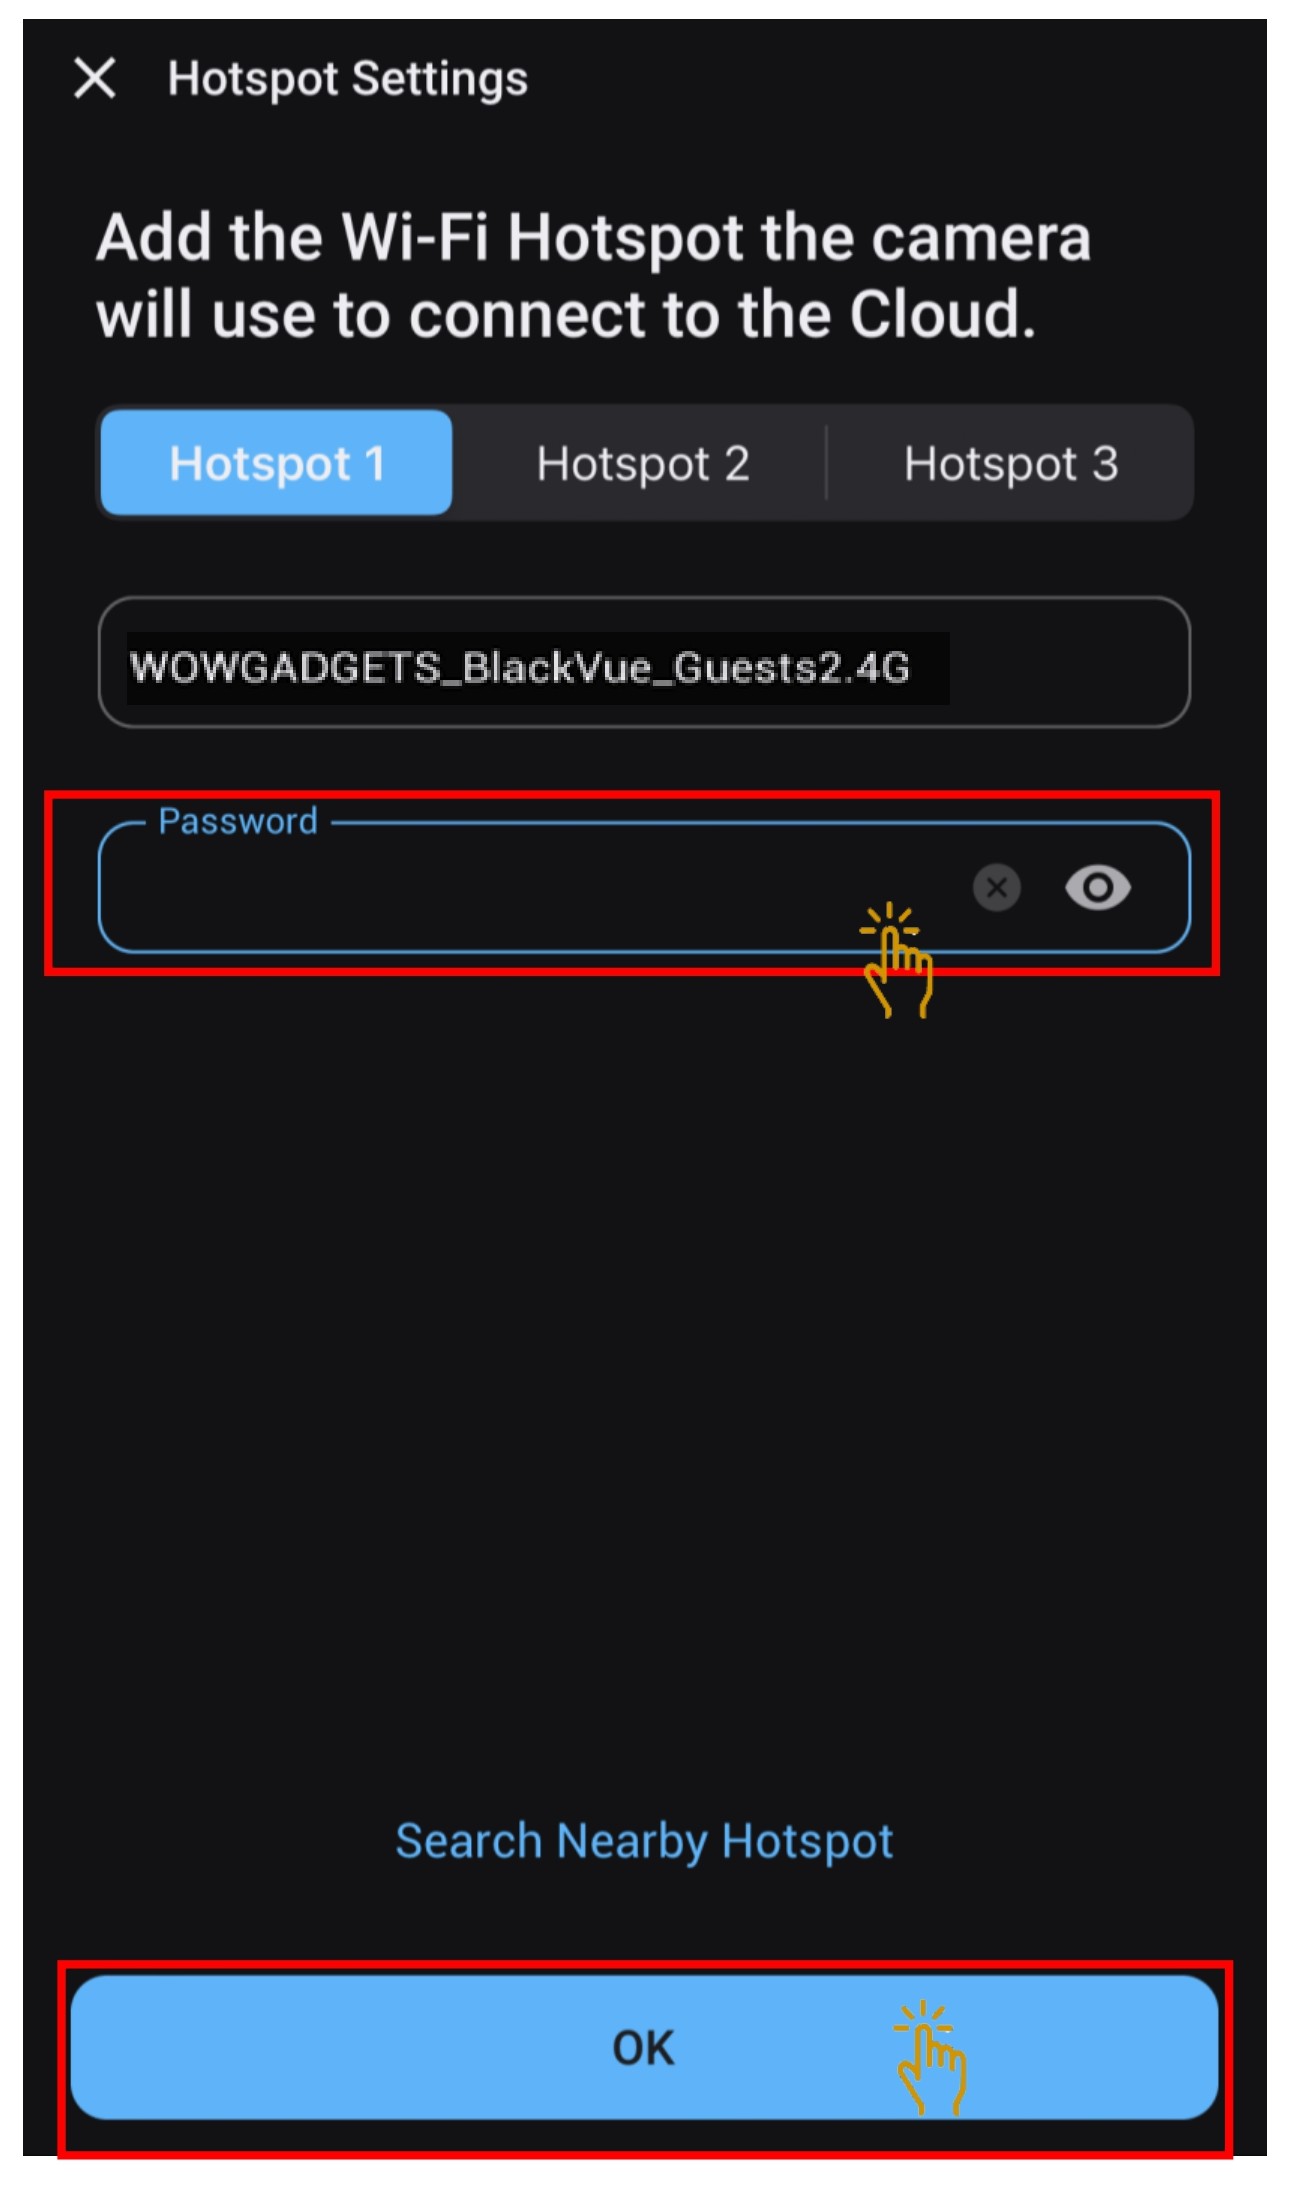
- Input the network password and click "Ok".
- Dashcam will restart.
- Click "Ok" and " Allow" to permit GPS access.
- Once connected. the cloud icon will turned blue in color.
6. TO DEACTIVATE CLOUD FEATURES FROM THE DASHCAM
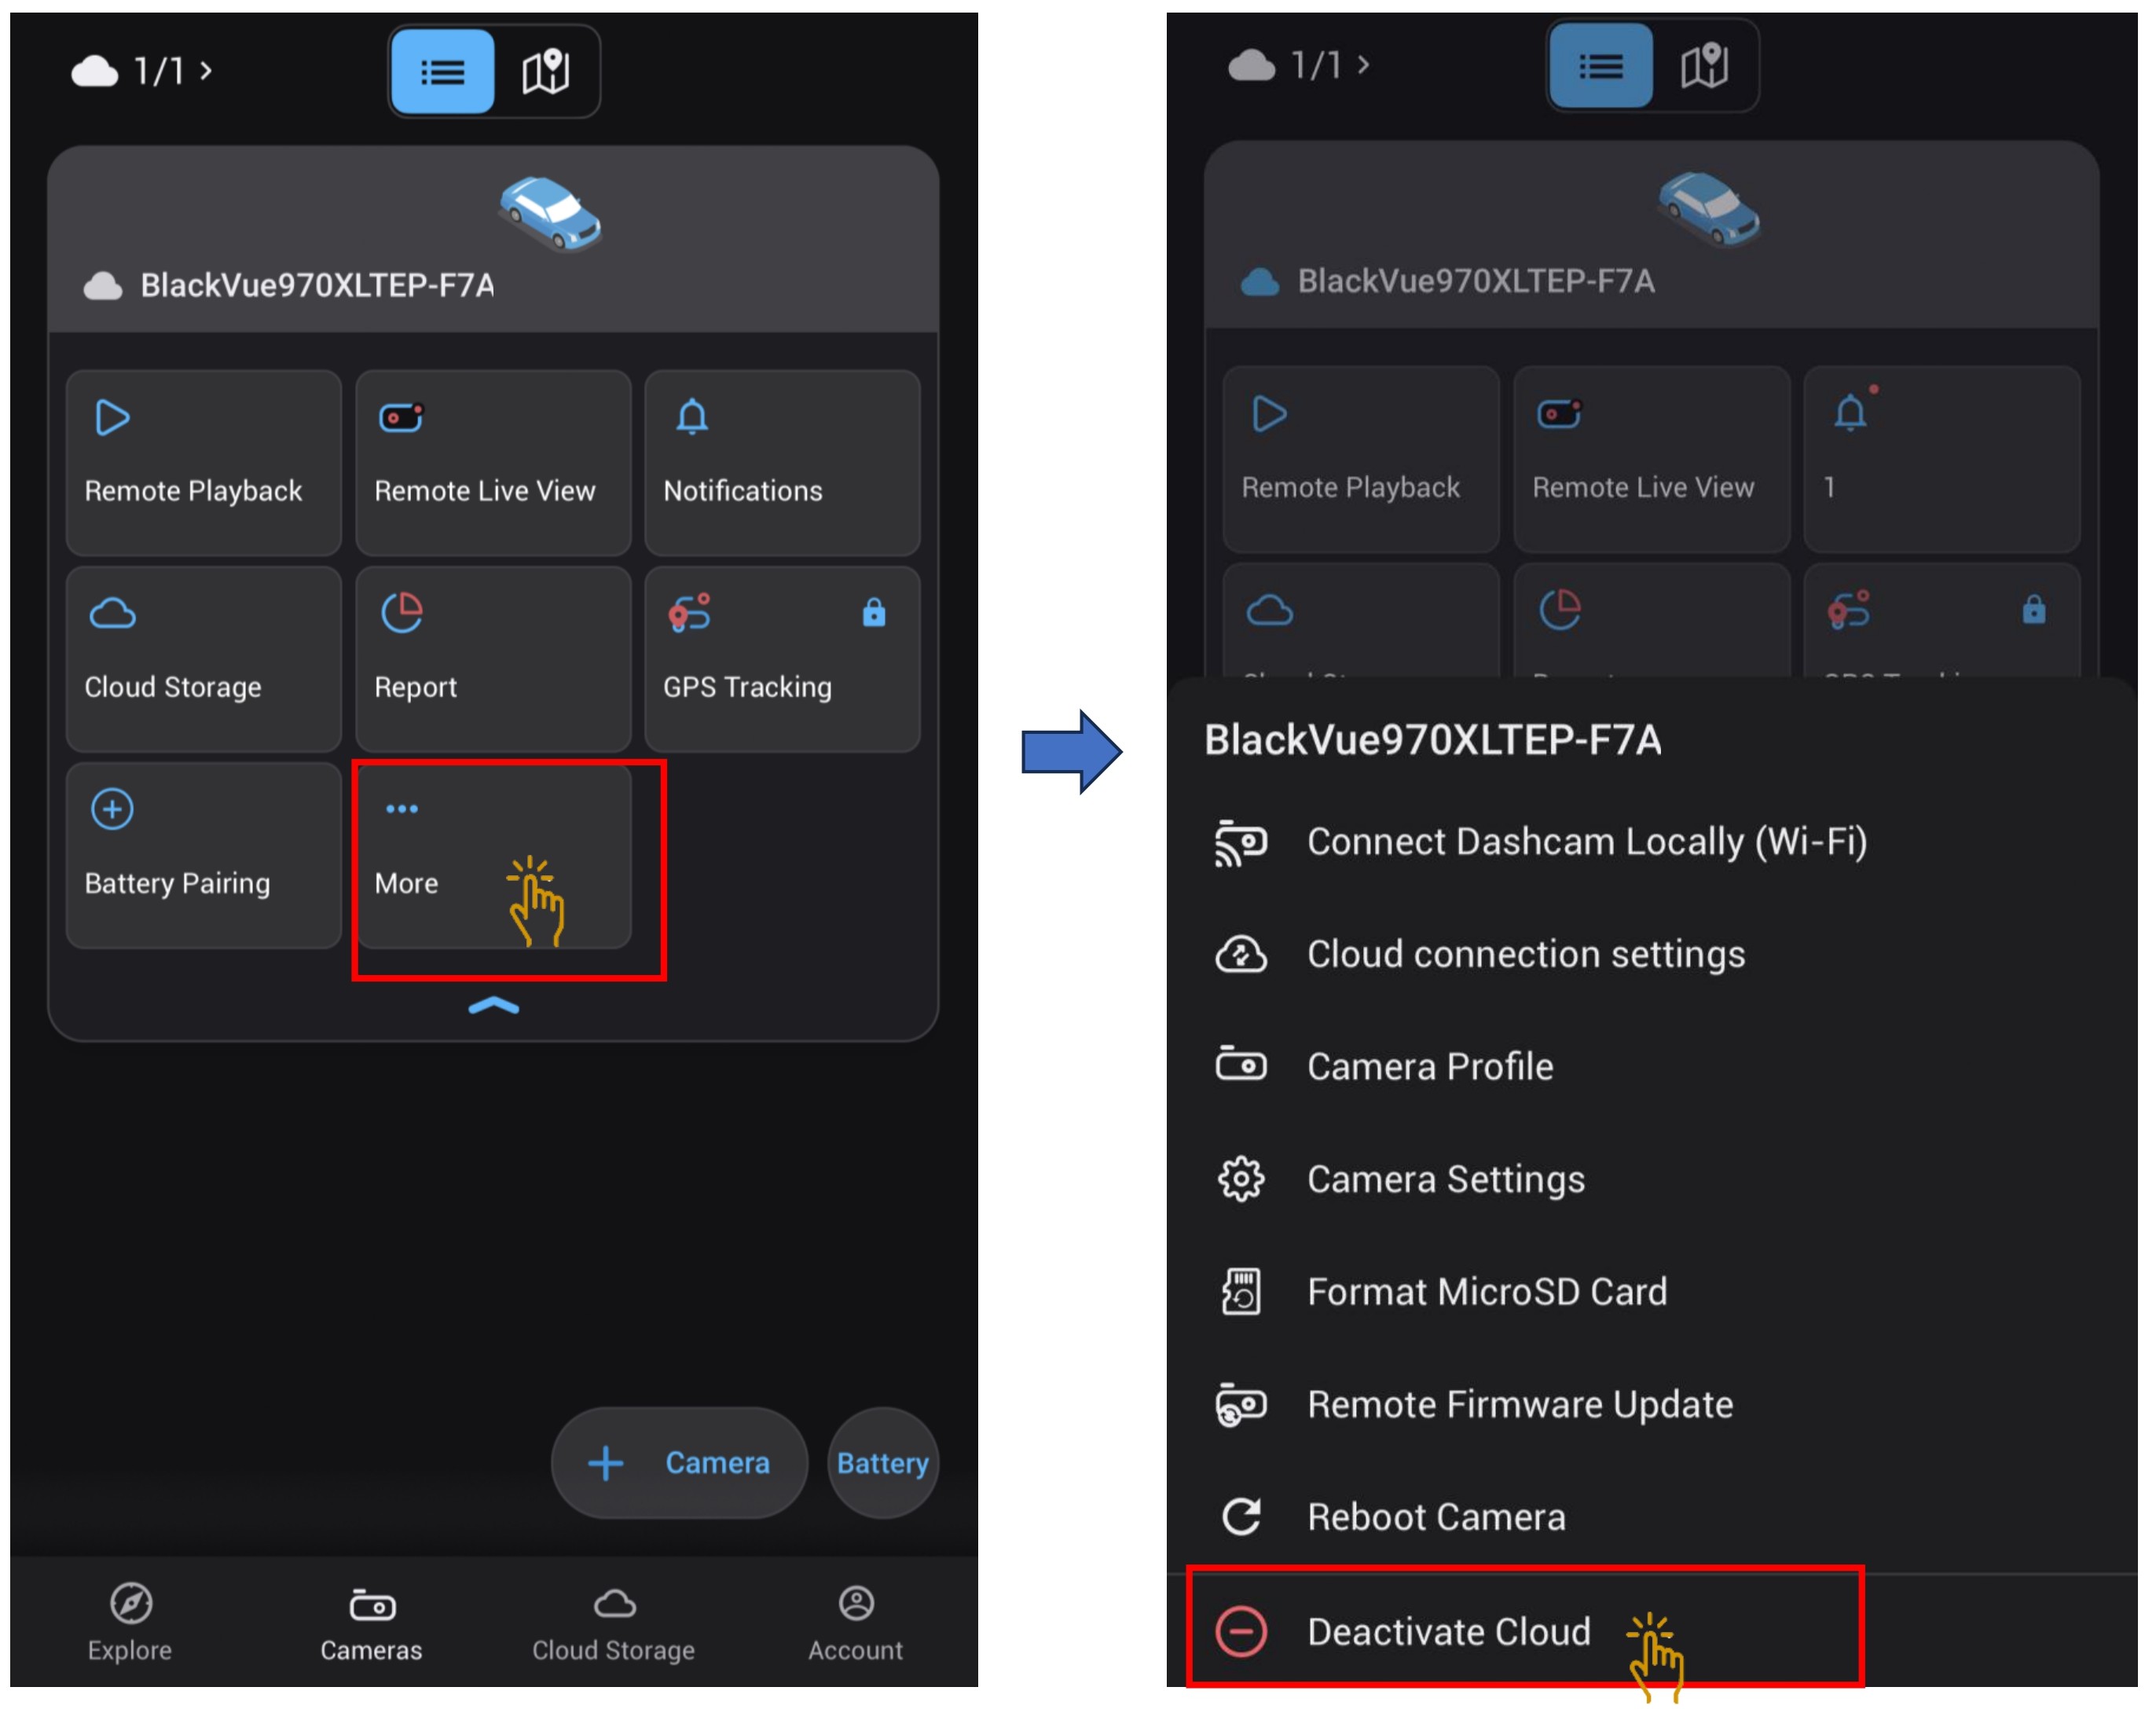
- Click on the "More" and the submenu will be shown and choose "Deactivate Cloud".
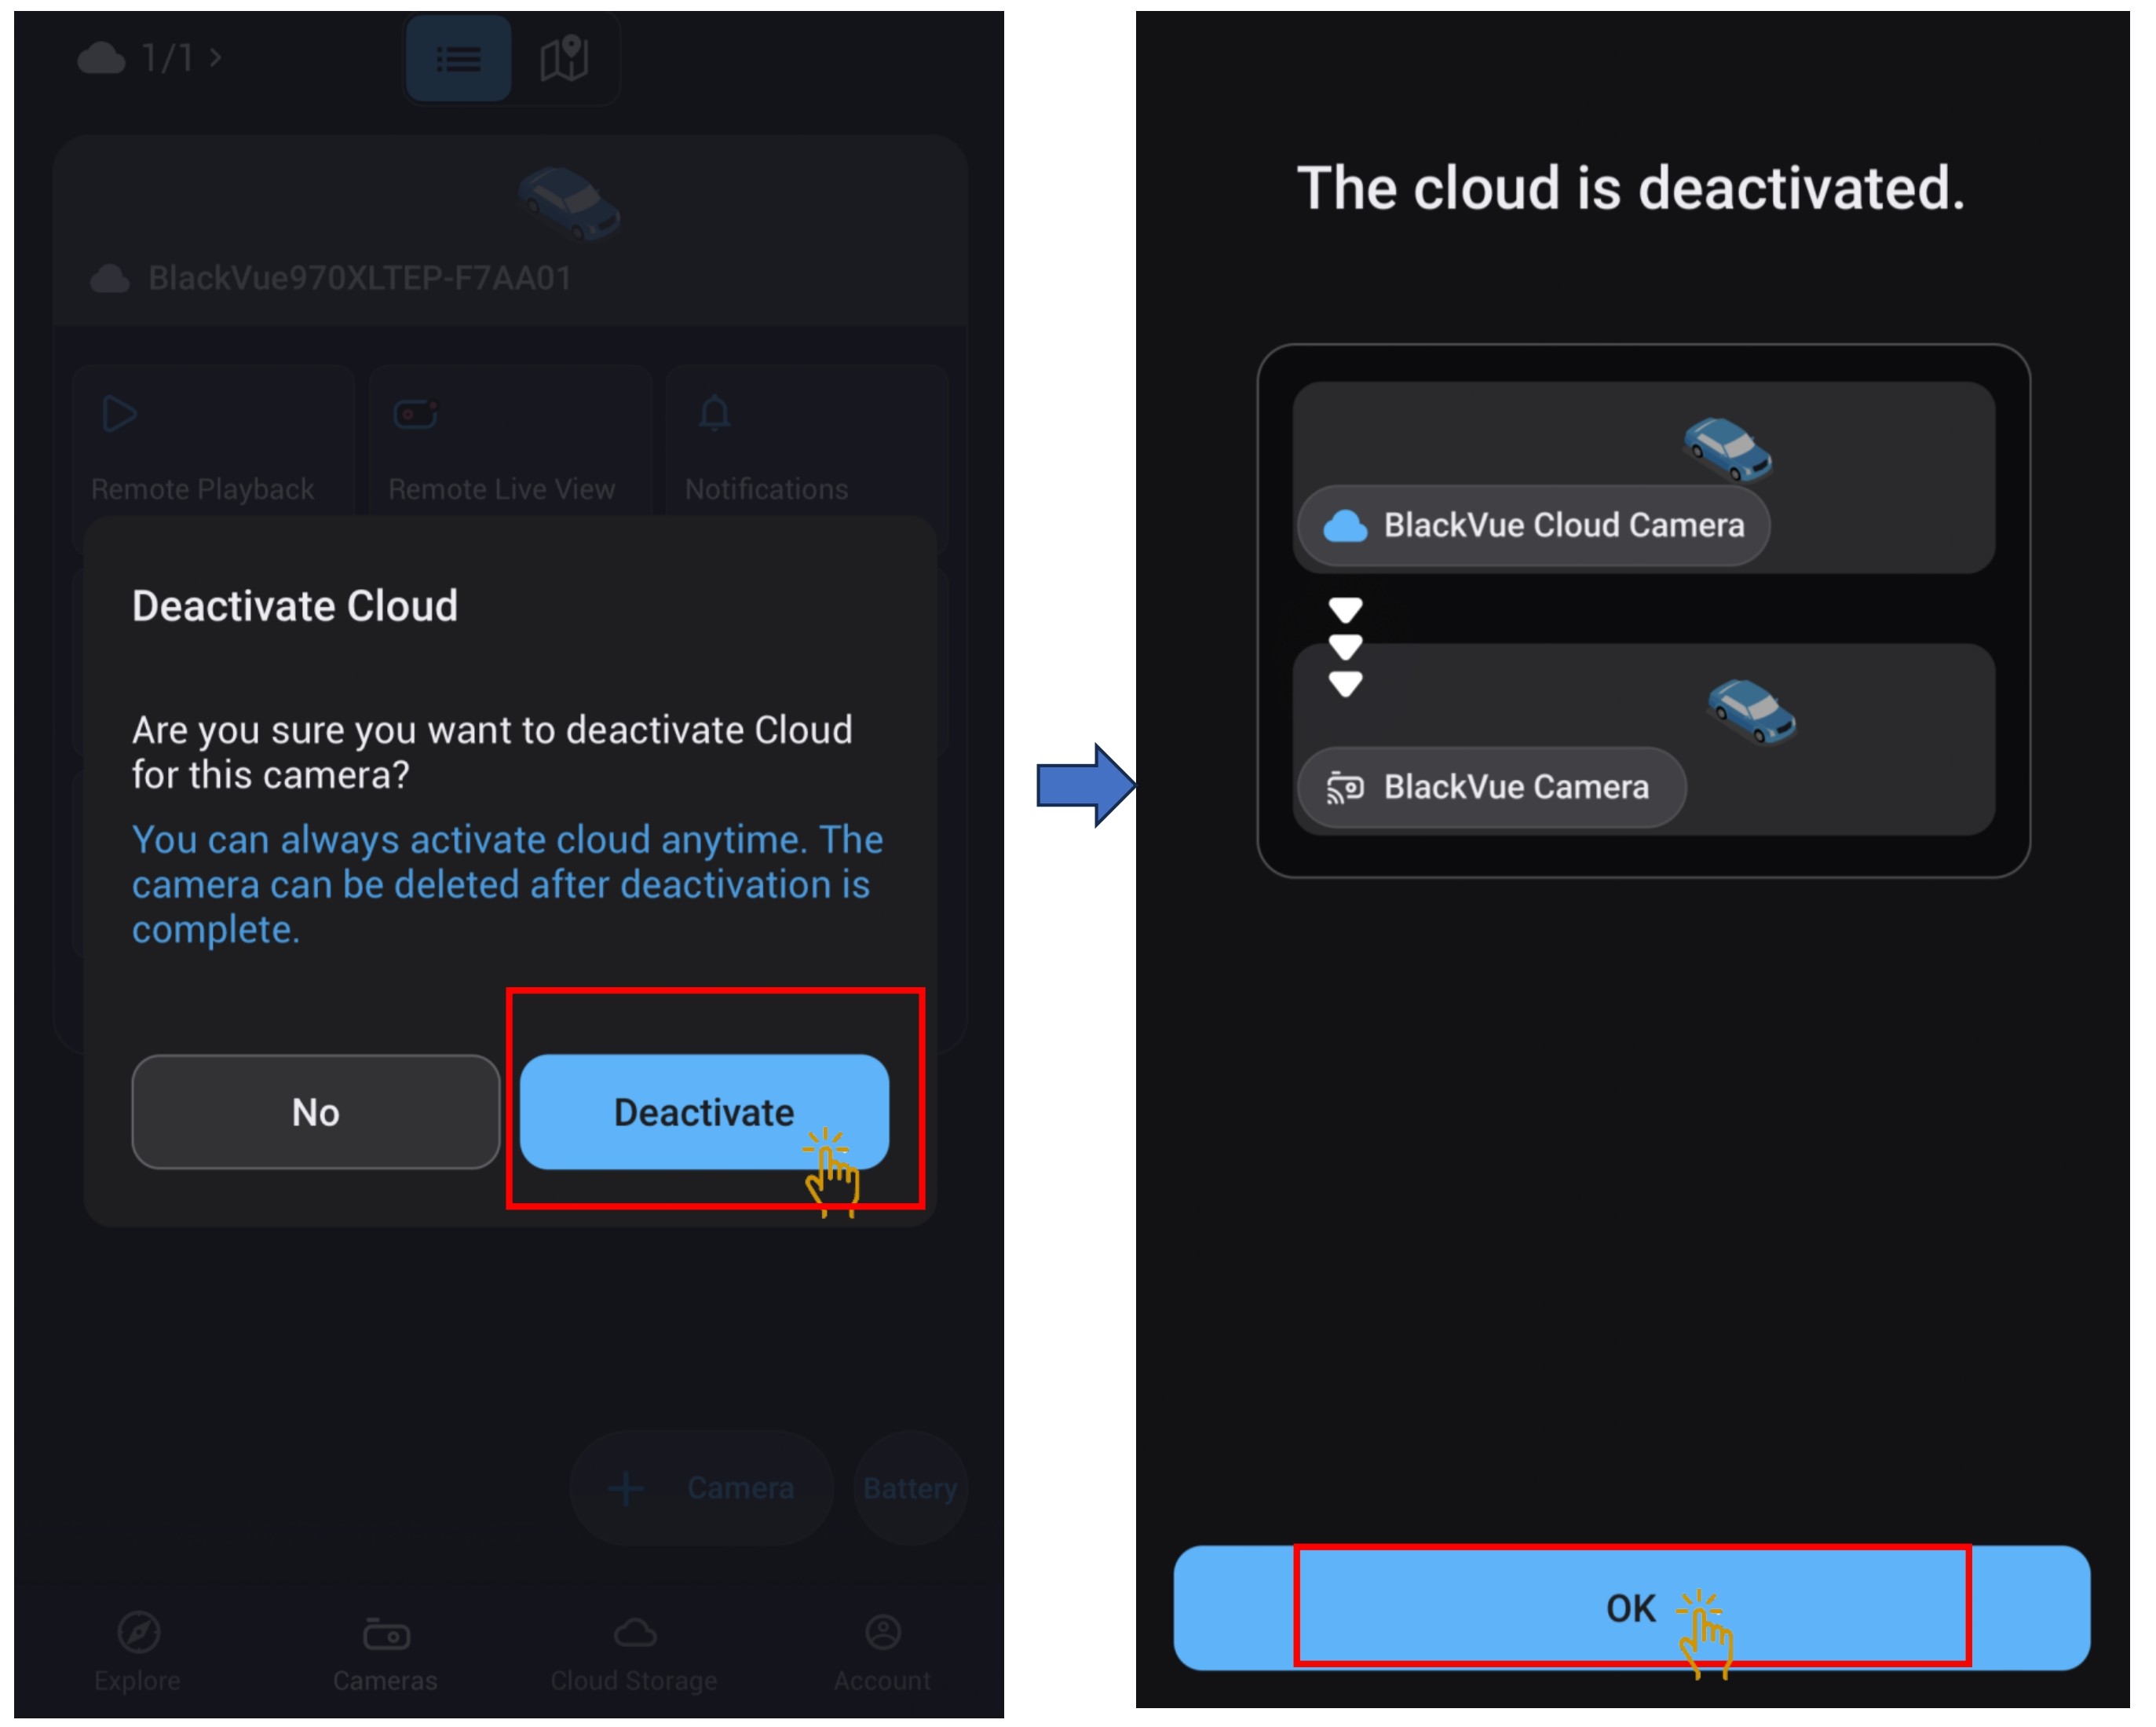
- Click on "Deactivate" and "Ok".
- Cloud features has been removed from the dashcam.